Excess heat is one of the most unrecognized and destructive forces that act on stringed instruments. I’m talking about the kind of heat that builds up in parked cars. It’s the kind of heat that kills the family dog in short order.
It’s the kind of heat that drives out moisture and causes instruments to crack. It’s the kind of heat that causes glue to melt. It’s the kind of heat that causes necks to warp.
How hot is it?
My car can make it to 175 degrees Fahrenheit in only 15 minutes on a hot day in the sun. At that temperature, it’s not long before the inside of an instrument case gets to be hot, too. At around 140 degrees the glue that holds modern instruments together begins to turn to liquid. LITERALLY.
Let me show you some of the really common heat stress problems that I see regularly.
This Martin D-18 was left in a hot car:
The glue lost all its strength and the bridge simply came loose completely. I know that’s what happened because I can see little “strings” of glue underneath, showing that the glue stretched as the bridge was lifted off the face of the guitar. This can ONLY happen in high heat.
Because the strings anchor under the face of the guitar on the bridge plate, the bridge can’t fly off all at once. A classical guitar bridge usually does, because the strings are tied on and don’t go through the face of the guitar.
This guitar was lucky. It’s owner saw the problem right away and loosened the strings before the top suffered more damage.
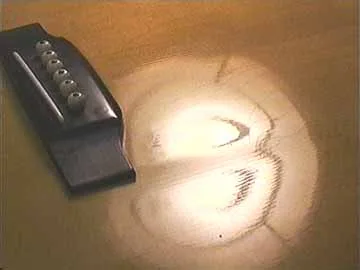
Here’s a D-28 that wasn’t so lucky. The glue melted in the heat and the bridge came loose and was subsequently reglued by a well-meaning repairman. Apparently no one noticed the severe wrinkles in the top, extending from the corners of the bridge toward the end of the guitar:
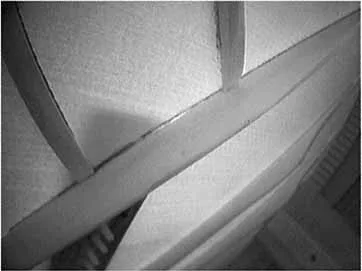
I hope the photo is clear enough. By the way, that’s a round desk lamp and the reflection is distorted by the wrinkled spruce top. When I see a wrinkle this severe in this location, I can tell that the brace has been pulled loose inside the guitar:
See that light gap right at the back corner of the bridge shadow? That baby’s really loose! With any luck, I can reglue it and restore much of the strength of the top brace. This is serious stuff, because regluing a brace inside means adding new glue to old glue, and the strength of the bond will be compromised. Usually that’s not a problem the first time. . .When I go to vintage guitar shows, I’m always amazed at how many old guitars I see with this telltale top damage, yet I’ve never seen either a dealer or customer looking inside a guitar to check for problems
Hey, take a look at this guitar neck:
Plastic parts tend to shrink with age as they lose volatile chemical components. In a hot car, this shrinkage can happen much faster:
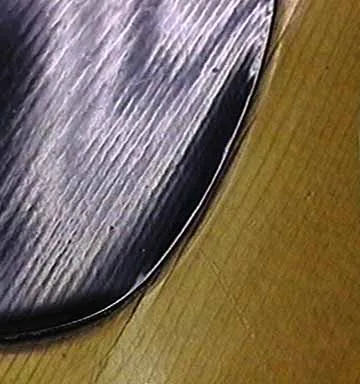
This Martin was repeatedly left in the car at festivals. It never got hot enough to melt glue, but it did get hot enough to accelerate the aging process. Here the pickguard shrank and curled, taking the top with it. Notice the two cracks that are starting to shred the top at the edge of the pickguard.
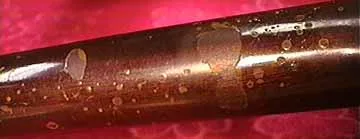
In addition, the entire instrument was covered with a gummy haze all over the finish. This haze is a result of repeated overheating. In the heat the moisture is driven out of the case lining and interior of the guitar, condensing on the finish as it cools. The gummy residue causes no problem and can be wiped or buffed off, but it is a clear symptom of overheating.
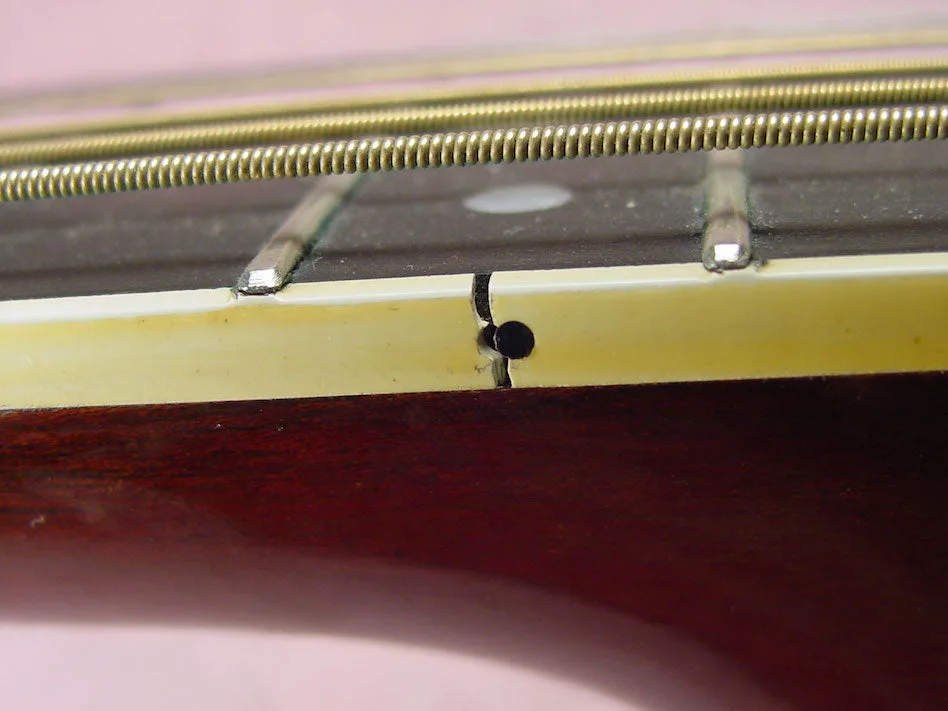
The fingerboard binding on this Martin D-35 shrank prematurely in the heat of a parked car, causing it to crack and separate at its weakest point where the edge dot was inlaid:
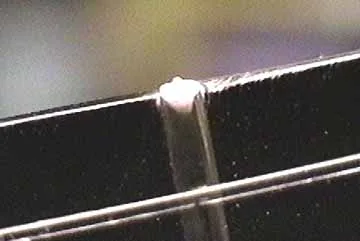
Here’s a fingerboard that shrank in the heat. The moisture was driven out and the wood shrank enough that the fret ends stick out like little spears:
These guys are sharp enough to cut your hand. Not just annoying, they too are a symptom of overheating. Once the wood shrinks, no amount of rehumidifying will cause it to regain its full original size. The sharp fret ends are easily repaired by filing level with the fingerboard.
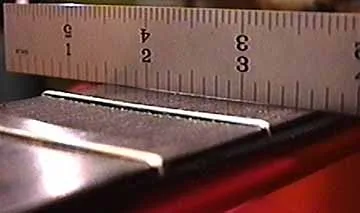
What’s not easily repaired is the other damage caused when the fingerboard shrank:
This is the same classical guitar fingerboard. It was originally flat, but is now cupped and concave through its entire length. Unfortunately, because of the heat the frets are also slightly loose as well. The only way to make this guitar play really well is to take out all the frets, level the fingerboard and install new frets. A big job that would not have been necessary otherwise.
And, just to show how bad it can get here’s one of the most dramatic ones we’ve seen. It’s a Martin D-45, and it was left in a parked car in the sun during at least one hot summer day. The wood shrank as a result of catastrophic drying, and it cracked alongside the fingerboard where the wood had been cut for the original abalone inlay. The heat was great enough to soften the glue that held the interior braces, allowing the string tension to pull the neck forward, displacing the soundhole inlay as well:
Please watch out for parked cars. Your car won’t get hot while you’re driving, so when you stop, just think of your instrument as being a living thing inside the car. If the heat would kill your dog, it could also kill your guitar. The same thing goes for other sources of high heat: direct sunlight, heaters, fires, etc.
Now, if you’re travelling, you may have your sleeping bag with you. You can protect your instruments in the car trunk by covering them with LOTS of insulation. After all, if your sleeping bag will keep you warm, it will also keep your guitar cool. Insulated and reflective case covers help, too. Only, don’t count on them for long term protection. Better to avoid heat altogether.
Beard Deco Phonic Guitars
Paul Beard is no newcomer to resonator guitars, as major players like Jerry Douglas, Mike Auldridge, and other A-list players have used Beard Dobros. But except for the imported versions bearing his trademark, Beard resonator guitars have always been, well, kinda pricey. That has changed thanks to Paul’s Deco Phonic line, as he has taken the Collings Waterloo concept and applied it to resonator guitars made right in his Maryland workshop. These Deco Phonic models are made by the same small crew (nine or ten guys), and feature simple but classy designs, thin low-gloss finishes, and offer great tone and playability at very affordable prices.
The name “Deco Phonic” is more than just a cute-sounding title. The whole resonator guitar phenomena began during the Art Deco era, and if you look at an original National Tri-Cone or the coverplate from a later Dobro, the influence of Art Deco design is hard to miss. Paul Beard’s Deco Phonic models are inspired by the Regal-made Dobros of the mid-1930s, instruments that provided guitarists with additional volume and sustain in the days before magnetic pickups made it easy to plug-in and get loud. Gryphon just got a new shipment of Beard Deco Phonic models, and we’re happy to be offering both roundneck and squareneck models. Most feature the Beard Legend cone and #14 cast spider bridge, a combination that delivers authentic dobro tone and plenty of volume.
Wegen Picks Back in Stock!
Wegen picks are hand crafted by artisan Michel Wegen and his crew in the Netherlands. They are easy to grip, durable, and improve the tone of your playing. Wegen picks are suitable for guitar and mandolin and are popular for Django Reinhardt-style jazz guitar, bluegrass, and general rhythm playing. Here are some of our most popular styles.
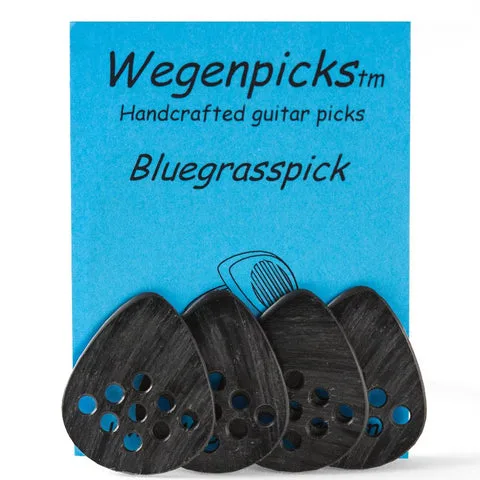
The Wegen “Bluegrasspick” is developed and designed for playing Bluegrass style on acoustic guitars. The ultimate pick for serious Bluegrass guitarists! Shaped like a tear drop with lightly beveled edges and a pattern of perforated holes for improved grip. 1.4mm thick and 32mm long.
Wegen Bigcitypickis specially designed for acoustic jazz and blues guitar, but will do well on electric guitars as well. These Bigcitypicks are 29mm long and either 1.4mm or 1.8mm thick, with perforated holes for grip.
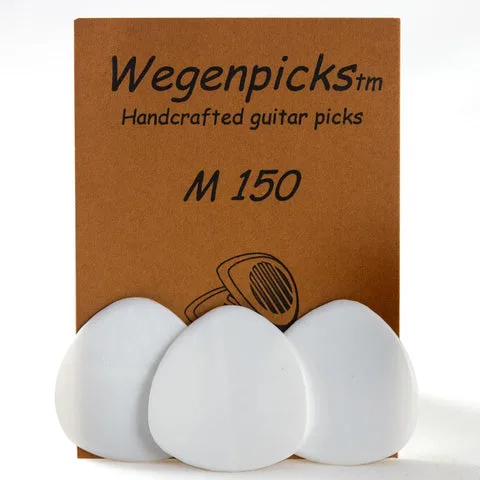
Wegen “M150”pick is a 1.5mm triangular pick specially designed in the shape and dimensions most popular with mandolin players. These picks greatly improve a mandolin’s tone and volume. M150 picks are 28.5mm long and 1.5mm thick with beveled edges.
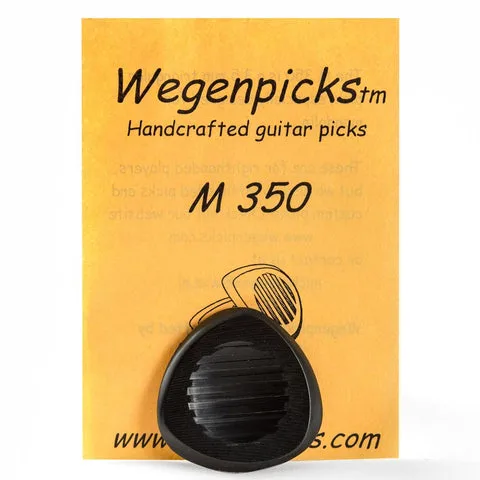
Wegen “M350”pick is a 3.5mm triangular pick specially designed in the shape and dimensions most popular with mandolin players. This pick greatly improves a mandolin’s tone and volume. Both sides of the M350 pick have grooves for grip, with a thumb impression on one side. The M350 pick is 28.5mm long and 3.5mm thick with beveled edges. Also great for guitar players.
Wegen “The Button” guitar pick is specially designed for playing rhythm on acoustic guitars. Similar to the picks used by Django Reinhardt and other gypsy rhythm guitarists, the pick is thick at 5mm, with a “pre-worn” beveled edge.
Deering Goodtime Banjos
Deering Goodtime banjos started with a simple 5-string open-back model and over the years the line has grown into a series of over a dozen different models. There are so many different Deering Goodtime models that they’re almost a banjo company in itself.
The heart of any banjo is the round rim that the neck and all metal parts attach to, as that’s the source of good banjo tone. All Deering Goodtime banjos share the same high-quality rim of three-ply violin-grade maple. The way these rims are made, with all the grain running horizontally, is also critical. There’s no cheesy multi-ply construction with vertical-grain layers, a Goodtime banjo rim is equal to what you’ll find on new banjos selling for much higher prices.
Deering sticks with maple for just about all the wood parts of every Goodtime model, and that’s a good thing indeed because rock maple is an excellent wood for instrument necks. Deering Goodtime banjos also have a maple fingerboard, just like on those classic Fender guitars, and an added benefit is that means no tropical hardwoods are needed. On Goodtime models with a resonator, layers of maple veneer are used for the arched back just as on expensive bluegrass banjos.
The metal parts on Goodtime models are of excellent quality, including high-ratio geared tuners, but they’re designed to do their job without adding lots of unnecessary weight. A typical Gibson Mastertone banjo, or the many copies of one, will weigh in at close to 12 lbs while the Goodtime Two (which also has a resonator) weighs barely more than half that. The openback Goodtime, weighing only 4 lbs, is the obvious choice for traveling with a banjo.
We’ve saved the best feature of Deering Goodtime banjos for last: All Goodtime models are made in Spring Valley, California right alongside the higher Deering banjo models. Deering essentially brought the manufacturing of lower-priced banjos back to the US after decades of that segment of the market being monopolized by imports.
There’s a Deering Goodtime banjo for just about every playing style that relies on banjo tone. This includes guitar banjos, tenor banjos and, of course, a variety of 5-string models including the Goodtime open-back banjo and the Goodtime Two, which has a full-sized resonator. For those who like the sound of an open-back banjo with a larger 12” head, the new Goodtime Americana delivers that more mellow tone at a bargain price.
The Martin Modern Deluxe Series
The Modern Deluxe Series combines Martin’s legacy of old world craftsmanship with some impressive contemporary features. These guitar have scalloped, forward-shifted x-bracing and the bodies are constructed using natural protein glue, both features Martin used during the 1930s, the era when the modern flattop guitar was created and refined. The modern features include carbon fiber bridge-plates, which are light and stiff and helps increase volume and sustain; Vintage Tone System (VTS) spruce tops; long wearing EVO frets; and an new asymmetrical neck shape that gives you maximum comfort up and down the fingerboard.
Octave Mandolins
We are very excited to offer an assortment of different octave mandolins for sale, more than we’ve ever had at one time. Octave Mandolins are fast becoming a staple in a variety of musical styles including Celtic and Americana. They are tuned to the same intervals as a standard mandolin, only an octave down, which maintains the chime and natural chorusing effect of the mandolin’s double strings, but it brings the down into the vocal range for most singers. (Just check out the music of Sarah Jarosz to see how effective an octave mandolin can be with a singer.)
Taylor Academy Series: Great Tone, Great Price
The Taylor Academy Series of guitars show what an asset Taylor’s Tecate factory is for guitarists, especially those on a budget. The excellent sound and playability is achieved by combining highly efficient production with a clean, functional aesthetic that looks simple rather than stripped down. The solid, torrefied spruce tops are lightly braced and deliver a clean, clear tone with plenty of warmth and harmonic complexity. In impromptu blindfold tests here at Gryphon, these guitars consistently fool players expecting far less impressive sound for $799. These guitars get the same finely-dressed frets as higher Taylor models, so the playability is equally impressive.
There are currently a number of Taylor Academy Series models in the catalog. The two steel strings models, the Dreadnought 10e and the Grand Concert 12e, have a shorter 24 7/8” scale, a narrower 1 11/16″ nut and they’re voiced to sound great with light-gauge strings, all of which make these guitar easy on your fretting fingers. The Grand Concert 12e-N is set up for nylon strings, which are even easier on your fretting fingers.
All the Academy models have a built-in armrest that softens the edge of the body’s bass-side lower bout to enhance the playing comfort. All versions have genuine ebony fretboards, which come from Crelicam, an ebony mill outside of Yaoundé, Cameroon that Taylor purchased to sustainably harvest the increasingly scarce wood. The electric versions feature Taylor’s ES-B pickup, which includes a built-in tuner as well as tone and volume controls. (Changing the battery takes just a few seconds and no tools are needed.) The Taylor Academy Series is an excellent choice for a beginning guitarist or a more advanced player looking to step up from that old guitar they found in a closet.
The Martin 15 Series
We were very excited to see the return of the mahogany-topped Martin 15 Series in 1997. The first model, D-15M, was an immediate hit with players and Martin soon began introducing new models including 000, 12-fret 000 and 00 variations. Like the guitars of the 1940s and 1950s, the Martin 15 Series guitars are cosmetically very plain but they pack a sonic wallop. Our favorites are the StreetMaster models, which have a very thin finish that is lightly distressed by buffing through some of the dark stain on the mahogany top.
The Martin 15 Series originally took some time to get up and running. The first mention of the style was in 1935, when Martin made prototypes of two R-18 archtops and two 0-15 flattops, which, according to the log books, were either birch or maple. In 1940, the style formally entered the catalog with the introduction of the 0-15. Martin made 578 that first year, making it their most popular model by a long shot.
The 0-15 was the plainest guitar Martin ever made and it had no binding, the simplest soundhole rosette, and a thin, satin finish. But the all-mahogany construction sounded very good. It didn’t have the roar and rumble of a rosewood and spruce dreadnought like the D-28, but the 0-15 was balanced sonically and responded well to both fingerpicking and flatpicking.
Martin’s catalog, which was almost as plain and unassuming as its least expensive model, had a line of small print at the bottom of the page which read “Many styles but one quality,” and that certainly applied to the humble 0-15. A careful examination of the interior bracing of a 1940 0-15 compared to a pearl-bordered D-45 from the same year would reveal that the workmanship was the same, despite the fact that the D-45 cost ten times more.
The 0-15’s reputation got a boost when it was adopted by Woody Guthrie, the singer and songwriter who wrote “This Land Is Your Land” in 1940 as well. Guthrie was photographed playing the model, cementing the idea of the small mahogany instrument as a guitar of choice for the Common Man. The 0-15 stayed in the catalog until 1961, when Martin discontinued its all-mahogany guitar models until they were reintroduced in 1997. Oddly, Martin has yet to reintroduce the 0 size, but the selection they now offer more than makes up for the lack.
Eastman Mandolins: An Affordable Alternative
We are very excited to announce the arrival of a new batch of Eastman mandolin family instruments. Eastmans all have carved spruce tops and carved maple back and sides, a maple neck and an ebony fingerboard and bridge. Their all-solid wood construction has a natural resonance that’s tough to beat. We have a good selection of oval-hole and f-hole mandolins in both A and F body shapes. We also have mandocellos, mandola and octave mandolins, for those of you looking to explore the lower tone depths of the mando world.
The Eastman story began in 1992, when the accomplished Chinese musician Qian Ni and a small group of violin makers traveled out of China to look at U.S. and European made violins and apply their design and construction techniques to their own instruments. He started Eastman Strings with the goal to handcraft fine violins and offer them at a reasonable price to the consumer. After much success, Eastman, now the Eastman Music Company, expanded into the Mandolin and Archtop guitar world. Gryphon was an early adopter of Eastman products and has been generally impressed with the quality of instruments produced in the Eastman workshops. With Eastman, you can expect excellent playability, top-notch fit-and-finish, and excellent tone, all at prices that won’t break the bank.
Carr Amplifiers
We are proud to carry Carr amplifiers, which are crafted in Pittsboro, North Carolina by Steve Carr and his talented crew. They boast unique circuit designs, meticulous point-to-point construction, premium components and hand-crafted cabinets. The Carr line includes lower watt amps like the Raleigh, the Super Bee and the Skylark, which produce amazing tone and sustain at bedroom volumes as well as louder amps like the Rambler, the Mercury V and the Sportsman that are loud enough to use at gigs. We always have a great selection in various finishes so please stop on by and give them a try. We suspect you’ll be glad you did.
Frank Ford's Bass Banjo Project
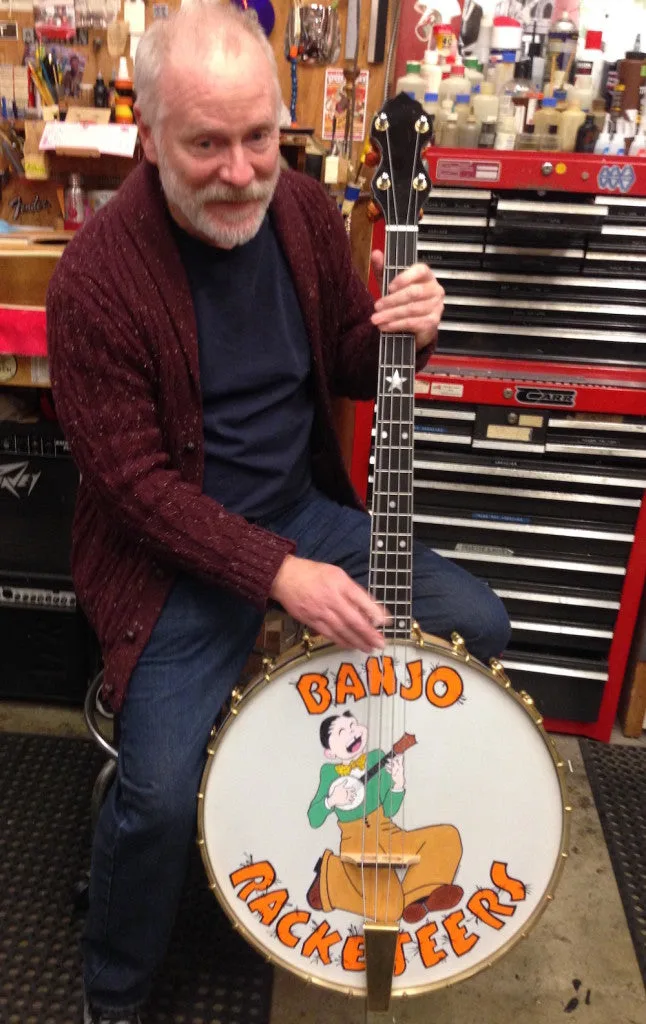
Looks like we’ve gotten ourselves into another crazy project! Our long term friend and staff member, Michael Simmons, plays with the BANJO RACKETEERS, a cool ensemble featuring banjos of all sizes, from the tiny ukulele banjo up to the giant bass banjo. Recently, their bass player left the group and took his big bass banjo with him, so it seemed appropriate to come to the rescue of this crazy bunch.
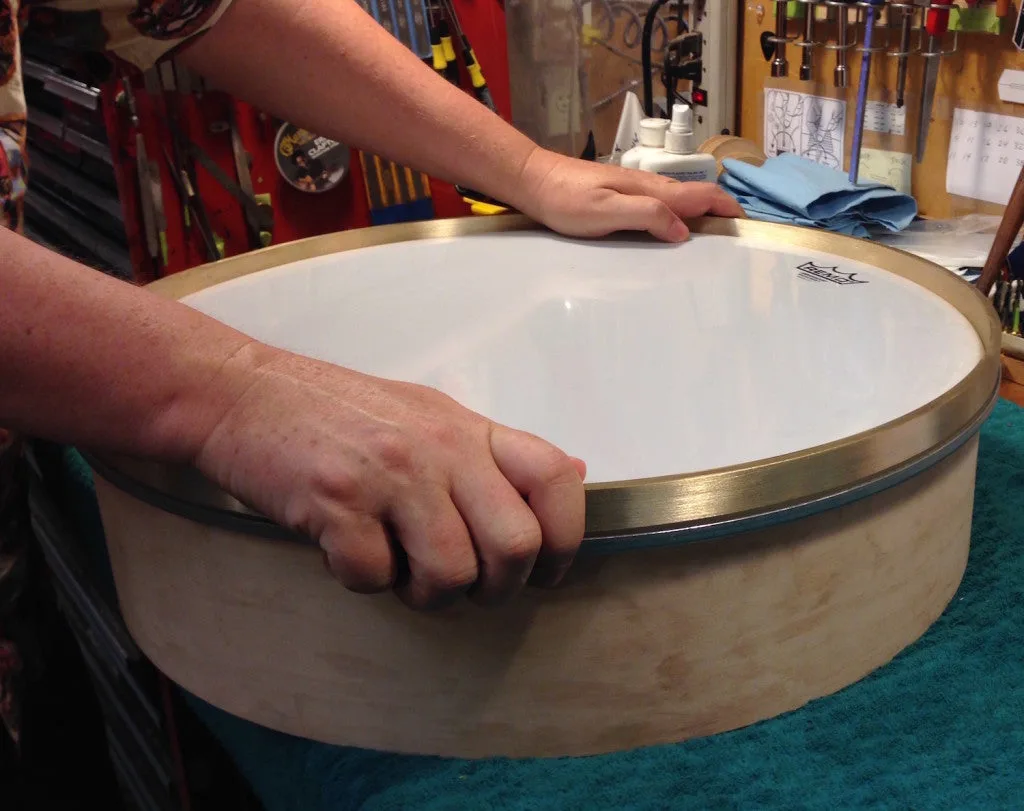
Certainly the heart of any banjo is its “pot” or shell, and many bass banjos are made from regular drum shells with a bass neck attached. Being not of sound mind, I came up with the suggestion that the Racketeers deserved a bass banjo that looked as much as possible like a regular banjo, but supersized. So, to get the project rolling, I offered to come up with an appropriate pot, starting with an idea that the Vega Little Wonder 17-fret tenor would be a good choice to scale up. After some head scratching, I came up with the notion of taking a regular size banjo and upsizing it by multiplying all the dimensions by about 1-2/3.
So, I set about measuring an old Vega, and came up with 20″ diameter as the logical choice for the head diameter. No point in making this thing an odd size, because we’d want to be able to use regular easy-to-find drum heads when replacement was necessary.
I have a fairly complete machine shop in my garage, and I’m able to reproduce some kinds of machined banjo parts, so this project is giving me quite a workout! And, it’s a nice break from making Frank’s Cranks.
Here’s how it’s going. . .
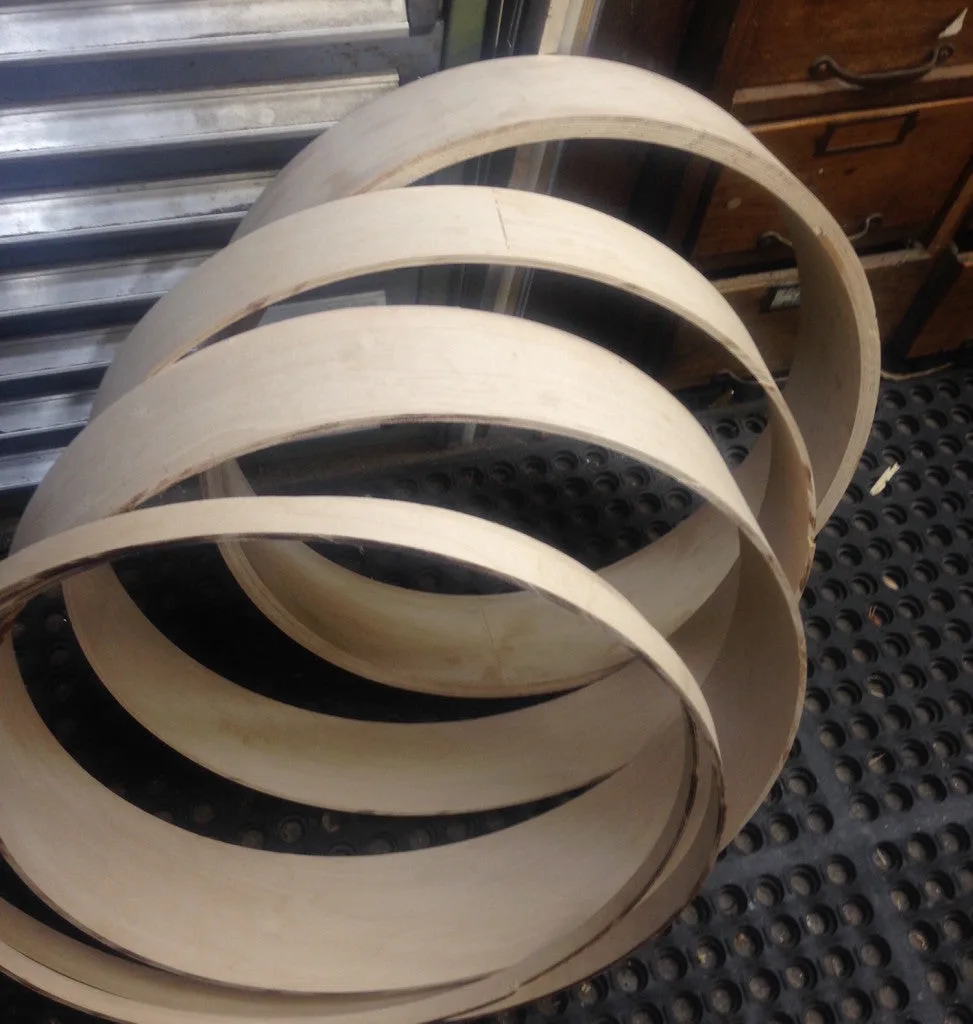
In New Hampshire, there’s a cool outfit called Keller that makes drum shells for the industry. They were my source for the rings you see above. I bought a 20-inch diameter, 24-inch long laminate cylinder that was probably intended for bass drum manufacture. Drum shells are way too thin for banjo use because two dozen banjo tension hooks generate quite a lot of force – banjo heads are generally much tighter than drum heads.
So, I set the fence on my table saw and sliced the long cylinder into 4-1/2″ rings to make the banjo shell. I cut and laminated two rings into an uncut ring for a triple-thick arrangement, that works out to about 5/8″ thick, with 24 maple veneer laminations in all.
In the photo above you can see the thick laminated banjo shell sitting behind some regular drum thickness rings.
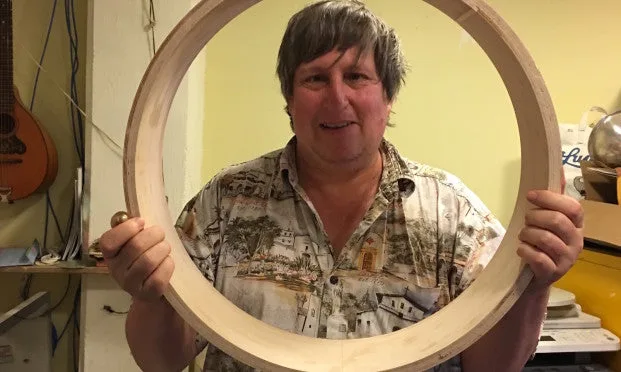
Here’s a shot of Michael – a classic pose:
This is going to be a big tenor banjo, you betcha!
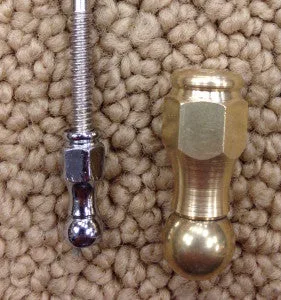
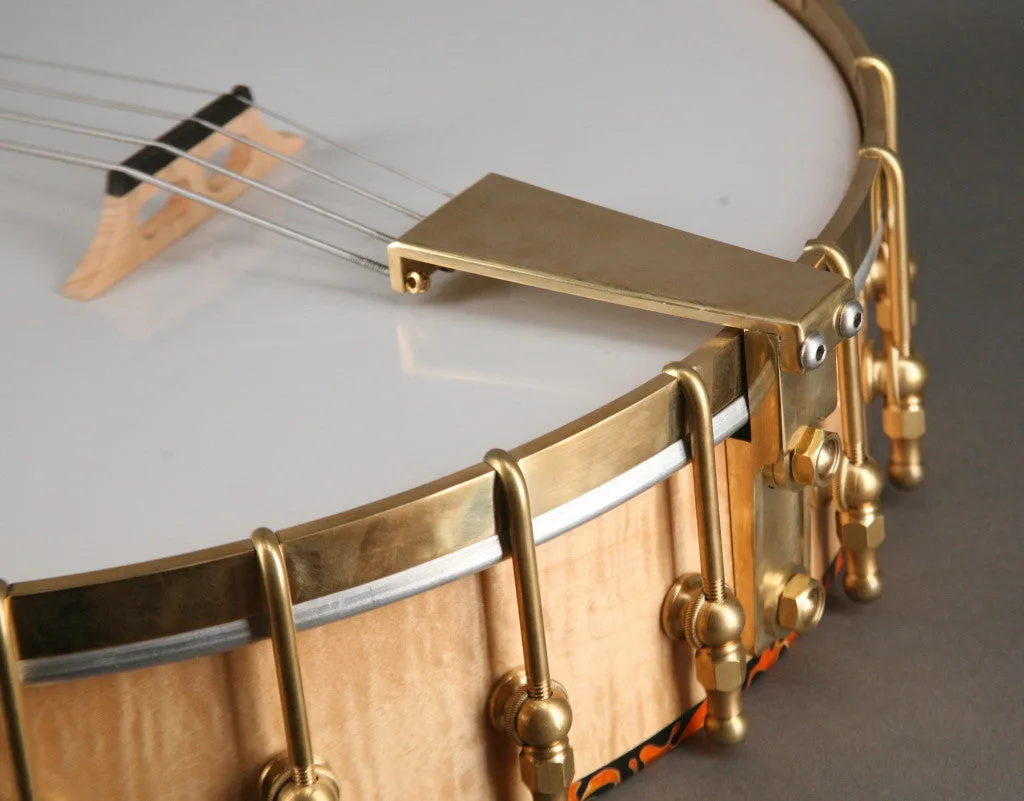
Since Vega is to be the inspiration, I figured I’d want to emulate the styling of the hardware as well as the neck and other features. As a matter of getting it underway, I decided to make the hooks and nuts first, because I’ve always liked the ball-end nuts Vega used on all those old time banjos. Here’s a shot of a real Vega unit, alongside my oversize replica:
Some decisions are being put off as the project gets underway, so at this point, we’re going with brass for all the hardware. Maybe later we’ll have it all nickel plated, but the brass has a nice “contemporary old-time” look, if you know what I mean.
Now, some of this old time banjo hardware was rather elegant in its design, from mechanical working standpoint as well as visual. I really couldn’t pass up doing a bit of unnecessary machining on the nuts, and since it’s not visible on the finished instrument, I’ll try to take some credit on this page.
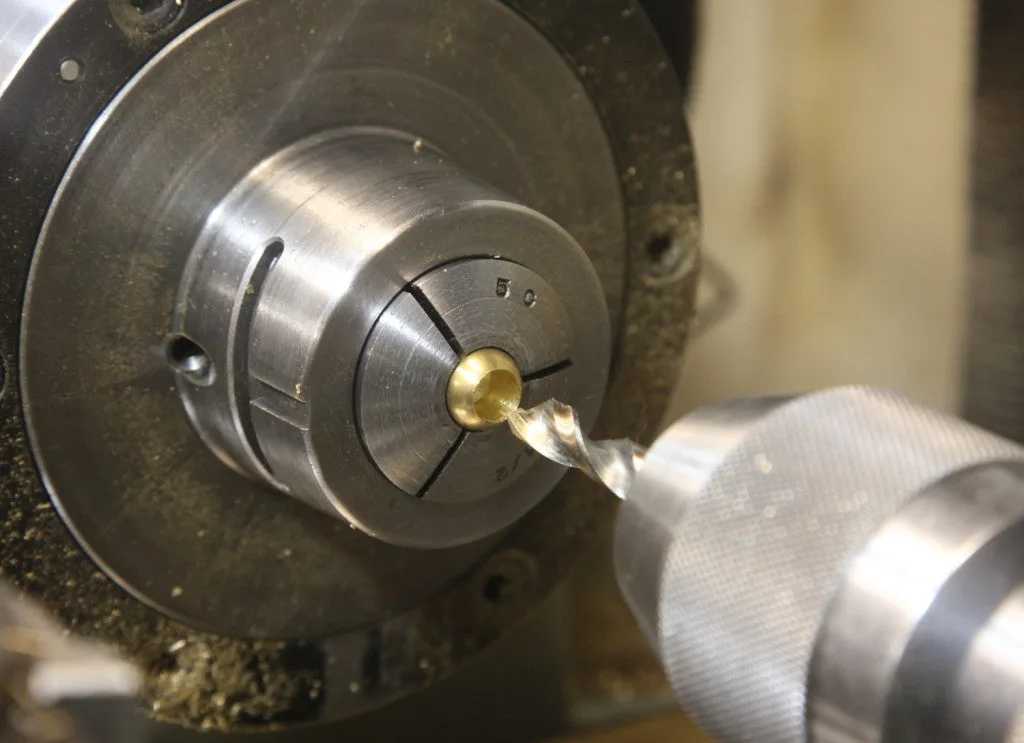
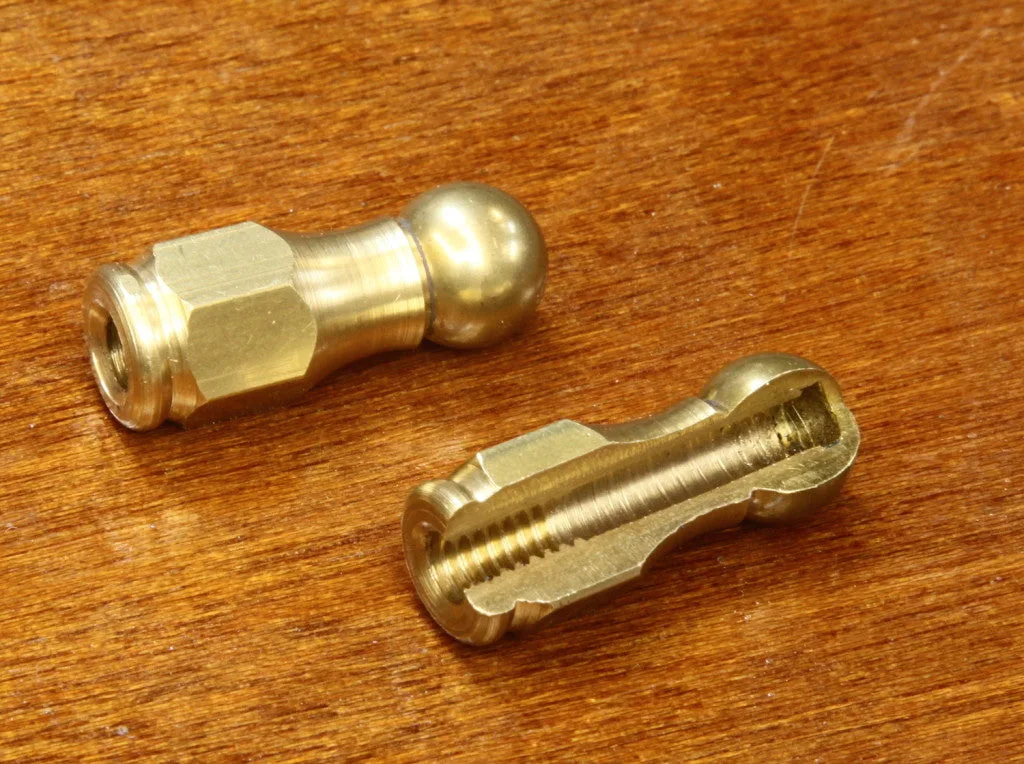
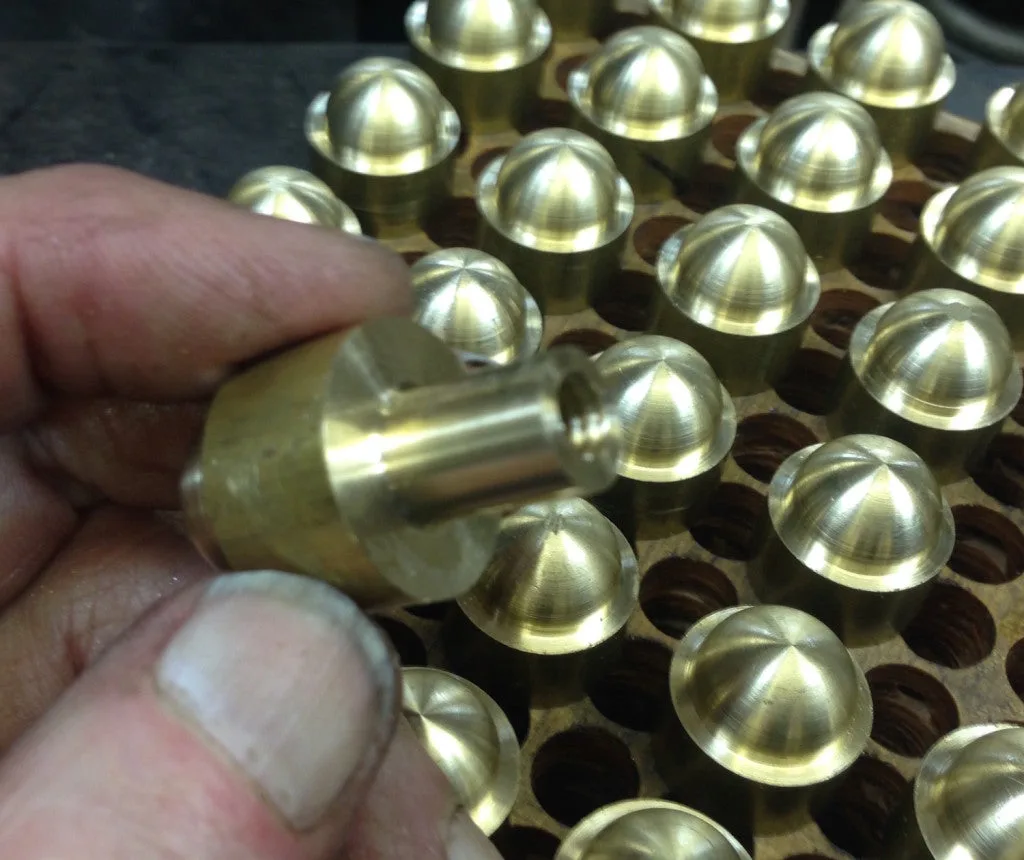
In order to make this cool nut, I worked with a two-piece design I’d seen on some from the 1890s. I bought a small supply of 1/2″ diameter brass balls, and drilled each one with a 5/16″ hole, almost all the way through, mounting the ball in my lathe collet to avoid marring its nice turned finish:
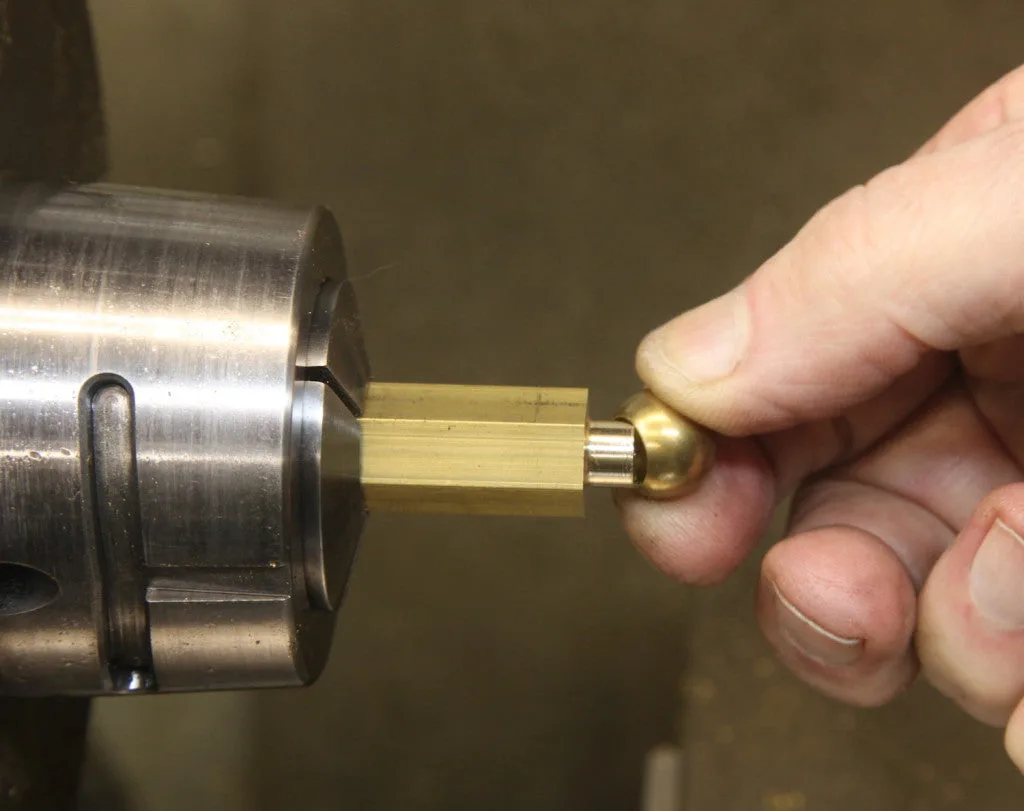
The main body of the nut was next, and I turned the end of some brass hex stock to fit the ball I’d drilled:
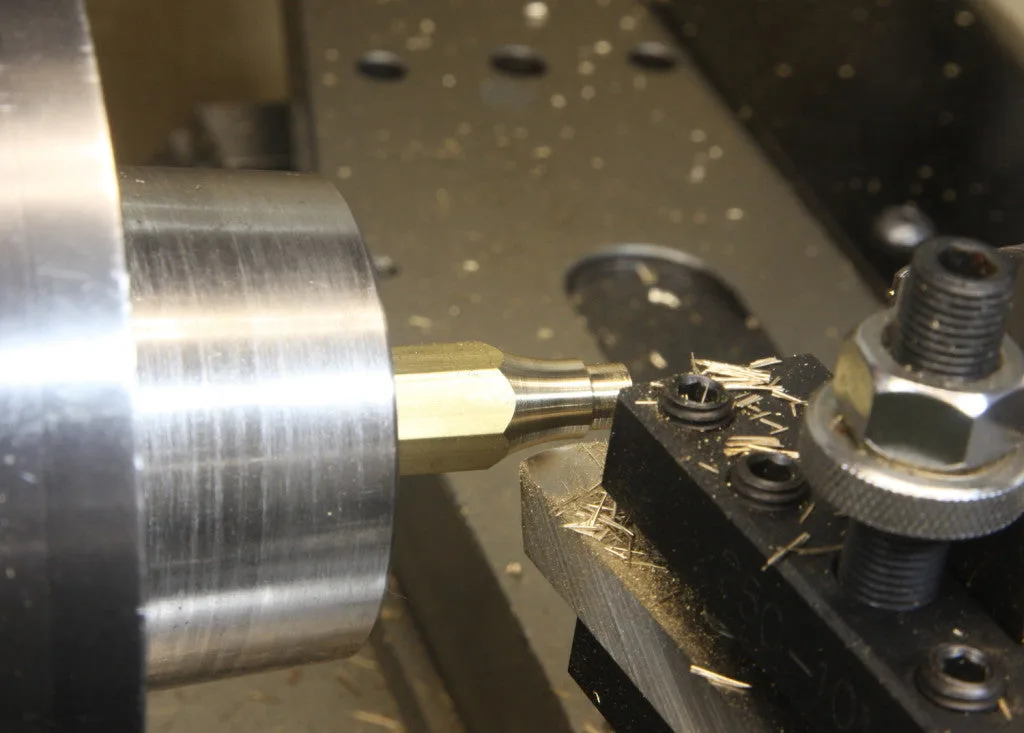
And, using a rounded “form tool,” I turned the nice contour where the nut transitions from the hex shape:
With the ball in place, the nut is starting to take shape, and only half a dozen or so operations remain to make it fully Vega-like. I drilled and threaded and formed the other end, drilled for thread clearance up to the ball, and ended up with nut that has a very pleasing shape, and is relieved to screw fully onto the hook. The idea is to be able to have lots of room for adjustment, so any variety of heads can be used, including a natural skin head if that becomes interesting. Check out the photo below, and you can see a good view of the inside:
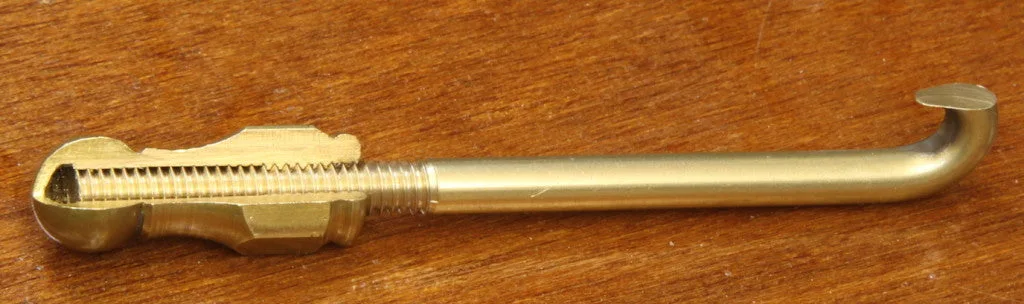
And, here it is with the hook screwed on:
This nut gives a full one inch of adjustment, while completely covering the end of the threaded hook. It doesn’t bind or drag as it is turned because only nine threads are actually engaged.
Having finished up the nuts, I really had a sense this project would get off the ground, so I got busy on the rest of the hardware. Next up would be the tension hoop, hooks and the lugs for the shell.
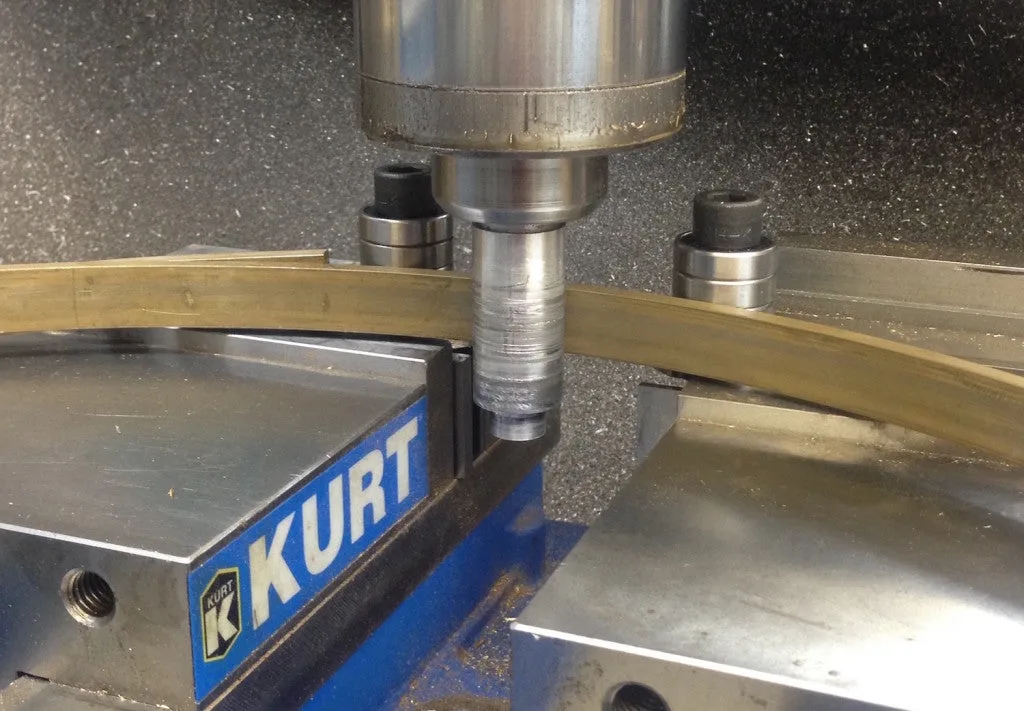
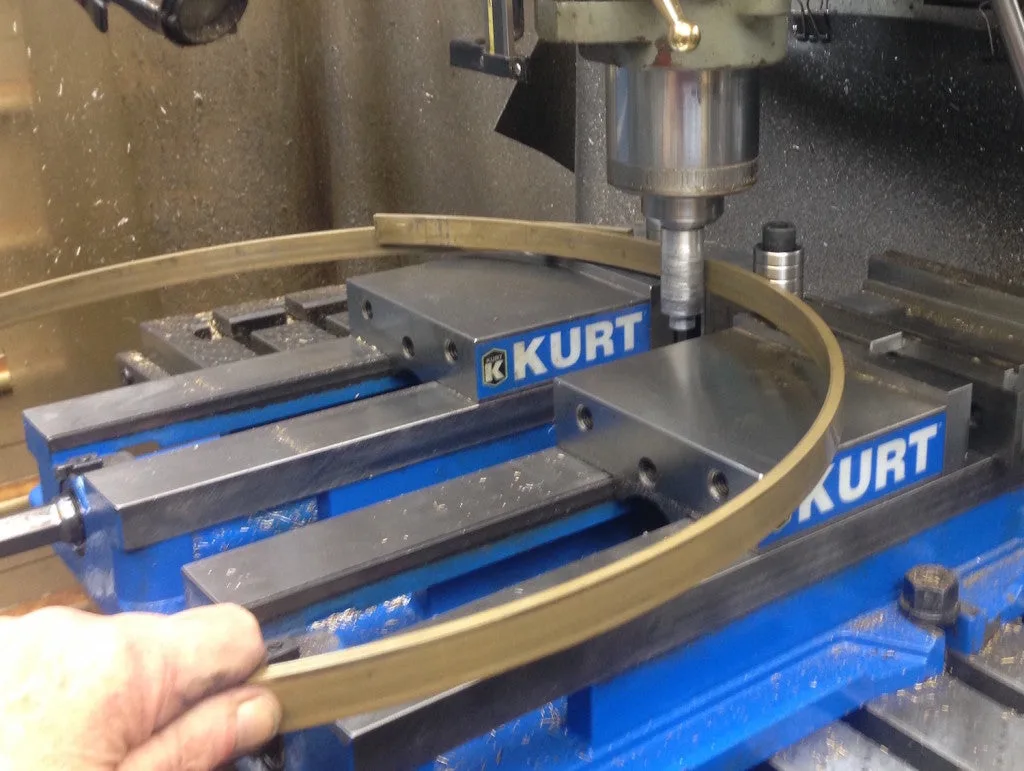
A big boy banjo like this one would certainly need to have big hardware, and the tension hoop proved to be a fairly challenging bit of bending, starting with a six-foot long brass bar 1/4″ thick and 3/4″ wide. In order to make a smooth bend, I had to rig up a bending fixture on my milling machine, so I set things up with a pair of heavy machine vises, each with a stack of ball bearings to act as rollers – that way I could easily adjust the spacing between the rollers. To drive the bar past the rollers, I used a simple one-inch diameter aluminum rod held in the machine quill. As I started to roll the bar past the uprights, I pressed it toward the rollers by drawing the mill table forward, running the machine at 50 RPM, its slowest speed:
I ran the bar through multiple times, with each pass decreasing the radius of the curve until I reached the approximate size I needcd:
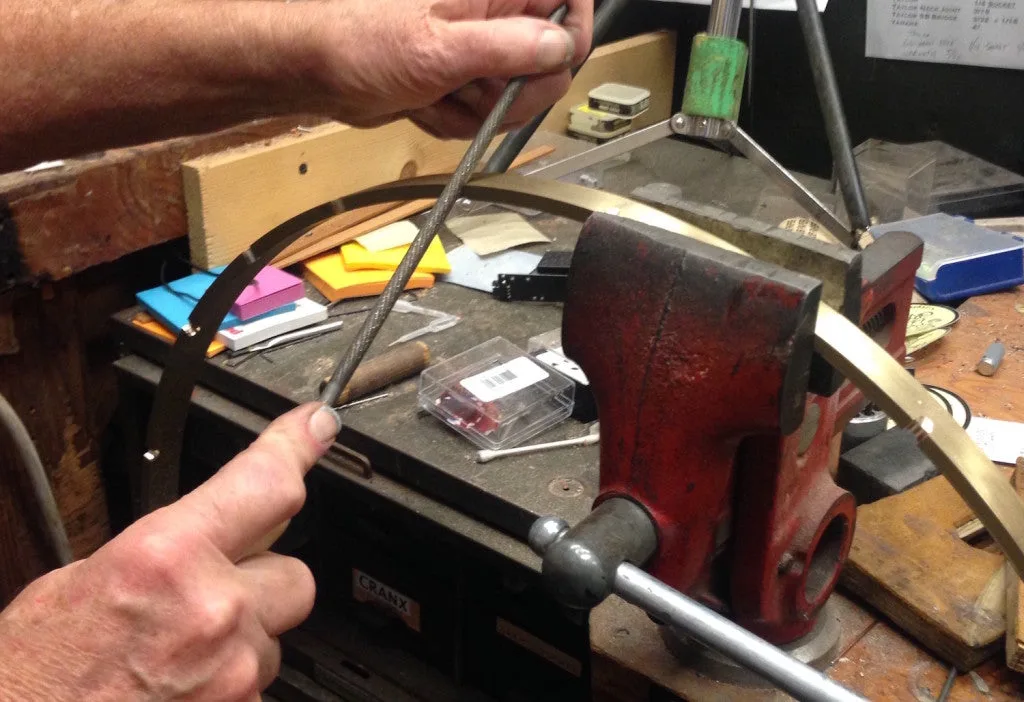
Then, it was over to the vise to cut and file a nice overlap joint preparatory to silver-brazing it together into a ring that would fit right over the head. After some serious cleanup with sandpaper and files, I had a nice fit:
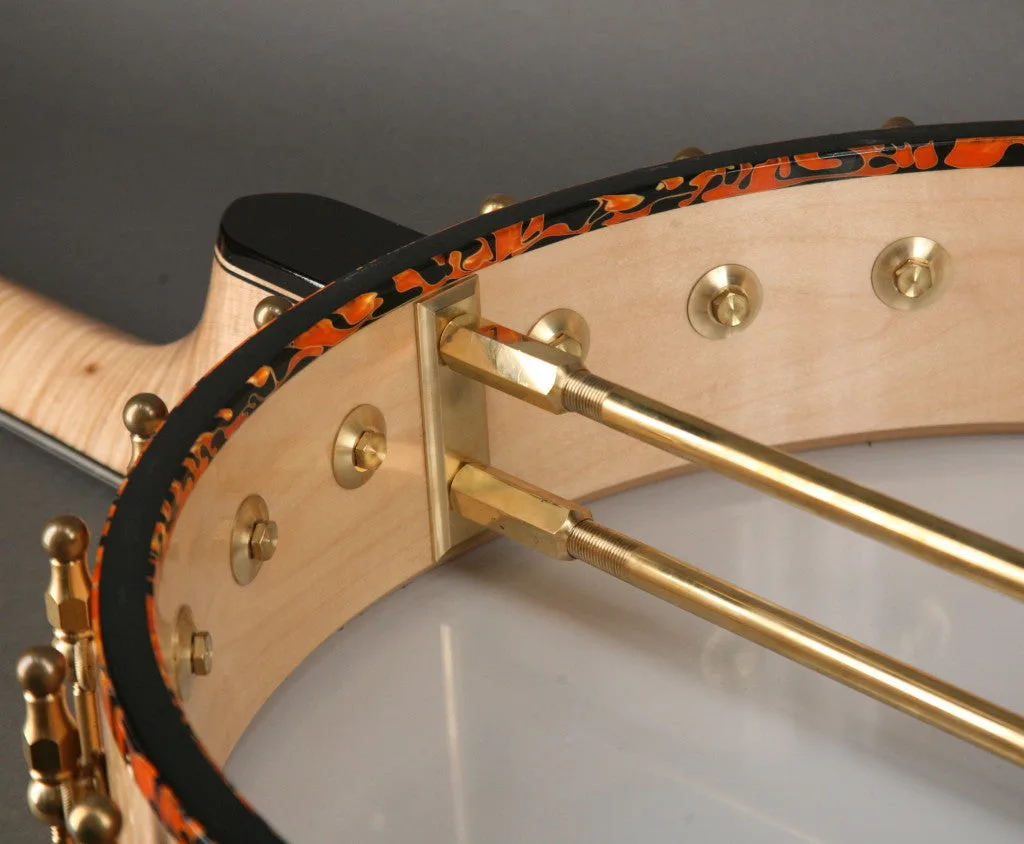
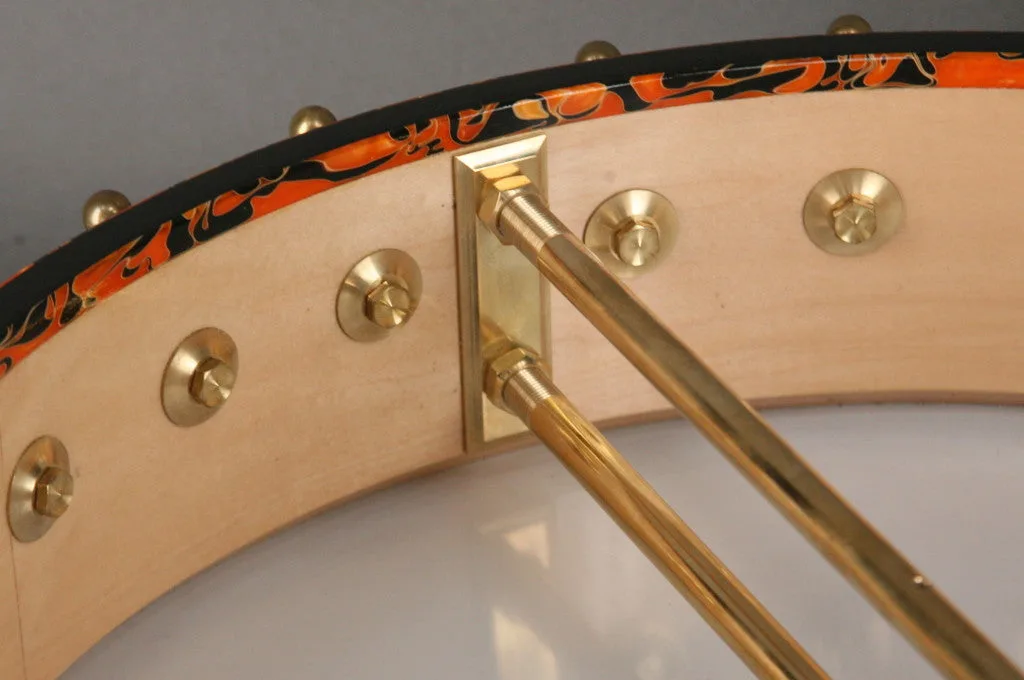
The next bit of machine work took quite a while as I machined the decorative end of all the lugs to go around the shell. I made each lug with a ball end and a turned, drilled and tapped segment that would be pressed into the wall of the shell, and secured with a screw from the inside:
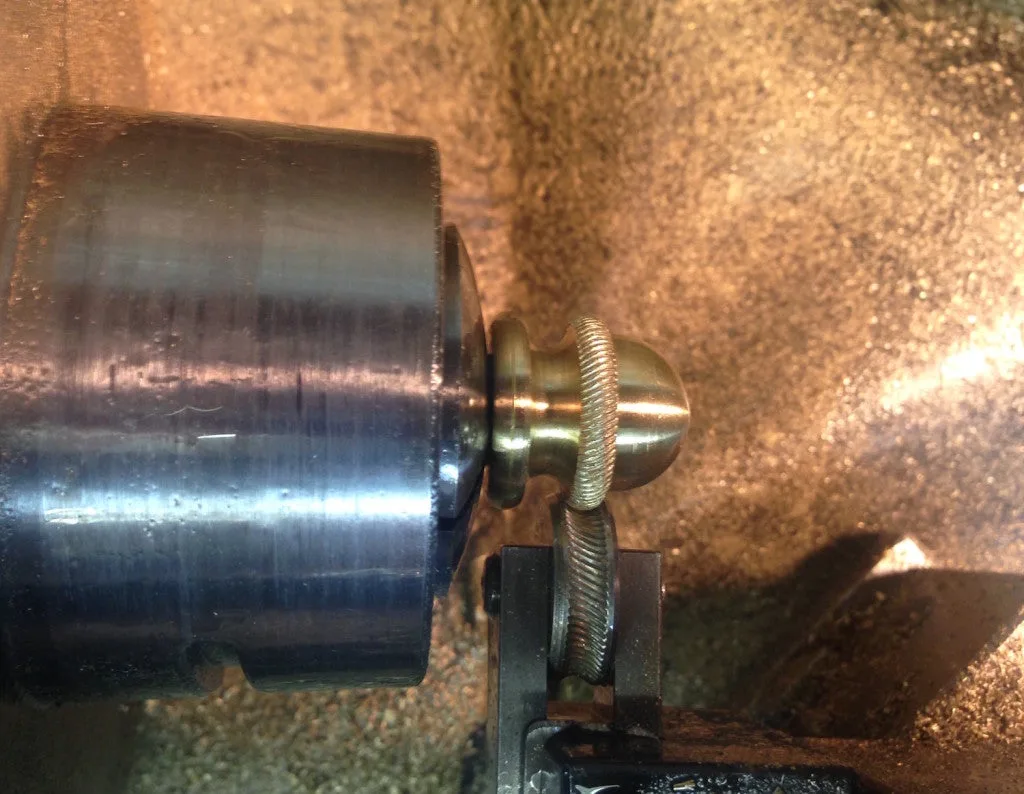
Then I held the part by the stem end and turned the decorative bits with various form tools, finally pressing the decorative “rope” pattern feature using a concave knurling tool I’d made some years ago to use for some special projects:
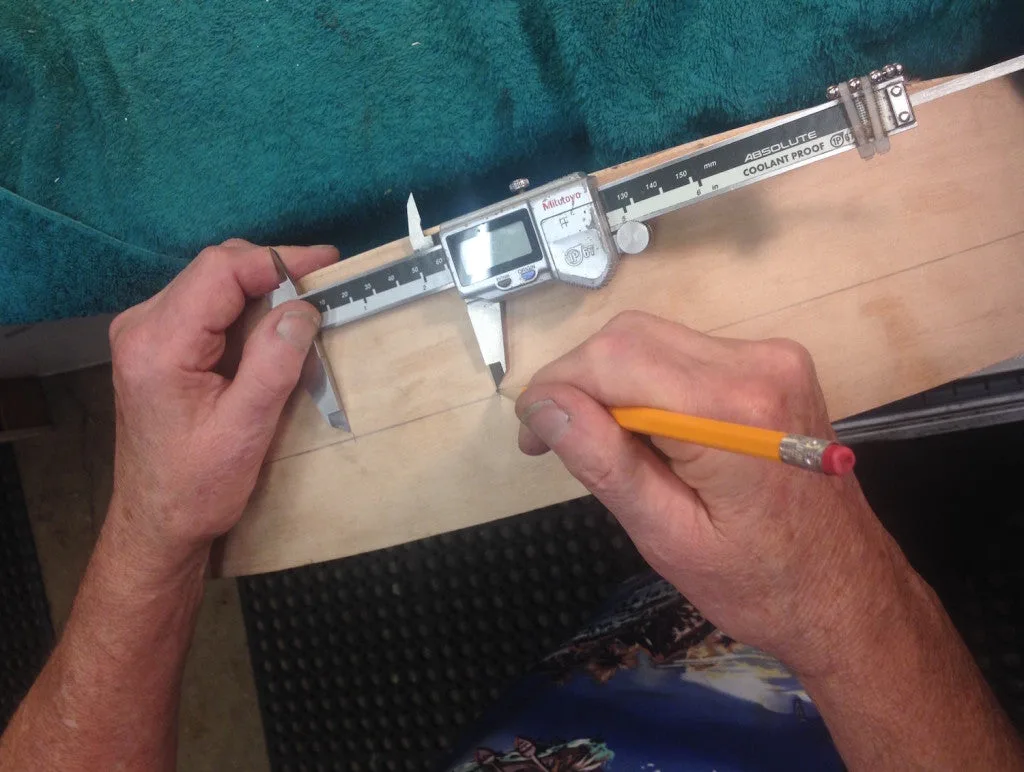
I swear it felt like it took me half a day to mark out the spacing for the 24 lugs around the shell, taking into account the need for a slightly wider spacing at the tailpiece and neck positions. “Measure twice – cut once” is the old woodworker’s adage, but this time I think I measured a dozen times before I got it right:
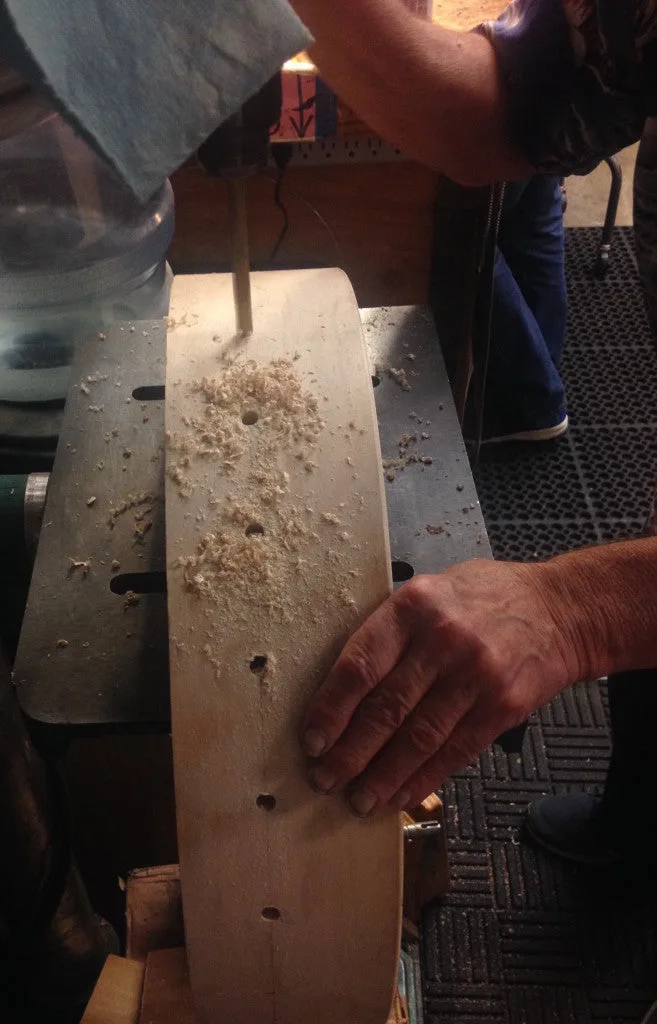
Ordinarily it can be a bit tricky to align a drill for boring holes squarely in a big round surface, but since this giant banjo actually straddled my drill press table, it was almost automatically lined right up as I drilled the two dozen holes:
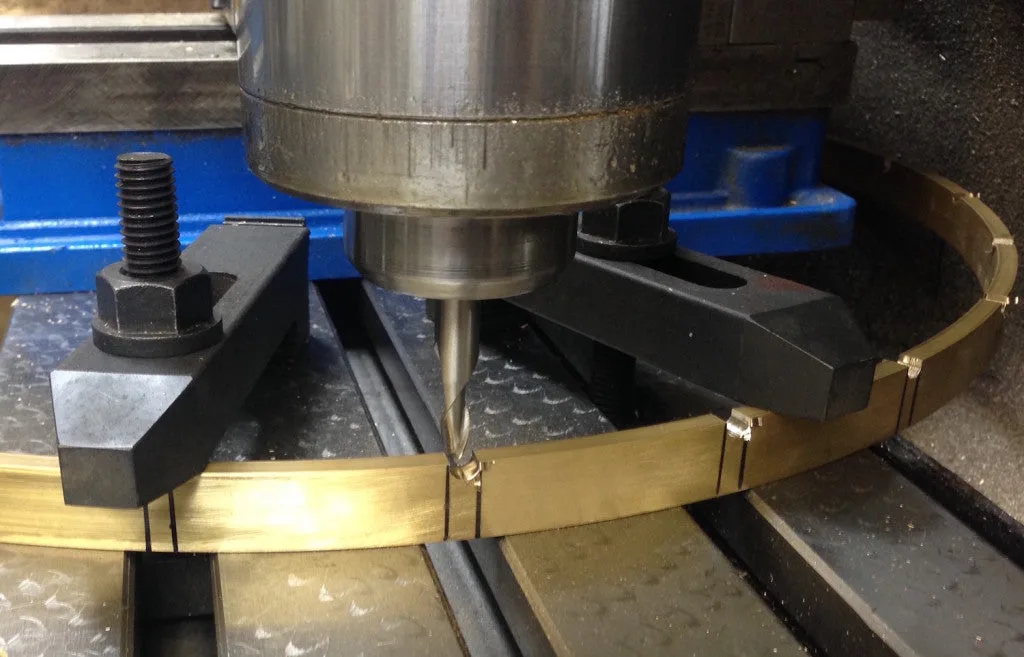
Once I had all those holes laid out and drilled, and the lugs installed I was able to slip on the tension hoop to mark the location of the 24 hooks, thereby making certain that all the hooks would line up nicely. With the locations marked out, I clamped the tension hoop to the mill table, and used a 1/4″ ball end mill to rough out a notch for each of the hooks:
It took a bit of hand filing to make the notches rounded and contour to fit the ends of the hooks. Without that little touch, the hooks might not be able to handle the appropriate tension without deforming or breaking at their bent ends:
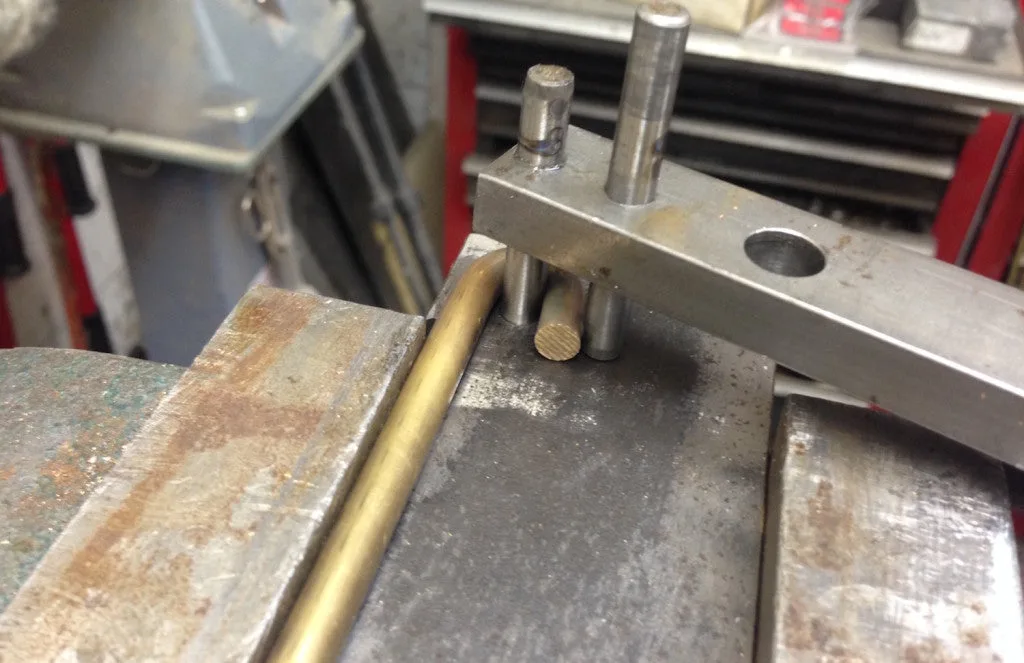
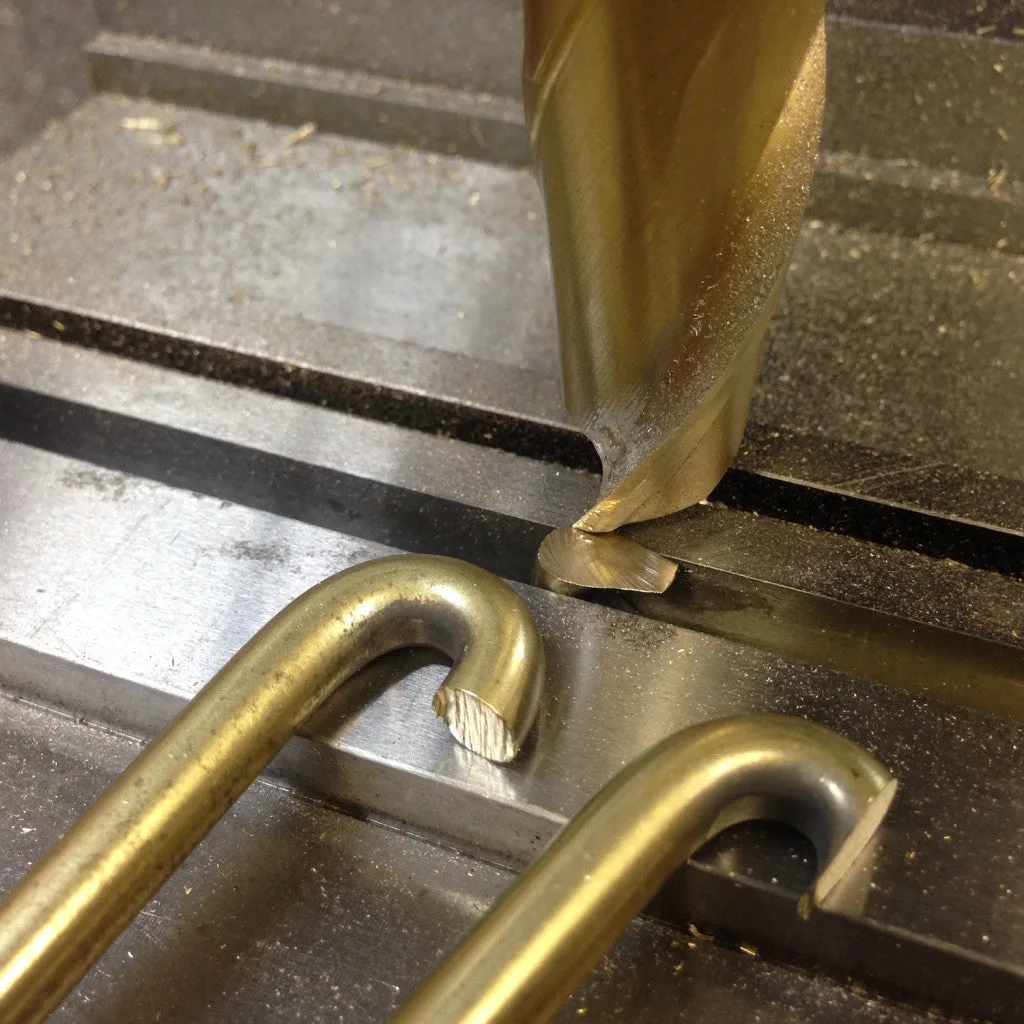
I made the hooks from brass, too, using 1/4″ diameter rod. To form this stuff to such a sharp curve, I heated the material to a dull red, and bent it in a simple, dedicated fixture I made up for this job:
Over on the milling machine, I was easily able to trim the ends of the hooks to a nice uniform shape and length:
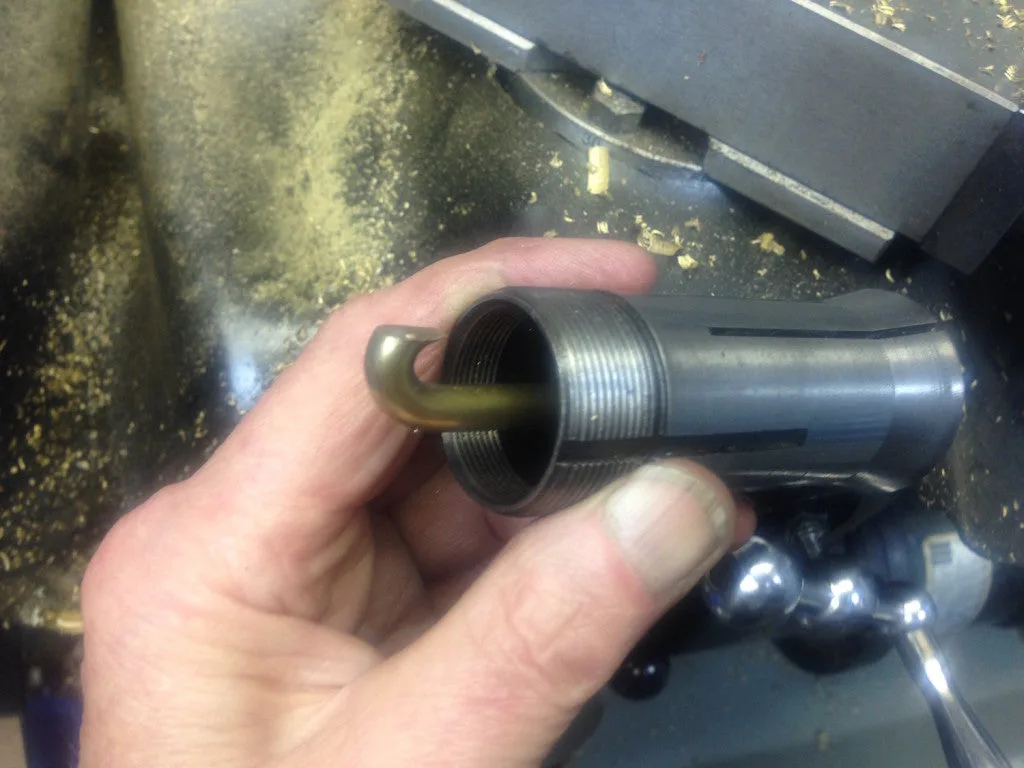
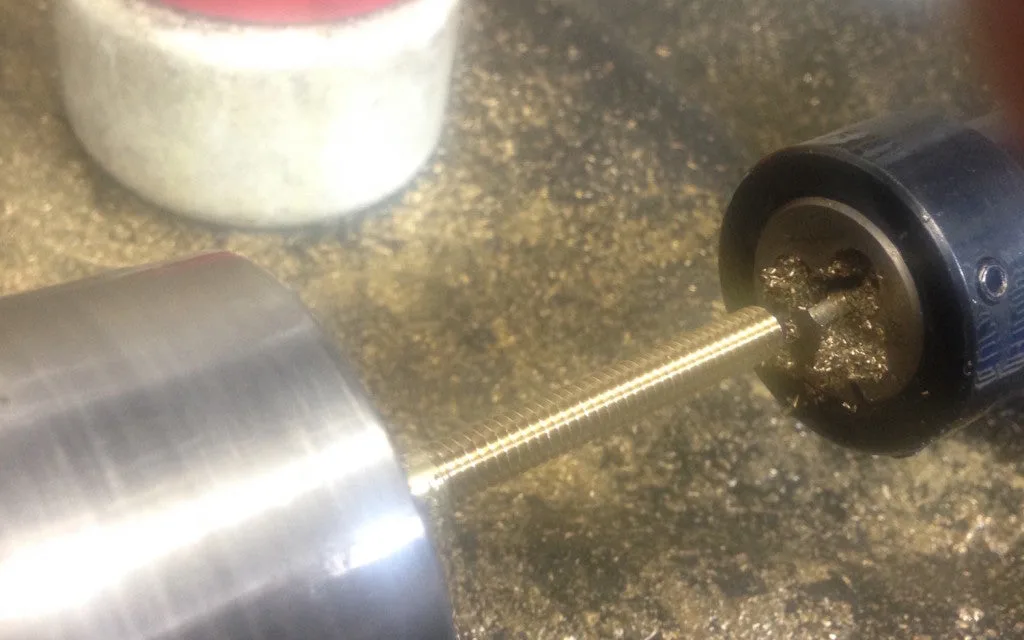
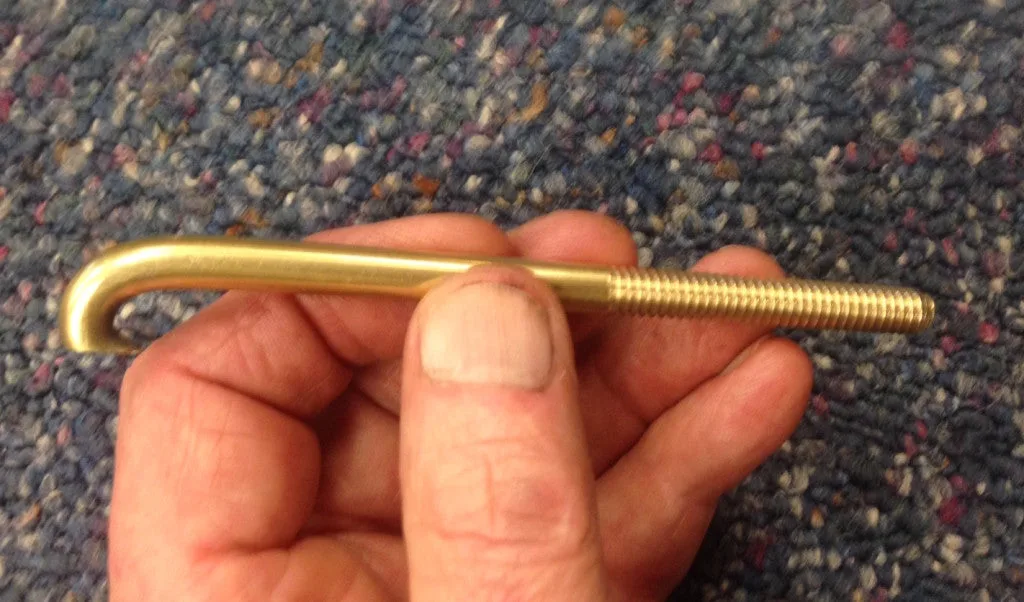
Because I’ve basically been designing this thing as I go, I actually made all the hooks before I figured out what length I’d need, so I didn’t cut or thread their ends until I had the shell together with head, tension hoop and lugs in place. Once I finally decided on length, I had a bit of a harder job threading them than I might have otherwise, but for only 24, it wasn’t too big an issue to do them individually, by inserting them backwards into the lathe collet, mounting the collet and running a threading die in the lathe tailstock:
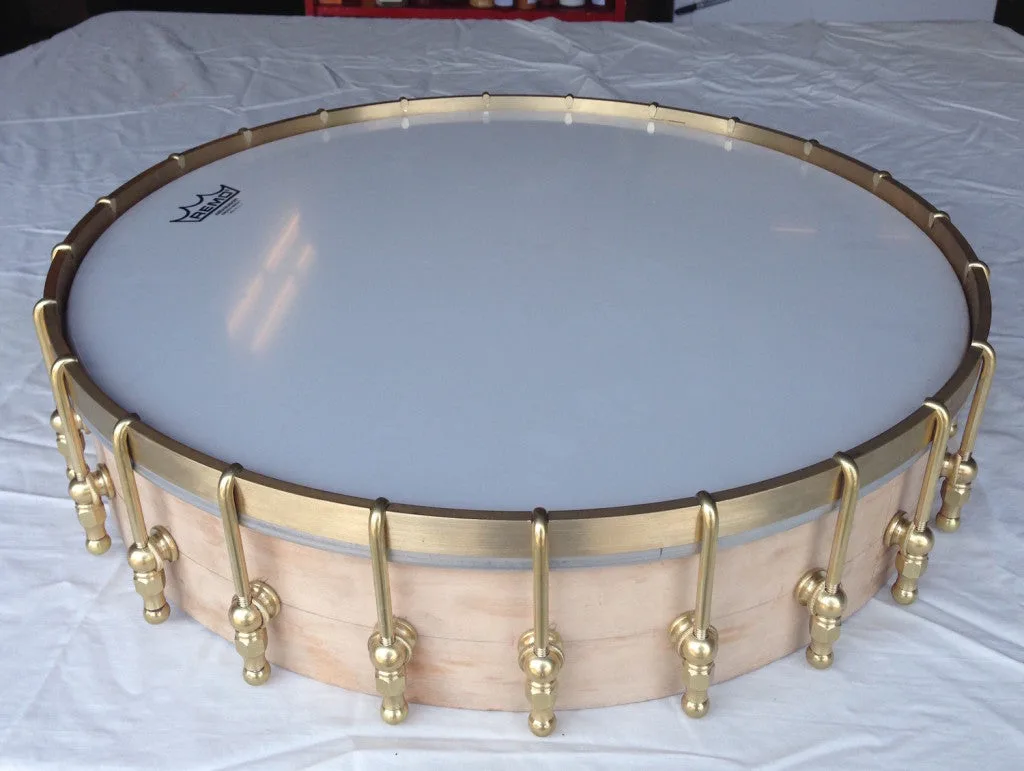
Well, here’s the shell all assembled:
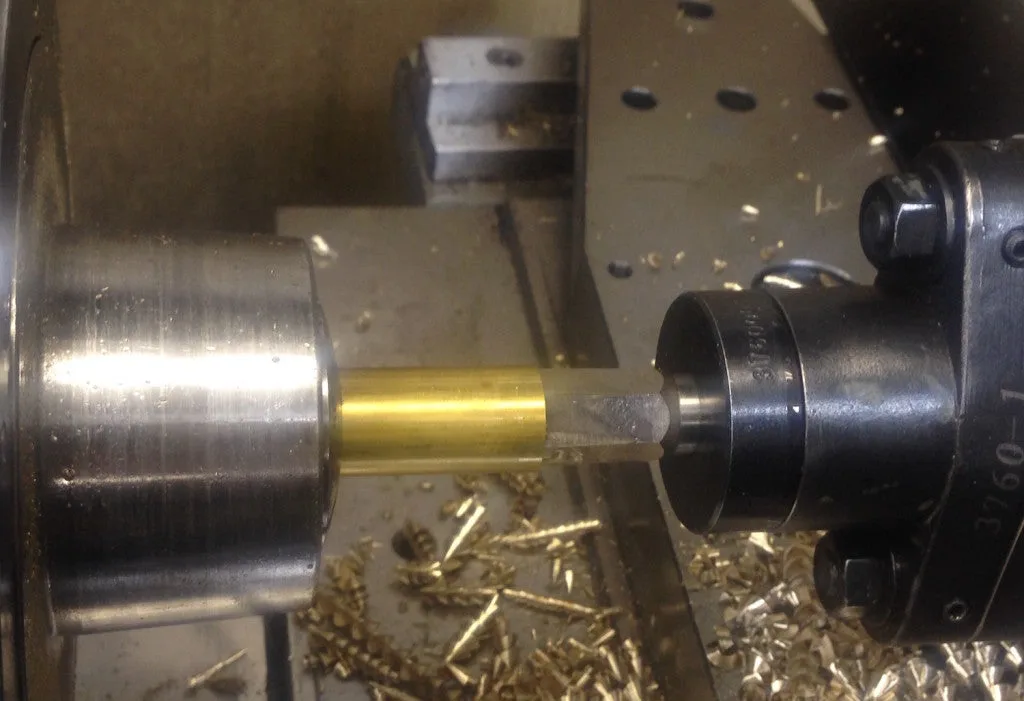
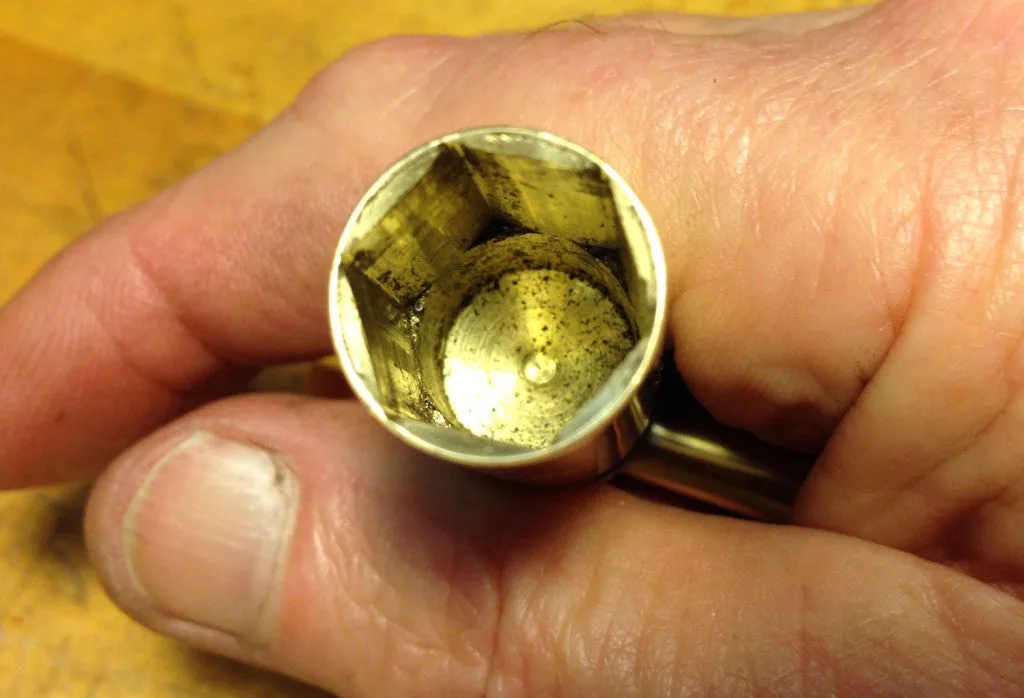
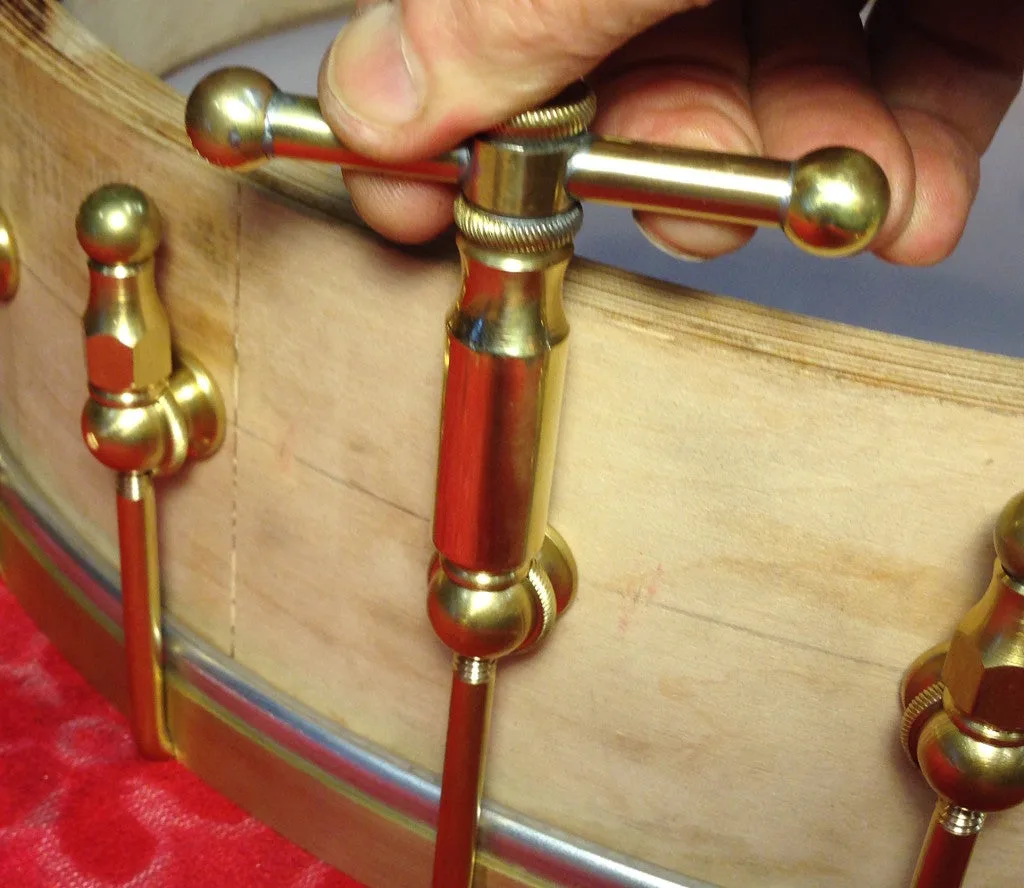
Naturally, the first thing the guys in the shop did was tease me about having a wrench to tighten the head on this big banjo, so I had to rise to the occasion, and make one up. I happen to have a tool called a “rotary broach” so I could form a hexagonal hole in a brass rod to make the 1/2″ banjo wrench I needed right on my lathe. Here are a couple of photos of the process and the finished tool:
Whew! That’s it so far, with a lot more stuff to come. Next, we’ll be laying out and making the neck, a few more small metal bits, and making some decisions along the way. This banjo will continue to be a scaled-up version of the classic 1920s 17-fret Vega tenor, so it will need a big tailpiece, an appropriate neck, and maybe a resonator.
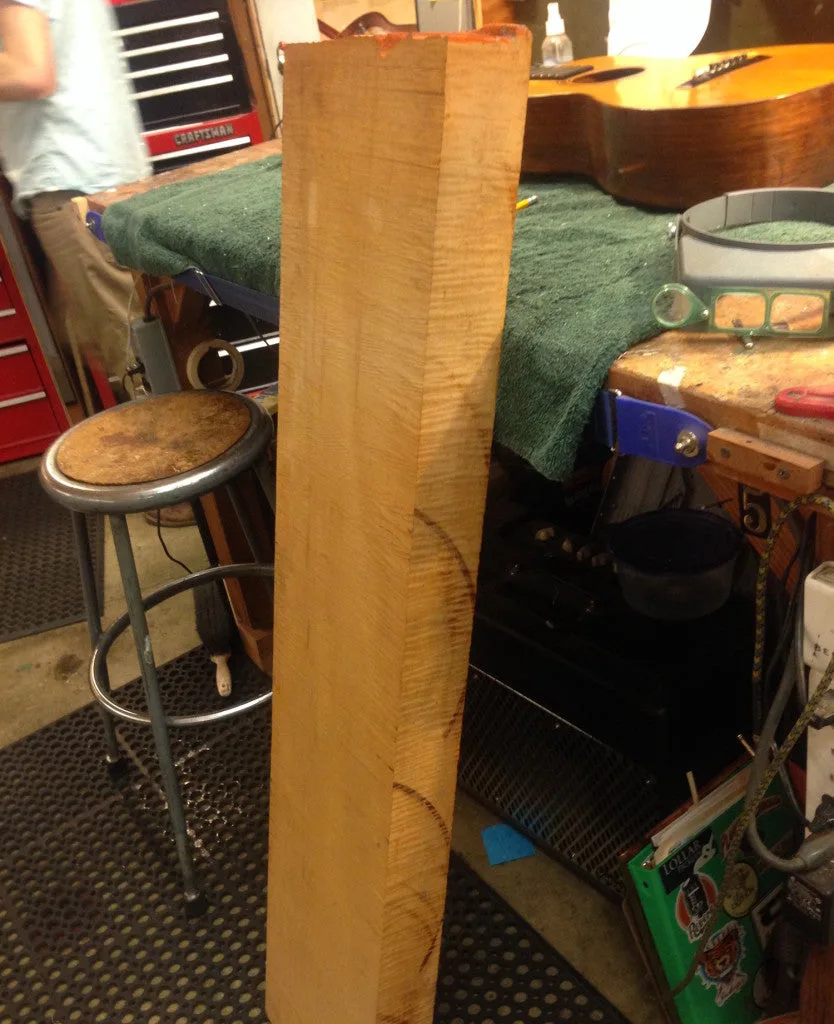
After some serious rummaging in our special wood pile upstairs, I found a likely piece of maple for the neck of this beast:
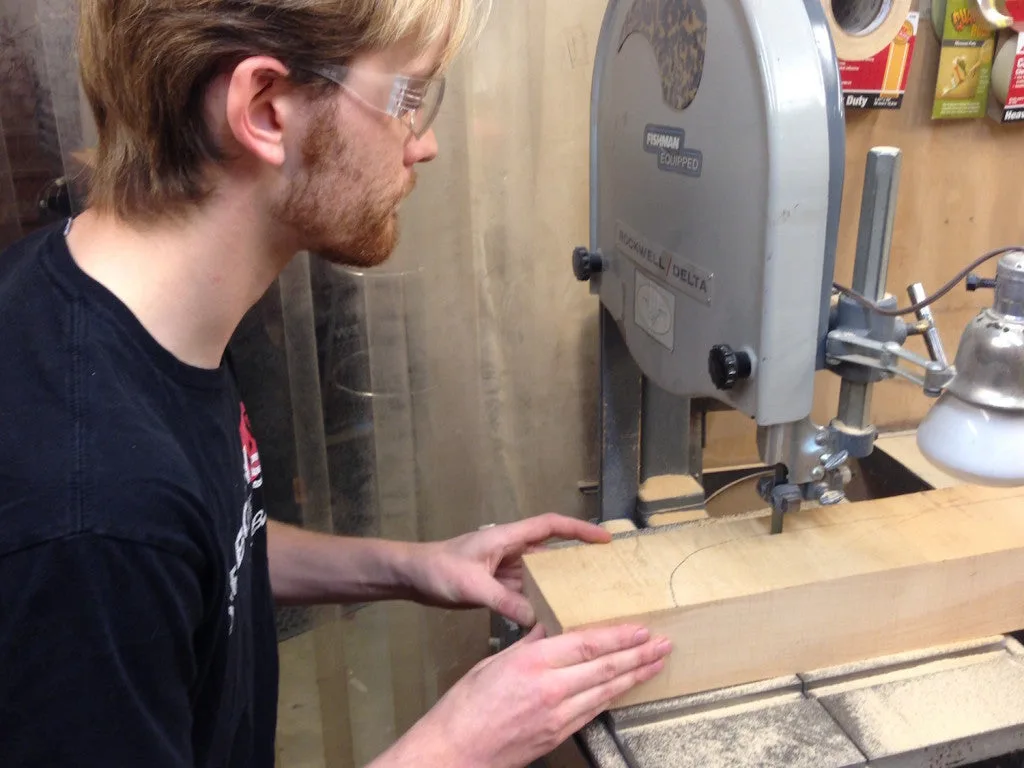
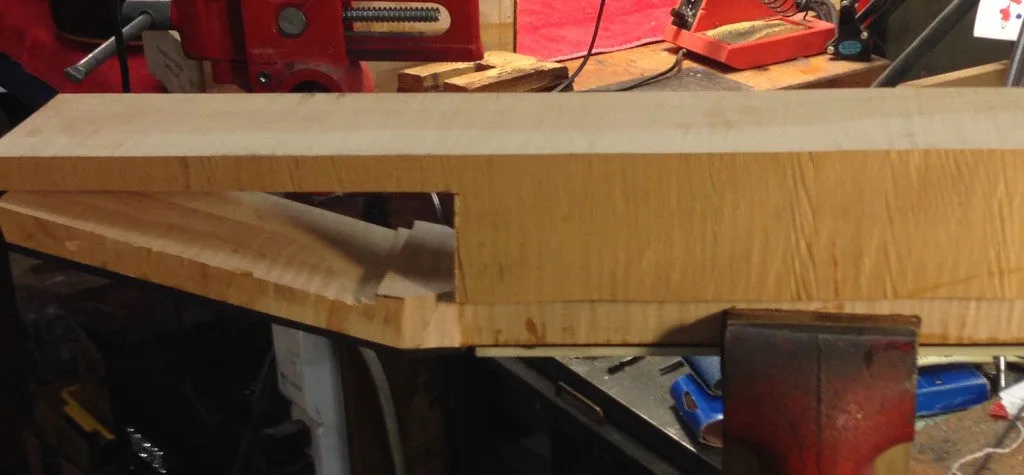
We actually bought this hunk of maple at MacBeath Hardwoods (Berkeley, CA) in 1971. It’s eastern hard maple, a solid 3-1/2 inches thick and by now rather thoroughly air-dried, I’d say! Wrestling it over to the bandsaw, we sliced off a section big enough for a one-piece bass banjo neck.
Here’s James cutting the profile, after laying out and marking the side view of the neck:
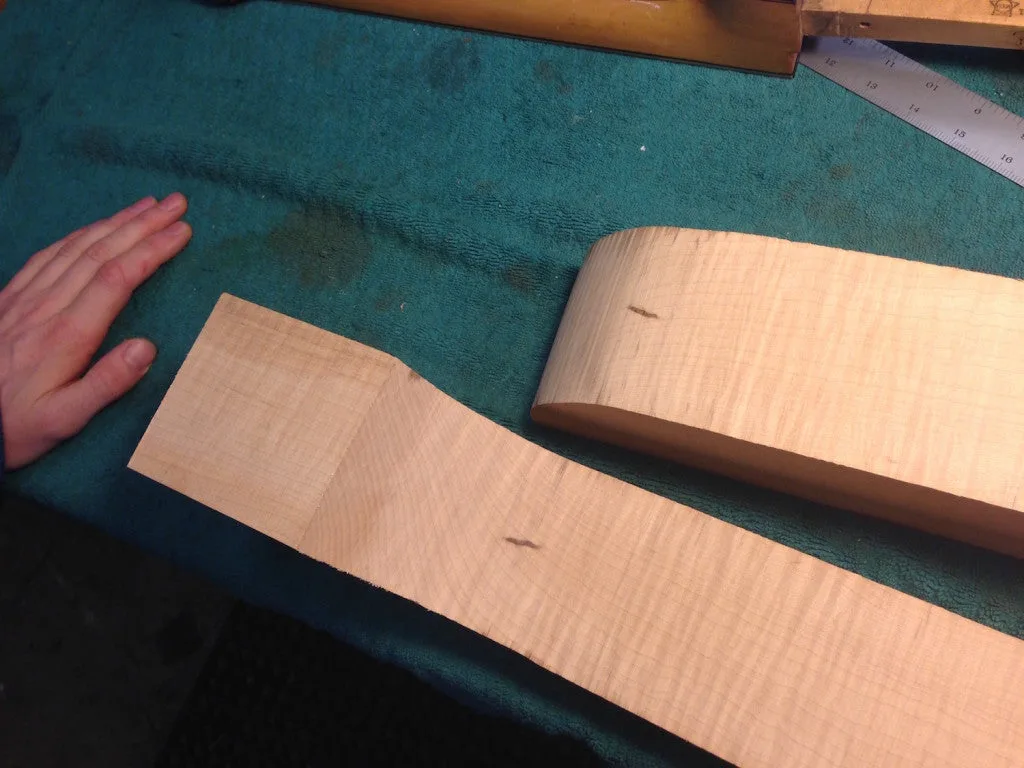
Oy – now here’s a fine little disaster! The cut revealed a little dark brown flaw in the wood, right at the curve of the heel:
It’s the kind of thing that can’t be detected from the outside before cutting, so we’ve learned to accept this kind of surprise, but, well, it is still disappointing. Had this been a different situation (and not such a giant piece of hard maple) we might well have tossed it out as unusable, but considering the scale and scope of this project, we thought a little “character” wouldn’t hurt anybody’s feelings. So, we’re going to proceed with our original enthusiasm intact. After all, it’s such a nice piece of figured maple.
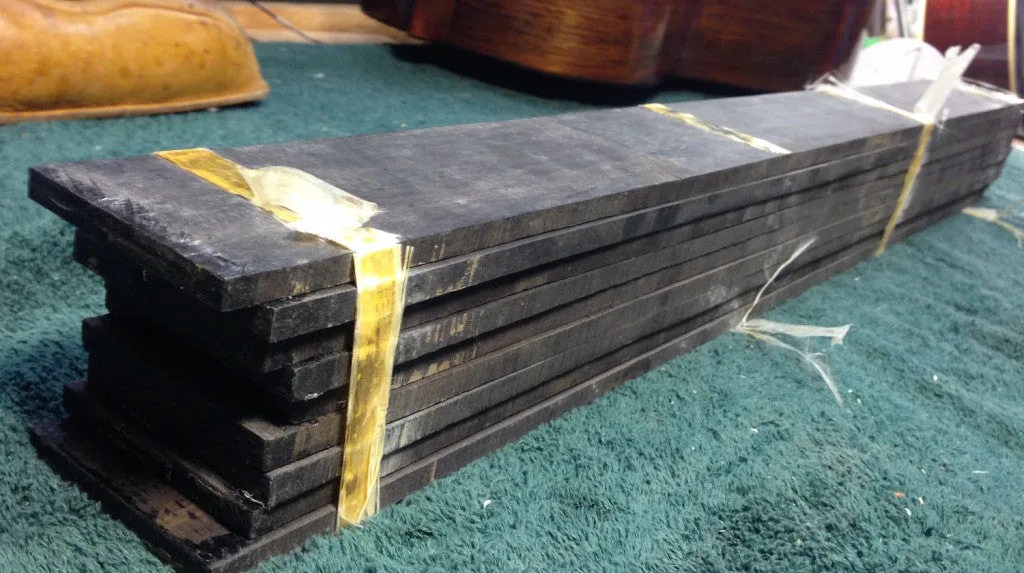
Here’s some more material from our upstairs stash:
That’s some petrified strapping tape trying to hold a small stack of fingerboards together. I don’t recall the exact date, but these date from the 1970s sometime ordered from the Vitali Imports catalog. They are oversize and overlength fine quality ebony fingerboards – just right for our bass banjo.
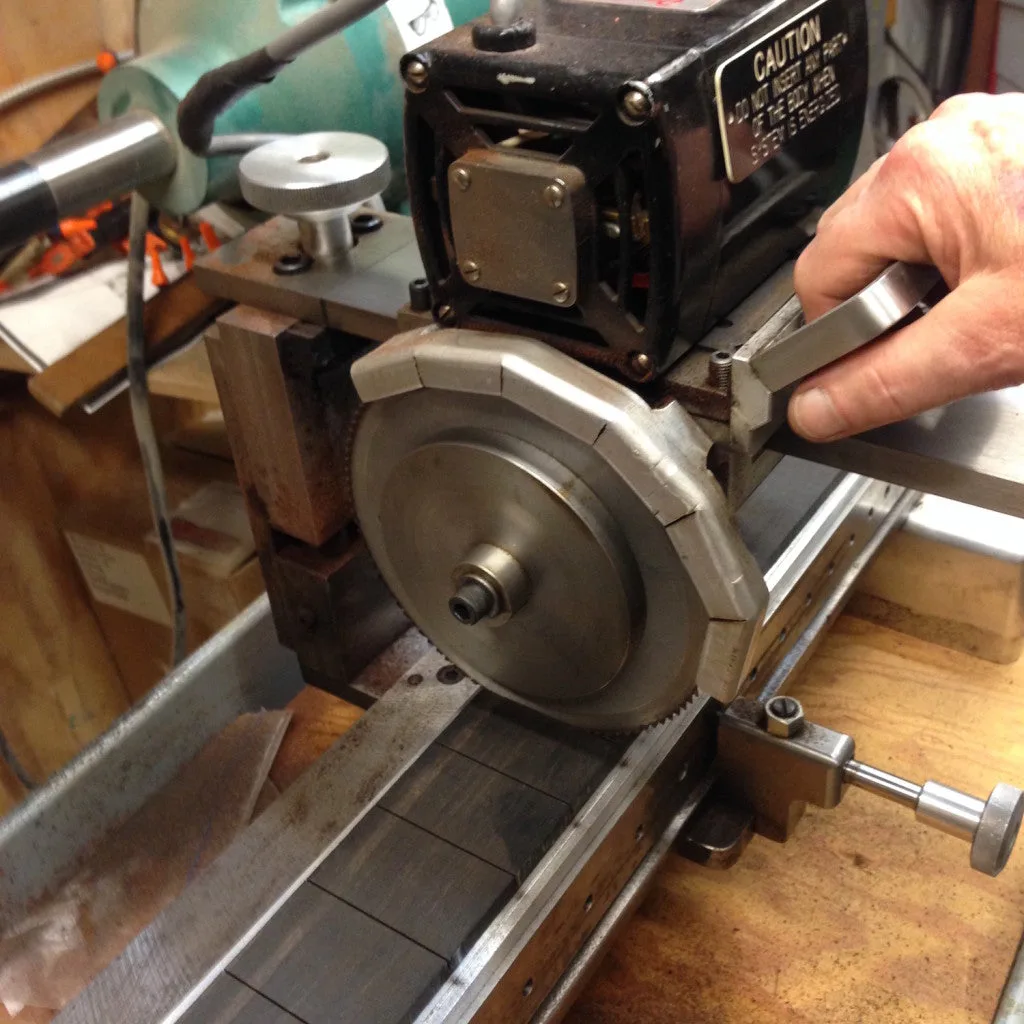
Some of the guys at Gryphon get into making electric basses, so a few years ago I’d made up templates for Gryphon’s Fret Saw to cut appropriate scale fingerboards. We’ve chosen 34″ for the bass banjo, so with that template mounted, we sliced the board for seventeen frets:
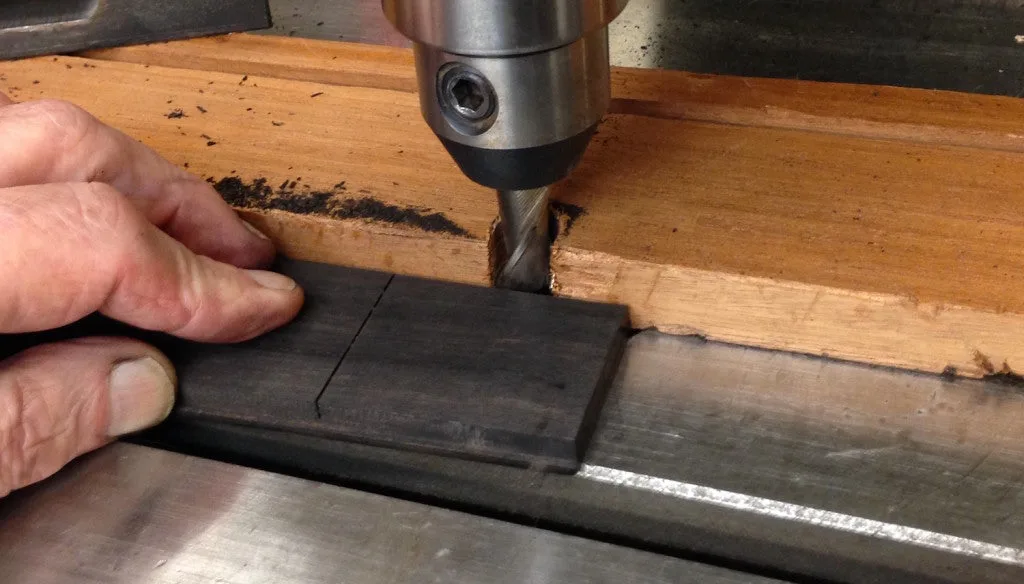
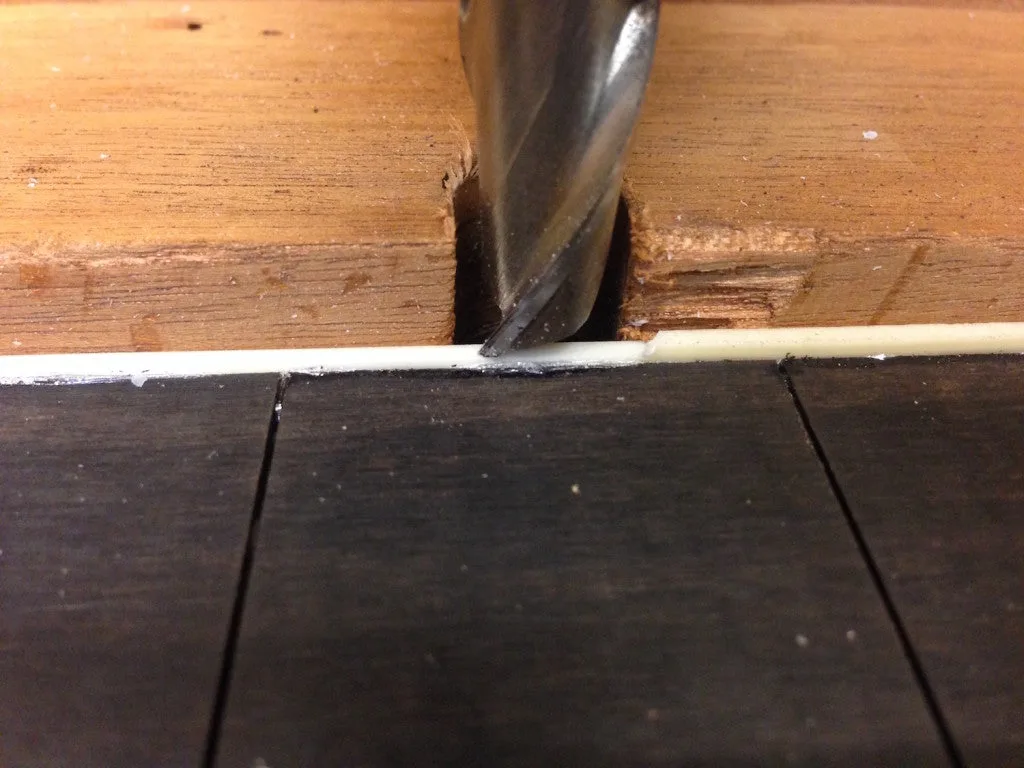
After profiling the tapered width of the fingerboard, I set up a simple wood fence on our milling machine to use a nice sharp end mill to cut the channel for ivory celluloid binding:
After the binding glue dried, I used the same setup, readjusted for height and depth, to trim the binding right in place:
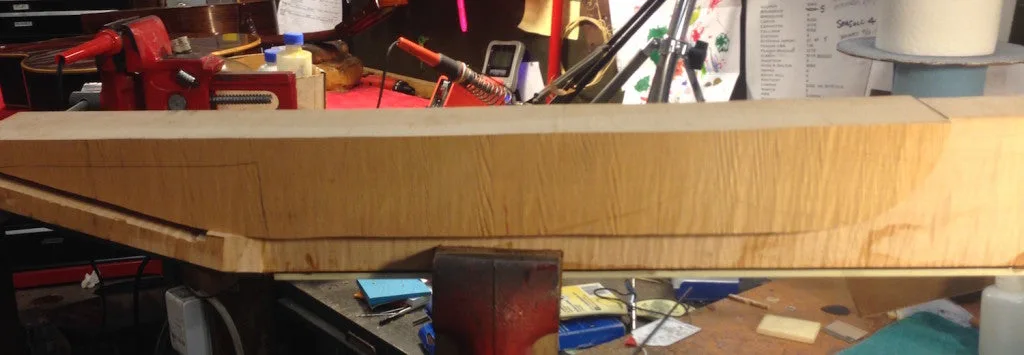
Back to the neck blank itself, here’s a shot of the heavy carbon fiber composite reinforcement we chose instead of an adjustable truss rod:
While this instrument will have the same scale as a Fender electric bass, the neck will be much heavier – more in keeping with the profile of a traditional “stand up” string bass. So, instead of a flexible, adjustable neck, we’ll have a heavy rigid one. Figuring that a bass banjo will not be used for sophisticated electric style playing, we’re never going to have to work with low action as we would with a jazz or rock style instrument.
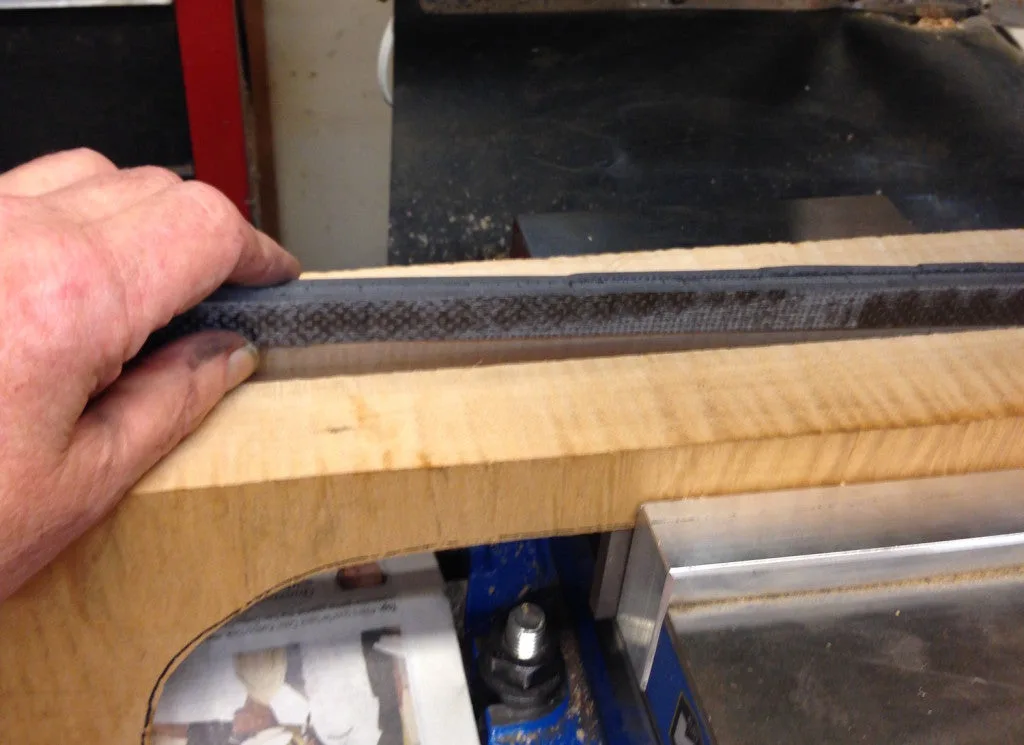
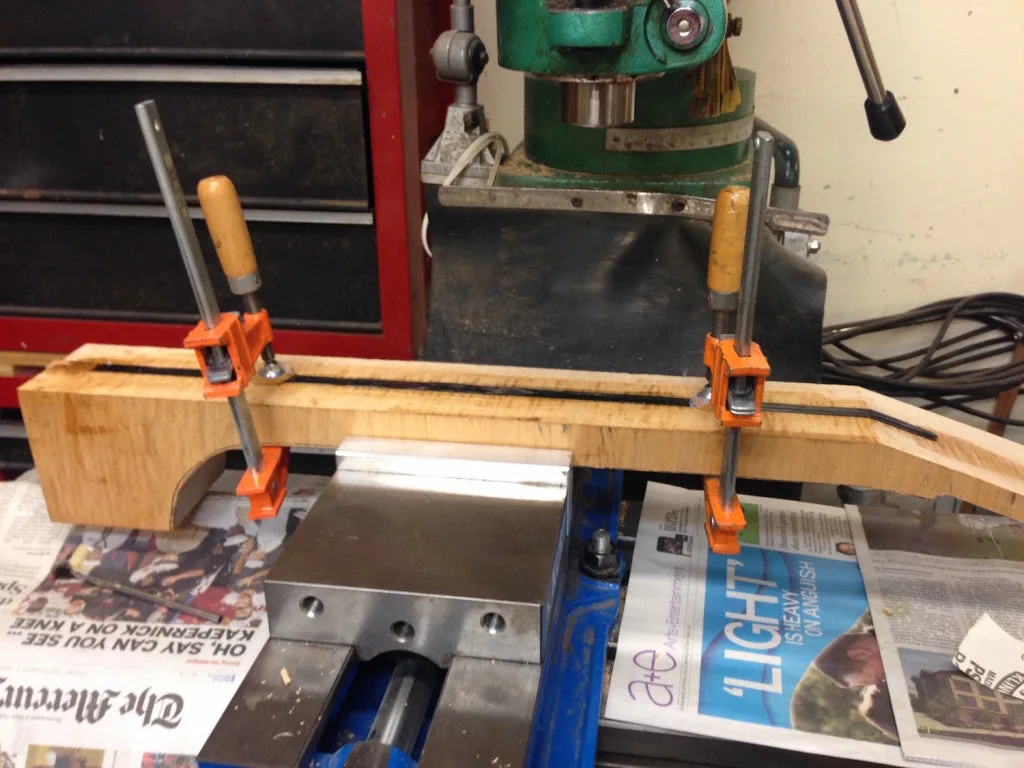
I’d used the milling machine to produce the slot for the reinforcement, and I glued the carbon fiber in place without taking the neck off the machine:
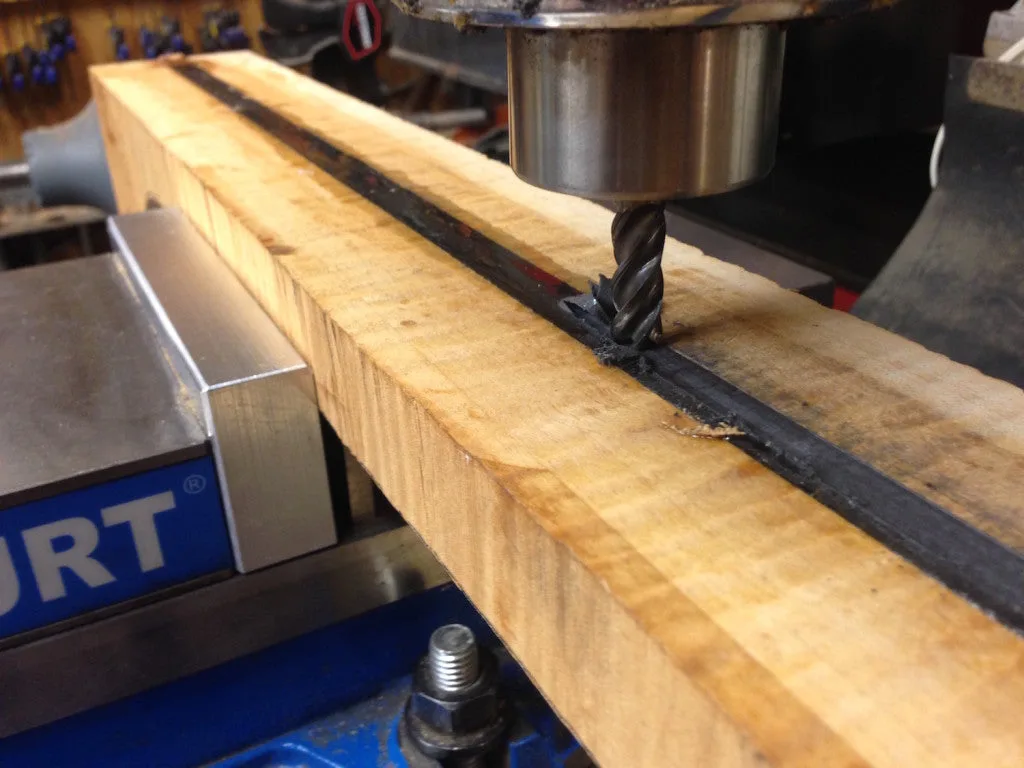
Then, after the epoxy hardened, I could easily skim off the top of the rod and true everything up nicely by plowing through the super hard composite with a slightly damaged carbide end mill:
Carbon fiber composites are notoriously hard on cutting tools, so I don’t throw out end mills that get chipped or worn, because I can still use them for abusive jobs like this one.
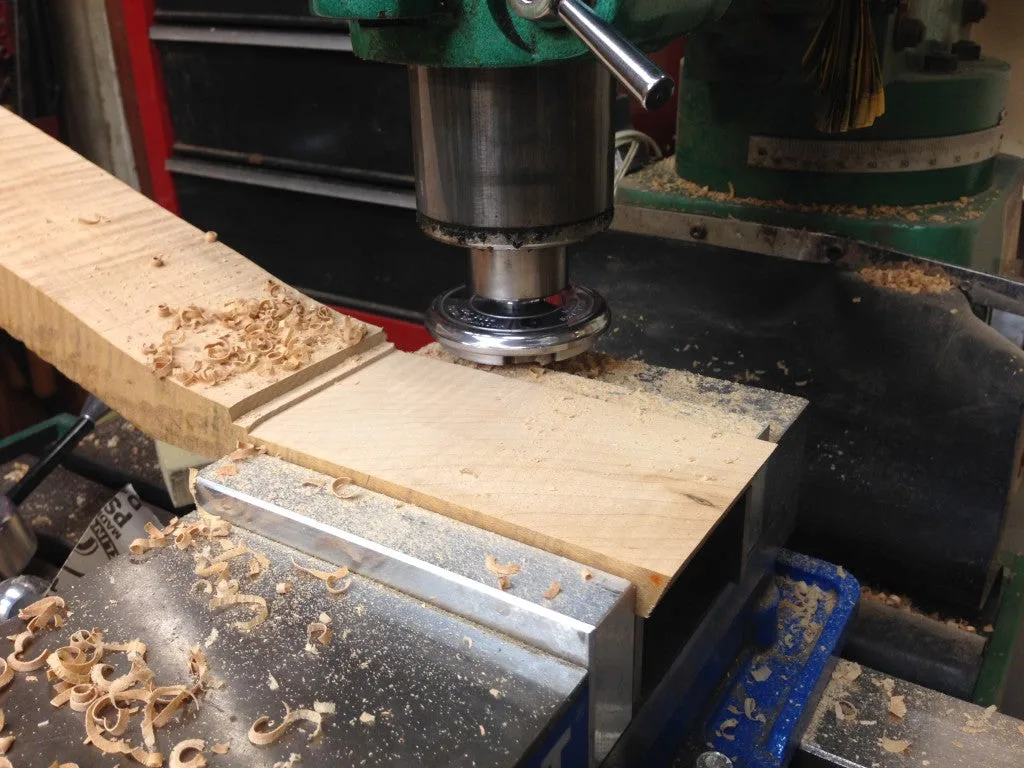
The classic “Wagner Safe-T-Planer” made short work of truing up the back of the peghead and reducing it to approximate thickness:
We used the same tool to smooth out the top of the peghead, and glued on a nice 3/16″ thick ebony overlay.
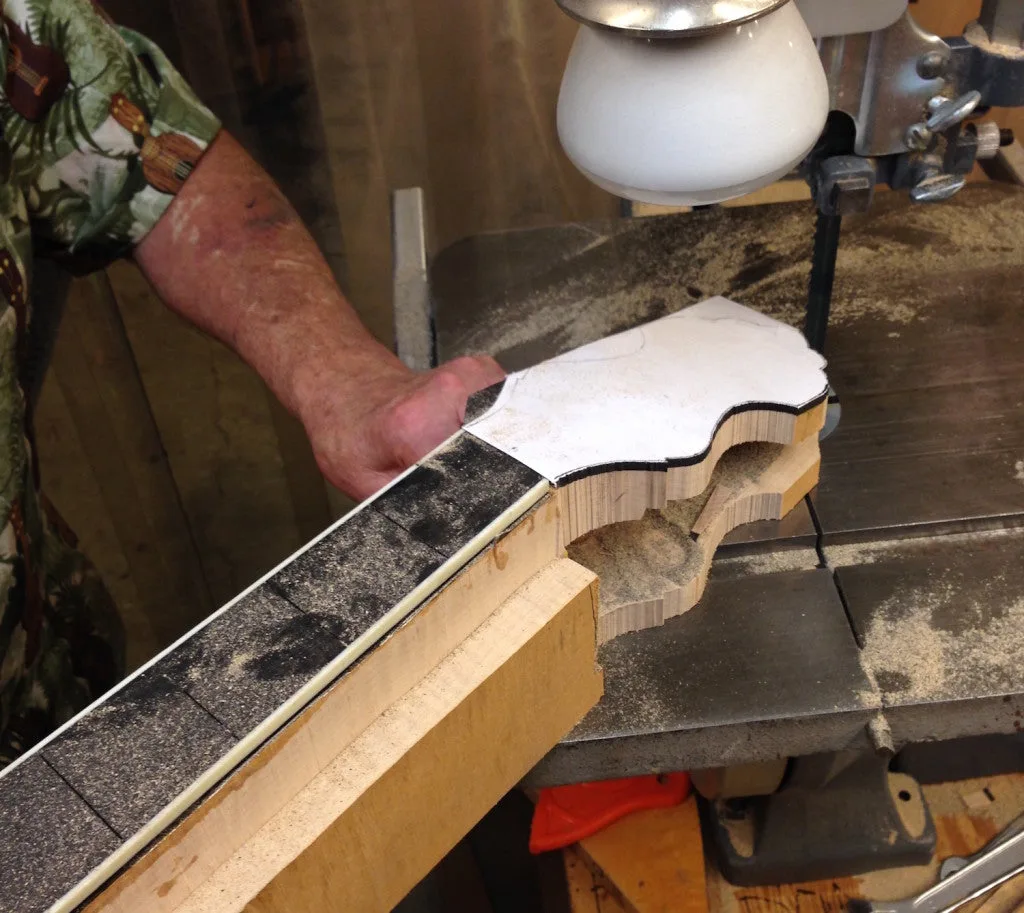
After gluing on the fingerboard and roughing the vertical profile of the neck, we set about covering the face of the peghead with white paper and drawing the outline of the Vega-style peghead (scaled up to proportion, of course) and prepared to cut the peghead profile on the band saw.
Unlike guitar pegheads, banjo pegheads have their profiles cut at a ninety degree angle to the plane of the fingerboard, so we feel it’s important to maintain that tradition, even on a novelty instrument such as this one. We figured the easiest way to handle the neck on the bandsaw would be to make a simple fixture to support it, and we thought it would be simple to glue back the portion of the lumber we’d cut off earlier, using some low strength hot melt craft glue. To avoid cutting a complex pattern through too much extra material, we prepared to undercut some of it to provide a sort of tongue:
Here’s the setup, as we cut the profile at the required angle:
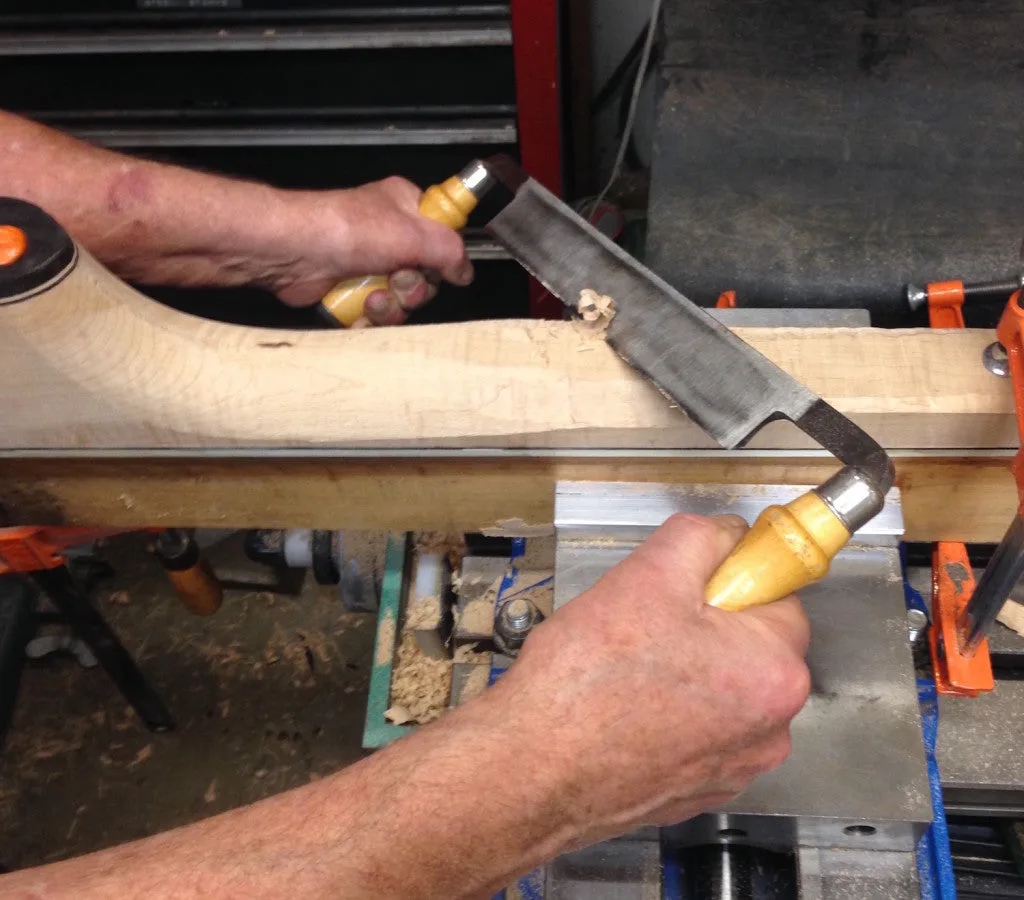
From here, it will be a fair amount of hand work to shape the neck, using the conventional draw knife, rasps and sandpaper.
Our Grizzly wood milling machine doubles as the strongest workbench in the shop, and having a height-adjustable table, it’s the ideal platform for this kind of heavy hand carving. I made up a simple wood fixture to hold the neck, and clamped it in the big milling vise, so I could really lean into the work:
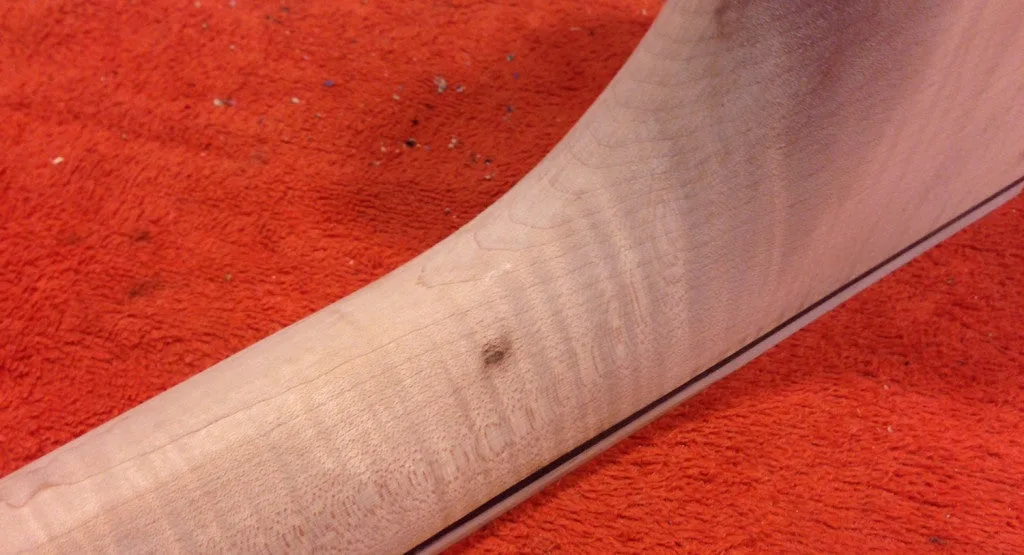
Well, here’s a nice little break! That big ol’ nasty dark brown surprise spot became progressively smaller the deeper I carved on it, so now that the neck is down to dimension, the spot is only about a tenth as nasty looking:
Betcha we’ll be able to make it look presentable with a bit of creative bleach and paint work.
Well, that’s it for now – progress is slow on the carving and fitting up, partly because I’ve been spending an inordinate amount of time on the tuning pegs. That’s right – a big bass banjo will obviously need some big bass banjo tuners. You know what? I called all the logical suppliers, and they’re fresh out of oversize banjo pegs!
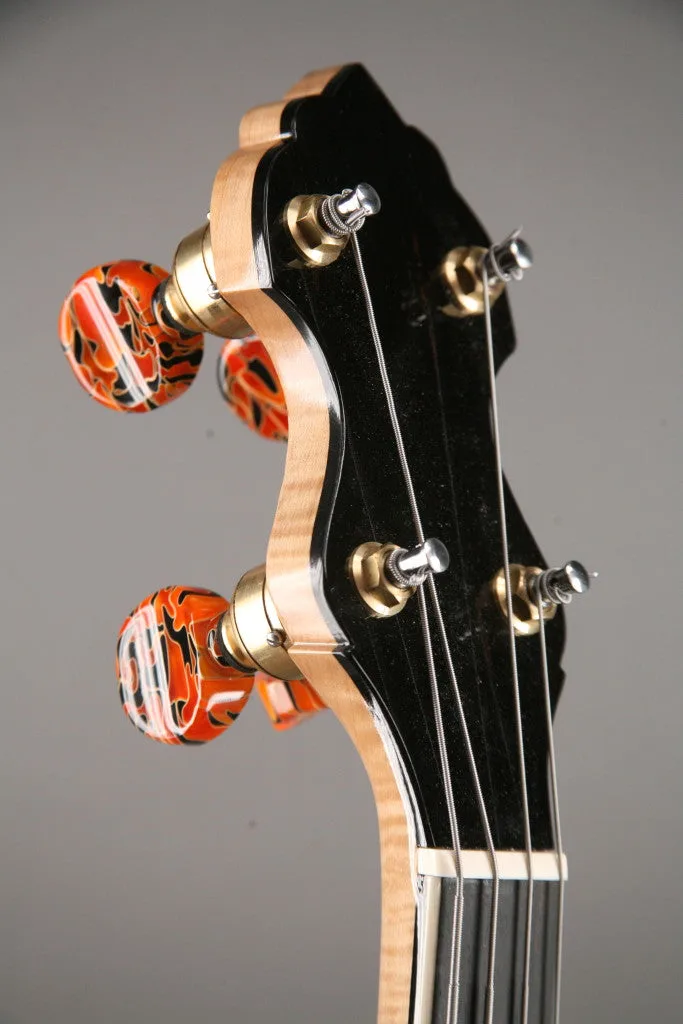
So, here’s a little teaser about that part of the project. After making and scrapping a bunch of trial efforts, I’ve come up with a working prototype, so it looks like I’ll actually be making a set of tuning pegs for this monster.
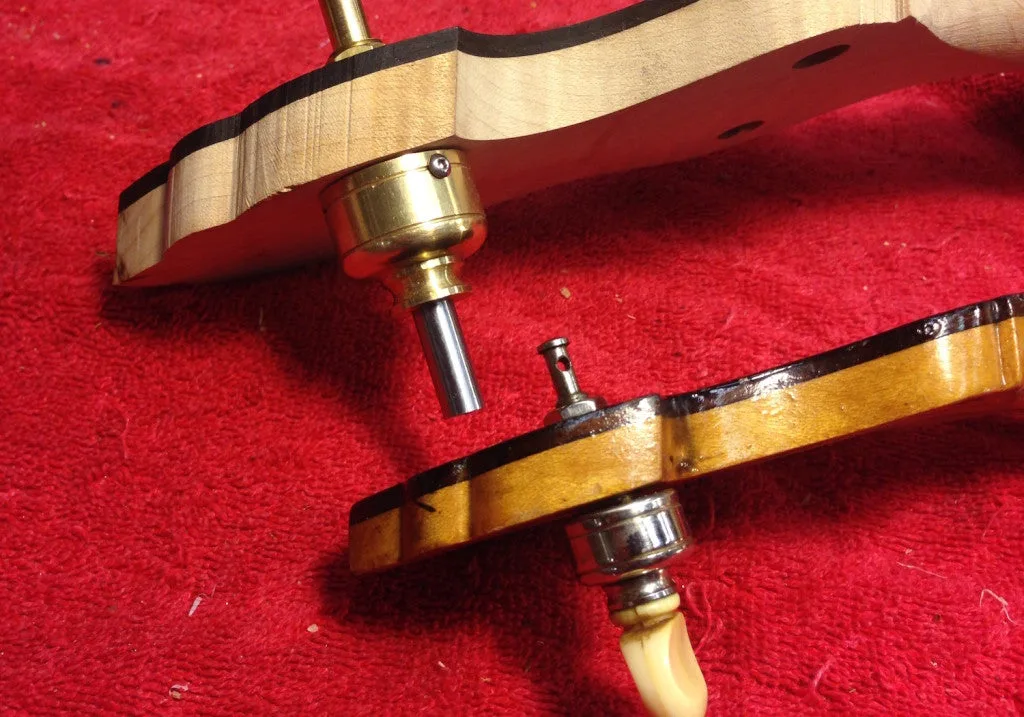
Banjos traditionally have “straight-line” tuners, that stick back rather than at right angles to the peghead, and it just wouldn’t do to jam on a set of right-angle guitar gears. While there are much more logical options, I started this project to make a complete scaled-up banjo, so I really don’t want to give up now. My model is a 17-fret Vega tenor, and it’s scaled up[ by a factor of 1-2/3 larger in all dimensions, so here’s a sneak peek at the tuner, alongside an vintage Grover mounted in the original Vega neck I’m using as a pattern:
My tuner has a 12:1 reduction, where the original Grover is 4:1. Rather than using straight gearing or planetary system, I chose to make mine with a cycloidal drive so I would be able to handle the design and construction with the machining equipment and skill I have available.
More progress photos when I can find them – something happened to my iPhone photo album.
FINISHED, at last! It’s been a busy month, with lots of small details to finish up – here’s a quick video of Ed playing the Big Banjo at a living room rehearsal with the Banjo Racketeers on October 31, 2016:
Here are some photos of the finished instrument:
And, just in time for the first Banjo Racketeers performance, our own Tom Culbertson painted the colorful head, featuring “Harold Teen,” the vintage comic strip character:
Pisgah Banjos
A few years ago, we thought we had our selection of open back banjos covered. We had Omes, Rickards, and California-made banjos by Chuck Waldman. How many banjo brands did Gryphon need? But then we got an email from Bart Reiter before he retired suggesting we look into Pisgah banjos, and when Bart talks about banjos we listen (Bart Reiter had been Gryphon’s #1 source of new open back banjos for over thirty years).
The fact that Bart Reiter would suggest that one of his best dealers stock instruments from a competitor said a lot about the quality of Pisgah banjos, and it also said a lot about Bart and the whole American open back banjo business. In fact “business” is hardly the right word, for while the folks making open back banjos in North America these days really are in business they act more like a co-operative. They make parts for each other and share tips and sources, and Pisgah Banjo Company founder Patrick Heavner is in the middle of this supportive community.
Heavner is a man on a mission that’s easy to state and even easier to understand. Since the banjo is an American instrument, he’d like to see as many banjos as possible made with North American woods and metal parts made here as well. He doesn’t wave flags and bash other banjo companies that do things differently, he just builds Pisgah banjos according to those principles and through his Balsam Banjoworks (a website offering parts) he supplies anyone who wants to make their own instruments. You have to admit that if we’re all concerned about the world’s shrinking rain forests, doesn’t it make sense to build instruments from sustainable, local woods like maple, persimmon, cherry, walnut and ash?