
Skip to content

Guitar Picks: The Cheapest Way to Change Acoustic Guitar Tone

Acoustic guitarists have a secret weapon for changing their tone: the simple guitar pick. This relatively expensive piece of plastic can do more to change your tone and increase the precision of your playing than any other device or gadget you can buy.

If you play electric guitar there are lots of ways to change your tone, just the tone pot on the guitar plus various amp settings alone give lots of options and those are just the beginning. Descriptions of how to change an electric guitarist’s “signal chain” read like a cross between complex recipes and electrical engineering code, while acoustic guitar players are stuck with their guitar, their strings and not much else. To make matters worse, changing strings is a hassle so if you experiment with nickel-wound tone you can’t just flip a switch and be back to the familiar sparkle and overtones of phosphor bronze.

But switching to a different guitar pick is a quick way to affect your tone. The pick affects every note you play, and it allows you to make critical changes to your sound in just seconds. And compared to anything else you buy for your guitar these “tone components” are really cheap and last for months or even years. Of course picks of different shape and thickness are not a new idea, but in the last few years the range of picks offered has become much greater and a lot more interesting to explore.

Some pick-makers have come up with innovative materials and tweaks that make a big difference not just in the tone a pick produces but in how it affects your playing speed as well. Many of these differences are to the edge of the pick, and if you’ve been playing with a typical celluloid tear-drop shape pick, such as the venerable Fender in heavy or medium gauge, you may find that you’re a more versatile flatpicker than you thought once you start experimenting with heavier (thicker) picks with a beveled edge that contacts the strings. Maybe you won’t be able to tremolo as convincingly as Grady Martin on the opening fills of “El Paso” or keep pace with Django Reinhardt playing “Improvisation 1,” but both your sound and the range of what you can play may dramatically expand. And best of all, your trusty celluloid or nylon pick can always be within reach, and no tools or time are needed to change back to what feels and sounds more familiar.

Several of the pick options discussed here are by Michel Wegen, who makes Wegenpicks by hand in his shop in the Netherlands. While a Wegenpick like the popular “Gypsyjazzpick,” one of Gryphon’s best sellers, isn’t cheap at $15 each, some other picks reviewed here are available from 30¢ to a few dollars. Twenty-five bucks will buy you a wide-ranging arsenal, and you’ll have a lot of fun doing your own tone tests. Lots of heavier-gauge plastic picks have nicely rounded edges, but this is often achieved by tumbling the picks in an abrasive material, while Wegen picks have a distinct bevel on only the leading edge of the tip, which makes a big difference. While the innovative bevels and molded grips in the thicker Wegenpicks are for right-handed players, versions for lefties are also available.

See Gryphon Strings’ selection of Wegen Picks »


Some of Gryphon’s most popular pick options:
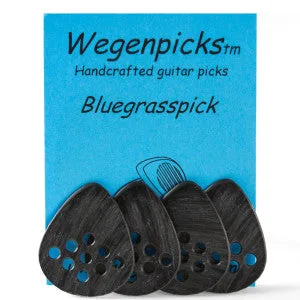
Wegenpicks Bluegrasspick

Wegen “Bluegrasspick” (pack of four, $15.00) is a 1.4mm thick teardrop-shape pick with nine small holes that provide an excellent grip and reduce the weight. The edge is beveled, but it’s not extreme. If you have trouble dropping picks or having them turn in your hand, you’ll love these!
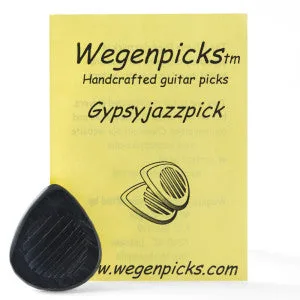
Wegenpicks Gypsyjazzpick

Wegen “Gypsyjazzpick” ($15 each) is a 3.5mm pick that doesn’t feel nearly that thick thanks to a heavily beveled edge. The grip is indented with diagonal ridges, and if you want to experiment playing faster lines this may help you rethink the relationship between pick weight, or thickness, and speed. Wegen says it’s “designed for loud and bright sound on acoustic guitars.”
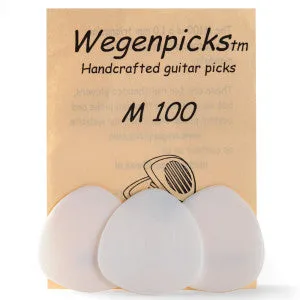
Wegen M100

Wegen M100 (pack of three, $15.00) is a 1.0mm thick triangular shape with very rounded points. Wegen describes it as designed for mandolin but popular with guitarists, too. No holes, no grip pattern, but not a slick surface. See other gauges  »
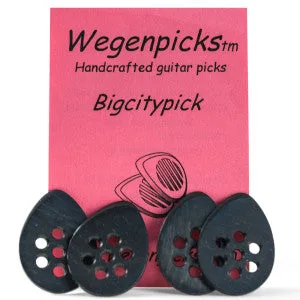
Wegen Bigcitypick

Wegen Bigcitypick (pack of four, $20.00) is a small pick with seven grip-holes and a heavily beveled, rounded tip.  Designed for acoustic jazz and blues, this small lightweight pick works for other styles as well and yields a nice bright tone. Looks a lot thicker than it feels when you’re playing with it. Great pick to start with if you want to get used to a thicker pick. Available in 1.4mm, 1.8mm, or 2.2mm.

More Wegen Picks »


Other picks to consider, available in our Palo Alto shop:
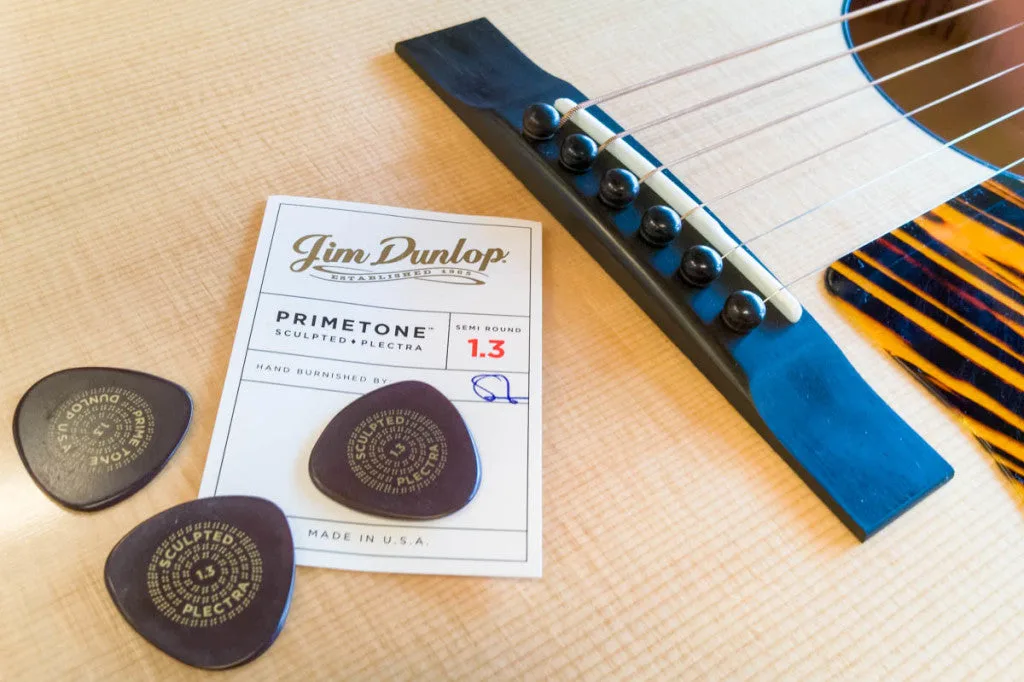
Primetone Picks

Primetone Sculpted Plectra “semi round” (pack of three, $6.95) is made by Dunlop. This hand-burnished pick is similar to the Wegen M100 with rounded points.
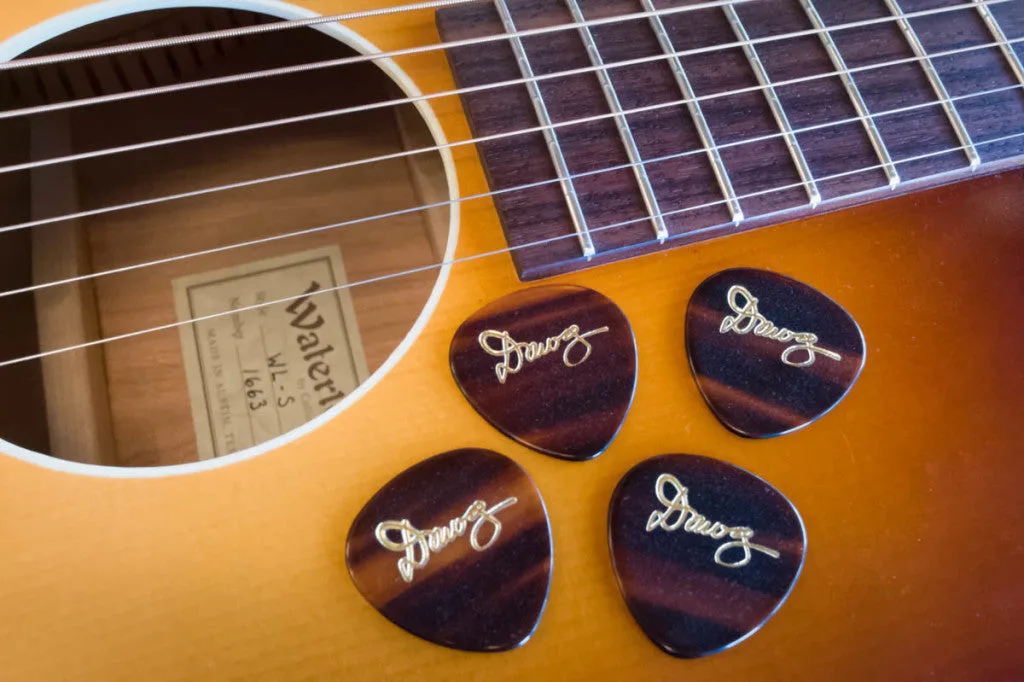
 

Dawg Picks

“Dawg” pick ($1 each), is one of the first thicker picks with a heavily rounded tip, designed by David Grisman ages ago. Try this pick if you’re working on your tremolo on either mandolin or guitar.
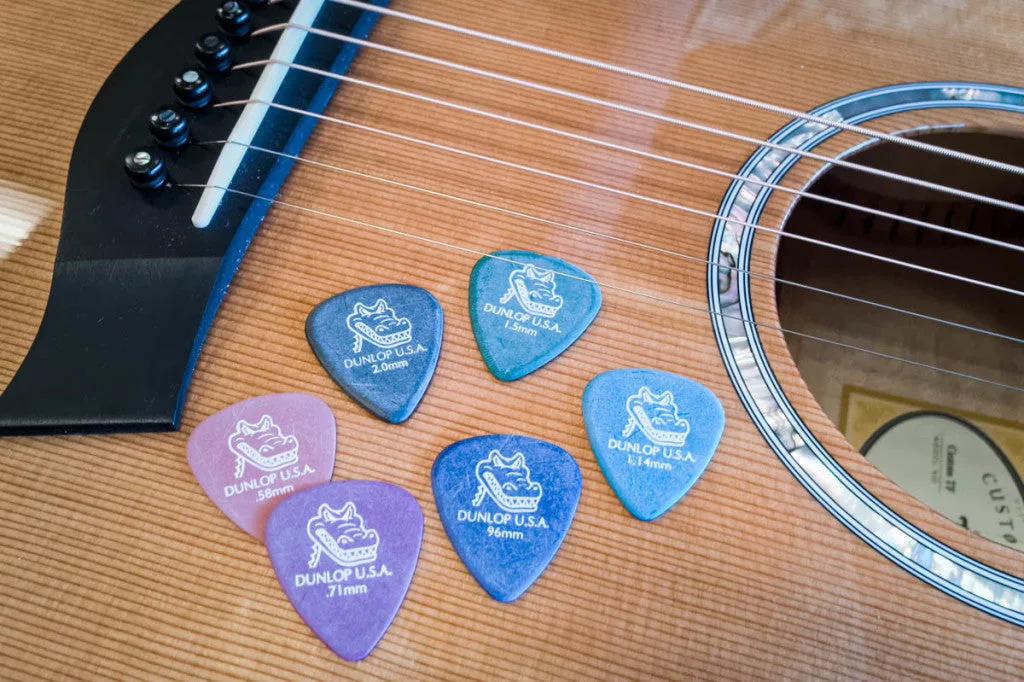
 

Gator Grip Picks

Alex’s favorite flatpick is the bargain of the lot. He prefers the 30¢ Dunlop “Gator-Grip” in the familiar tear-drop shape and a full 2.0mm thick (in black). The alligator-head logo imprinted on the matte surface provides plenty of grip, and you have the choice of playing with either the slightly rounded point or the very rounded shoulders. Available in a range of color-coded thicknesses.

Stop by the store to try out our full variety of picks for yourself!
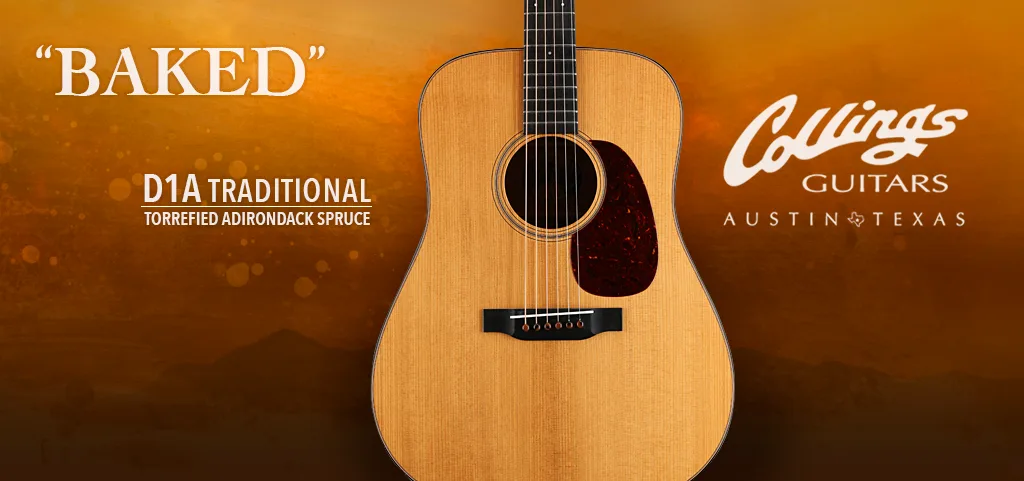
What is a "Torrefied" Guitar Top?

Players seek out vintage guitars not because they’re old but because they sound great. When I play an old guitar I notice that the notes just seem to pop, that it takes very little effort to get the strings to respond to my pick. Also, I hear the tone as having a certain clarity with a strong fundamental and well-defined overtones. As well- made as new guitars are, and I truly believe that modern guitars are built as well as they were in the past, they just don’t have that “vintage” tone. Until now. About a decade ago, luthiers began experimenting with tops that had been subjected to extreme heat, a process known as torrefaction. I’ve played guitars from a  number of builders made with torrefied wood and they all have the dry, woody tone I associate with vintage guitars.

Torrefying, or thermo-treating wood is not a new idea. The concept has been around for centuries, making charcoal is a crude form of torrefaction, but it’s only recently that more sophisticated methods have been developed.  The shortest summary of the process is that the wood is heated over an extended period in an oxygen-free kiln (which allows the use of high temperatures without the wood catching on fire).  This “cooks off” the oils and resins that normally take many years to diminish as newly harvested wood dries and ages. The theory is that a torrefied soundboard comes close to replicating the cellular structure of the top of an old guitar. Along with sounding more like a vintage guitar, torrefied wood is also more resistant to swelling or shrinking when exposed to climate changes. On guitars given a natural finish, a torrefied spruce top has a somewhat darker color.

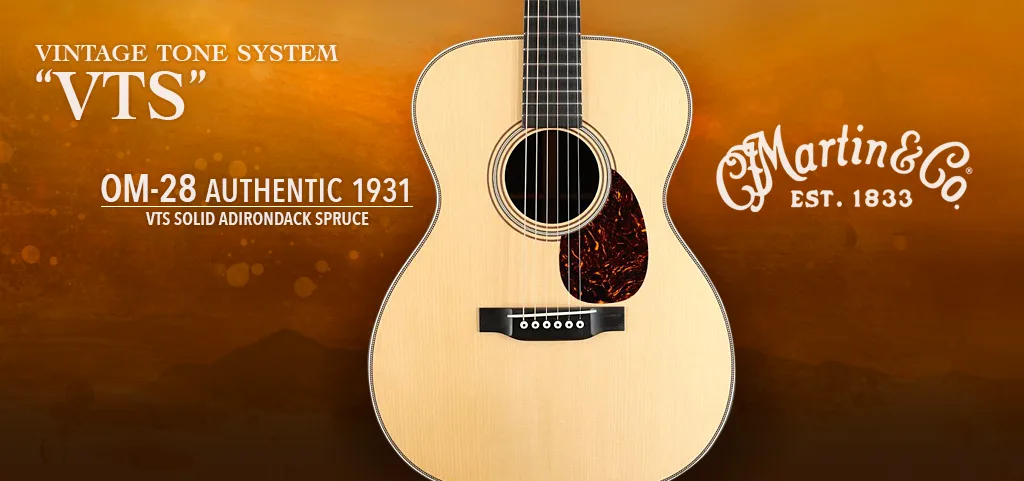
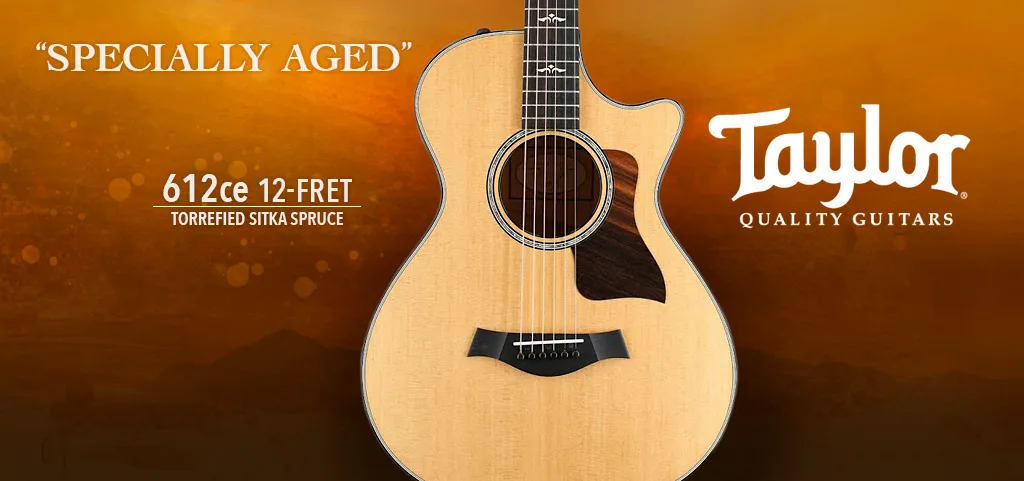
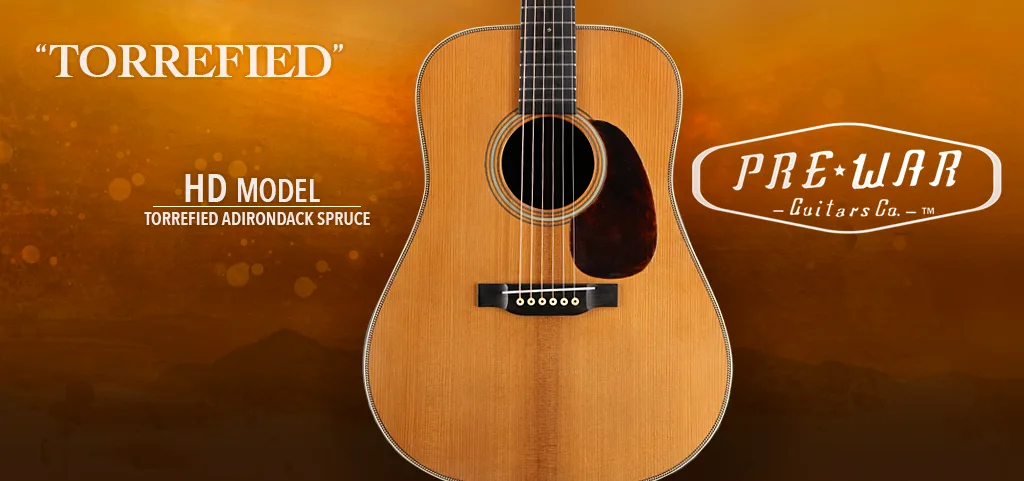
What makes the use of torrefied wood on new guitars somewhat confusing is that most guitarmakers have given the process their own term, so here’s a short list of words or phrases that essentially all mean the wood has been subjected to the same thermo-treatment process. Collings calls their torrefied tops “baked,” while Martin calls it “VTS” (which stands for Vintage Tone System). Taylor is using torrefied Sitka spruce tops on their new 600 Series acoustics, calling the spruce “specially aged.” Dana Bourgeois, one of the pioneers in using torrefied wood, calls it “aged tone” and other builders use terms like “roasted” or “acoustic resonance enhancement.”

Collings D1A Traditional guitar with a "Baked" Adirondack Spruce top.


Martin Guitars


Taylor Guitars


Pre-War Guitars


Some of Gryphon’s current selection of guitars with torrefied tops:

Collings Guitars

Ask the typical guitar picker about high-quality fretted instruments made in North America and the brands you’ll hear will probably be household names: “Gibson, Martin, Fender, Taylor, gee, Guild, but wait, some Guilds are now imported, and let’s see, there’s that newer guy with three names, Paul Reed Smith…” Of course the in-crowd types will probably mention Collings, but often we find that the people who know about Collings flattop acoustics, or Collings electrics, or Collings mandolins are those who actually own one. Why is that? For a music store that primarily sells fretted instruments, such as Gryphon, Collings is one of the top three or four brands, right behind, and sometimes ahead of, those high-production names you see on headstocks all the time.

 
It’s odd the Collings brand isn’t better known because Bill Collings has been making guitars sold through retailers like Gryphon since 1989, when he rented commercial space in Austin and hired two helpers (that’s just a few years after Paul Reed Smith got started). Well-known performers, such as Lyle Lovett, have been performing with a Collings hanging around their neck pretty much ever since. Early Collings dealers, and Gryphon was one of the first, recognized that Bill excelled at not only playability and impressive volume, he also made sure his crew spent the extra time needed to insure impressive “fit and finish.” Throughout the 1990s, Bill’s acoustic flattops were often hard to get and his production numbers grew with no compromise in quality. During one of my visits to a larger Collings workshop outside Austin in 1995, I noticed a sign posted above the set-up station that read “Do the Ding, Do the Time.” In other words, if a member of Bill’s crew put a scratch or a ding in the finish, that same guy had to do what was needed to make the guitar perfect again. Throughout these early years Bill Collings’ version of the iconic herringbone-trimmed rosewood dreadnought, the D2H, was in constant demand.

Among discriminating flattop guitar players Collings reputation was secure by the late 1990s, and Bill’s success making fully carved archtop guitars, essentially by hand, led him to tackle Gibson-style mandolins with carved tops and backs. Within a few short years Collings versions of the iconic F-Style mandolins were appearing on bluegrass stages along with Collings dreadnought guitars.

For mandolin pickers who didn’t need a mandolin the same shape as Bill Monroe’s, the Collings A models were much more affordable while still delivering similar tone and volume. Soon a line of lower-cost mandolins, with low-gloss finishes and less binding and inlay, brought Collings quality to a wider range of players.

After years of focusing on Martin-style flattops, by this time Collings had also branched out with “slope-shoulder” D models (the CJ, for Collings Jumbo) and a smaller L-00 style called C10. More traditional 12-fret flattops with slotted headstocks were also trickling out of Austin, a nod to much earlier American guitar styles, but made for steel strings and the more rough-and-tumble life that modern flattops often face. By the early 2000s Collings offered a dozen different guitar body shapes in numerous styles and with a seemingly endless range of wood options.

This impressive growth was because Bill had enlarged his second workshop several times and had a crew of over four dozen builders. Both Bill’s guitars and his mandolins had been out long enough to have a solid reputation: Collings instruments held up, you could travel or tour with them, they didn’t need constant tweaking to be optimally playable. Sure they were made with beautiful wood and were finely finished, but a Collings guitar or mandolin was also tough. With an impressive line of flattop guitar models in over a half-dozen different shapes, two body styles of fully carved mandolins with either f or oval soundholes, wasn’t it time for Bill to settle down and focus on upping production and wider distribution?

Not hardly. After building a new shop in 2005, just a few miles from the old one, in 2006 Bill Collings introduced his first electric guitars.  You’d expect Collings would start with solid-body models only, but Bill’s long affair with arched-top guitars came shining through in new thin hollow-body models as well. Within a short half-dozen years Collings had a line of different electric guitar models, and price ranges, to rival manufacturers who’d been focused solely on electric guitars for decades. Gryphon tries to stock a representative group of Collings electric models, but as the time between ordering one and taking delivery can be several months we’re sometimes out of stock of certain models.

But despite dozens of different models, Collings guitars were all relatively “high end” by most people’s standards and developing more affordable models was the next challenge. After all simple guitar designs with less decoration, and thinner, low gloss finishes had sustained American guitarpickers during the hard times of the Great Depression, why not rely on the same formula using modern wood-working technology to keep the quality far higher than it had been 80 years ago? Using the best of the 1930s “budget brands” as inspiration, the first Waterloo acoustic flattops were introduced in 2014.

OK, we’ve talked about how much Collings Guitars has grown since the 1980s, even a glance over the links above will give you good sense of how many different Collings models are now available, but what about that opening question: Why isn’t the Collings brand better known?  A quick summary of 2016 production is probably the best answer.  The Martin Guitar Co., for instance, builds over 10,000 guitars per year, all flattop models.  By contrast, last year the Collings crew produced just over 1200 flattop acoustics, plus 560 electric guitar models and about 320 mandolins.  The new lower-priced Waterloo acoustics added another 970 guitars, but that still leaves a total of only about 3,000 instruments per year.  When you consider that Collings now employs 90 people, it’s obvious that there is a lot of old-fashioned labor in each instrument, despite state-of-the-art woodworking machinery and designed-in-house tooling.  There’s no other way to get the fit and finish Collings is known for, and that quality translates to both the sound of the instruments and their legendary dependability.

— Richard Johnston

Gibson K-2 Mandocello restoration

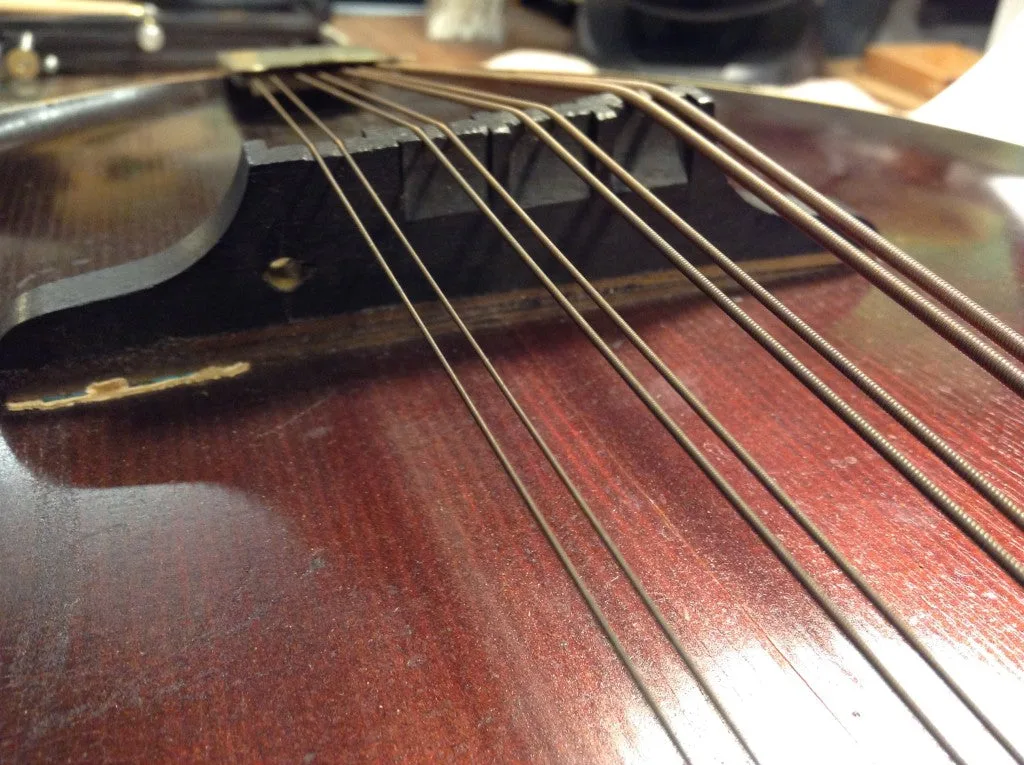
This is a Gibson K-2 Mandocello from 1920. These were built much like their little brothers in the A style Mandolin family – with one small brace by the sound hole. Mandolin tops typically hold up, but with the heavier strings and wider surface area, the K-2 tops struggle to keep their arch. According to Frank and Richard, it’s pretty standard for the top to collapse on the K-2’s as a result of the light bracing.

Here’s a video showing the extent of the damage on this one, keep an eye on the reflected light to see the dimples and concavities around the bridge area. The top has cracked and completely let go.

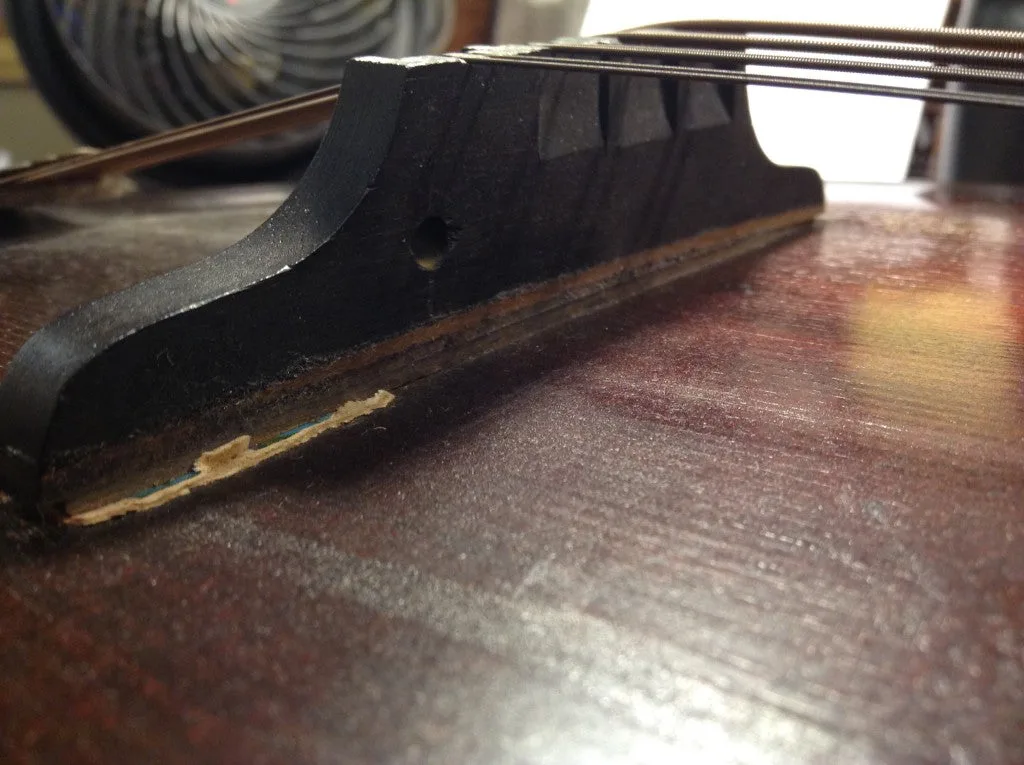
After the top gave up, it looks like someone had to shim the bridge up half an inch to make it play at all. This also shows how flat the top is now. We’ll try to fix that, but first..

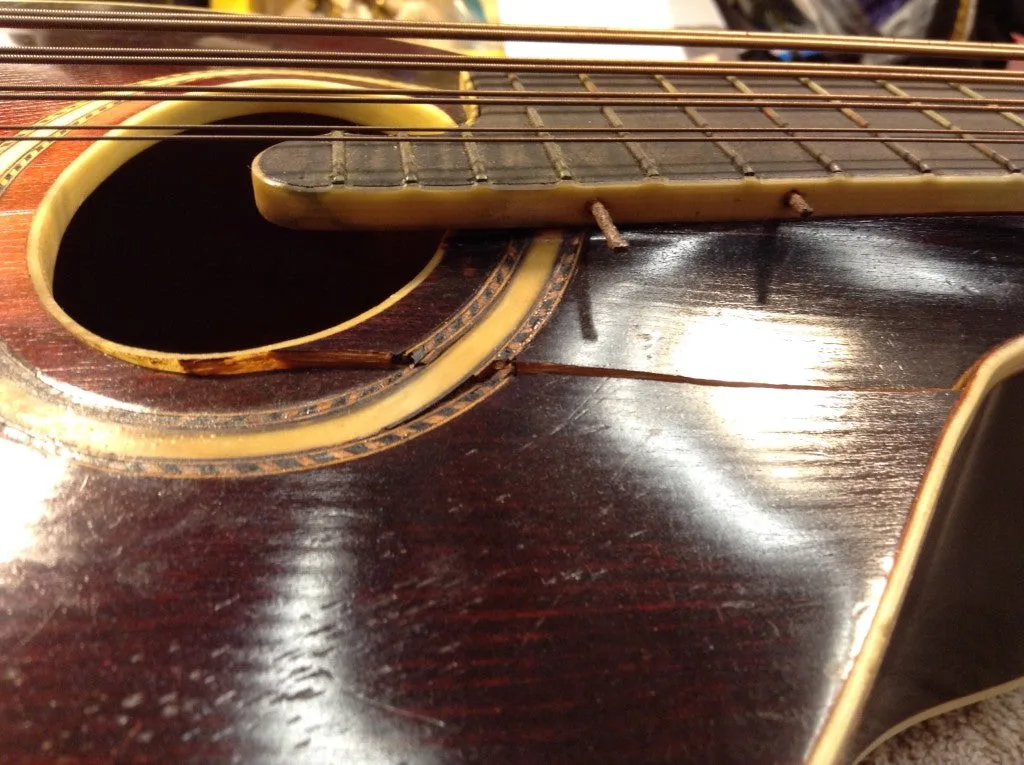
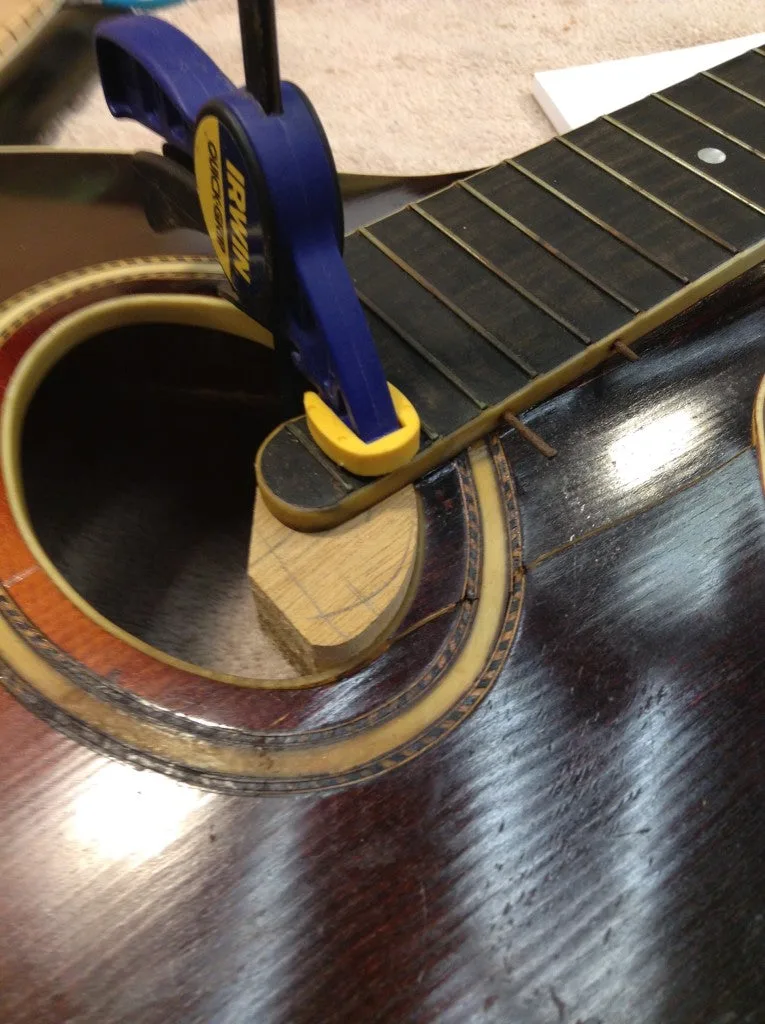
Here’s a tricky crack to fix. Lots of curves, and needs clamping pressure from multiple angles.

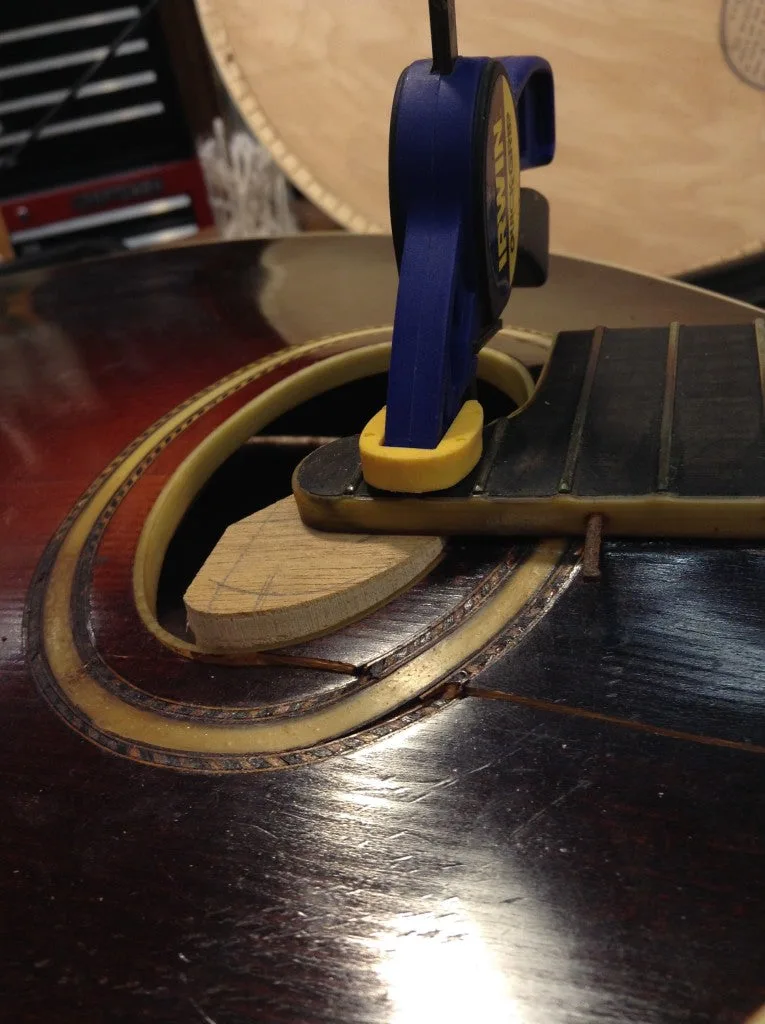
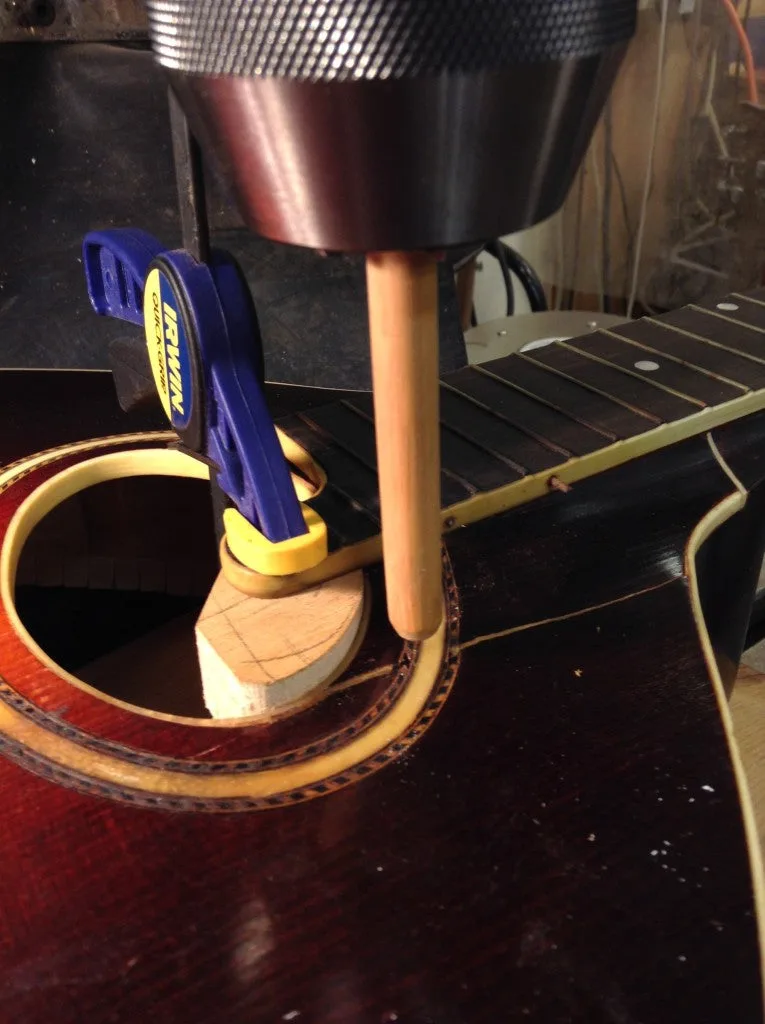
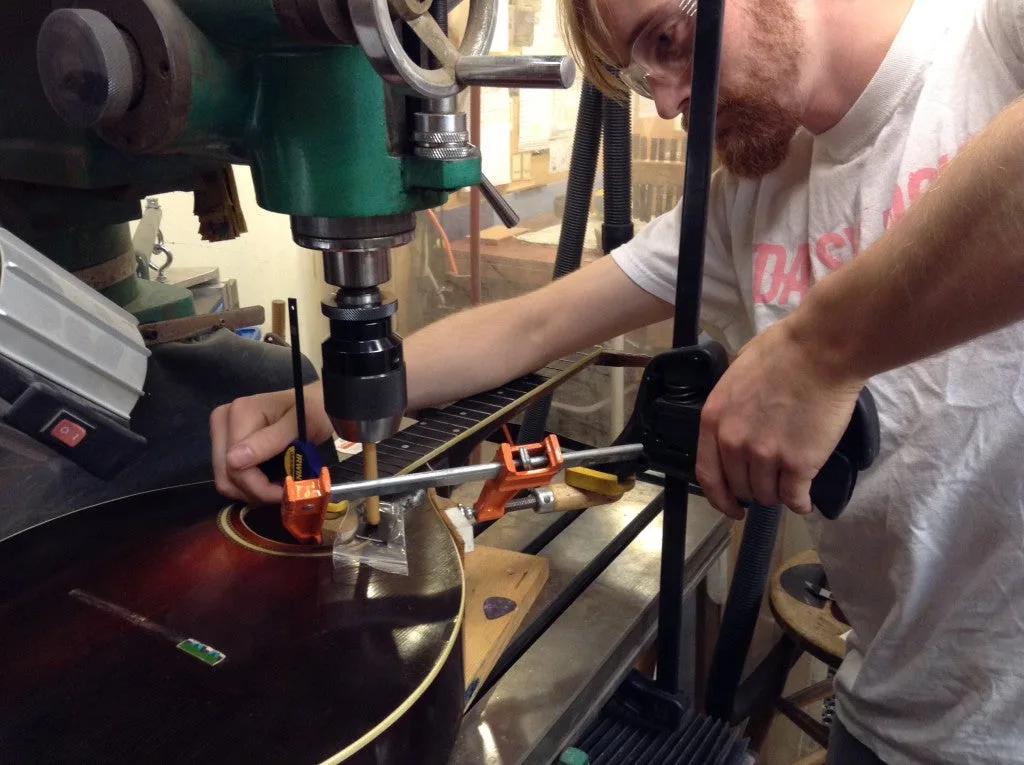
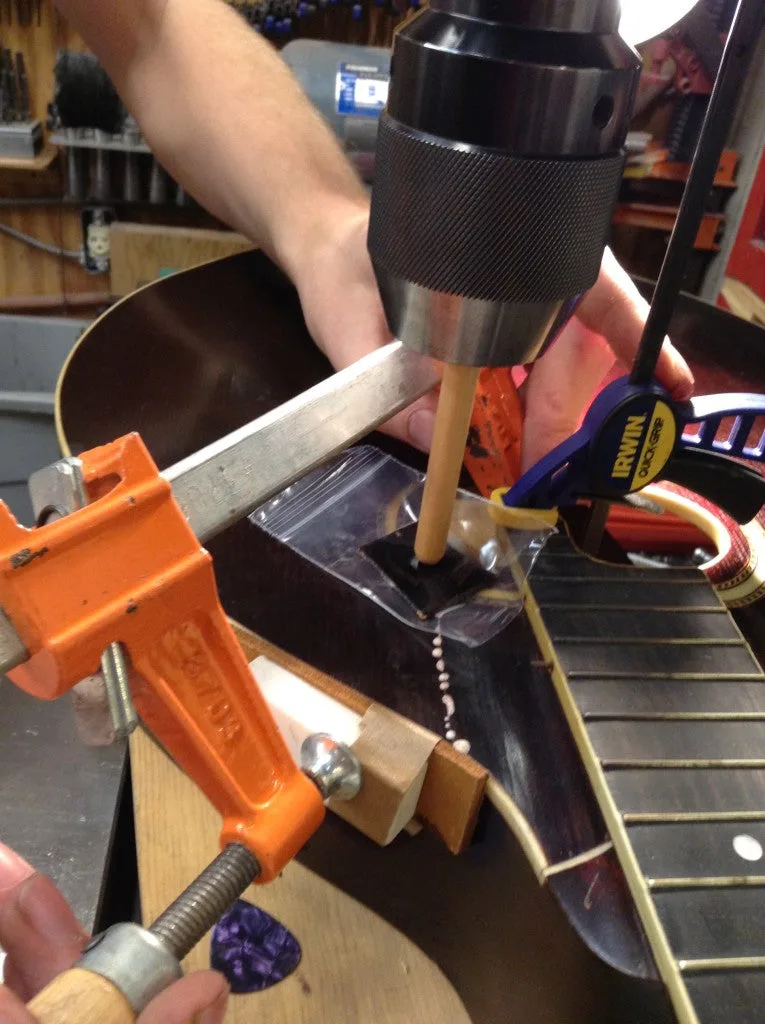
I made a little caul to match the sound hole radius, with a flat portion so we can pull it to the straight edge of the treble side. The downward pressure is more of a challenge, how about the chuck on the milling machine?

Here’s a handy wooden dowel in the chuck, took a minute to find the sweet spot but it lined up nicely.

Pushing down on the top, and pulling the two halves together on the mill table.
Here’s what you like to see : glue squeeze out all along the crack.
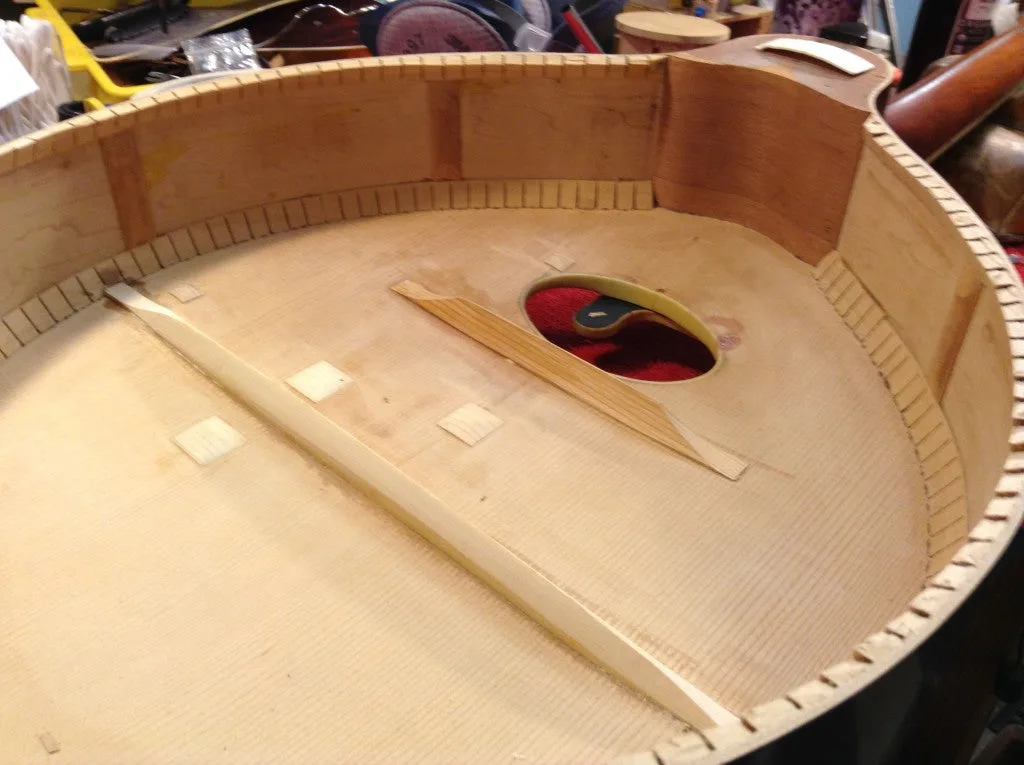
Now the plan is to remove the back, and jack the top back up with a second brace. This brace will have more radius than the top does, and by clamping and gluing it in place we’ll get a bit of the arch to come back. Here’s a time lapse of me removing the back. Proof again that taking things apart is always faster than putting them back together.
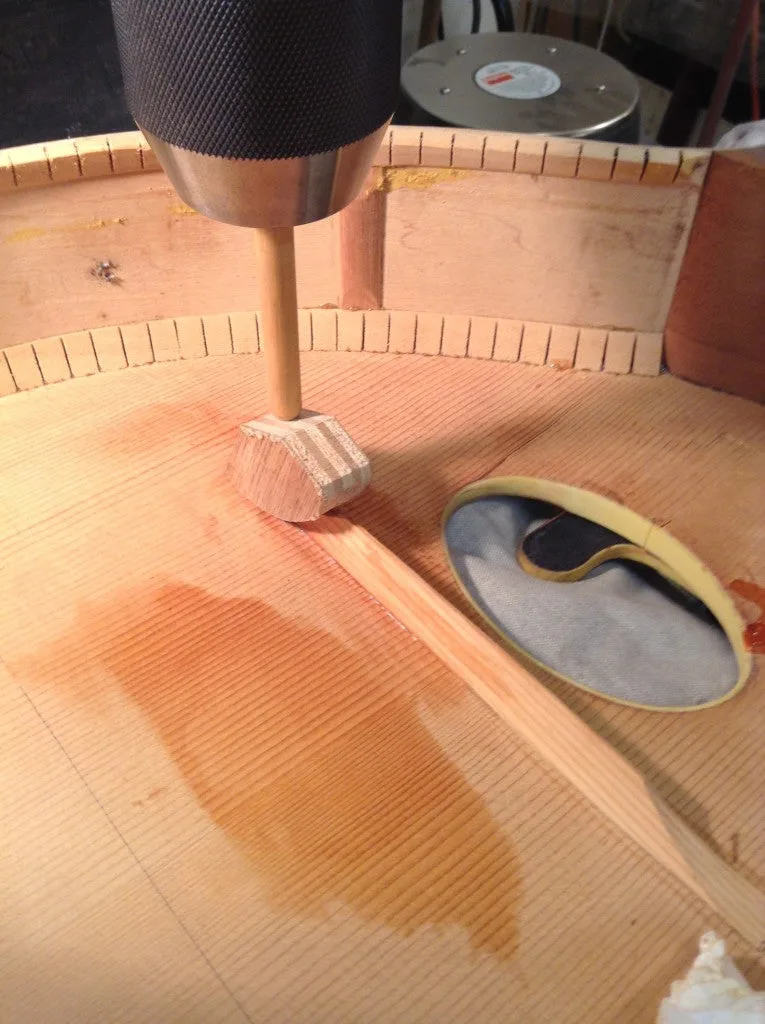
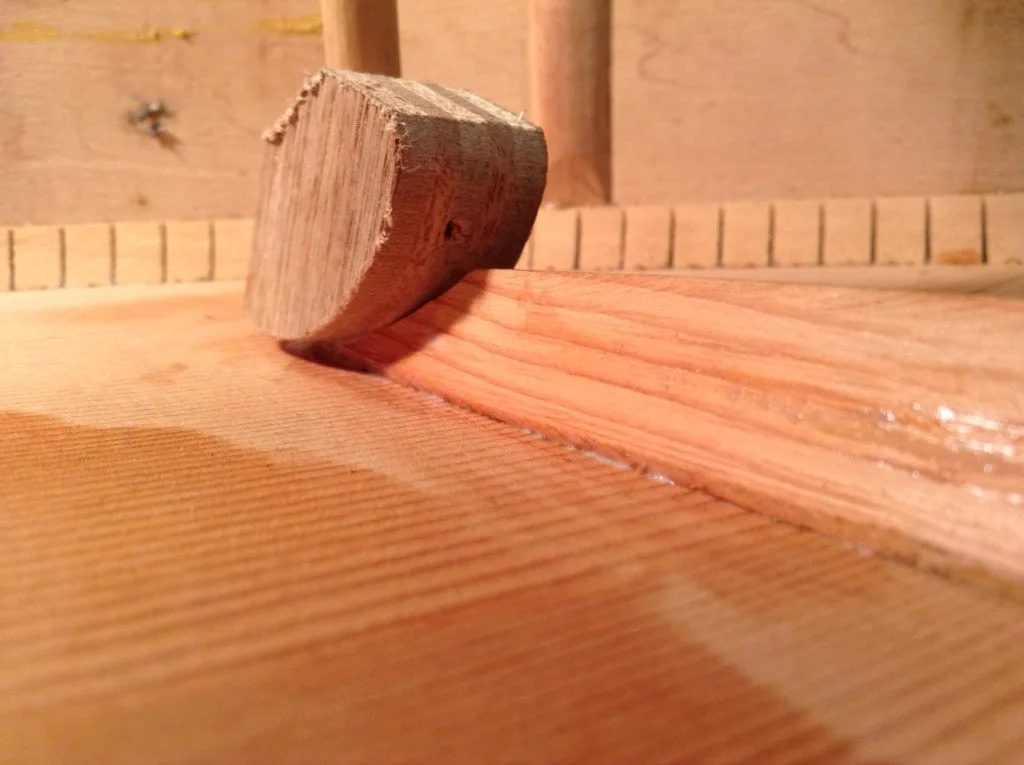
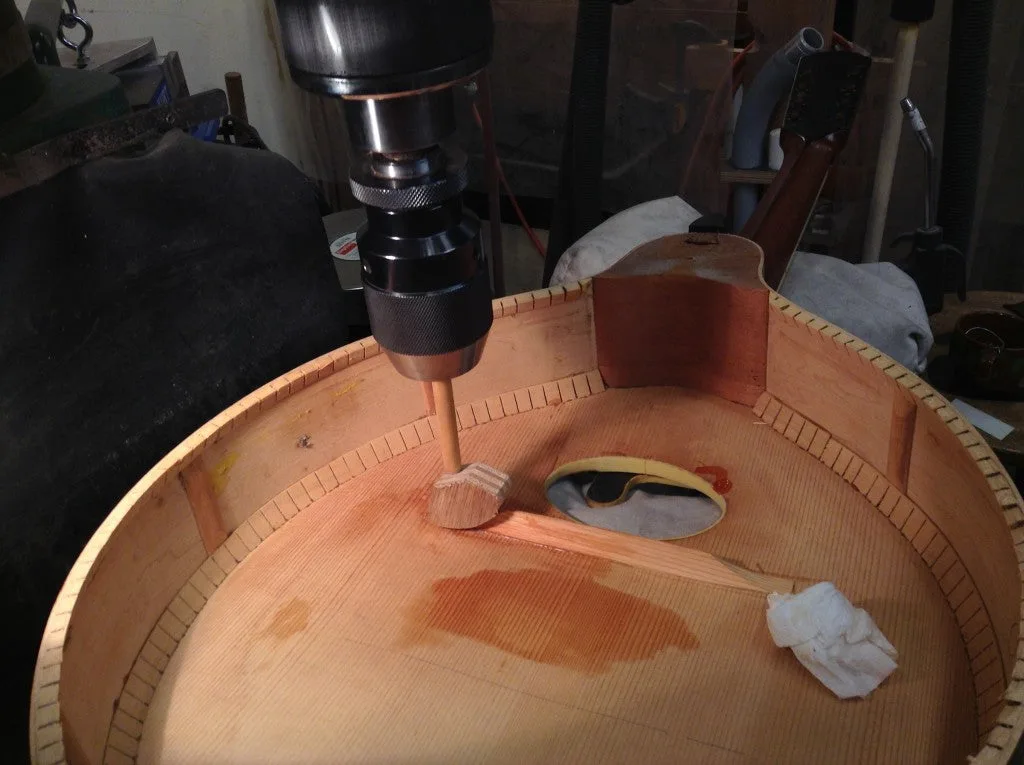
Here is the only original brace, you can see why the top caved in. I’m recycling my caul from before to glue down one side of this brace. 

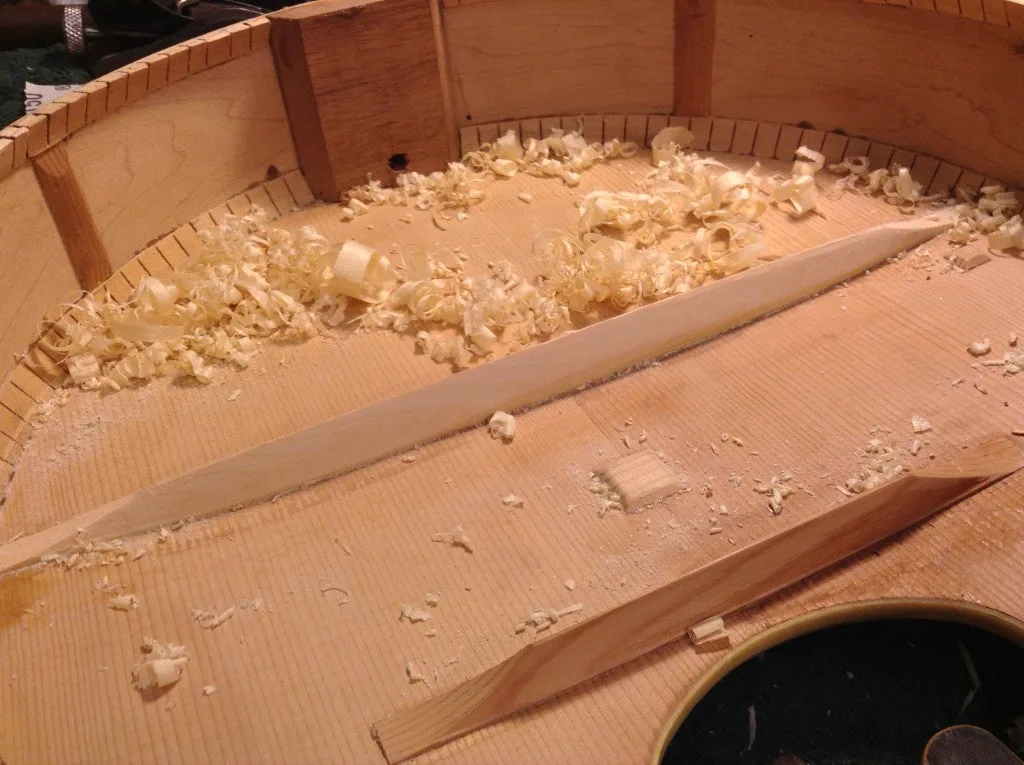
Here’s the new brace getting shaved down to match the style of the original. Unfortunately I can’t seem to find photos of the brace going in..

Here’s the brace all shaped up, with a couple ultra-thin cleats on some top cracks.

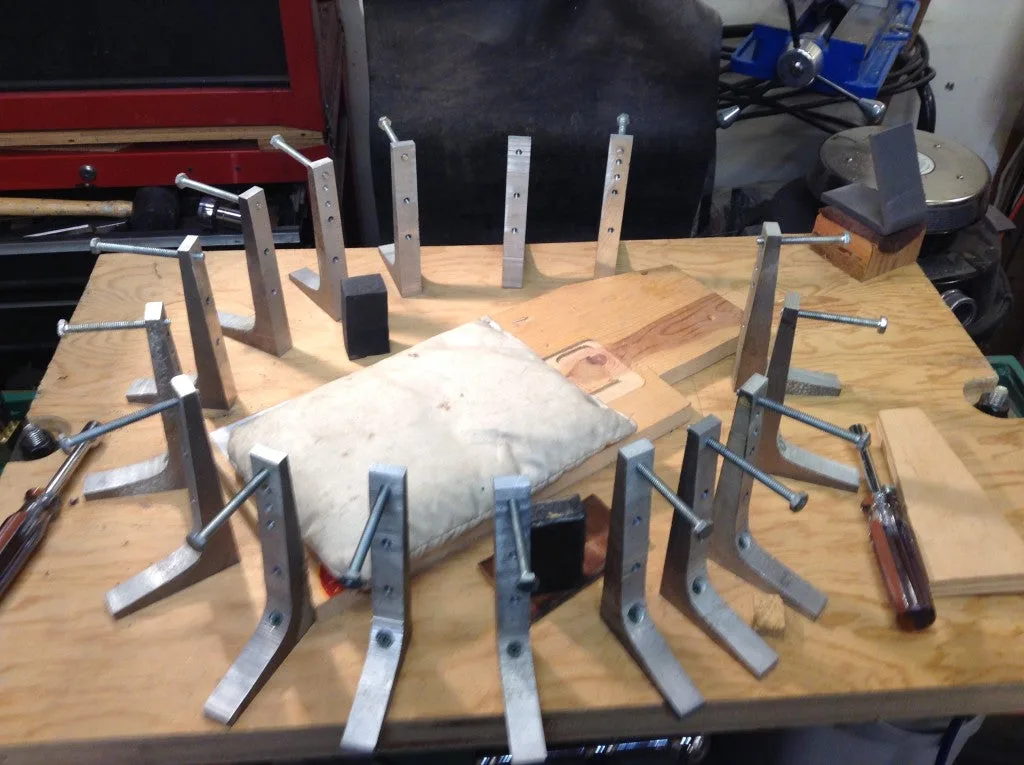
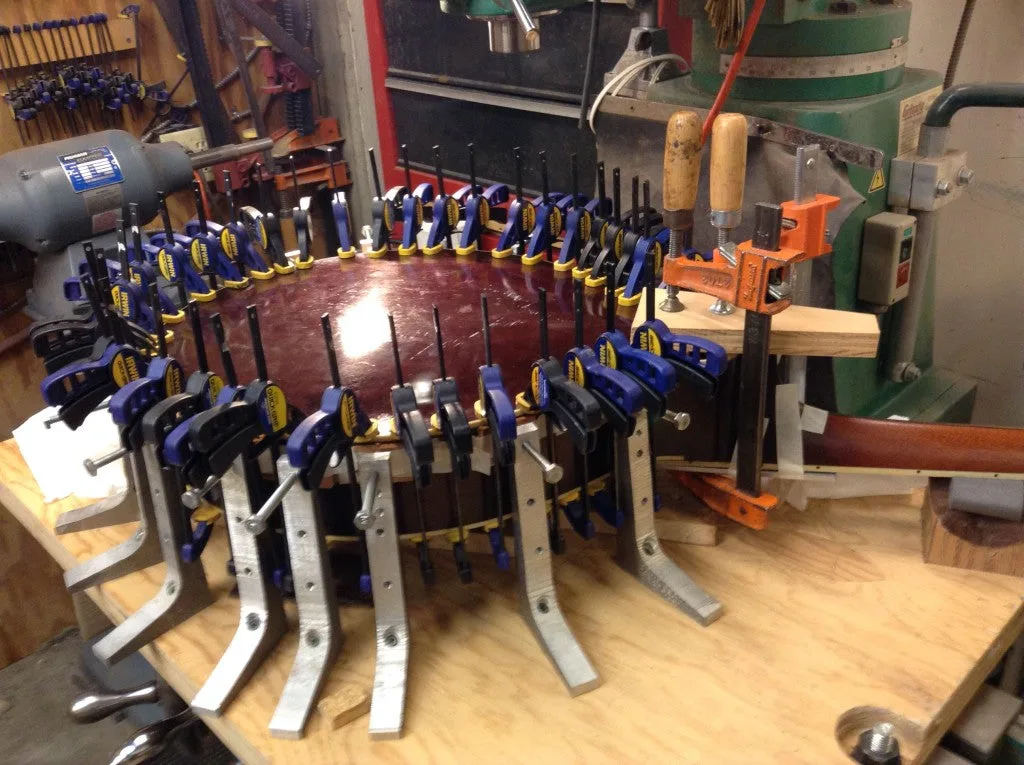
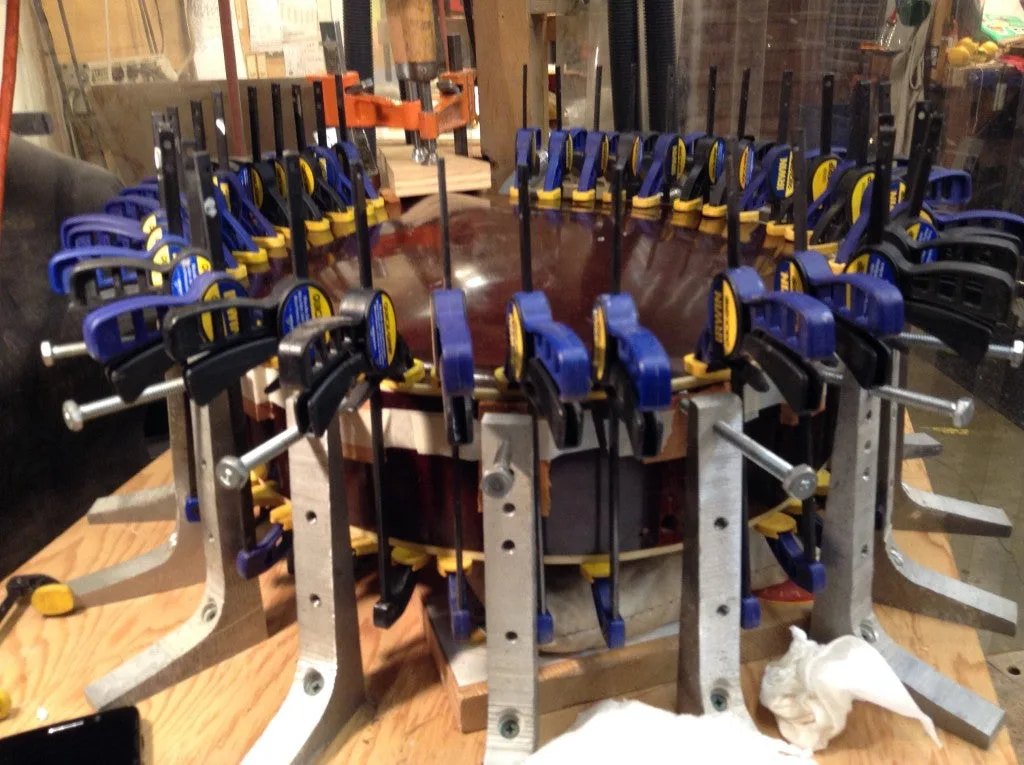
Now to get the back glued on. The sides are slightly relaxed now that the back has been removed, and nothing really lines up. So here are some cool “bench clamps” Frank made that you drill into the bench and apply pressure from all sides.

Once they’re all in place we can line the pieces up and glue them back together. Couldn’t we have fit a couple more clamps on there?
It went together well and got new frets and set up.


A Smiling Skull From a 1940’s Decal Haunts Two Guitars

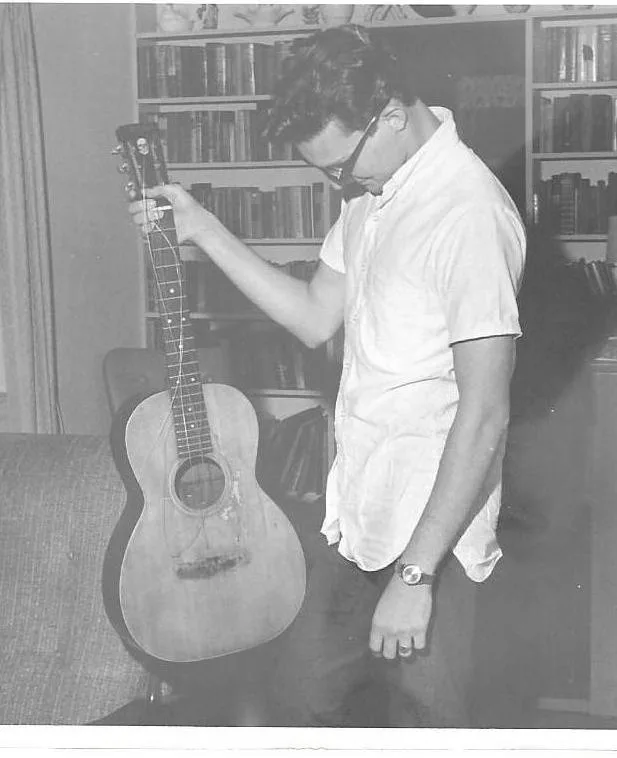
My favorite uncle gave me his home-repaired guitar when I was in college. A black paint job hid the Bondo he’d used to smooth out damage from a detached bridge. A mismatched tailpiece and floating bridge restored a sad semblance of functionality.

Introduction by Harold Fethe

I carried that guitar around for sentimental reasons until one night when Bill Drennan, my college roommate, explained to me that it was something called a “herringbone Martin.” I raced over to a drugstore near the dorm and bought some bottles of nail polish remover. When the black paint came off, Drennan was right–a Martin 00-21 from the 1940’s.

Years of searching for a trustworthy restoration expert finally led to the Gryphon gang. They repaired that double-O and even gave me $100 discount in lieu of the Martin lifetime warranty. Martin doesn’t really cover reversal of repairs done by relatives who are sports car mechanics, you know. I gave it back to my uncle when he retired.

Bill Drennan recently lost his battle with cancer. His wife wanted me to have his best guitar–another Martin, a D28 he’d bought shortly after college. I accepted with immense gratitude. It got new life from a refret-and-reset cycle at Gryphon, but that didn’t seem quite enough. I decided that the skull image from the decal on my uncle’s old Martin would be a fitting acknowledgment of the education I got from Drennan–something like a bus transfer, so Billy’s spirit could come along for the rest of the ride. After consulting for several months with the Gryphon shop, Beth Drennan, and a graphic arts company, we had a reincarnation of the smiling skull.

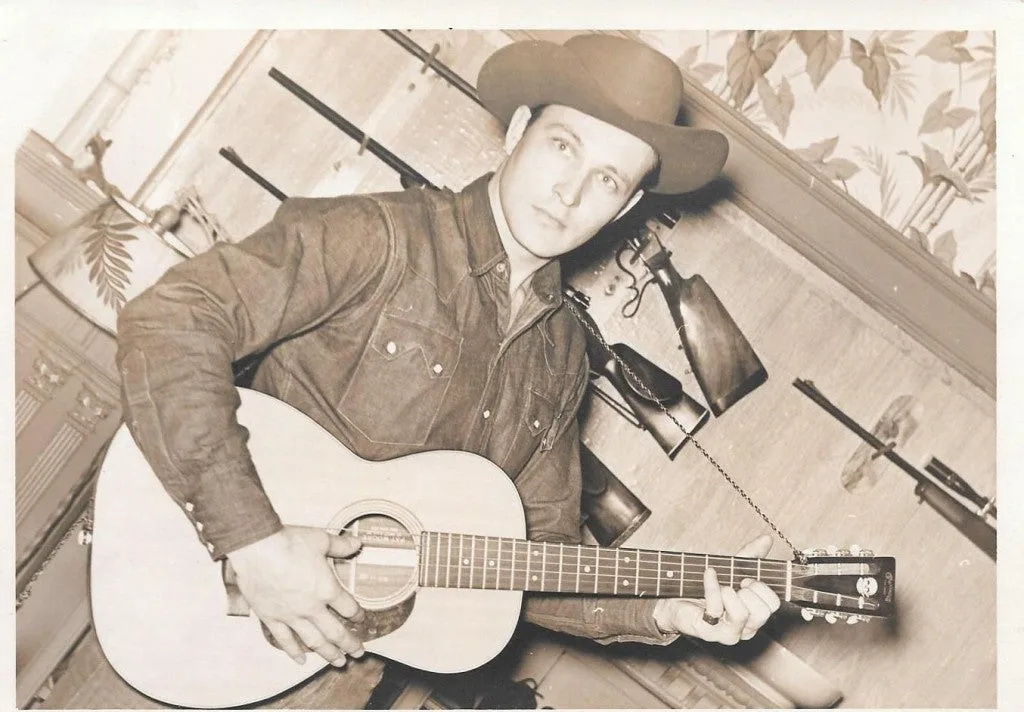
Pictured below: before the bridge damage and black paint, my uncle Pat Moore with the 00-21 in his heyday.

Pat Moore with his 00-21 and Skull decal

Pat Moore with his 00-21 and Skull decal.

Below, the black paint is stripped off and I’m still bewildered.

Harold and the now busted 00-21

Harold and the now busted 00-21.

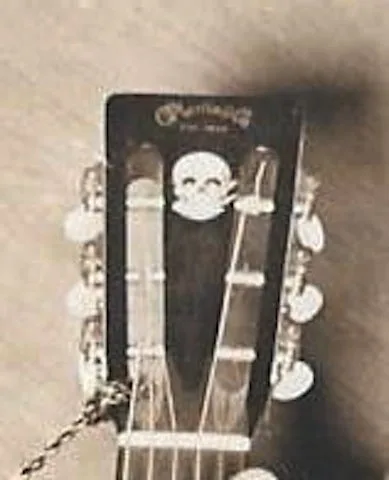
Martin 00-21 pat moore headstock

Headstock detail.

Skull artist rendering from original picture

Artist rendering from original picture.

Frank Ford and James Hingston take the handoff from here:

So Harold brought us this interesting project, and we’ve been scratching our heads wondering how to go about doing the inlay justice, both physically and narratively. We were given the artwork to replicate in the pearl.. and the level of detail involved was what made Frank think twice before just grabbing the inlay saw.. here’s the image.

Artwork

Artwork.

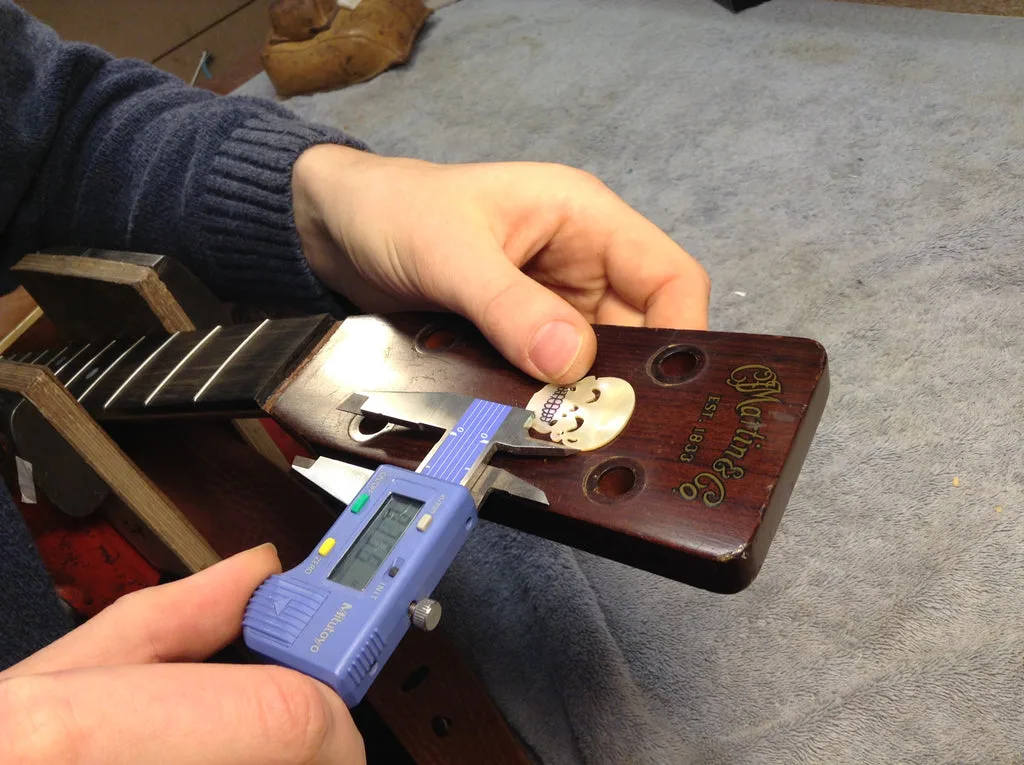
Harold requested that the inlay be no bigger than an inch wide. So the teeth are the main problem.. how do we get the inlay small enough, while preserving the level of detail in the artwork?

Frank happens to have a pantograph at his home shop. He thought this would be a fun way to actually use it!

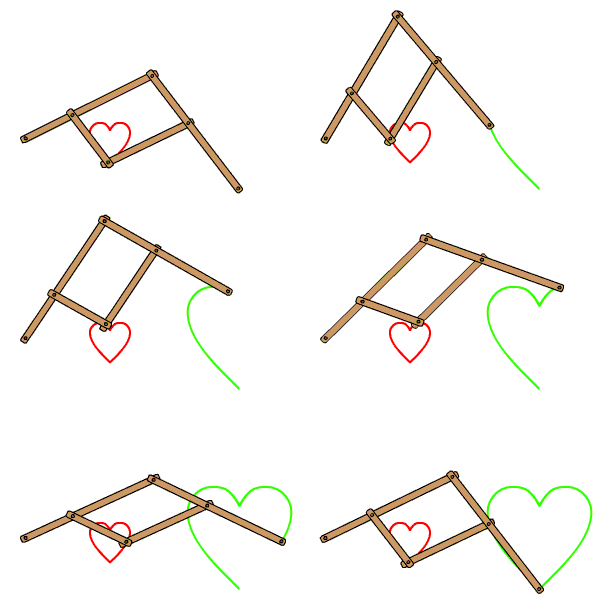
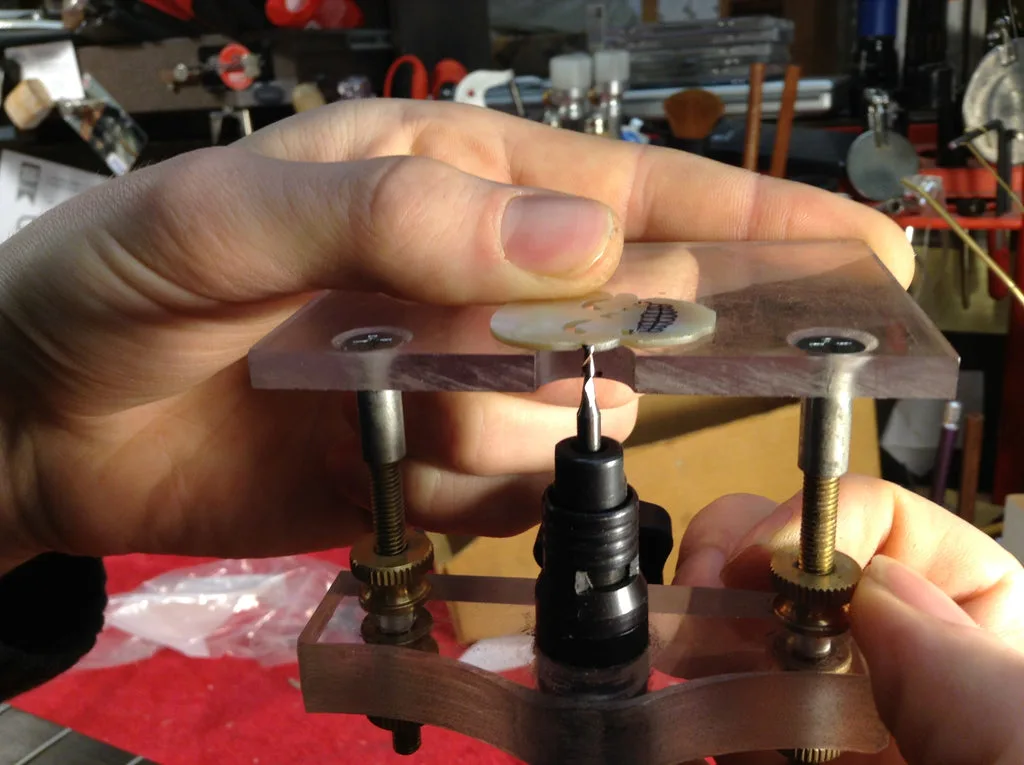
The way a pantograph works is to have an original with the overall shape and pattern established. Using a parallelogram structure, one side of the tool traces the pattern, while the other end cuts out a duplicate. As shown below, the scale can be adjusted.. which is what we’re after.

Animation of a pantograph

By AlphaZeta – Own work, Public Domain, https://commons.wikimedia.org/w/index.php?curid=16115008

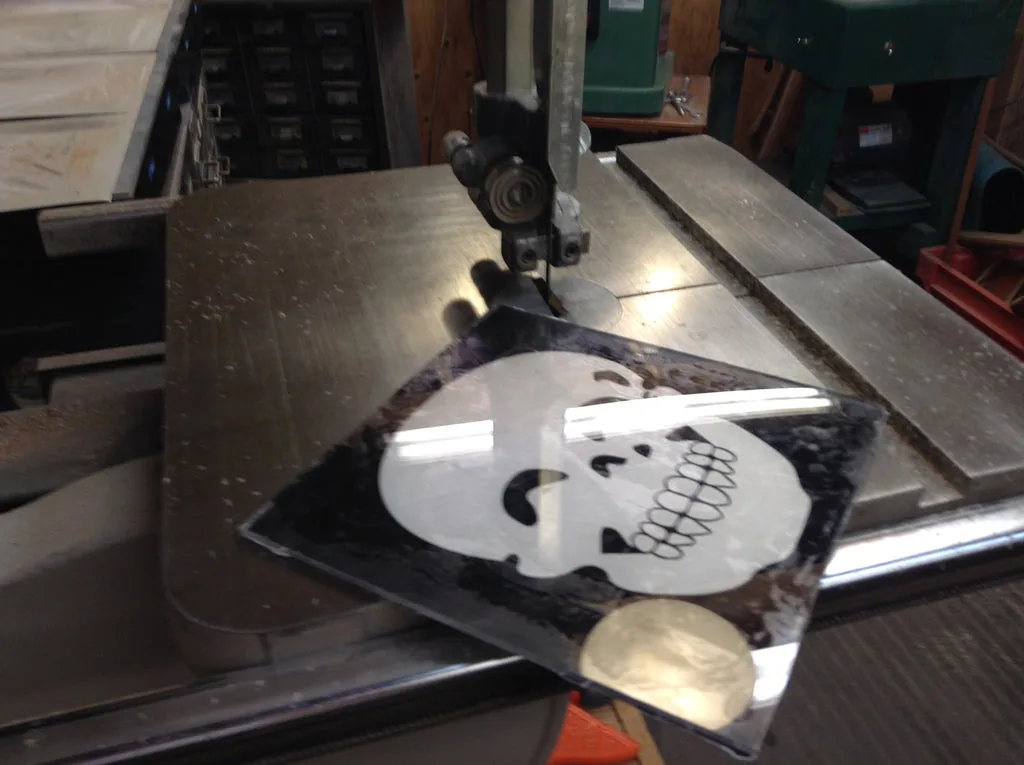
So the first step is to use the artwork to make a template. We glued the image to a piece of plexiglass with rubber cement. Then I got to work cutting it out.

Cutting the perimeter on the bandsaw.

Cutting the perimeter on the bandsaw.

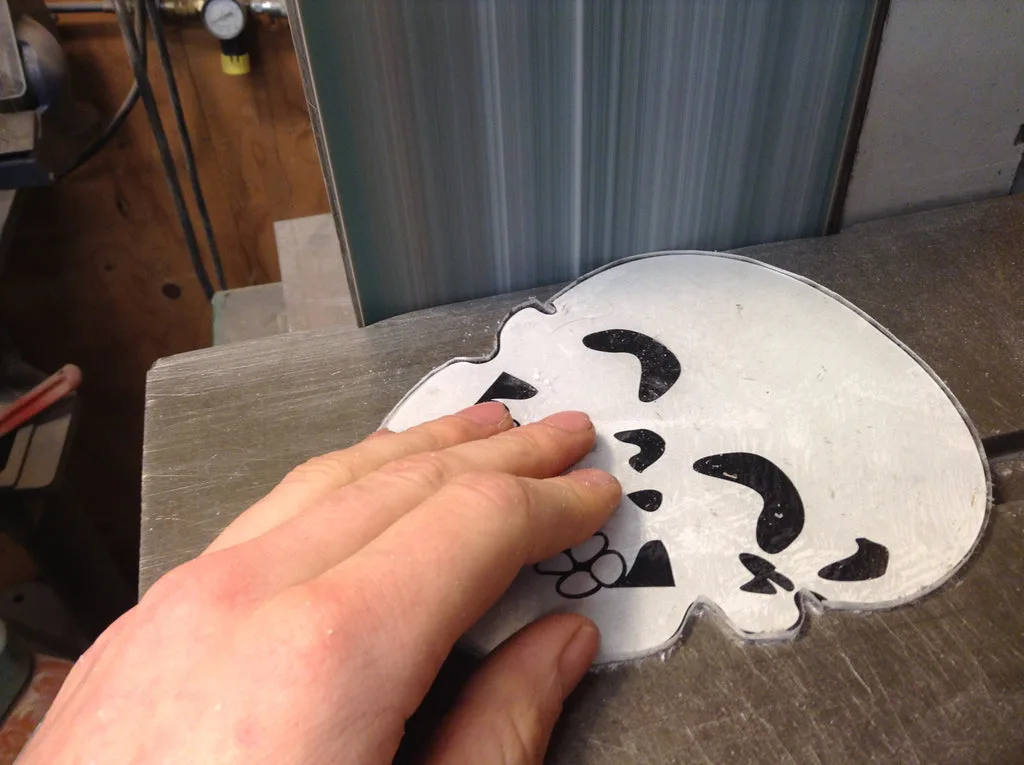
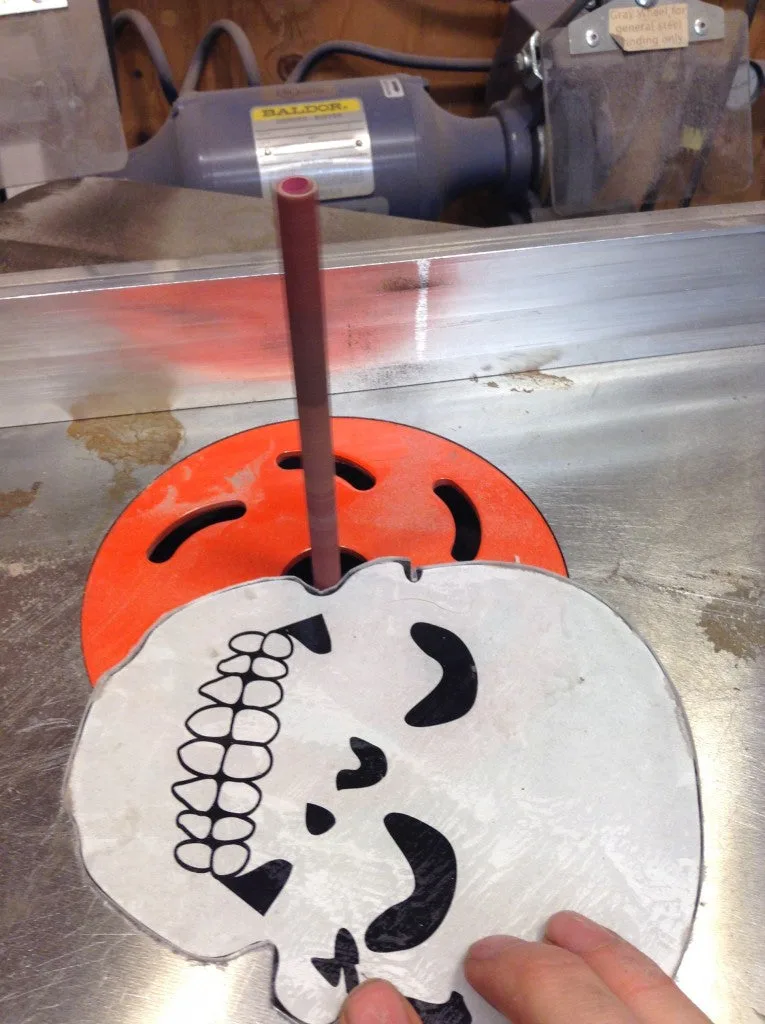
Then I used a variety of sanders and files to dial it in.

Sanding the edges smooth

Sanding the edges smooth.

The oscillating spindle sander gets into the tight curves.

The oscillating spindle sander gets into the tight curves.

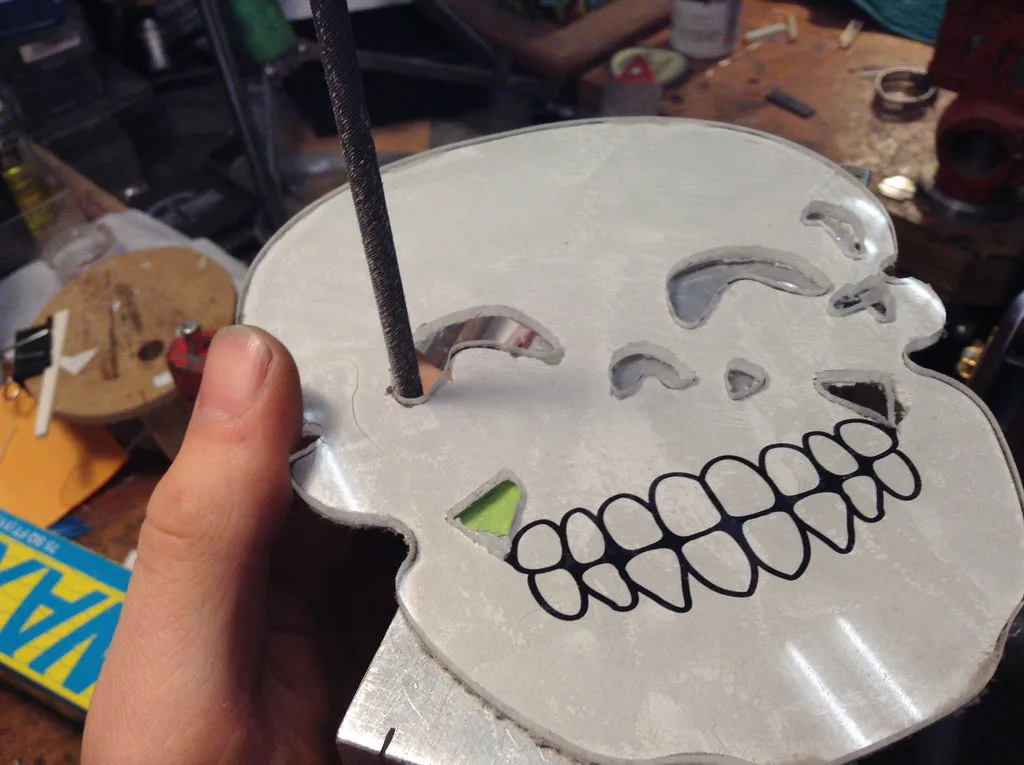
Once satisfied with the overall shape, I brought it back to my vise to cut out the interior details. First I drilled holes through each shape. Then I ran the inlay saw blade through the hole and proceeded to rough in the shapes.

Tidying it up with a round file

Tidying it up with a round file.

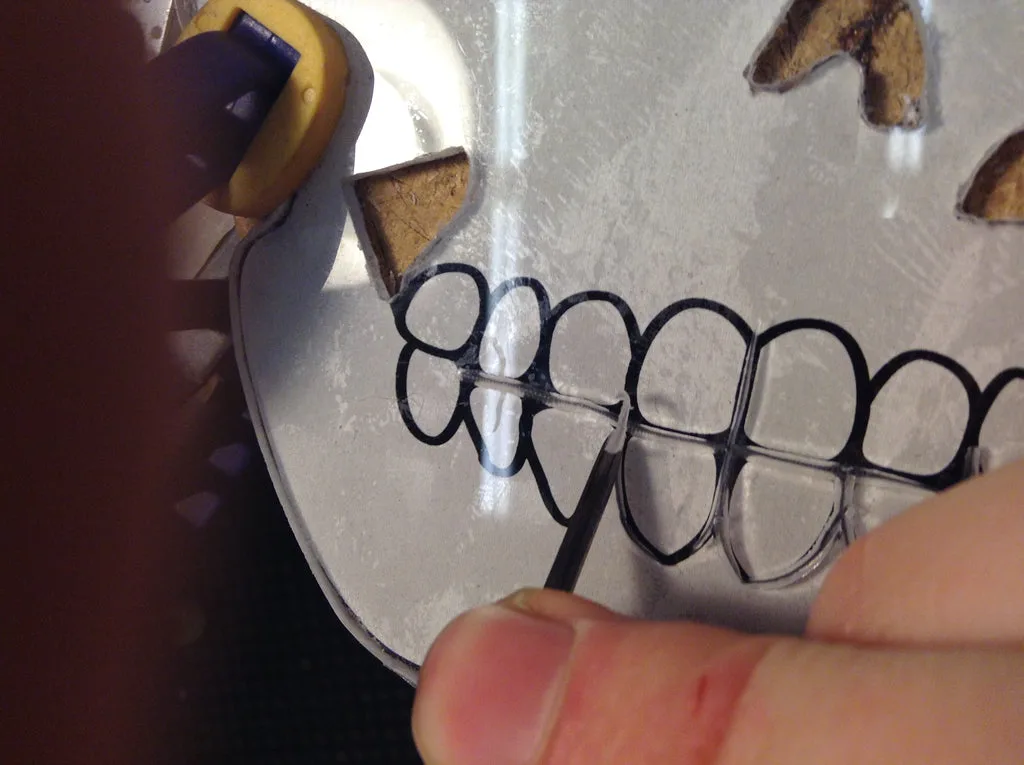
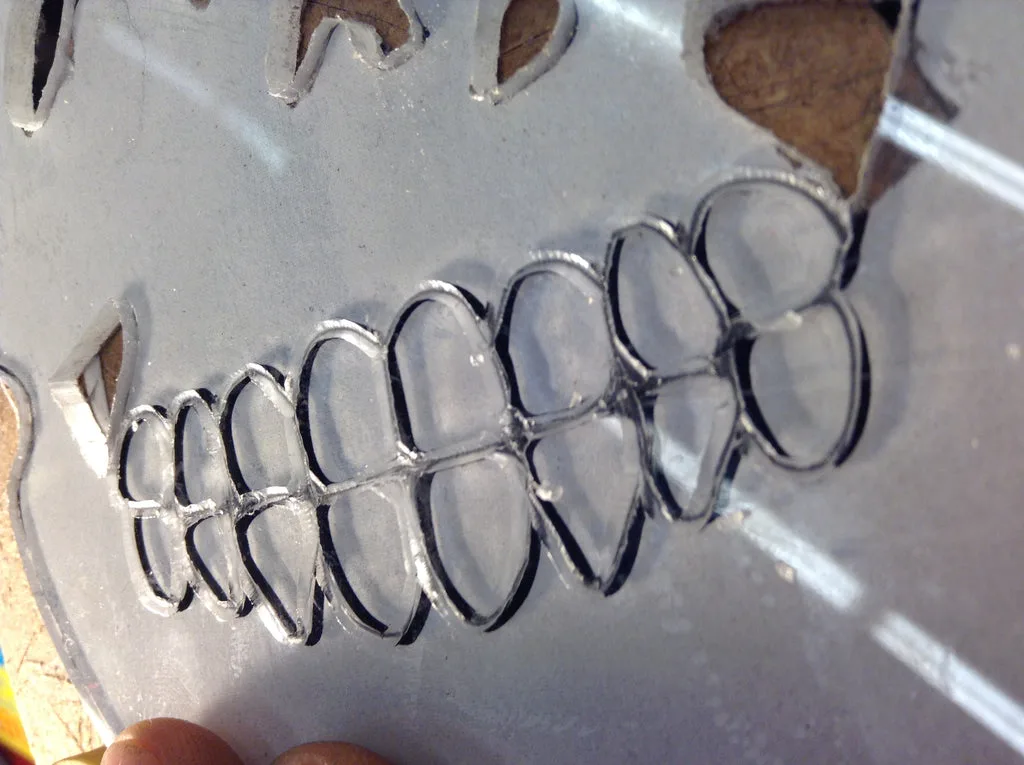
Next came the teeth. Using an engraver, I dug into the acrylic making a big enough groove for the pantograph to trace.

Engraving the teeth

Engraving the teeth.

Teeth after engraving

So the template is ready, Frank and I took a field trip to his home shop to put it on the machine. Here’s a video of the pantograph in action. We increased the speed of the footage, because we’ve watched too many longwinded shop videos. Thanks A.J.!

Now it’s time to rout it into the peghead.

Checking the depth.

Checking the depth.

Getting it centered.

Getting it centered.

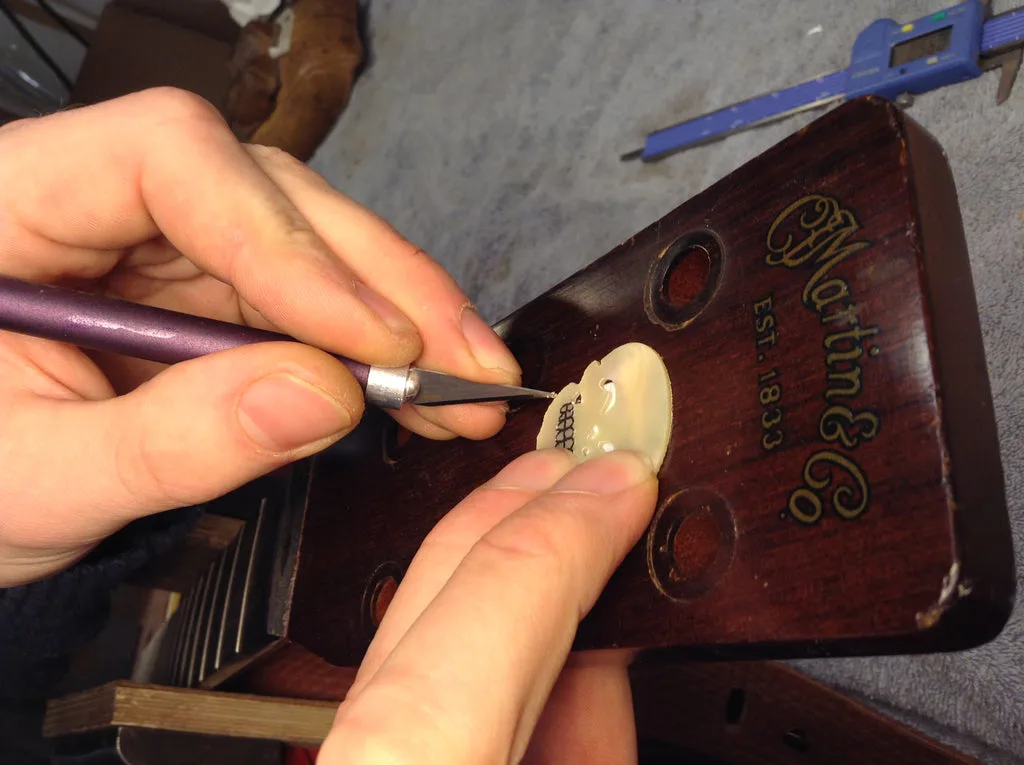
Tracing the outline with a sharp blade.

Tracing the outline with a sharp blade.

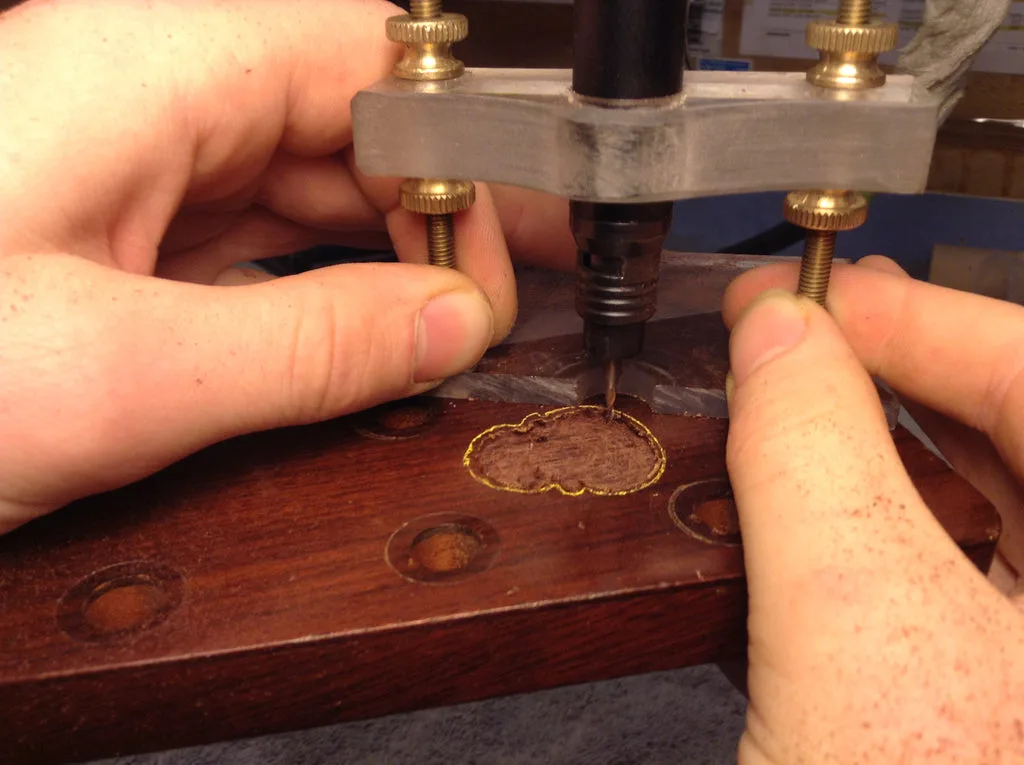
Routing the peghead.

Routing the peghead.

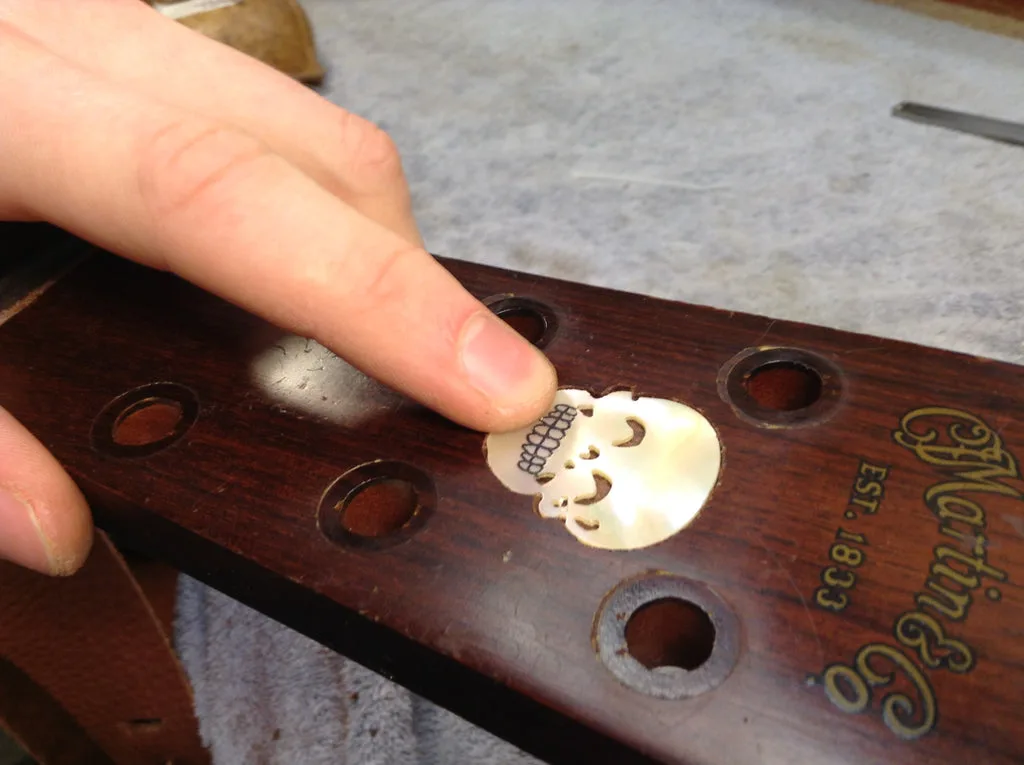
Dropping it into place

Dropping it into place.

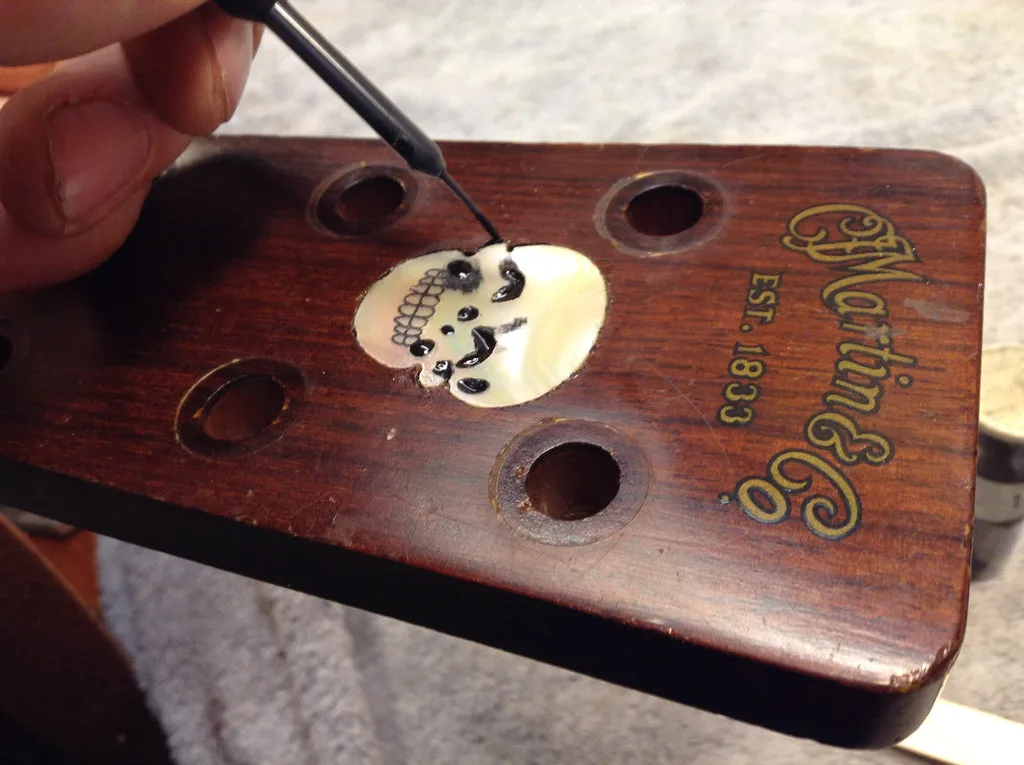
Adding the black filler to the interior

Adding the black filler to the interior.

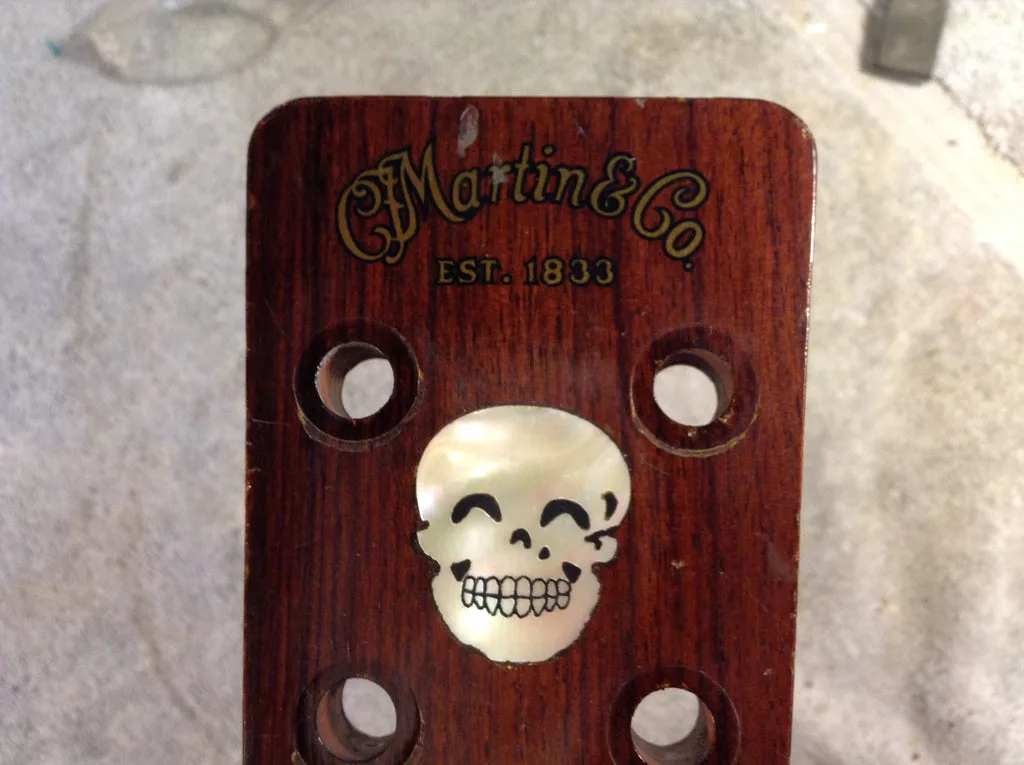
Fitted and ready to sand and add some lacquer

Fitted and ready to sand and add some lacquer.

Check back in a week or two for an update… the lacquer is drying upstairs in the meantime!

Does Your Guitar Need a Set Up?

It’s not as easy as you might think to trouble-shoot your own guitar. If you’ve had it for years you may be used to its quirks, or you might think you just need to get used to a guitar you’ve recently acquired. Here at Gryphon we’re frequently amazed when a customer brings in a guitar that’s so difficult to play we wouldn’t even attempt an easy 4-string G chord, but they just apologetically murmer, “it seems easier to play chords on my friends’ guitars…” Unlike some repairs, a set-up isn’t expensive and may be the best investment to get more enjoyment from your playing. Below are some easy pointers to help you determine if your guitar may be holding you back.


Test #1

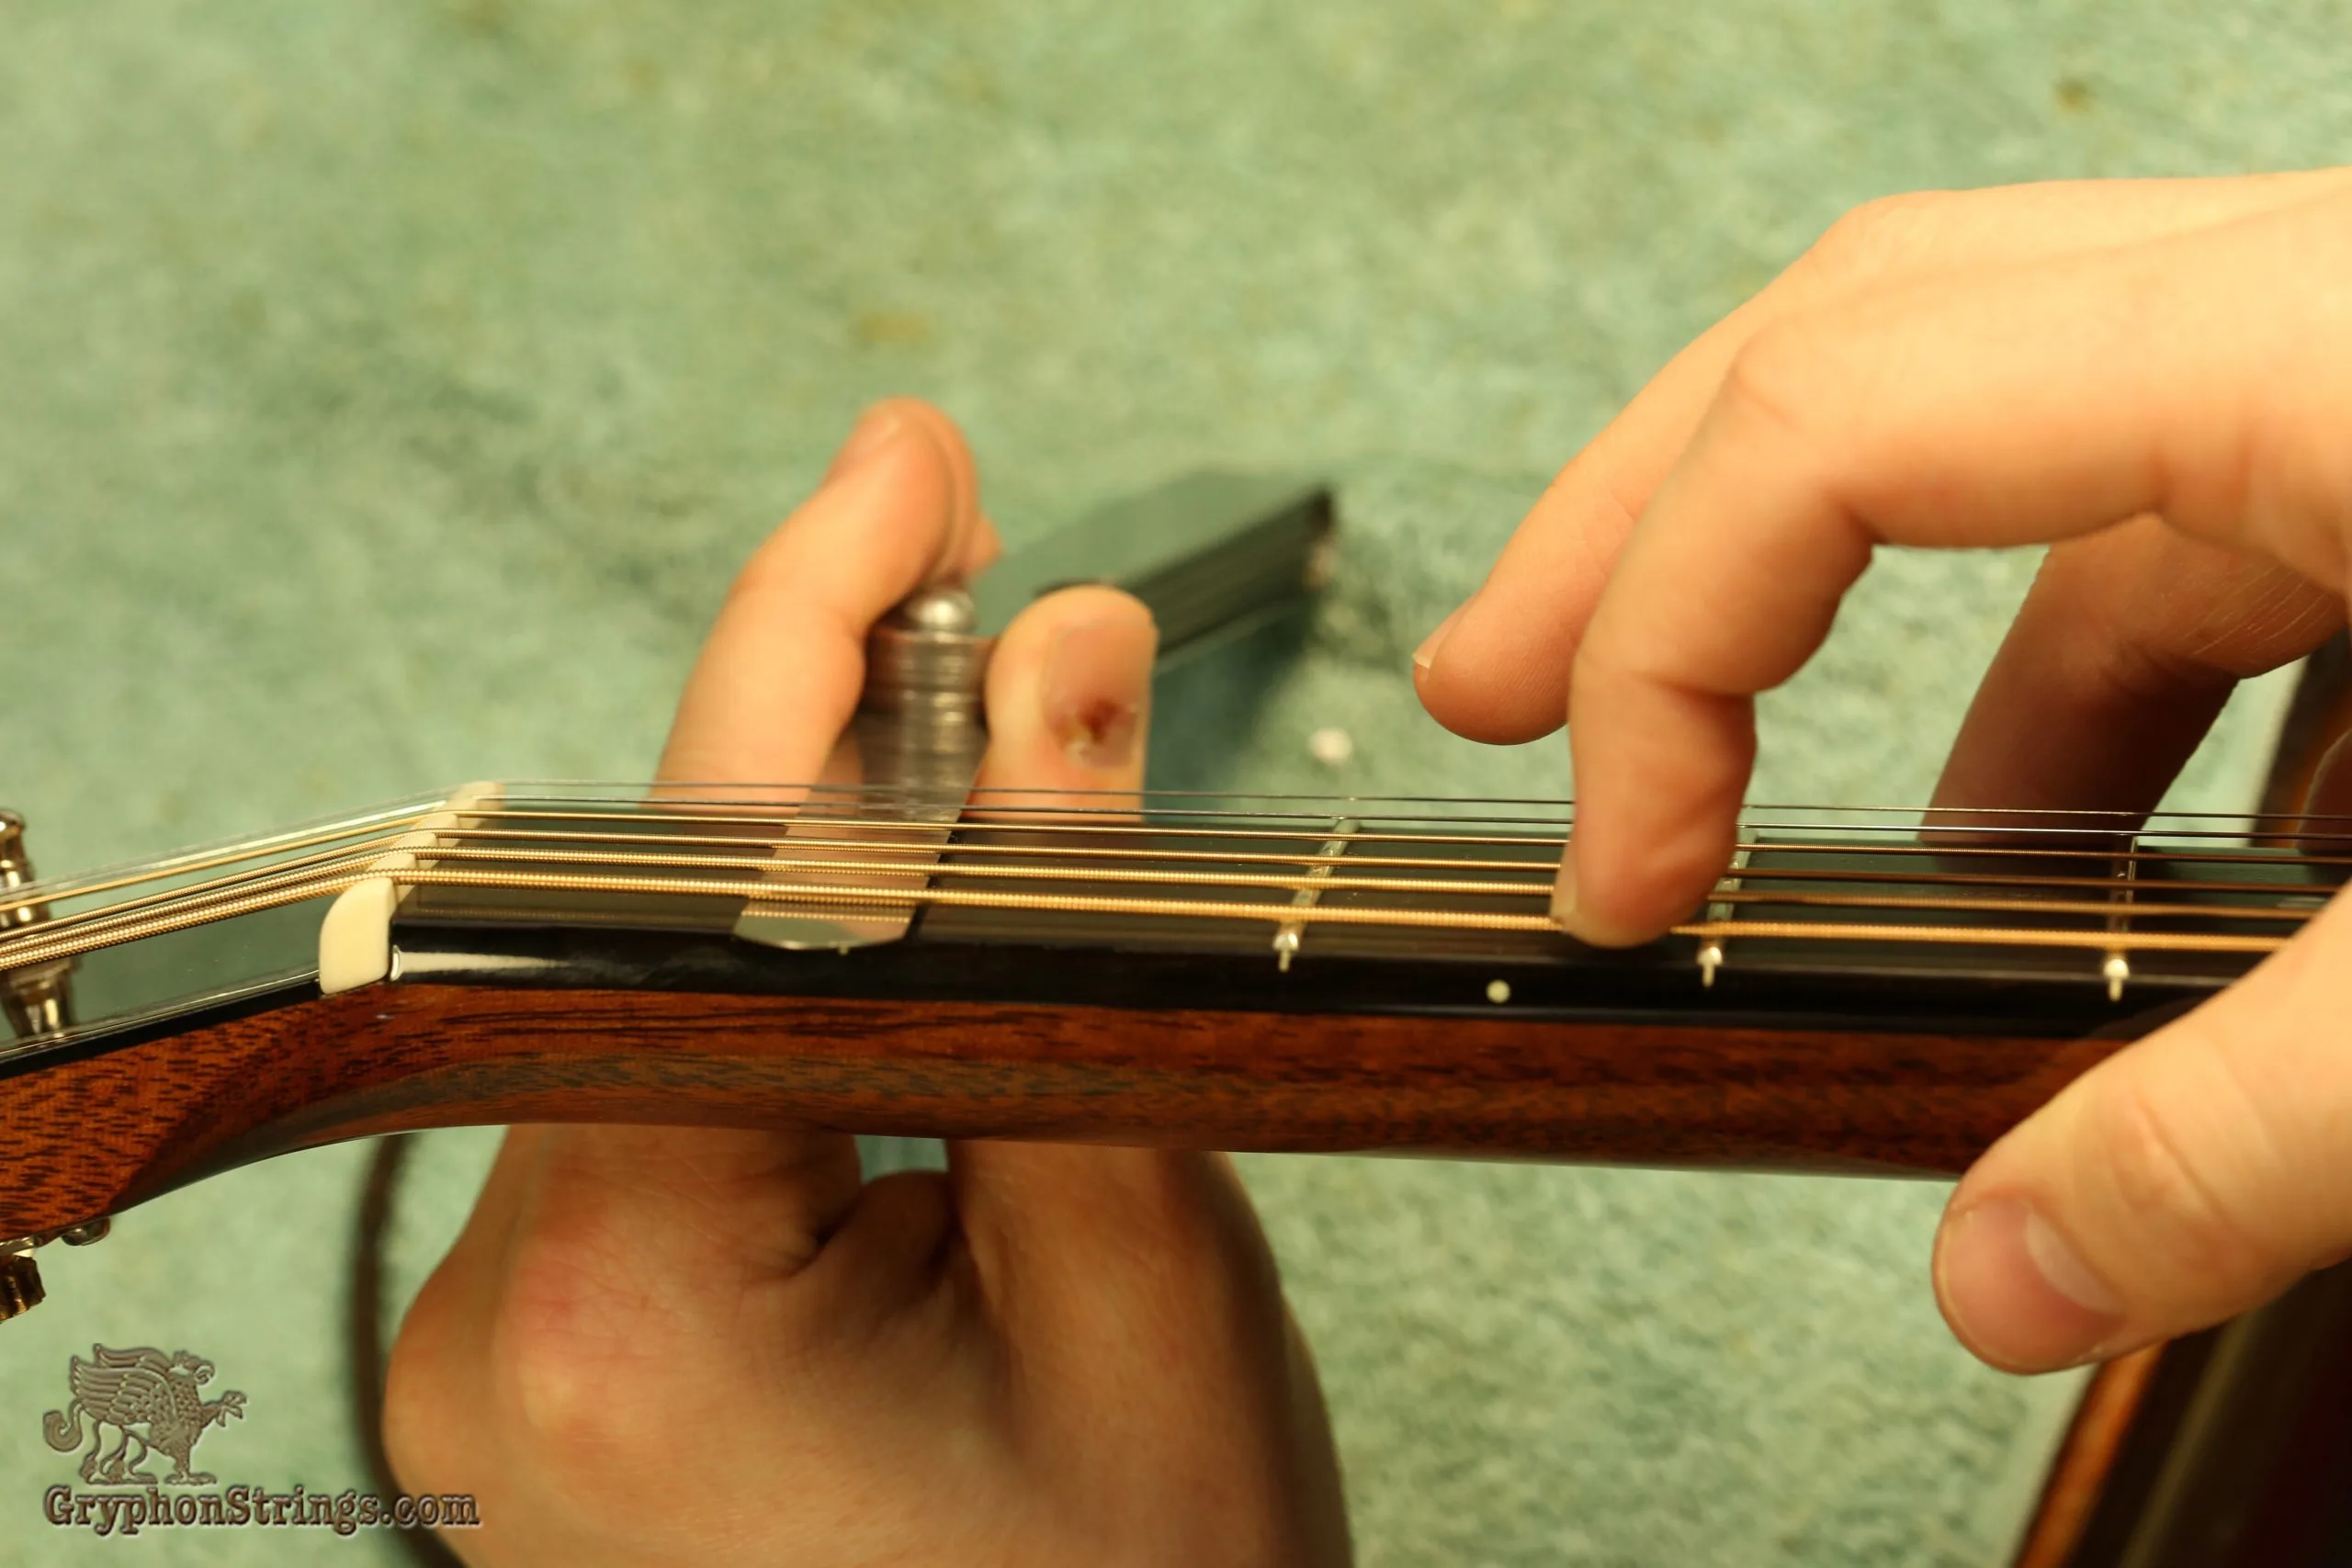
To start, make sure your guitar is tuned to standard pitch, or close to it. Push the low E string down to the first fret with your left hand as shown.

First Fret Player Watermark 

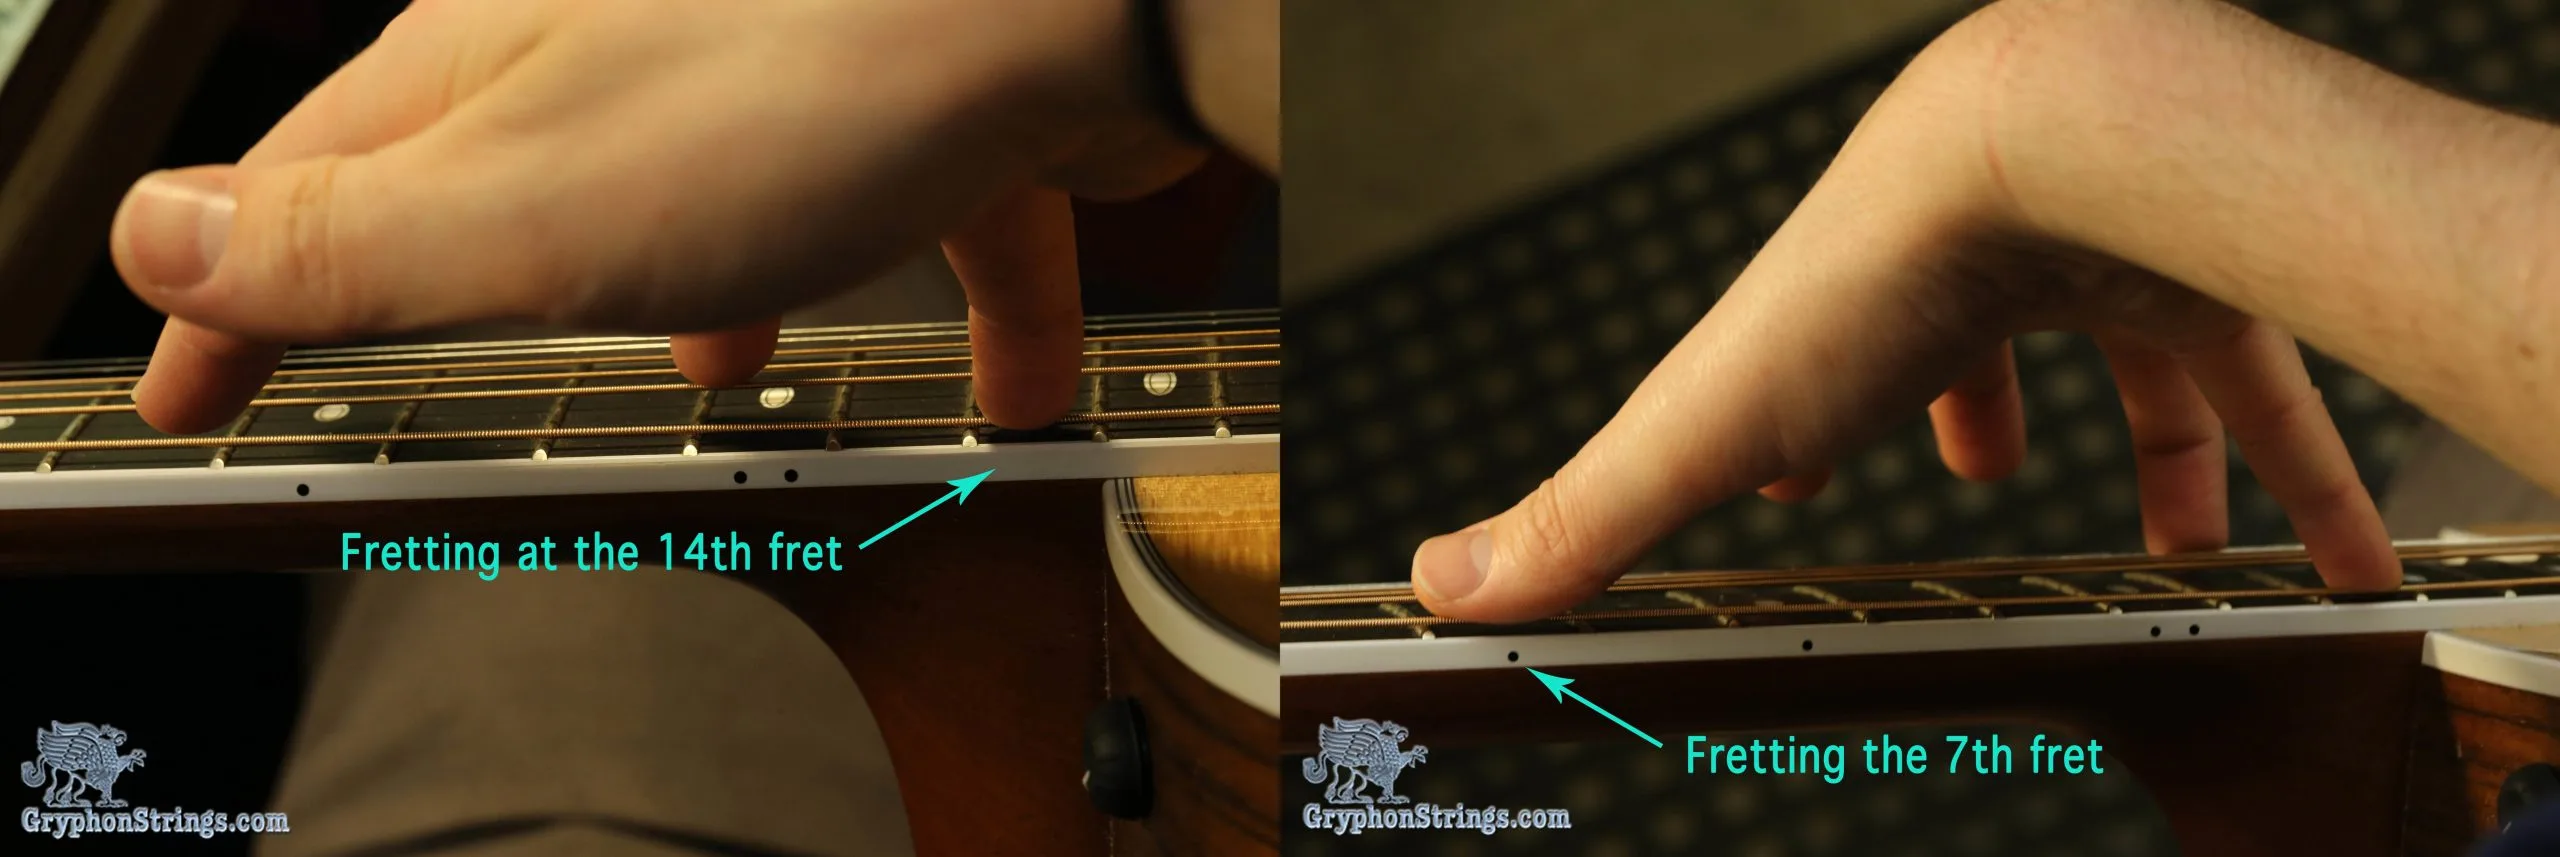
While holding that string down, press it to the 14th fret with the little finger of your right hand. You’ll be able to reach up with the thumb or index finger of your right hand to push that same string down to the fretboard again at the 7th or 8th fret. 

Pinky 14th and 7th Fret Annotated 

If the neck of your guitar is relatively straight, there won’t be much clearance between the string and the frets in the middle of the neck. But if you can see a gap between that low E string and the 8th fret, enough space to tuck in a couple of flatpicks, the neck of your guitar has bowed up from string tension and getting that neck straighter again will make your guitar easier to play. This may be as easy as having the truss rod in the neck tightened, which Gryphon will gladly do for free while you wait, but sometimes making a guitar neck straighter is more involved. 

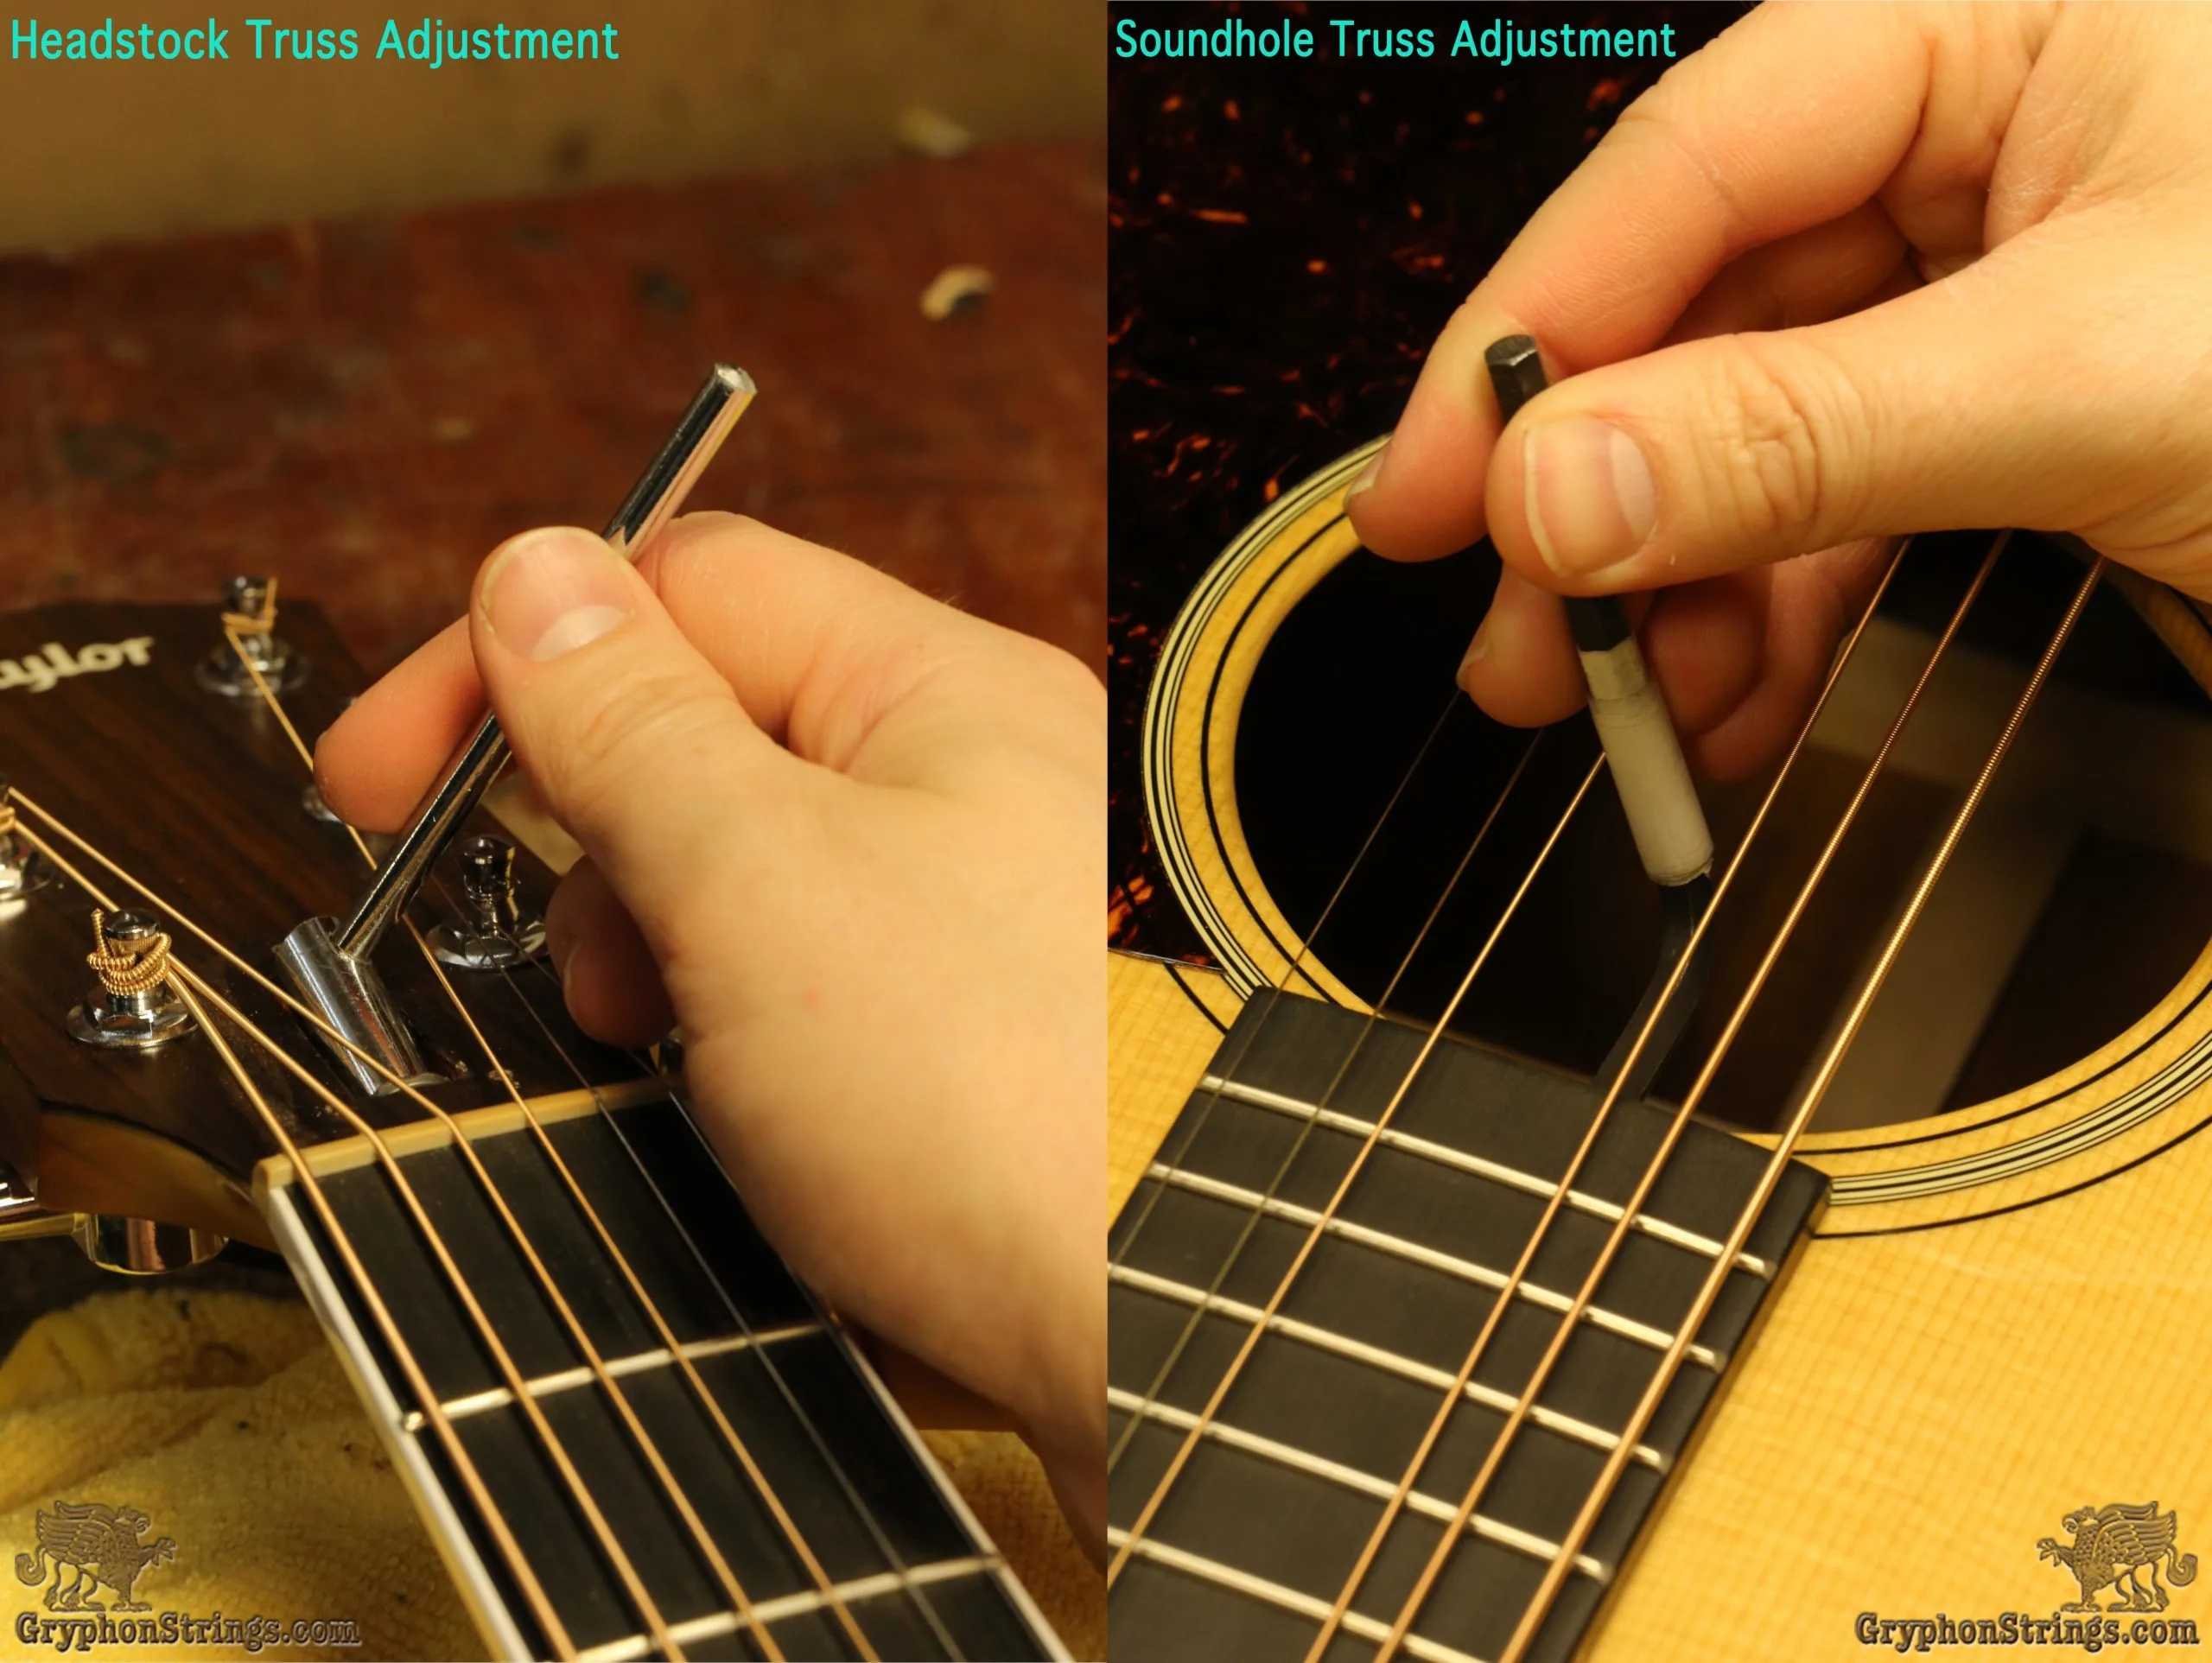
Truss Adjust Annotated 

The above photo shows a Gryphon Luthier adjusting the the truss rod on a guitar with a headstock truss rod adjustment (left) and a sound hole/body truss rod adjustment (right).

Test #2

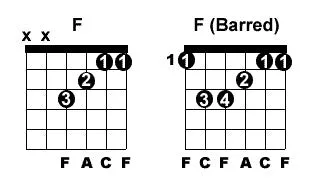
Make sure your guitar is tuned to standard pitch and have a good capo handy. Try playing chords in first position, particularly the F chord (if you can’t play a full barred F, just play the top four strings version). 

F_vs_F_Barre 

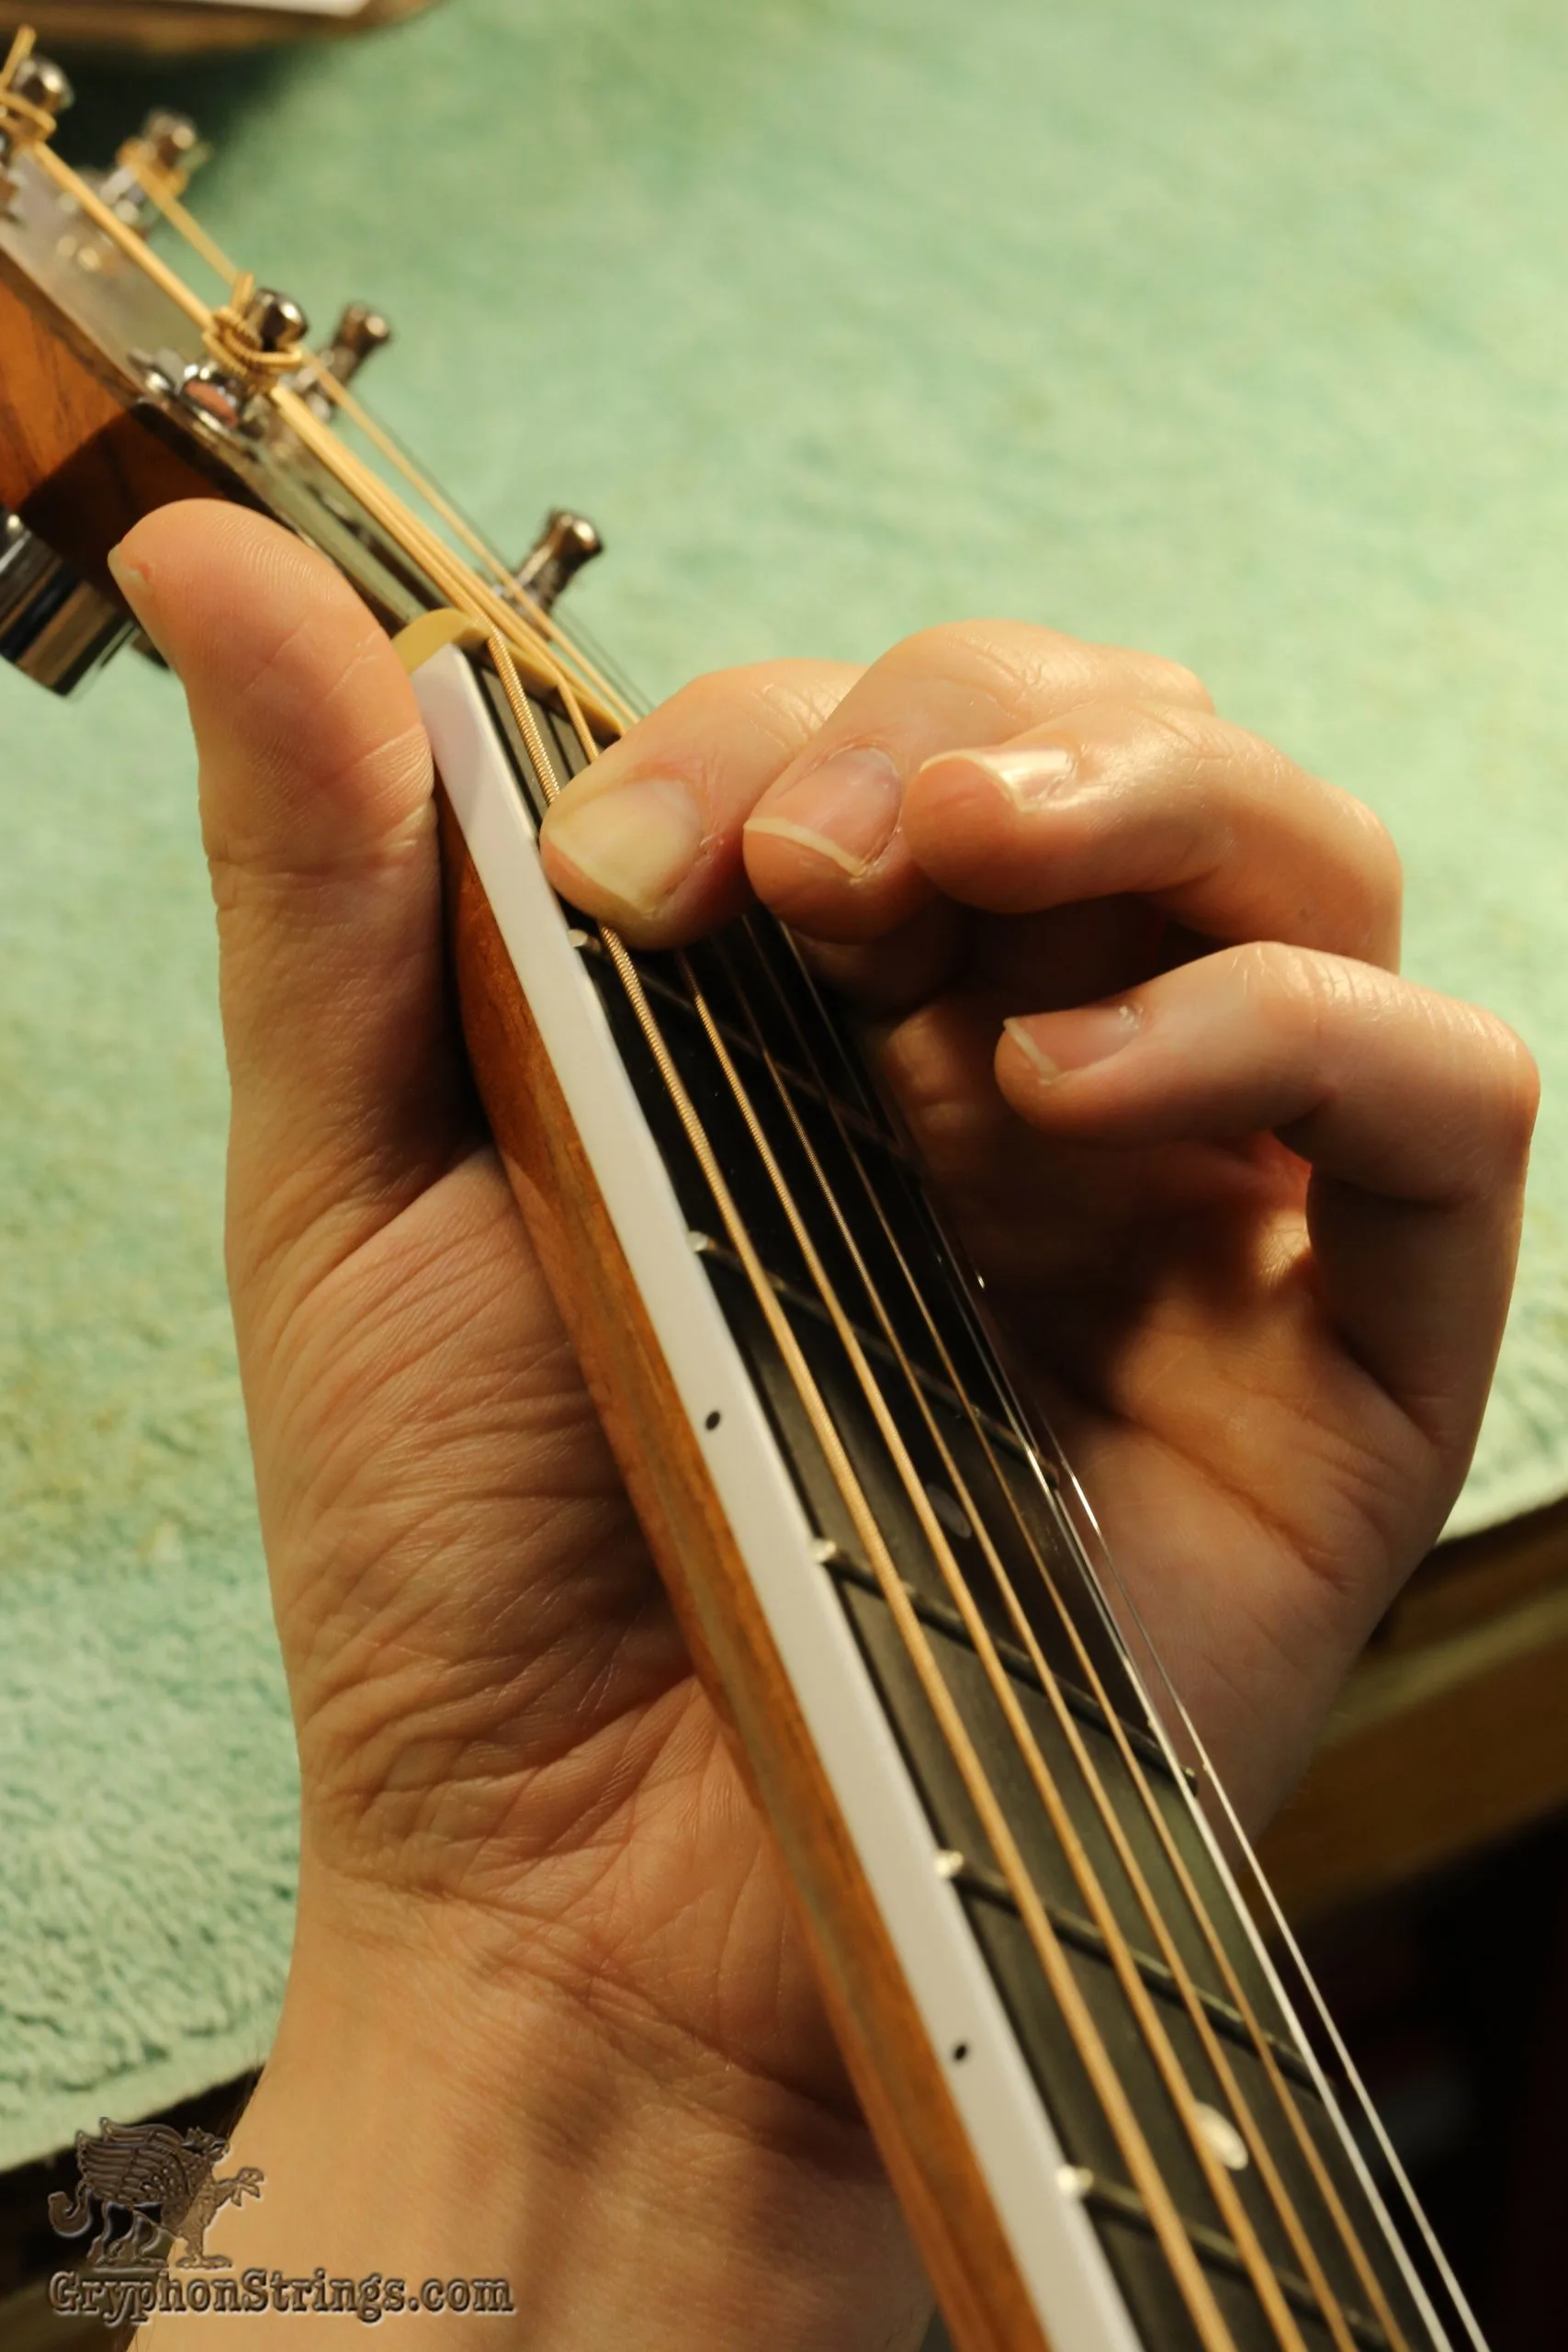
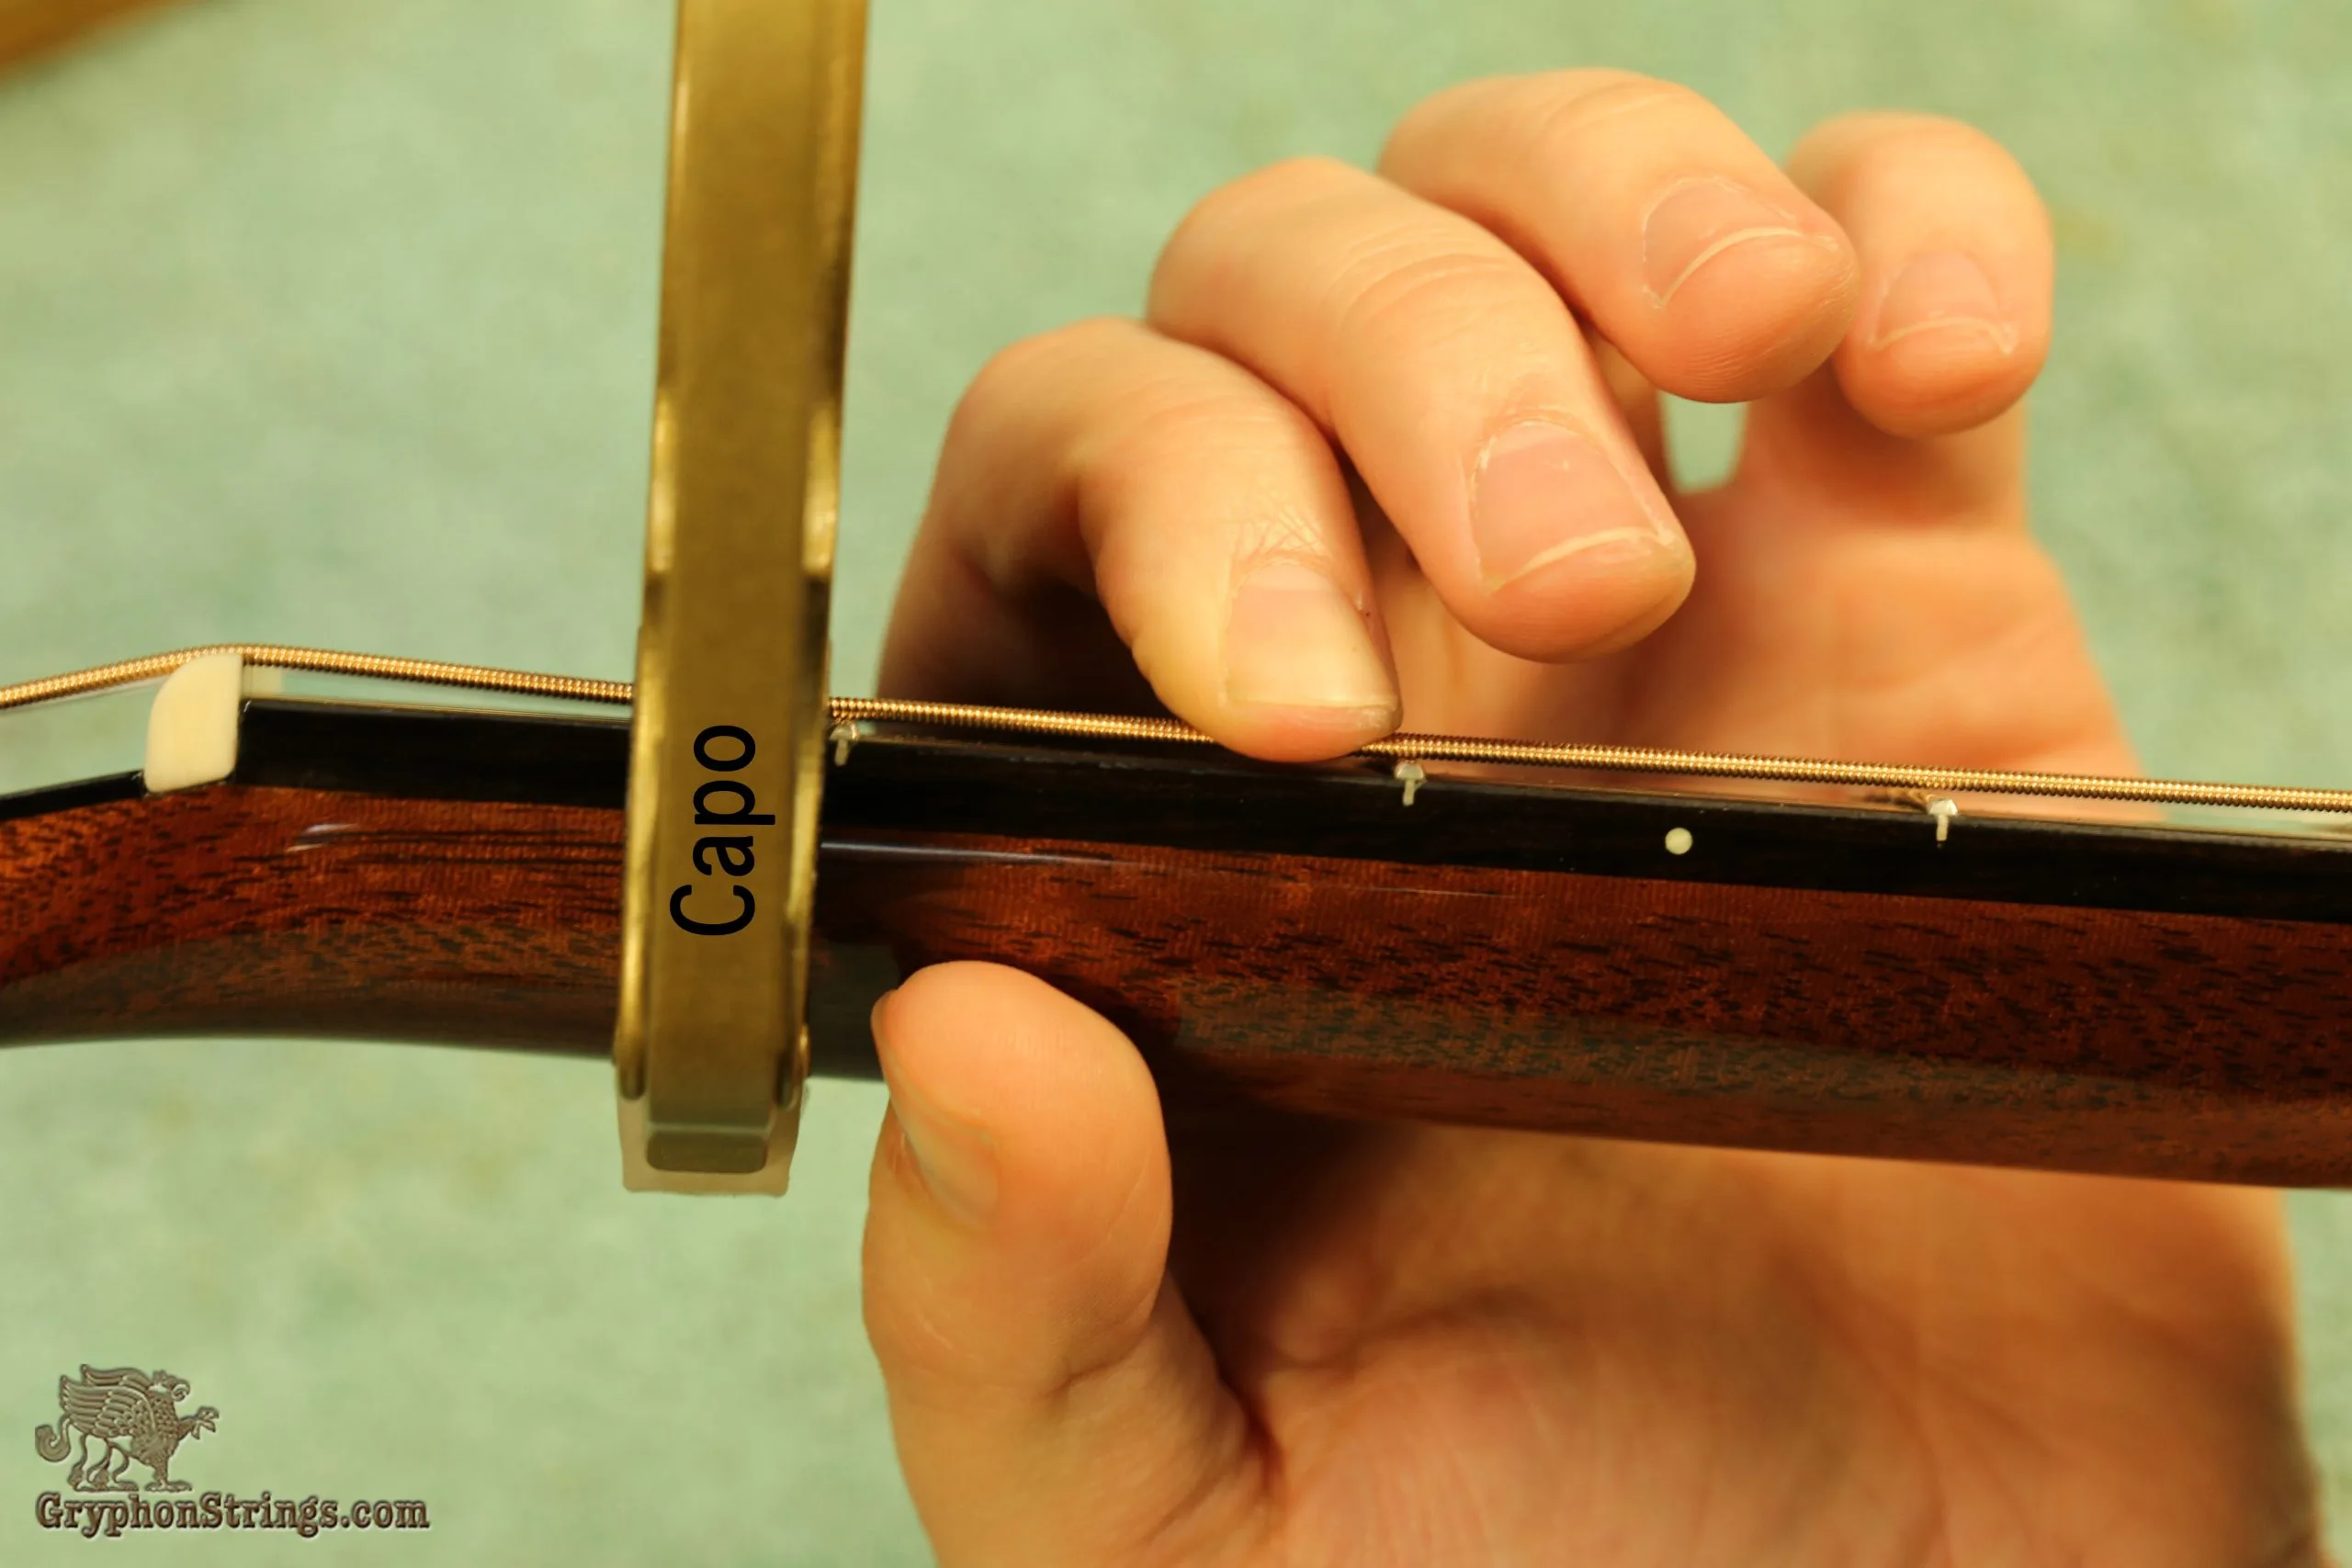
Put the capo on your guitar neck at the first fret, and play that same chord again.

F Chord Watermarked 

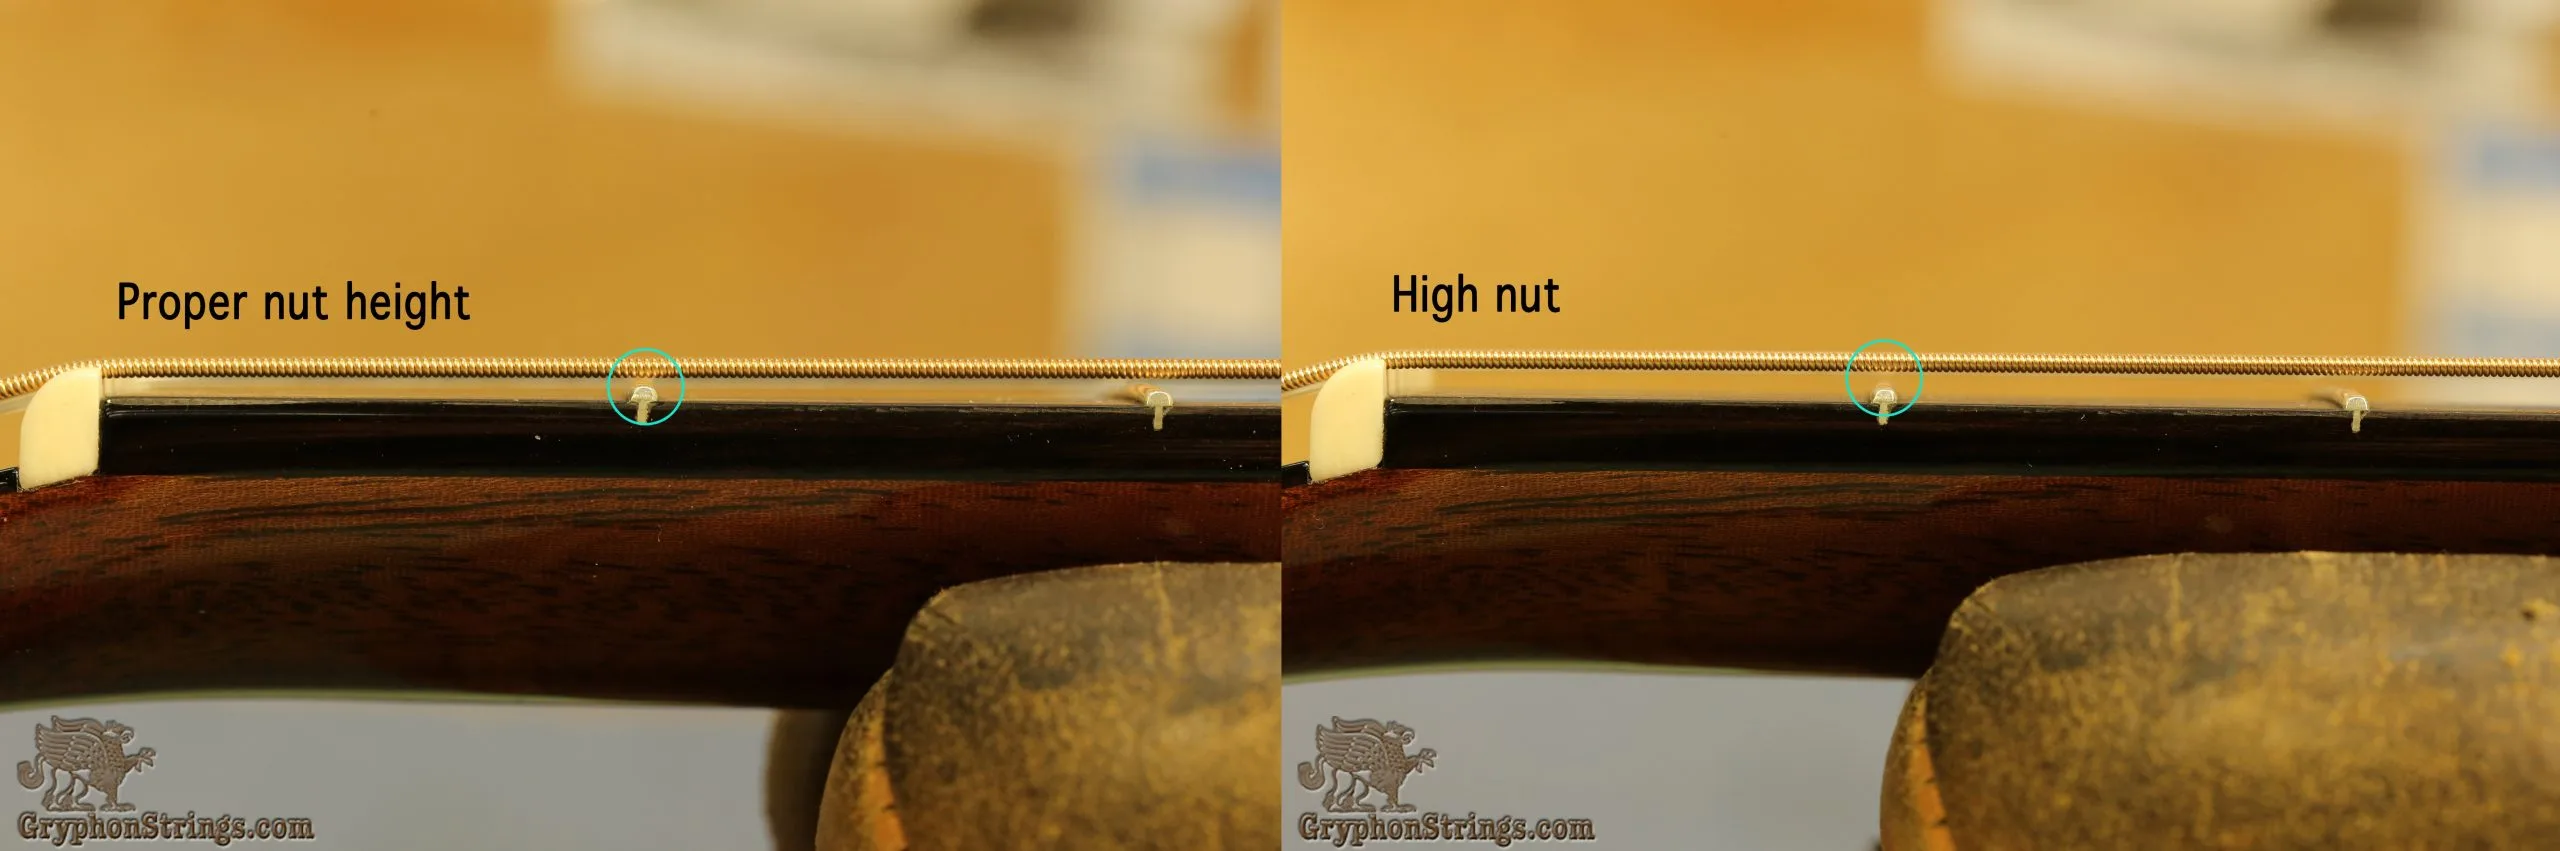
It should be slightly easier to play that F barre chord shape with the capo in place, but if it’s dramatically easier, the strings on your guitar are too high at the nut and lowering them will make the guitar easier to play. 

High Nut Annotated 

String height at the nut is very critical because each string is tightly anchored in a nut slot. Your guitar’s string action may be quite low overall, so that F chord position is relatively easy if you’re fingering it at the 5th fret (to play an A chord), but if the action is too high at the nut you’re working harder than you need to trying to push strings down to the first fret. If you’re mechanically inclined, you can use a “feeler gauge” to check string height above the first fret while pushing the string down at the third fret. 

Feeler Gauge Player Watermark 

High action at the nut is the most common problem with inexpensive guitars, but we’ve also seen new guitars selling for thousands of dollars that are tough to play for the same reason. 

In Summary

Often people can’t believe that a virtually new guitar needs a set-up. How could they build the whole guitar but not do that final step? Part of the reason is that the string tension, even over a short period of time, has made that brand-new guitar change shape in subtle ways. Another reason is that modern guitar manufacturing is very efficient, but there’s still no way to mechanize the set-up of a guitar. And since the needs of guitarists vary, depending on the style they play and string gauge they prefer, there’s really no “one size fits all” set-up anyway.