Skip to content

Why Set-Ups Count

Why Set-Ups Count (especially when giving a uke or guitar as a gift)

You’re giving a ukulele or guitar to a beginner, so making sure the instrument is set-up properly is no big deal, right? Nope, and here’s why:

Manufacturers know that appearance and sound are what people first react to, and so that’s what they focus on. Even the final stages of set-up to a little uke takes time, and those extra minutes during final assembly are often skipped in the quest for a lower price. Sometimes this is hard to spot, especially the string height at the nut, but believe it or not a proper set-up when you’re playing in first position is even more critical when you’re starting out than it is for a serious pro. Why? Because a beginner spends more of their playing time on those lower frets, and their fingers aren’t as strong yet and their fingertips don’t have a tough callous. So if making those first-position chords is difficult because the strings are too high at the nut a beginner may get discouraged, especially since a nut that’s too high can also make those chords sound out-of-tune. Of course having the string action low overall is also important for beginners, simply because the longer a beginner can practice without fatigue the faster they will progress.

The Gryphon Repair Dept. does a lot of difficult and highly involved repairs and restorations, but they also spend a lot of time doing set-ups. They set-up all the instruments Gryphon sells, but they also do a lot of set-ups for instruments people buy elsewhere, and that includes a lot of instruments sold online. Of course spending an extra $85 isn’t tragic when it’s a guitar that cost several hundred dollars, but the set-up on a little ukulele is likely to cost at least $50 and that’s a real jolt when you didn’t spend more than $100 on the instrument itself.

When giving an instrument, don’t skip making sure the guitar or ukulele you give is as easy to play as possible!

Why We Buy Multiple Guitars

Richard Johnston-

(Published in Premier Guitar Magazine, April 2018)

This article was inspired by a conversation with a long time friend of the shop, Roy Pea. Roy is the Stanford professor referred to but not named in the article.

Like many people in the music industry, I’ve long believed that guys who buy lots of guitars (Yes, they’re almost always guys.) are driven by conspicuous consumption, or would rather fuss for hours or even weeks buying guitars at the lowest price than spend that time playing music on them. I’ve recently dealt with estates, however, that suggest some collectors just don’t fit those stereotypes. What can you say about a guy who has guitars hidden behind a false wall in his closet that nobody knows about? Hiding guitars from the wife is one thing, but what if an impressive collection of mahogany dreadnoughts is hidden from everyone? What if a collector visits online forums and user groups but never mentions—let alone brags—about what guitars he owns, and only family members know he plays at least one of his guitars everyday? What’s that about?

Somehow describing such an urge to own several guitars seems like more than just G.A.S. (aka Guitar Acquisition Syndrome, a favorite code term in online forums). In talking to a Stanford professor who owns multiple guitars, I learned that the urge to buy yet another instrument similar to ones we already own might not be mere consumerism at all. Instead, the urge to compare similar instruments in detail is in our DNA.
martincollingssantacruz-1 (1)

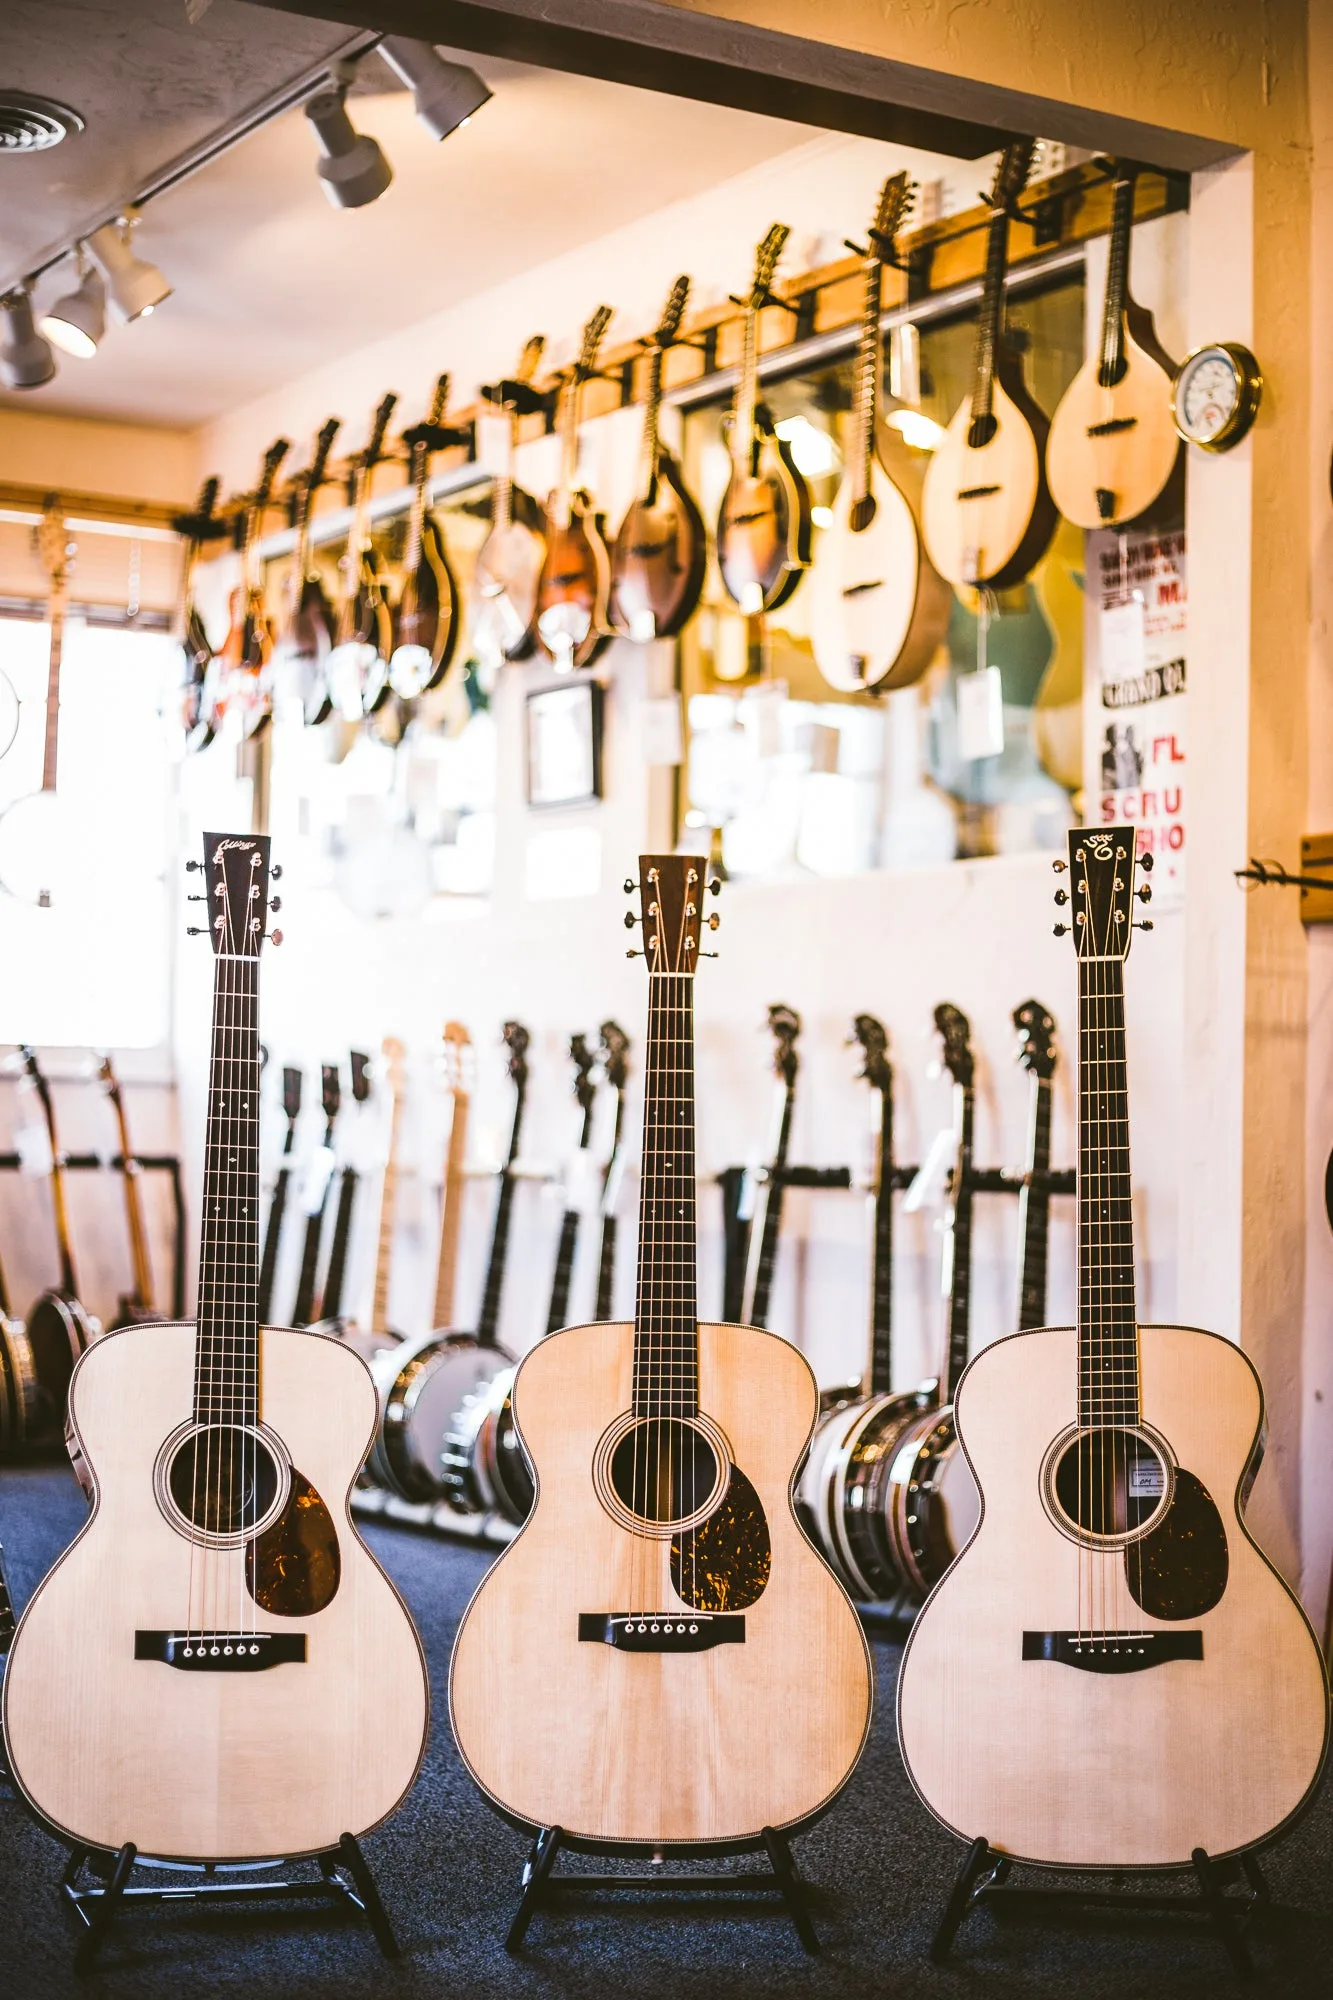
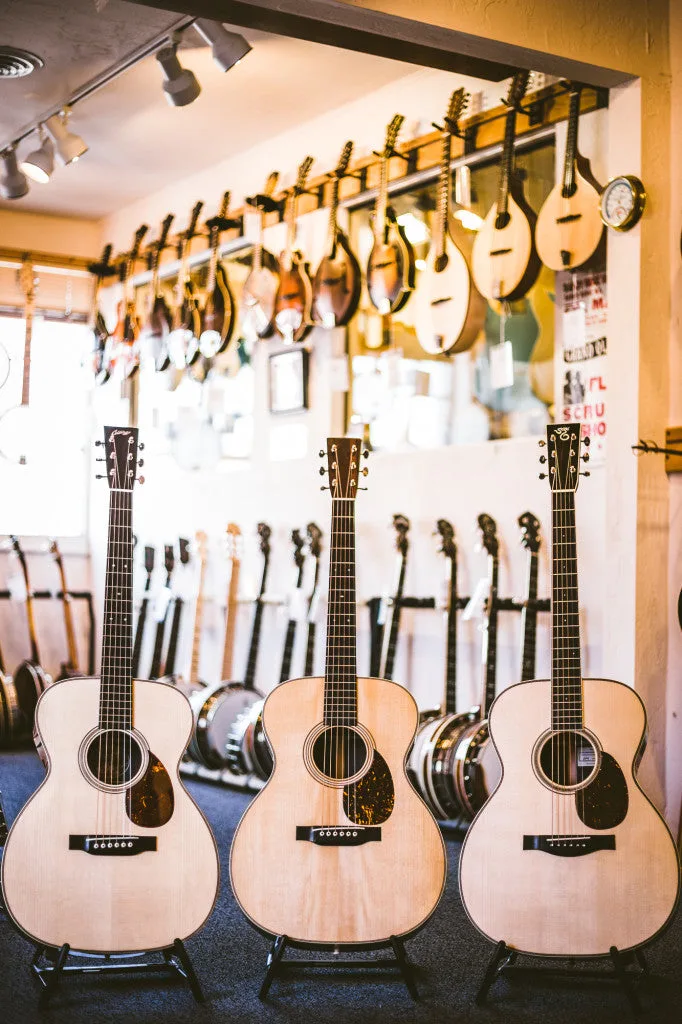
The Collings, Martin, and Santa Cruz OMs above are nearly identical in size and have similar bracing and Adirondack spruce tops but sound distinctly different.

Learning how to discern differences in things that appear to be similar is an important part of human evolutionary development. So, rather than dialing the Wayback Machine to the dawn of rock ’n’ roll and eavesdropping on the development of Les Pauls and Telecasters, let’s go back another couple of hundred thousand years.

Caveman Ben and Caveman Bob came back empty handed from the hunt, and are now gathering mushrooms since their respective families will be having soup for dinner instead of bison ribs. Caveman Bob is stronger and faster than Ben, and picks mushrooms more quickly, too, but Bob scoops up some death caps in the fading light along with the good ’shrooms. Ben’s cave family dines on thin broth and wakes up hungry the next morning, but Caveman Bob and his clan don’t wake up at all. Ben’s superior sense of smell and touch, and his urge to look carefully and critically at what he was gathering, allowed his clan to survive and his DNA to be passed down. Chances are good that Ben, and women in the tribe with similar critical abilities that anthropologists call ethnobotany, used those skills in determining what other plants were toxic and which ones had healing properties. Despite what we see on movie screens about the lives of early humans, it took more than brawny spear throwing and noggin cracking to survive.

Fast-forward to the present. Beginner Ben is a guitar player who is probably never going to take the stage or even join a jam session, but his keen ear propels him to spend hours at guitar shops testing different guitars. His pal Bob, however, is rocking up a storm in the basement and doesn’t care what guitar he plays as long as it’s loud. Thanks to the FDA and mushrooms from Safeway, Bob’s family is safe despite having to listen to “Stairway to Heaven” played on a cheap, Stratocaster knockoff with crusty strings and out-of-phase pickups. Ben is meanwhile on a tone quest and—guided by a wide range of recordings and YouTube videos from Tony Rice to David Grier and Bryan Sutton—he foregoes electric guitars and their confusing array of pickups, pots, and other factors that alter how a guitar sounds. Ben instead buys a used D-18, and soon another. He never quite gets the sound he’s seeking, but he gets a lot of enjoyment out of the search.

By reading guitar magazines like this one and visiting online forums, Ben taps into the collective intelligence of others like himself. He learns terms like “crunch” and “shimmer,” and what contributes to “bell-like tone.” He drives his local guitar shop’s repair crew crazy with questions about neck angle, action height, and TUSQ bridge saddles versus bone. And what about stainless steel frets? Or torrefied tops and hot hide glue? His endless questions are tolerated because he can’t seem to go more than a few days without buying another type of pick, or several. They could be thick picks with beveled edges, or maybe Ben’s testing classic celluloid versus polycarbonate. Be it the unslotted bridge pins or another $75 capo, Ben could stock a bluegrass-festival booth with accessories for flatpickers. He doesn’t keep any guitar for very long, but often owns a half-dozen different dreadnoughts at a time while straying to a slope-shoulder Advanced Jumbo for a while, and then to Custom 0000-size with deep sides.

In terms of his playing, this guy will always be Beginner Ben. Replicating the music of guitar heroes who drew him to the acoustic guitar in the first place isn’t what his guitar shopping is about. Instead, his satisfaction comes from testing and comparing, making Ben a lot like people who would rather taste wines than drink more than half a glass. And why not? There are lots of ways to enjoy wine, and there are lots of ways to enjoy guitars. There’s no reason that testing and comparing dreadnoughts isn’t just as valid as drowning out the banjo player’s Mastertone with one. Bill Collings and Leo Fender, after all, were the testing and comparing kind, too. If their distant ancestors ever gathered mushrooms, you can bet they only picked the good ones.

Read more from Premier Guitar Magazine…

Taylor’s New “V-Class” Top Bracing

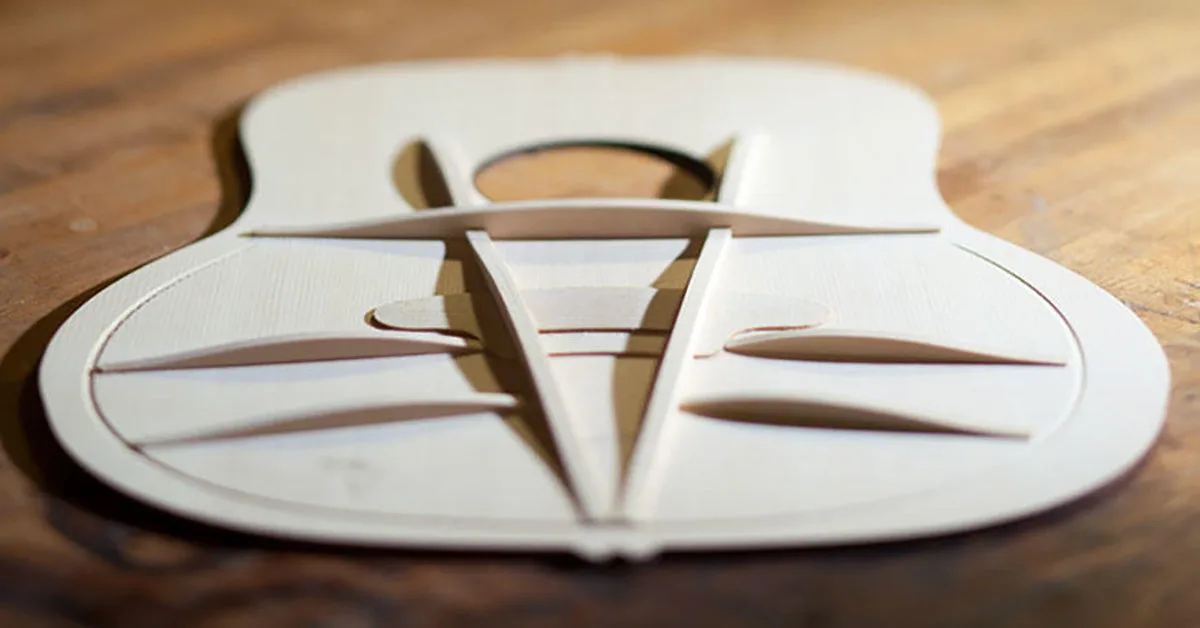
We are very excited to announce the arrival of Taylor’s new V-Class series of guitars here at Gryphon. Named for the distinctive shape of the new bracing system designed by Andy Powers, the V-Class guitars are an intriguing step forward in guitar evolution. Perhaps the most noticeable attribute of the new guitars is the increase in sustain and overall responsiveness. These guitars produce some impressive sound at the lightest touch and yet they can be played aggressively without breaking up. Another notable feature is the balance of tone up and down the neck. No matter where you play on the neck, the notes ring out clearly without any variation of timbre or volume.

Taylor V-Class Bracing

As good as the V-Class guitars sound, and they sound very good, we are perhaps more impressed with the engineering that Andy Powers has put into them. Frank Ford and Richard Johnston have been restoring and repairing guitars for almost 50 years and in that time they have seen just about every style of bracing imaginable. Tone is very important, of course, but structural stability is even more vital. The V brace delivers both. If you look at an X-braced top compared to Taylor’s V-braced top, one of the things you notice is how the upper portion of the V borders the right and left (bass and treble) sides of the soundhole, after going underneath the larger horizontal brace just below the soundhole. Compared to an X-braced top, you can see there’s a lot more bracing that’s in line with the pull of the strings on the bridge. Yes, these long continuous “legs” of that V pattern increase the guitar’s sustain, as Andy Powers points out, and at the same time that long V brace also increases the soundboard’s stability.

Since Gryphon does a lot of repair, that stability issue is a big deal to us. We’re constantly dealing with problems that result when a guitar’s soundboard just can’t withstand the strain of a set of steel strings pulling on the bridge (a set of light gauge strings exerts over 150 lbs of “pull” on a pin bridge). The top bulges behind the bridge under the strain, the top sinks in front of the bridge as that bridge rolls forward under string tension, and often the top gets distorted around the soundhole because right where the top needs to be strongest, there’s a big (sound) hole! This flexibility where you don’t want it also increases the chance of the string action going up and down depending on how the soundboard reacts to changing humidity levels.

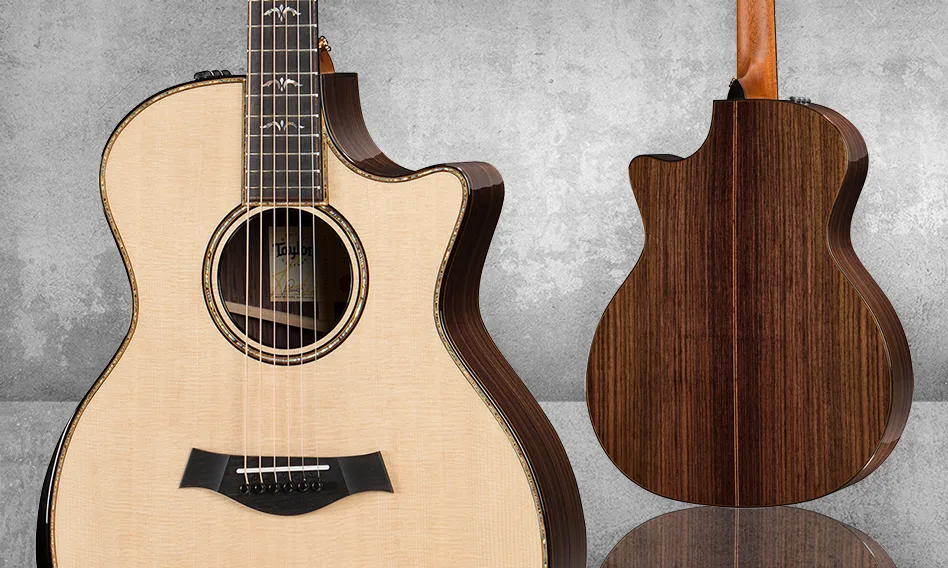
Taylor V-Class 914ce GuitarTaylor V-Class 914ce Guitar

We agree that Taylor’s new V-Class guitars sound both different and impressive when compared to a typical X-braced acoustic guitar of similar size and materials, but we feel players will also benefit from a guitar that’s far less likely to need adjustment or repair in order to be optimally playable. If you look at the design, you can see these V-braced Taylor soundboards are a lot stronger, but only where they really need to be. To increase the guitar top’s stability while at the same time improving the volume and sustain is quite an achievement, and so far everyone at Gryphon loves the sound of the V-Class 914ce Taylor sent us. We can’t sell it yet, but you can play it. We’ll be posting videos soon, but there’s nothing like playing a guitar yourself and we hope you’ll do just that.


Read more about Taylor’s V-Class™ Bracing »


Adapting Waverly Tuners

Frank Ford –

The patient is a venerable 1932 Martin OM-28  –  a guitar that has been known for decades as a holy grail of fingerstyle guitars. Unfortunately, the original Grover tuners used on this model were made with a “double lead” worm gear which resulted in a 6:1 gear ratio.  As these tuners wear, they tend to loosen to the point that they really don’t hold the tension of steel strings adequately.  For an active player, these 6:1 tuners are quite a burden, so we often replace them with modern, higher ratio, better quality tuners.

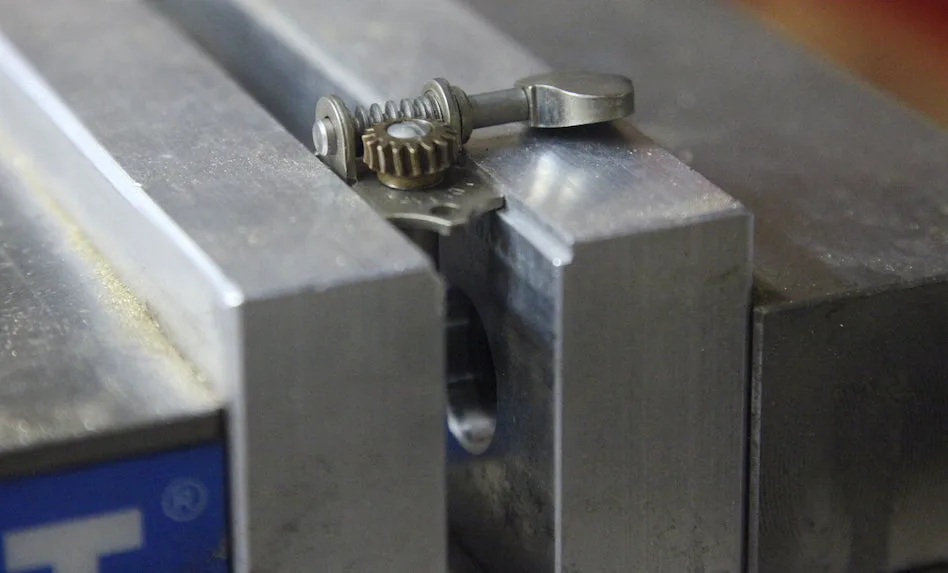
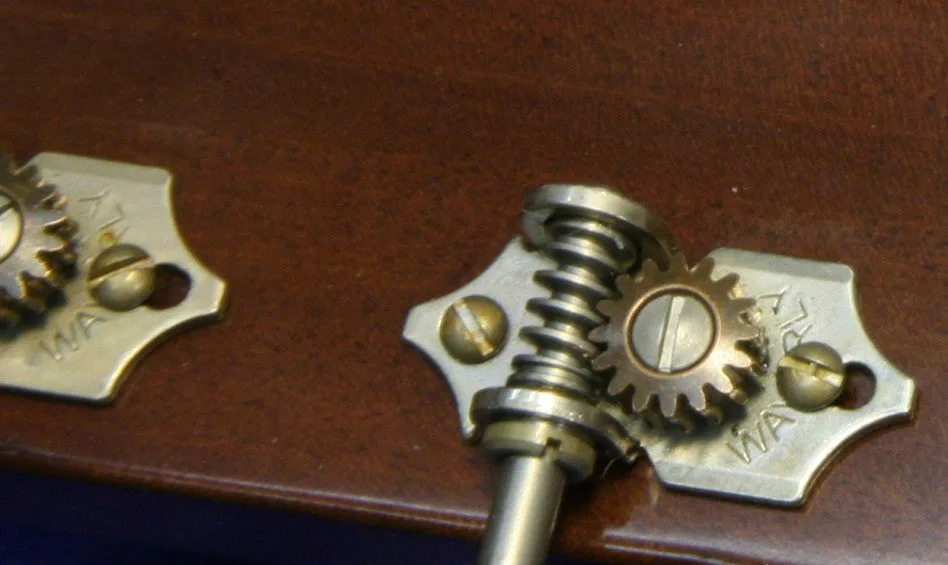
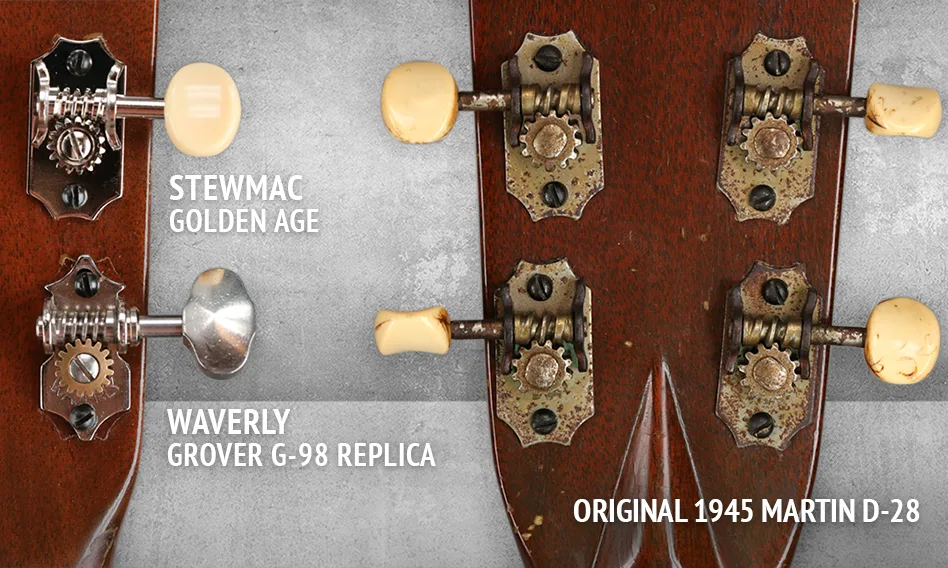
In recent years, some of the best replica vintage style tuners have been made by Stewart MacDonald under the Waverly trademark.   Accurately styled to look like the prewar Grover tuners used on many vintage guitars, these tuners have gained favor among musicians the world over.  But, the mounting plate doesn’t match up with the very early 6:1 design (on the left in the photo above), and the screw holes are located such that  they might require drilling new screw holes in the peghead of a valuable collectible guitar.   Rather than filling and drilling holes in the instrument, I’d much rather modify the replacement tuners.  Whenever possible I like to adhere to the “principle of reversibility,” allowing for a return to the original state in the future should it be desirable to do so.

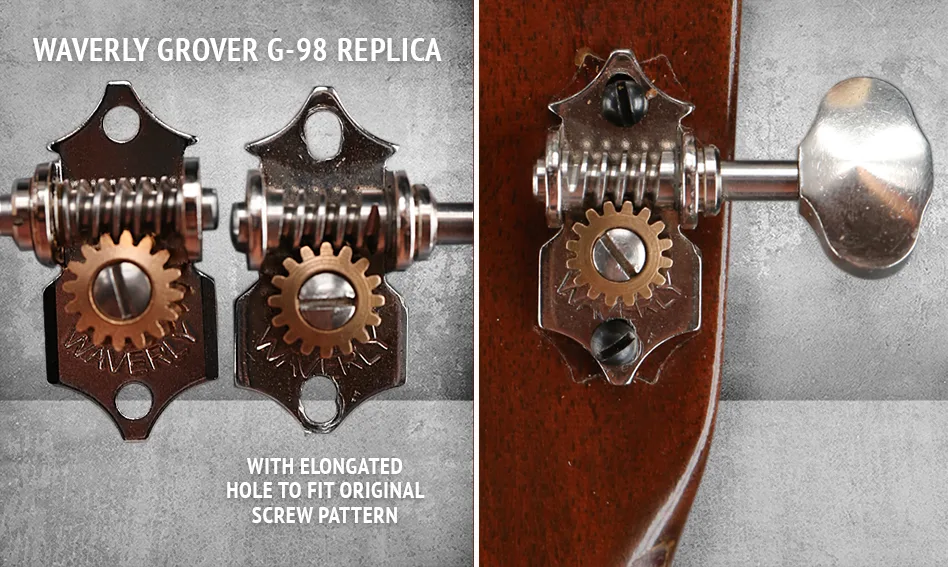
In this case, I think the easiest and most reasonable approach is to enlarge the holes in the tuner plates so they can be mounted and removed easily with no damage to the guitar.  Mounting the new tuners in this manner will make it possible to reinstall the original tuners with no sign that the instrument ever had the tuners changed to modern ones.


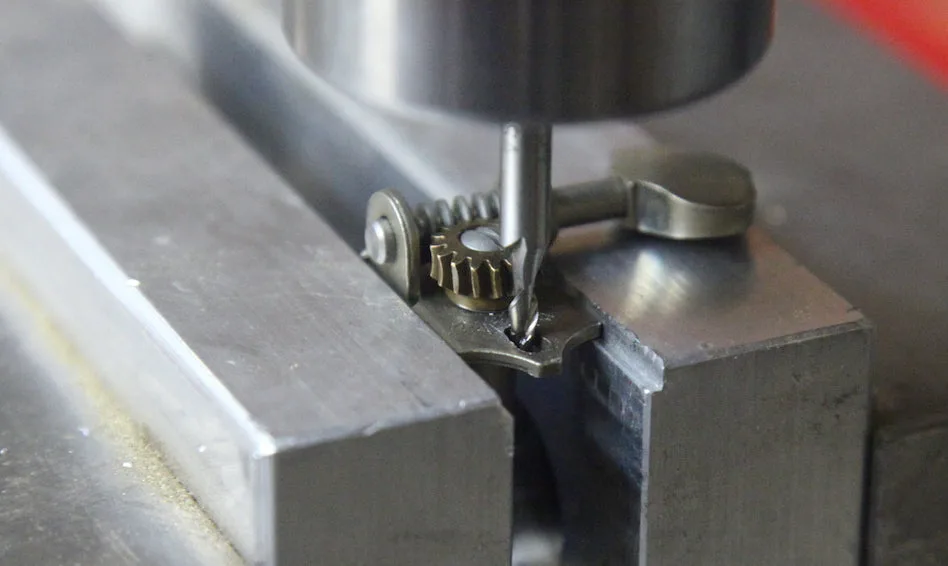
I do this job often enough that I modified the jaws of my milling machine vise to hold the tuners safely and rigidly:

waverlymod01


Then, it’s a quick bit of milling on each hole, enlarging it to a slot that will allow the tuner to be screwed in place without relocating holes in the guitar peghead.  Lowering the mill ing cutter into the mounting screw hole, I can advance the work into the cutter to elongate it:

waverlymod02

Years ago, I often did this same job with a tiny needle file.  The milling machine makes it go a bit more neatly, and a lot more quickly.

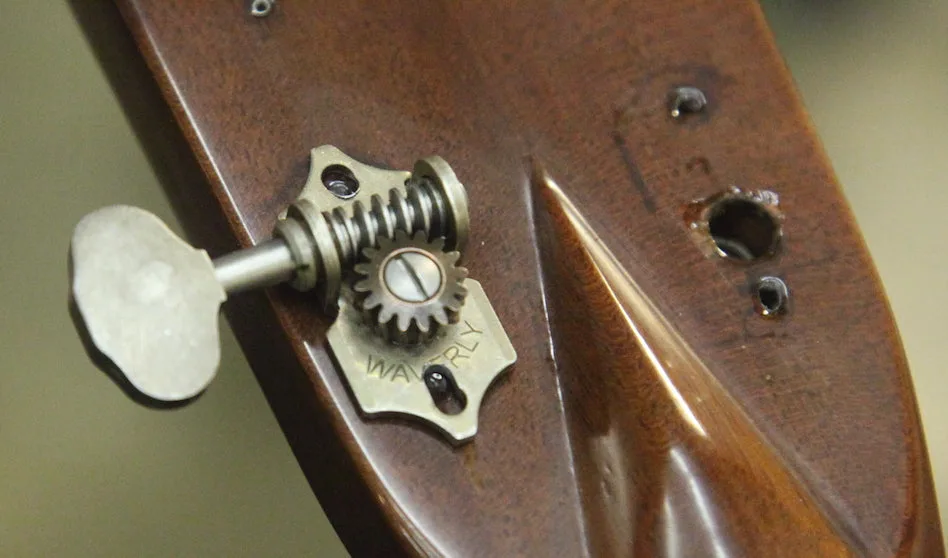
Here, you can see the tuner in place, revealing the original holes through thee longated slots:

waverlymod03


Once they are screwed down, the tuners look pretty good on this old timer.   I used the Waverly model 4076 with the optional “aged” nickel finish so the hardware would not stand out too much on a guitar that was made a dozen years before I was born:

waverlymod04

Even the tiny mounting screws have a nice aged patina.

Back to the Future of Open-Back Banjos

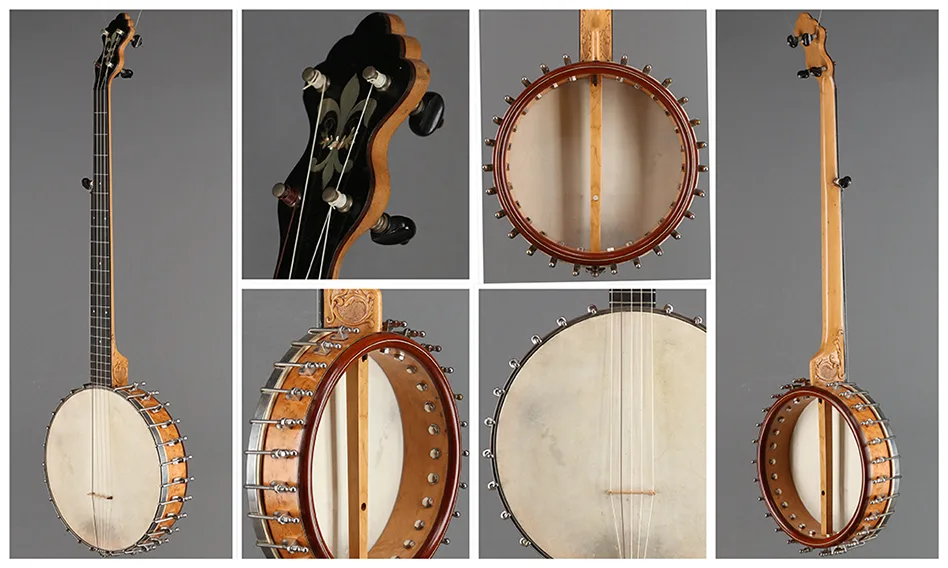
Often regarded as America’s indigenous instrument, the banjo has a complex history. That’s not surprising when you consider that it’s been a big part of American music since at least the 1830s. Over the decades, banjos have evolved into a bewildering array of styles including open four-string and plectrum banjos, five-string banjos, as well as banjos with guitar, mandolin or ukulele necks. The earliest instruments came to our shores as part of the slave trade. Like so many other parts of our culture, the banjo started as an immigrant.

In their most basic form, the early banjos had a short drone string fastened part way up the neck, and most of them had five strings in total, although other configurations existed. All these instruments had a round body with a string head, and were strung with gut strings. At the time of the Civil War, banjos were tuned considerably lower than the steel string banjos of today.


c.1900 A.A. Farland Concert Grand Banjoc.1900 A.A. Farland Concert Grand Banjo »


As banjos gained popularity, they were often produced in small factories. Experimentation and evolution produced a variety of attempts to improve the tone and volume. Particularly around the turn of the 20th century, any number of patents were issued for such improvements, and there was fierce competition between different brands.

Banjos were made with wooden rings, or “shells” equipped with metal tensioning bolts to draw the head tight, and many also sported metal covering or metal structures over which the heads were stretched. Such “tone rings” modified the sound of the banjo and were often proprietary to individual manufacturers.


Banjo ShellsShells: 1) Thin, lightweight wood, 2) “spunover” nickel clad wood, 3) heavy wood, 4) “spunover” raw brass clad wood
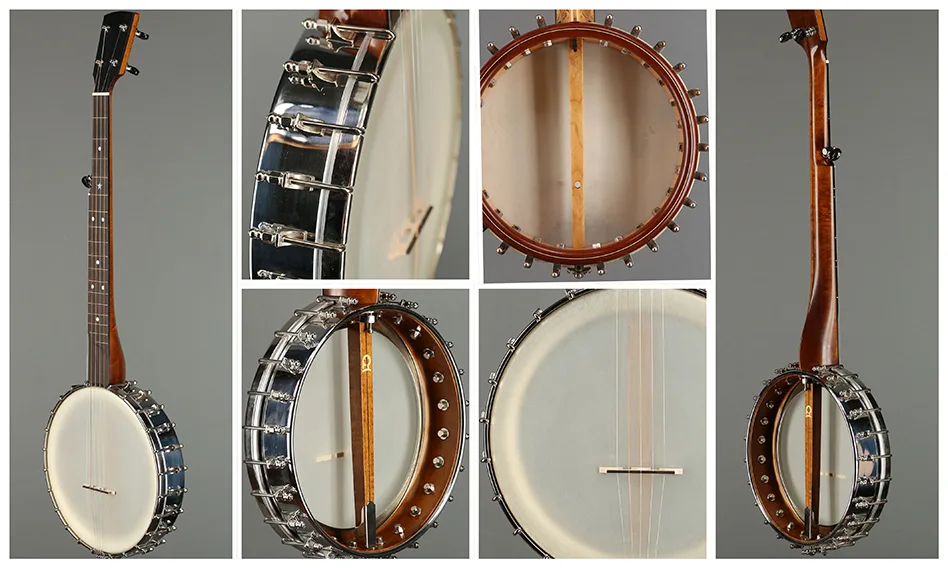
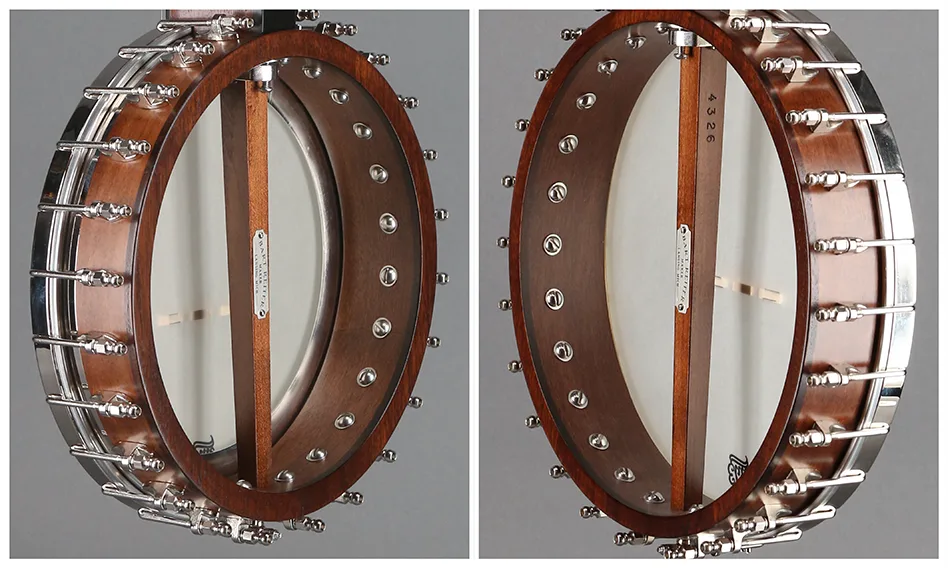
 

Those tone rings and shell configurations really do have an effect on tone, but exactly how they work is somewhat of a mystery. Many of the designs have been abandoned over the years, only to return recently in modified forms.


Rickard 11" Banjo, Nickel plated spunover, Dobson tone ring Rickard 11″ Banjo with Dobson-style tone ring and Nickel plated spunover (NEW) »


There is far more variety in open-back banjos than you might think. The body, also called the pot, comes in different sizes and weights. These variations account for the differences in tone you hear from ‘sharp and snappy’ to ‘plunky.’ This variation in tone is the result of the size of the pot and whether or not the pot includes a tone ring.


Bart Reiter Bacophone 11" vs. Round Peak 12"Pot Size Differences: Bart Reiter Bacophone 11″ vs. Bart Reiter Round Peak 12″
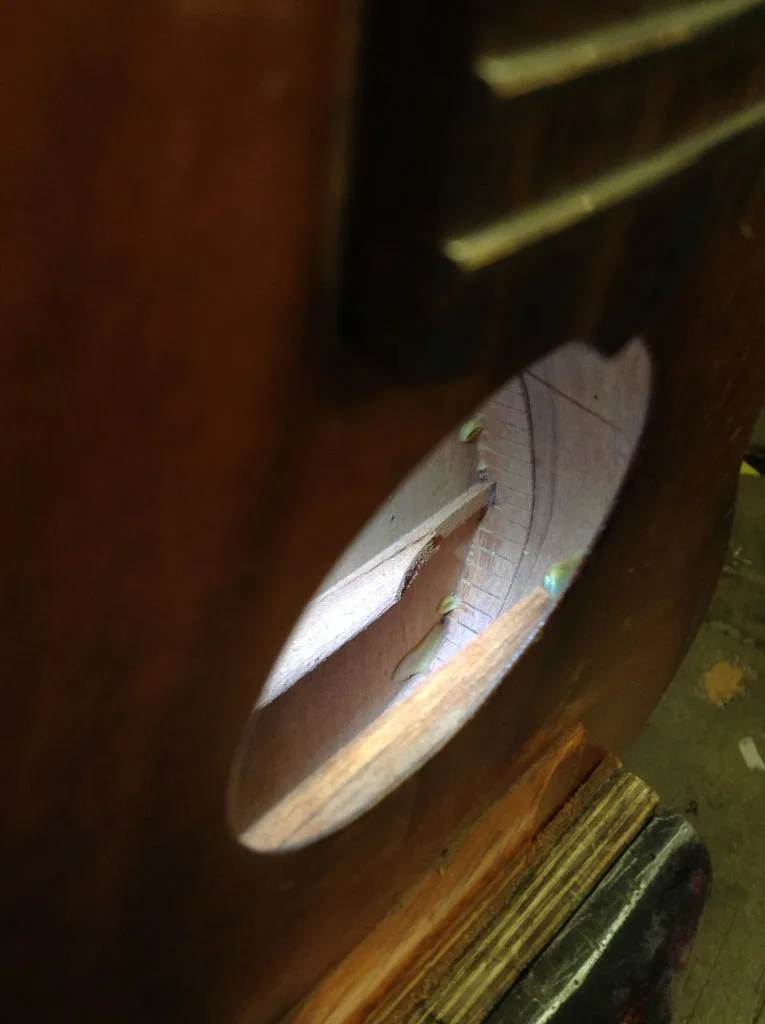
 

In its simplest form, a tone ring is a metal hoop that fits over the pot and under the head, adding mass and weight. This changes the volume and sharpness and brightness of the sound. The more mass, the sharper the tone. Bluegrass banjos have the heaviest tone rings of all, and have the loudest and snappiest tone. The other factor, the size of the drum head, has a similar influence. The bigger the head, the lower the frequency response and deeper and mellower the tone.

What size head and tone ring is right for you depends on what kind of music you are playing. For those of us that grew up in the sixties and seventies, the two most popular open-back banjos were made by the Vega company in the early part of the 20th century.


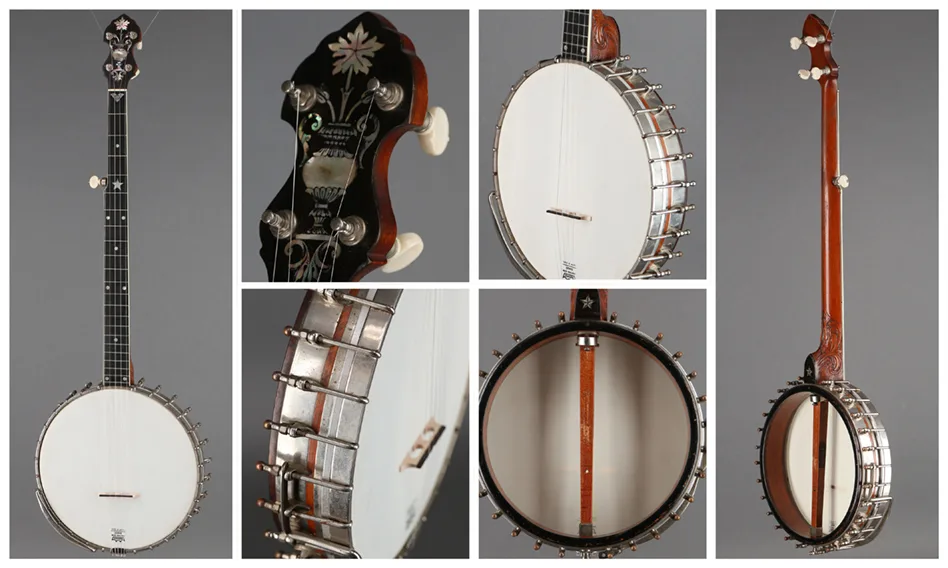
1913 Vega Tubaphone No. 3 Banjo (Whyte Laydie TR)1913 Vega Tubaphone No. 3 Banjo (Whyte Laydie TR) »


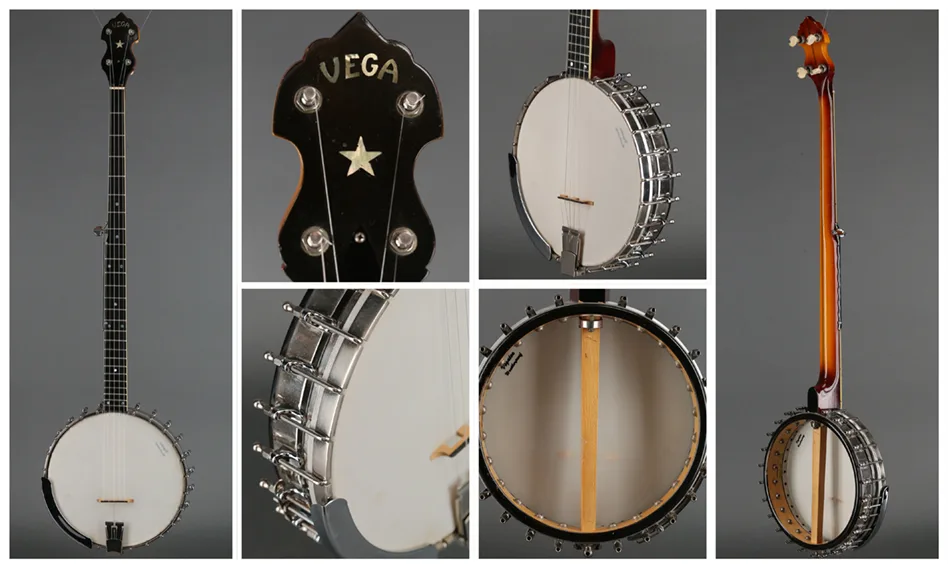
One was the ‘Tubaphone‘ and the other was the oddly named ‘Whyte Laydie.’ (The Whyte Laydie was made of blond maple, which was new in Vega’s production at the time, and took its name from the pale color of the wood.) Both of these have fairly heavy tone rings making them the loudest open-back models with the most projection. They are great for old-time string band music and work well for solo banjo players, as well. For years, most modern open-back banjo makers based their designs on one of these two instruments.

The professional grade Vega banjos, such as the Whyte Laydie, used an external bracket band around the exterior of the rim, providing great strength to allow the tightest head and strongest voice possible.


1961 Vega PS-5 Pete Seeger Banjo1961 Vega PS-5 Pete Seeger Banjo »


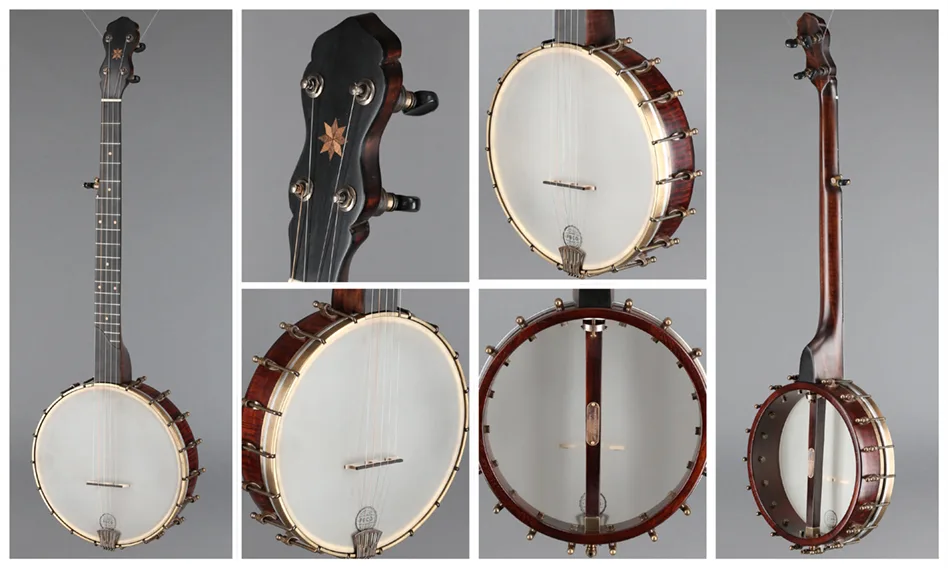
Pisgah Wonder 11", Short Scale, S-Scoop, Curly Maple BanjoPisgah Wonder 11″, Short Scale, S-Scoop, Curly Maple Banjo (NEW) »


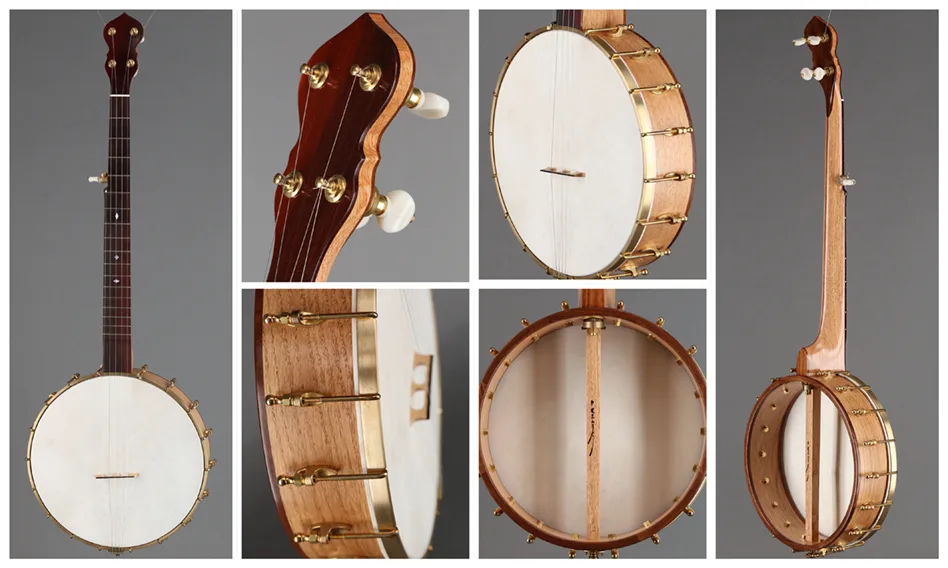
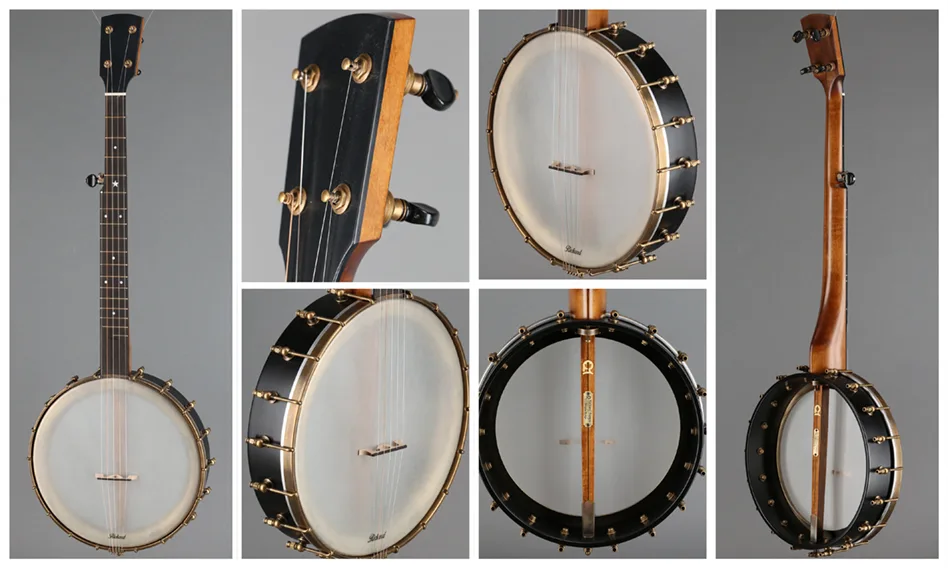
Recently, a more soulful style of playing has evolved among singer-songwriters looking for a subtler sound to accompany their vocals. There has also been a revival of old-time string band music and a growing interest in music from the 19th century. Consequently, lighter weight banjos with bigger (12 inch) heads have become quite popular. These banjos produce a warmer, sweeter tone and many of them have no tone ring at all and have the head simply pulled down over the wooden shell. Although this style of banjo may seem new, it’s actually a throwback to the instruments of the 19th century. These new (that is old) banjos are very plain with little or none of the fancy inlay decorating the neck and headstock that came into vogue in the early part of the 20th century. Many of them are based on the work of 19th century luthiers like Dobson, Boucher and Ashborn. In keeping with the antique asthetic, the shiny nickel plating common on modern instruments has been replaced by antiqued brass. This return to an older aesthetic has produced some of the nicest looking and sounding banjos to date.


Waldman 12 inch Oak BanjoWaldman 12 inch Oak Banjo (NEW) »


Rickard Maple Ridge 12" Banjo, Antiqued brass hardware Rickard Maple Ridge 12″ Banjo, Antiqued brass hardware (NEW) »


Here at Gryphon we stock a variety of these instruments from a number of makers. Private builders include Rickard (Canada) and Waldman (California). Factory makers include: OME (Colorado), Bart Reiter (Illinois), Pisgah (North Carolina), Deering (California), and Recording King (China).


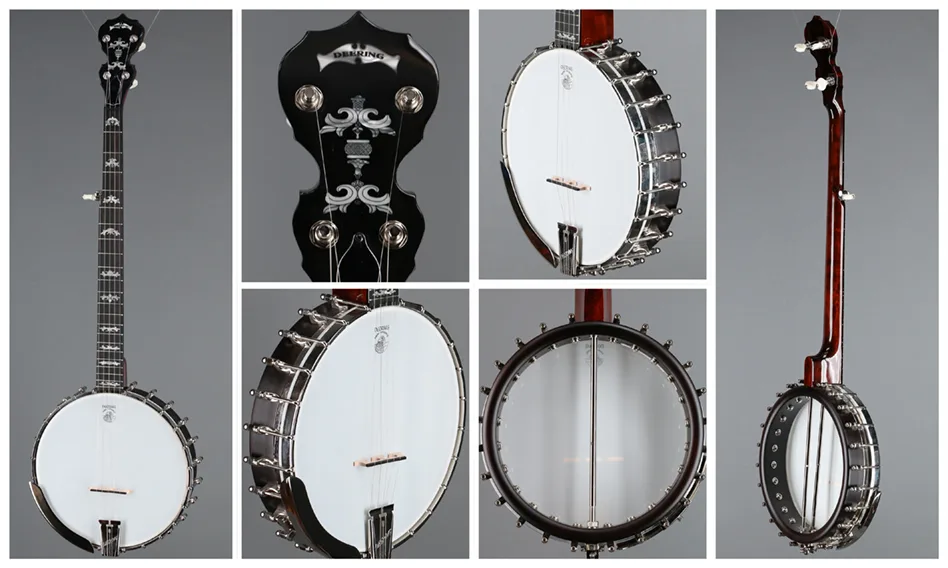
Deering Eagle II Openback BanjoDeering Eagle II Openback Banjo (NEW) »


Shop Open Back Banjos at Gryphon »

New World Guitars

Kenny Hill has been building classical guitars since 1972. His New World Guitars brand was established in the early 2000s to bring easy-to-play, attractive, high quality instruments crafted of the best materials to players at affordable prices.


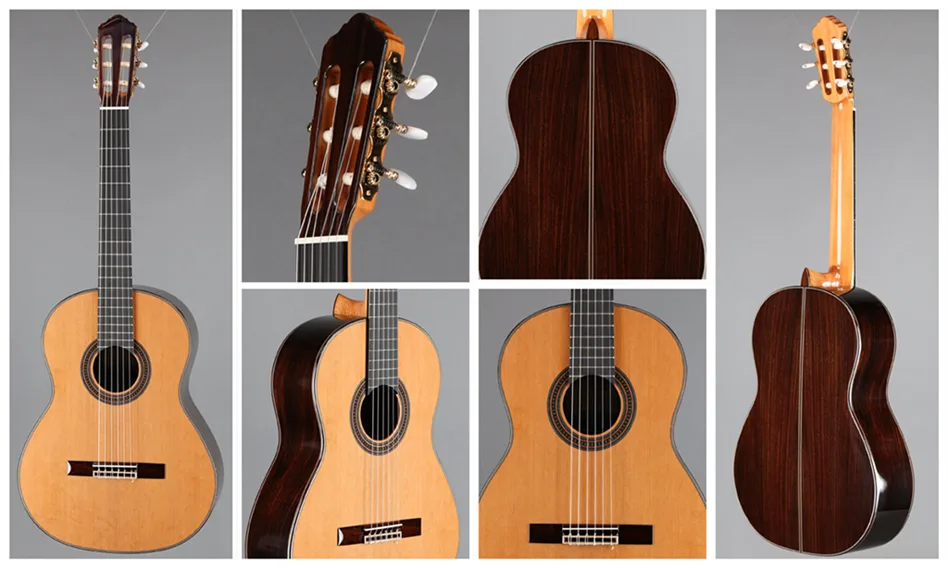
New World Guitar Player P640CNew World Guitar Player P640C »


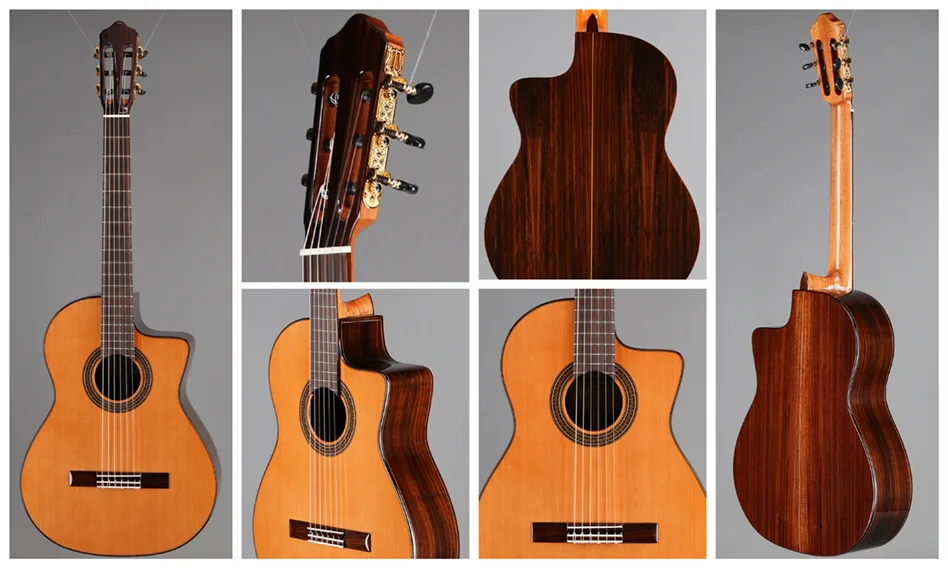
The New World Guitar Player series offers premium solid woods and features at a more accessible price. This Player P640C features a 640mm scale length, with a top of solid Western Red Cedar, solid Indian Rosewood back and sides, and an ebony fretboard. Hard case included.


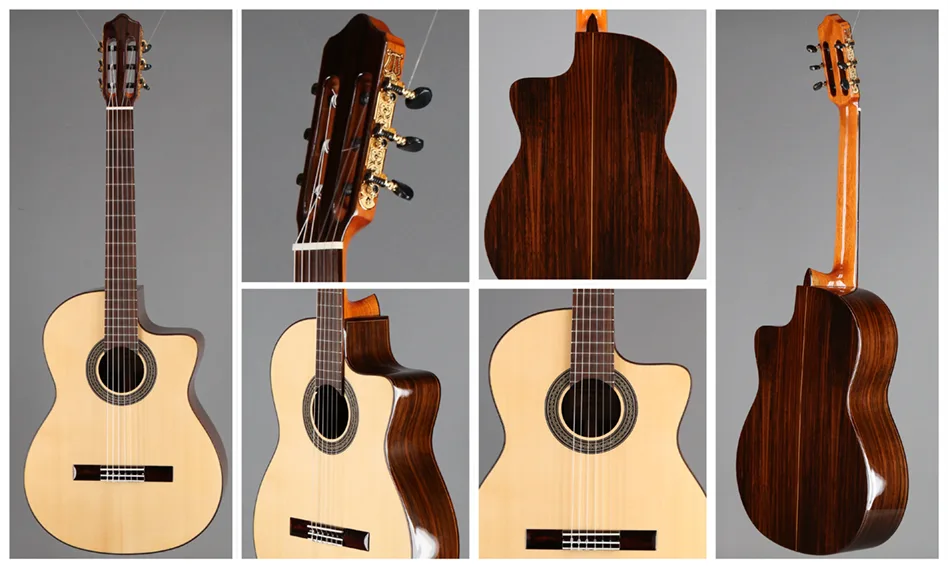
New World Guitar Estudio 650 SFSNew World Guitar Estudio 650 SFS »


The Estudio Series guitars look, sound and play like much higher priced instruments, with a select solid wood soundboard. While at a price point attractive to students, these guitars are a good fit for any level of player. This Estudio 650 SFS features a solid Spruce top, laminated Indian Rosewood back and sides, and a Rosewood fretboard. Comes with its own gig bag.


New World Guitar Estudio 650 CFSNew World Guitar Estudio 650 CFS »


This Estudio 650 CFS features a solid Red Cedar top, laminated Indian rosewood back and sides, and a Rosewood fretboard, with a 650mm scale length. Gig bag included.

See the current selection of New World Guitars at Gryphon Strings »

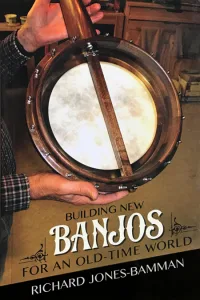
Building New Banjos for an Old-Time World

Richard Jones-Bamman is more than just a close friend of Gryphon – he was a partner in the business for half a dozen years in the early 1980s, and we’ve kept in touch since those days. A serious historian, musician and academician, he was always keenly interested in the classic five string banjos of the 19th and early 20th centuries. We’ve spent countless hours together examining and talking about those great old-time banjos.

His new book is a fine exploration of contemporary makers of instruments that have captivated a new generation of traditional old-time banjo players, many of whom choose gut or nylon stringing, fretless fingerboards and other vintage appointments.

Building New Banjos for an Old-Time World

Artisans building musical instruments and community

building-new-banjos-book-450Banjo music possesses a unique power to evoke a bucolic, simpler past. The artisans who build banjos for old-time music stand at an unusual crossroads–asked to meet the modern musician’s needs while retaining the nostalgic qualities so fundamental to the banjo’s sound and mystique.

Richard Jones-Bamman ventures into workshops and old-time music communities to explore how banjo builders practice their art. His interviews and long-time personal immersion in the musical culture shed light on long-overlooked aspects of banjo making. What is the banjo builder’s role in the creation of a specific musical community? What techniques go into the styles of instruments they create? Jones-Bamman explores these questions and many others while sharing the ways an inescapable sense of the past undergirds the performance and enjoyment of old-time music. Along the way he reveals how antimodernism remains integral to the music’s appeal and its making. He also delves into the omission of African Americans–the originators of the banjo–from both the instrument’s popular history and the nostalgia engendered by the music, and the role contemporary banjo builders are playing to rectify this situation.

“The issues raised by Jones-Bamman and the information he provides to aid in their discussion have never been brought together in one volume. A significant addition to the literature.” –Bob Carlin, author of Banjo: An Illustrated History

“Completely unique in his focus on present-day banjo makers and the cultural significance of the banjo for builders and players today. Jones-Bamman shows us how the banjo taps deeply into conflicting ideas about modernity and the USA’s checkered past.” –Timothy J. Cooley, author of Surfing about Music

Paperback, measures 6 x 9 inches. 288 pages. 33 black & white photographs, 5 line drawings. Published by University of Illinois Press, ISBN 978025208284.

About the Author:
Richard Jones-Bamman is emeritus professor of music at Eastern Connecticut State University.

Buy ‘Building New Banjos for an Old-Time World’ »

Shop Banjos at Gryphon »

Koa Crunchtime: Ukulele Restoration

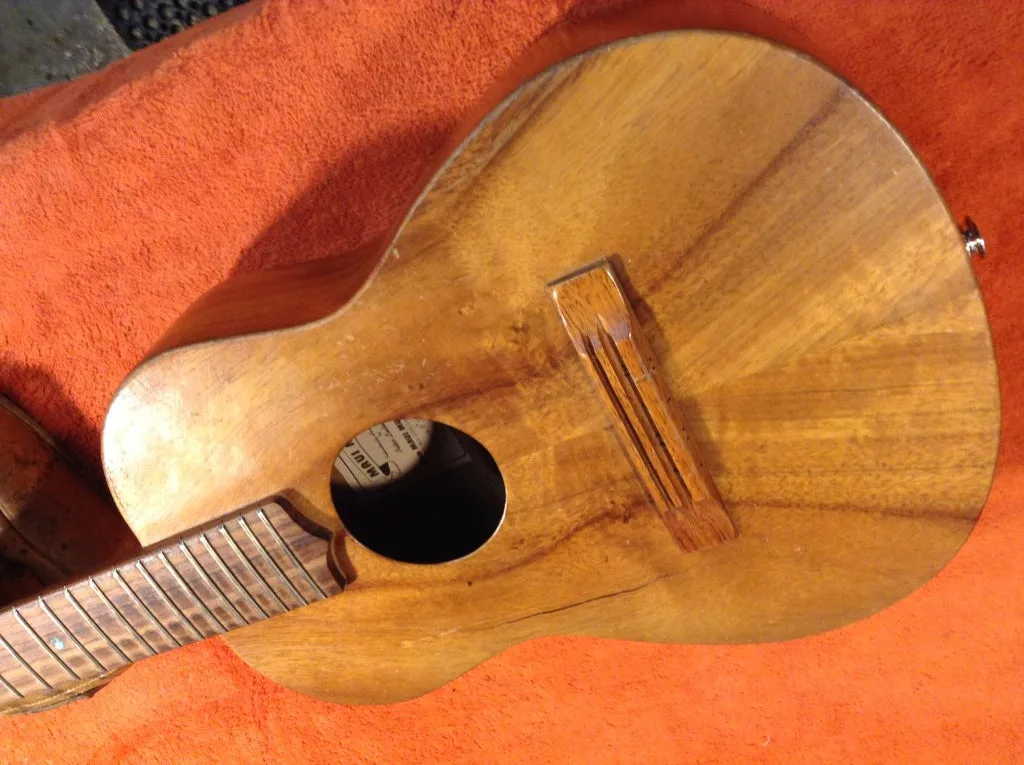
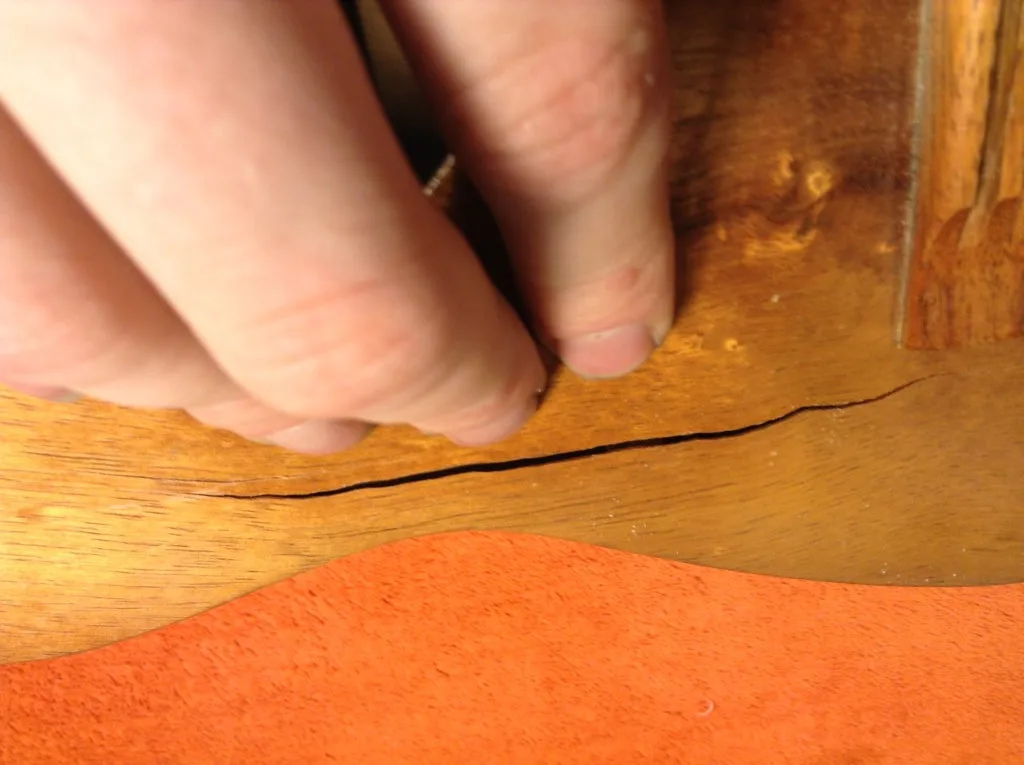
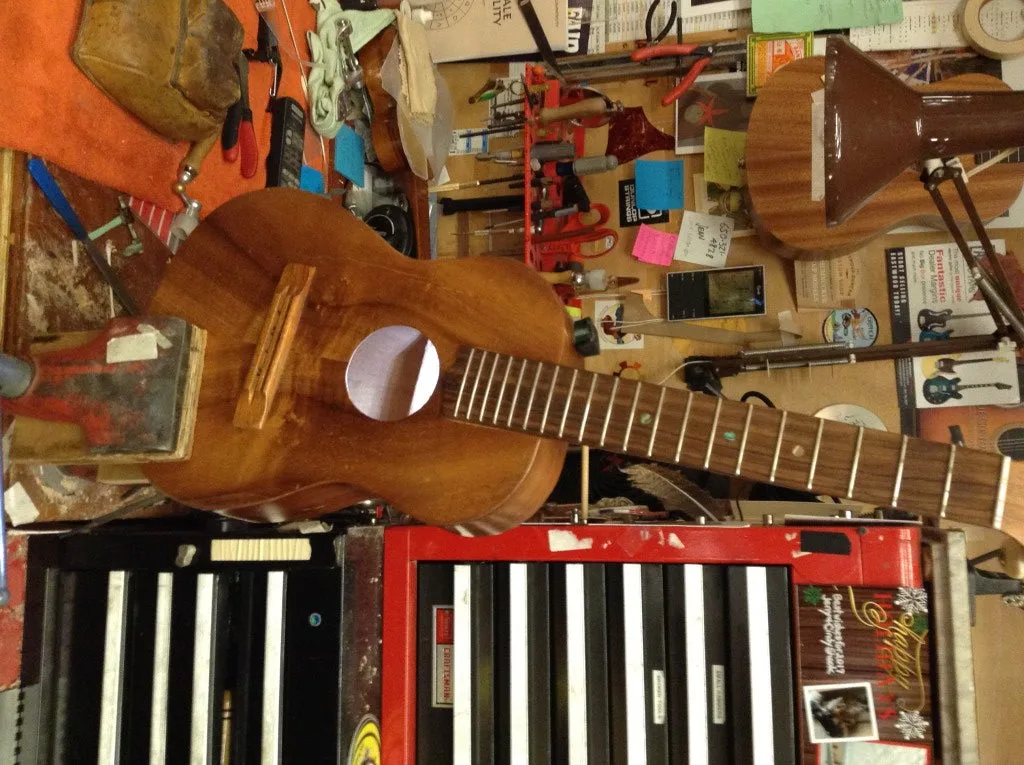
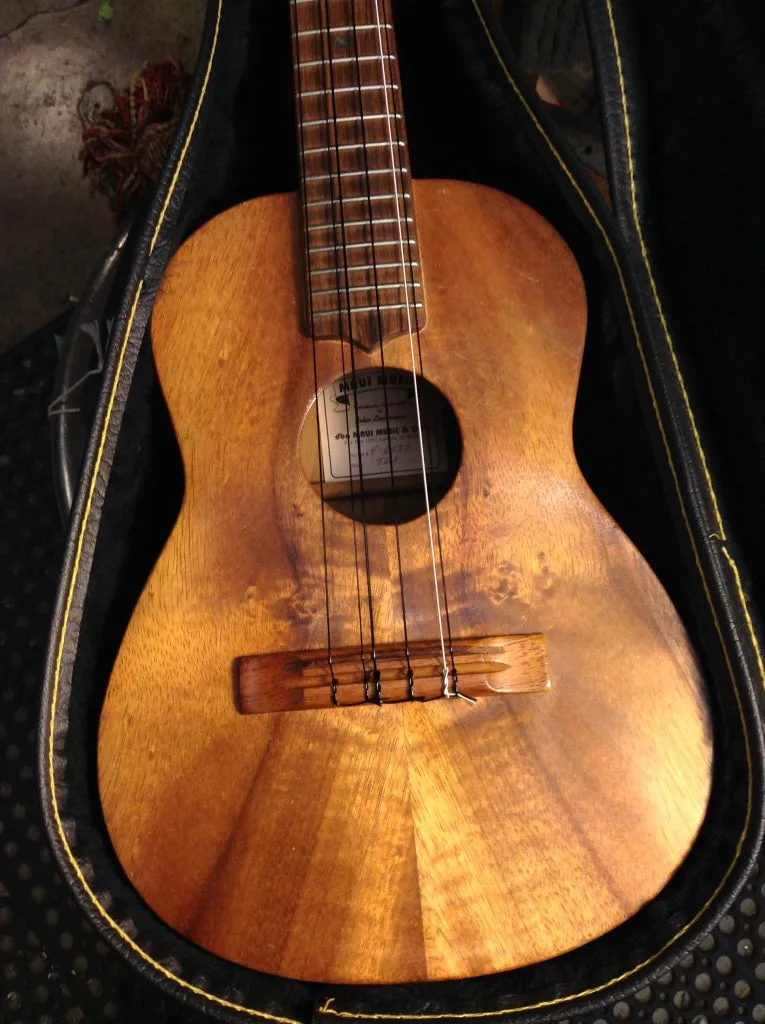
This koa Maui ukulele has a pretty significant top crack, and cracked back brace.

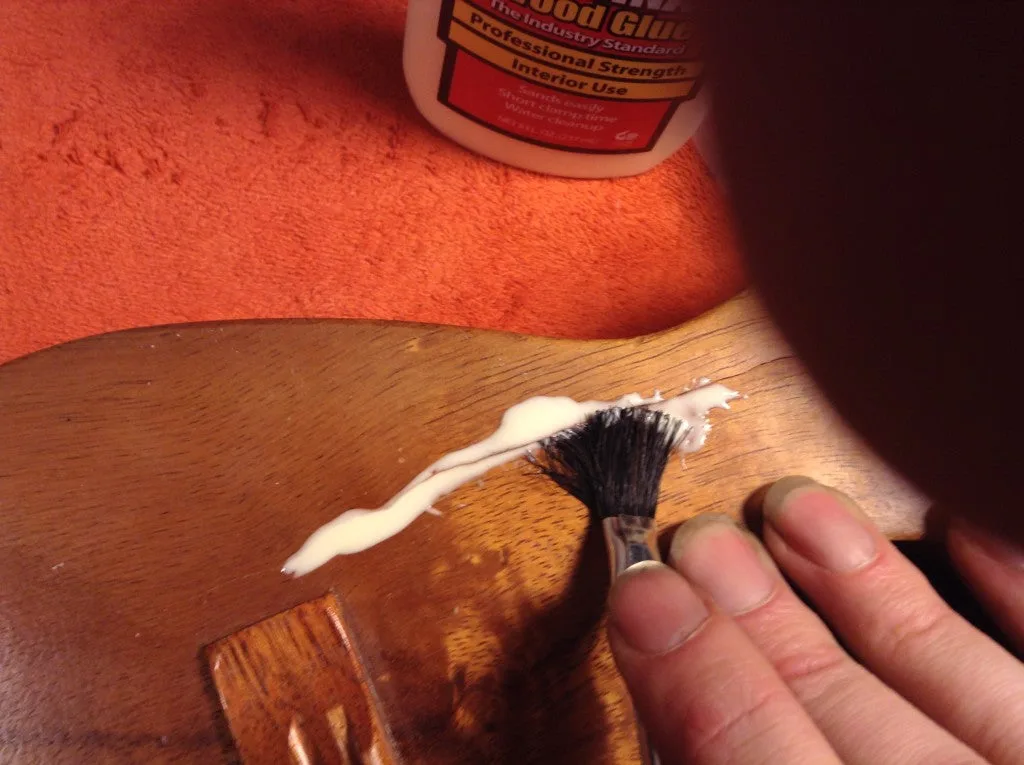
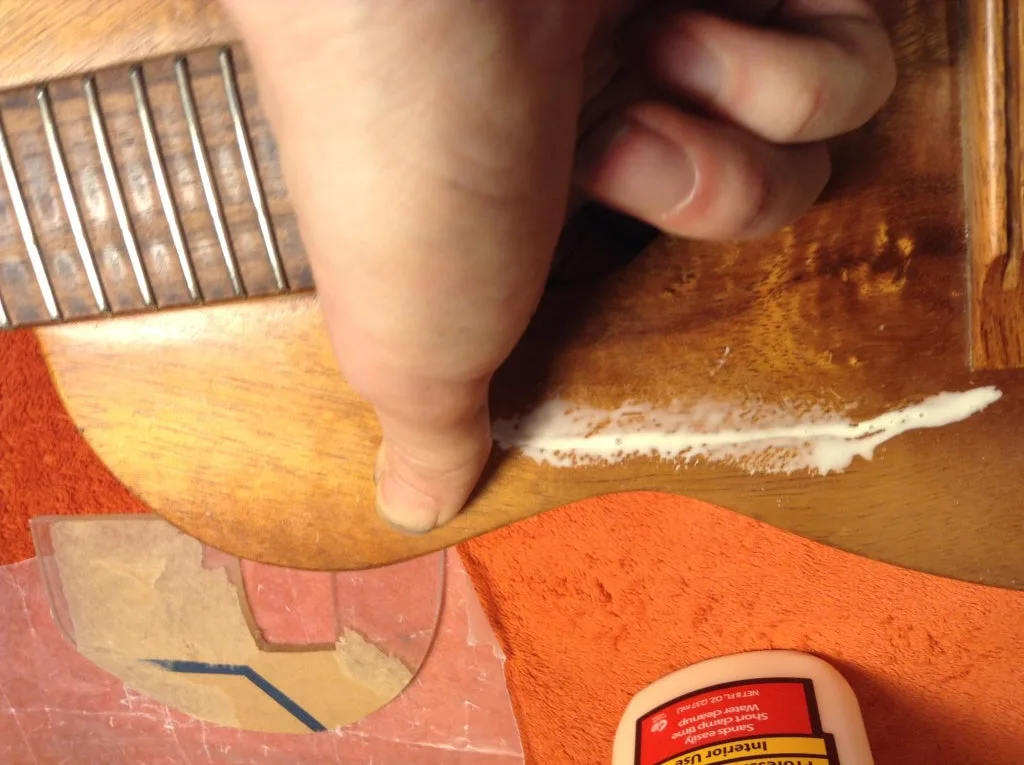
First I’m going to glue up this crack, before it gets any worse.

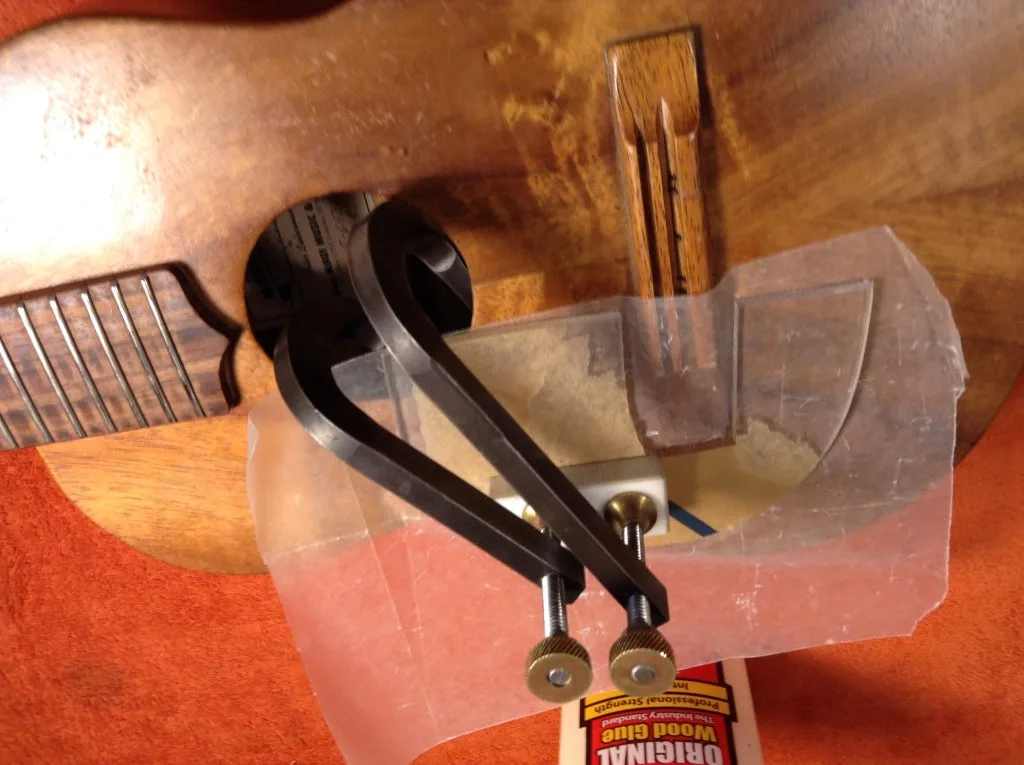
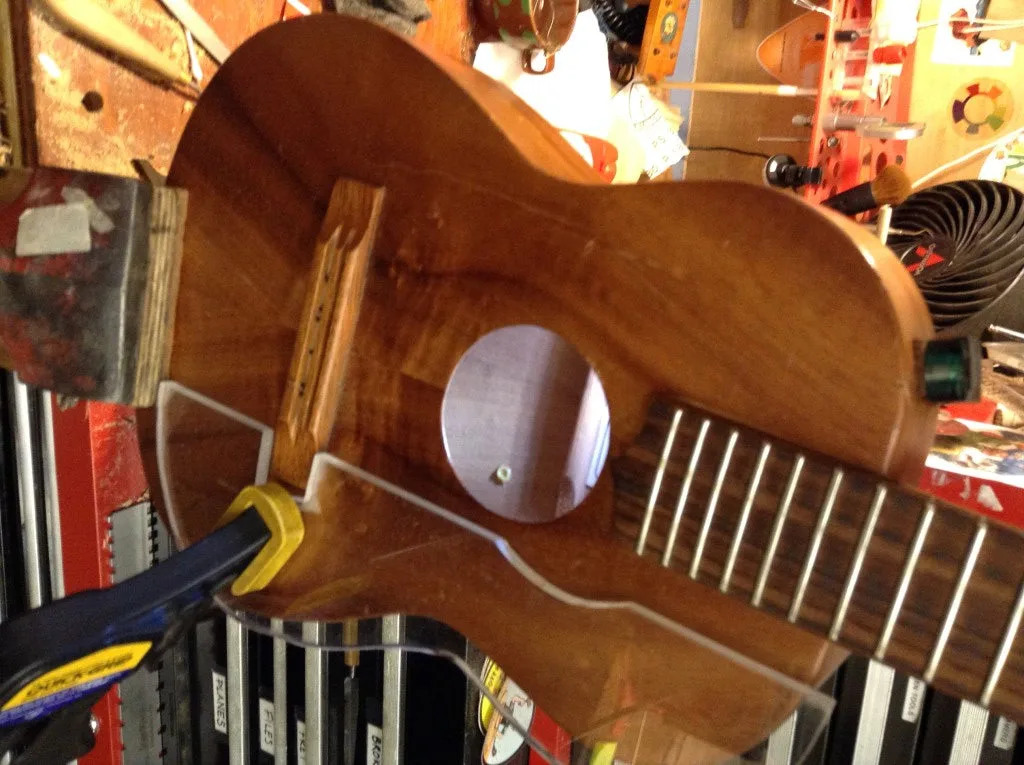
We make pretty much all the clamping cauls from scratch here at Gryphon- there’s a huge variation of repair jobs, we often make the caul as part of the job. The caul keep things all on the same plane, and enables the clamps to be good and tight without denting the wood or finish. It has a cutout for small uke bridges and fits most small body contours. I then add a block to focus the tension in this isolated area.

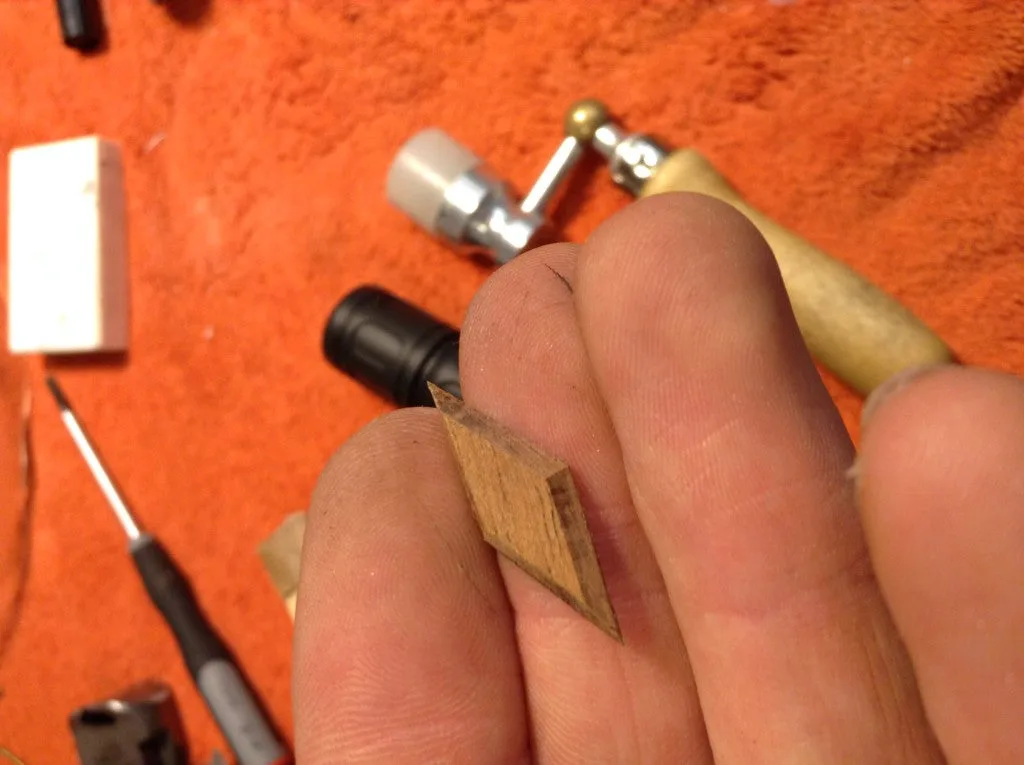
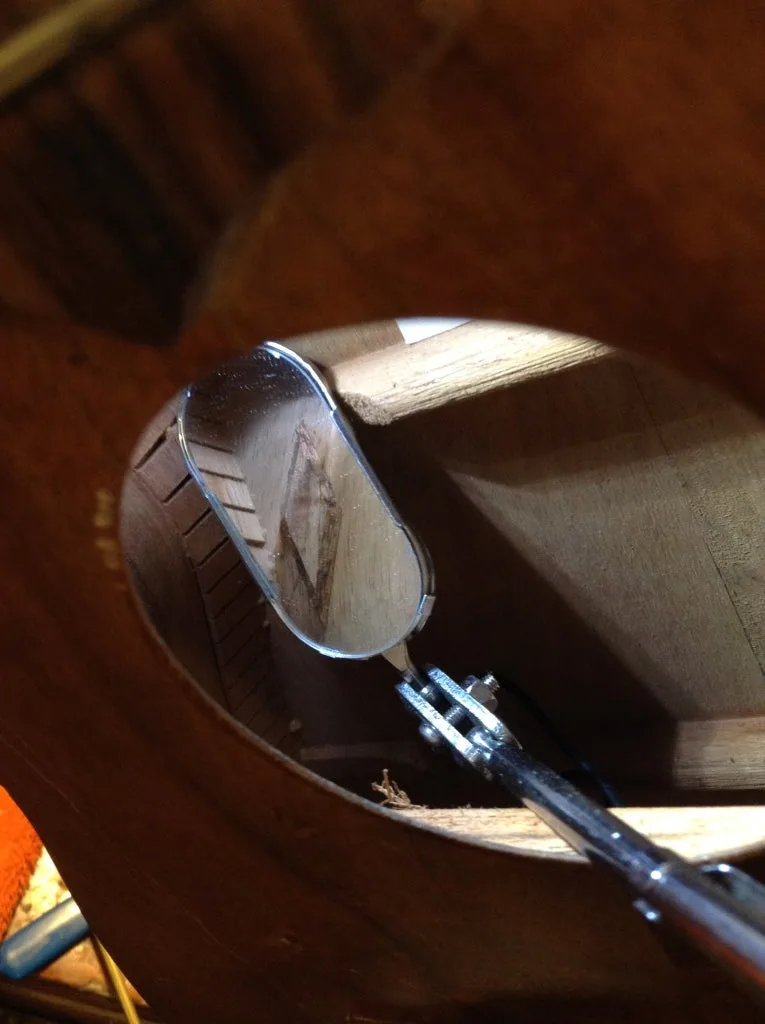
Next up is reinforcing that top crack. I made a faceted diamond cleat out of Koa seen here. It’s a little thick at the moment, but I will sand it a bit once it’s in place to clean it up and make it look a little more at home.

I missed the shots of installing the cleat, but here it is in place.

Now I can start working inside. I have a homemade magnetized flashlight ideal for this type of thing. It frees up a hand, and that’s especially useful when dealing with a small instrument with a small soundhole.

Now we’ll take a look inside and see what’s going on.

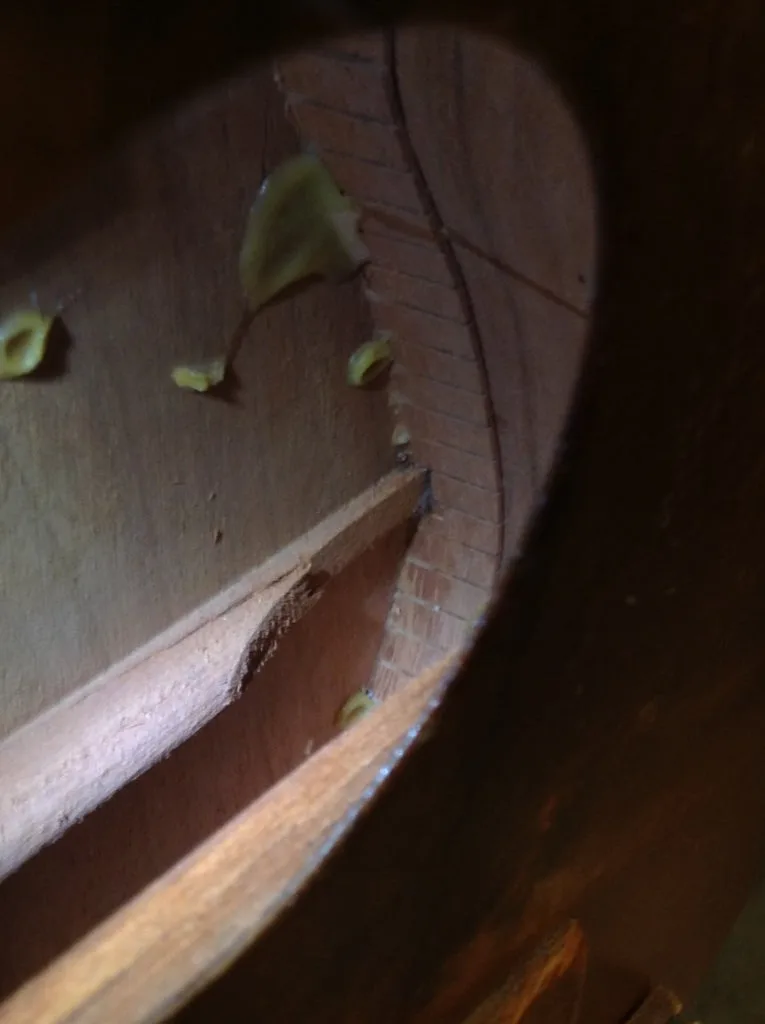
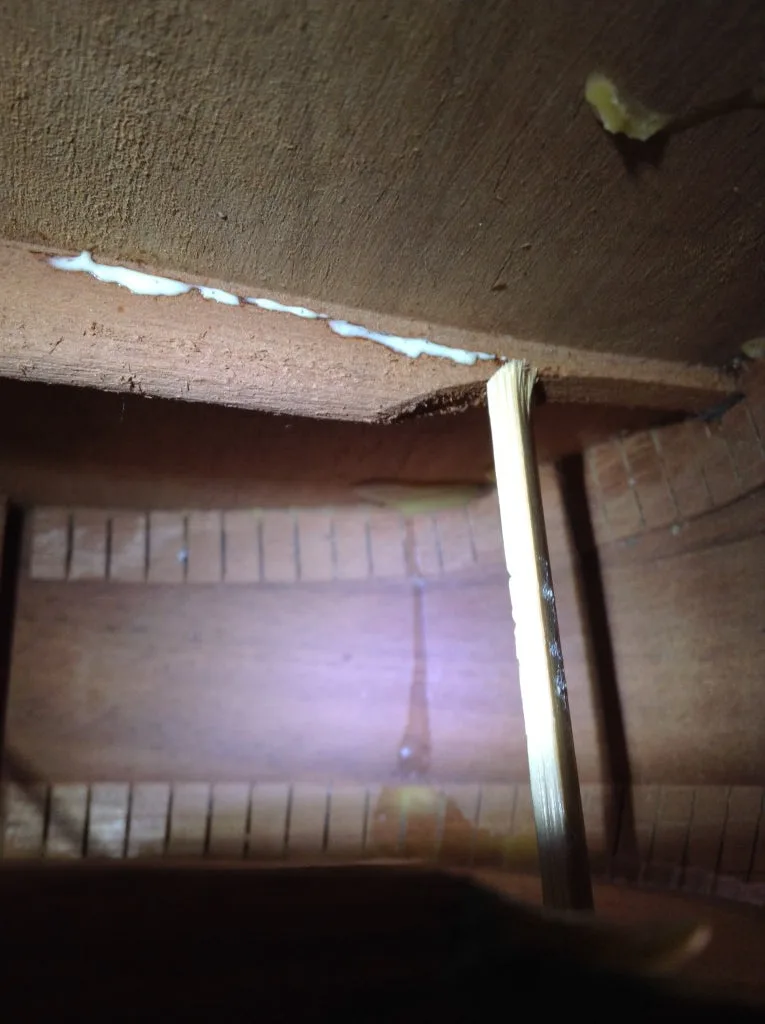
Apart from the messy glue residue from manufacturing, there’s a pretty nasty broken brace. (It’s not too bad, but the limited access is what makes it tough). We usually use the StewMac scissor jack for this type of thing on guitars, but with something this small it limits your options.

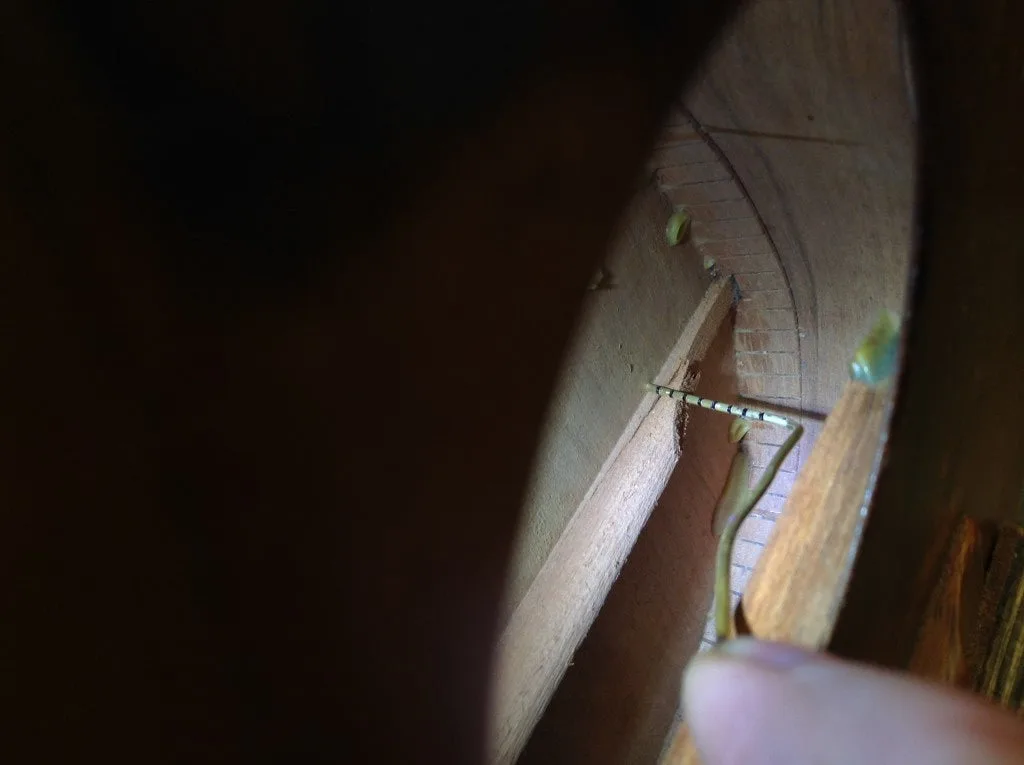
I’m going to have to make something to wedge between the brace and the top, and then clamp from the outside to close it up. Before I start, I take my bendy piece of brass that I notched with 1/8″ increments.. just for a reference point. Then, when I measure the side of the uke approximately where I’m working, I can subtract the height of the brace for a rough idea of how long my wedge needs to be.

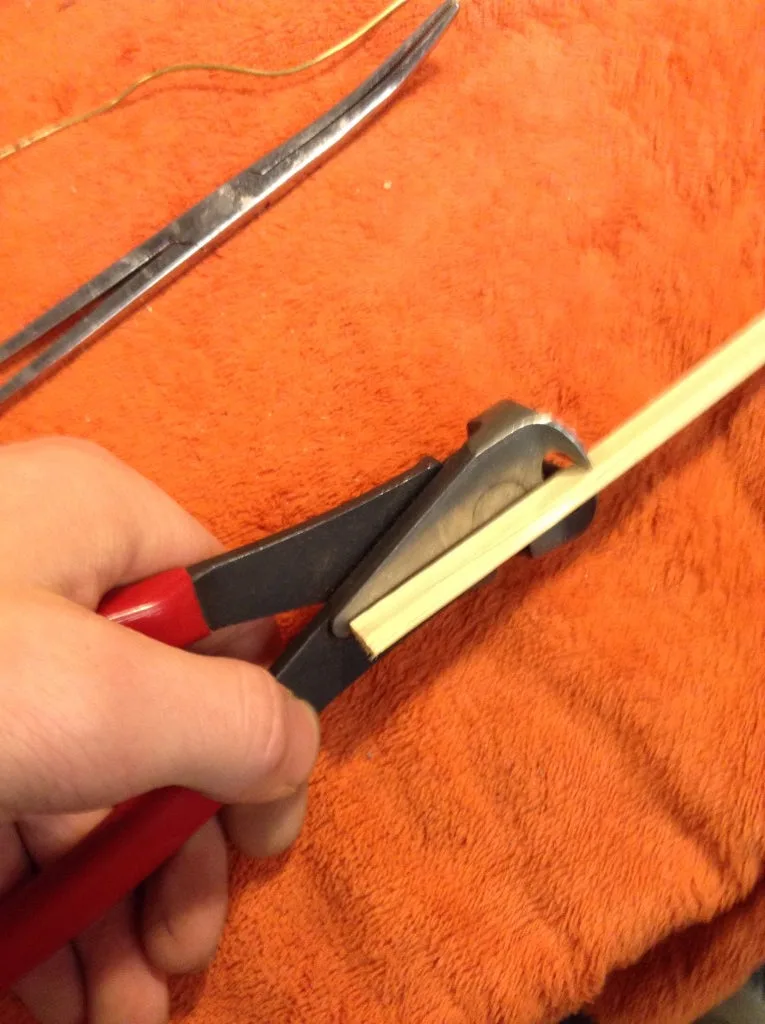
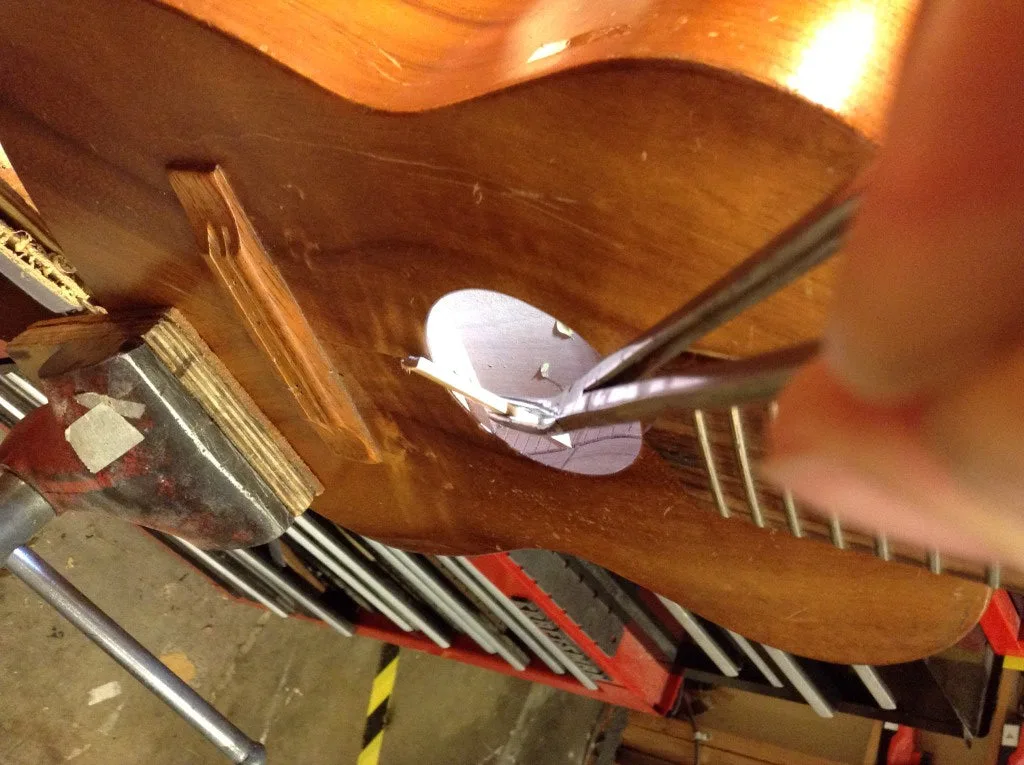
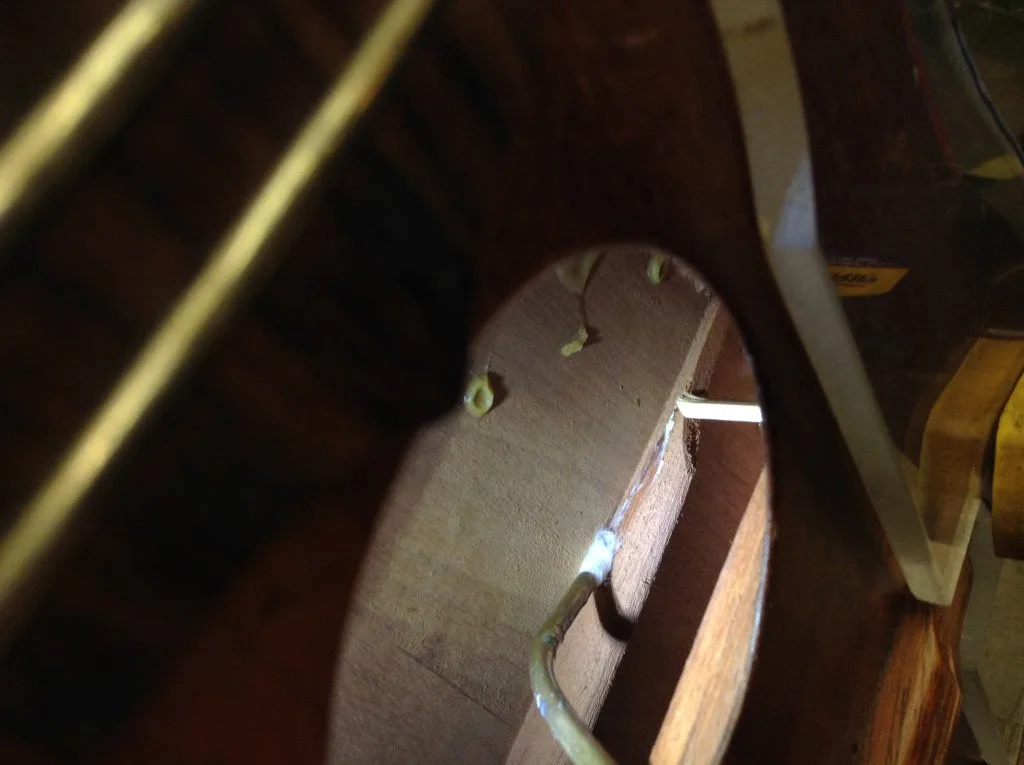
Here I’m cutting some bamboo from Frank’s garden. This is strong and bendy and our favorite for this type of job. With a long curved hemostat, I’m able to work it into the sound hole and crank it into place (after a few length adjustments).

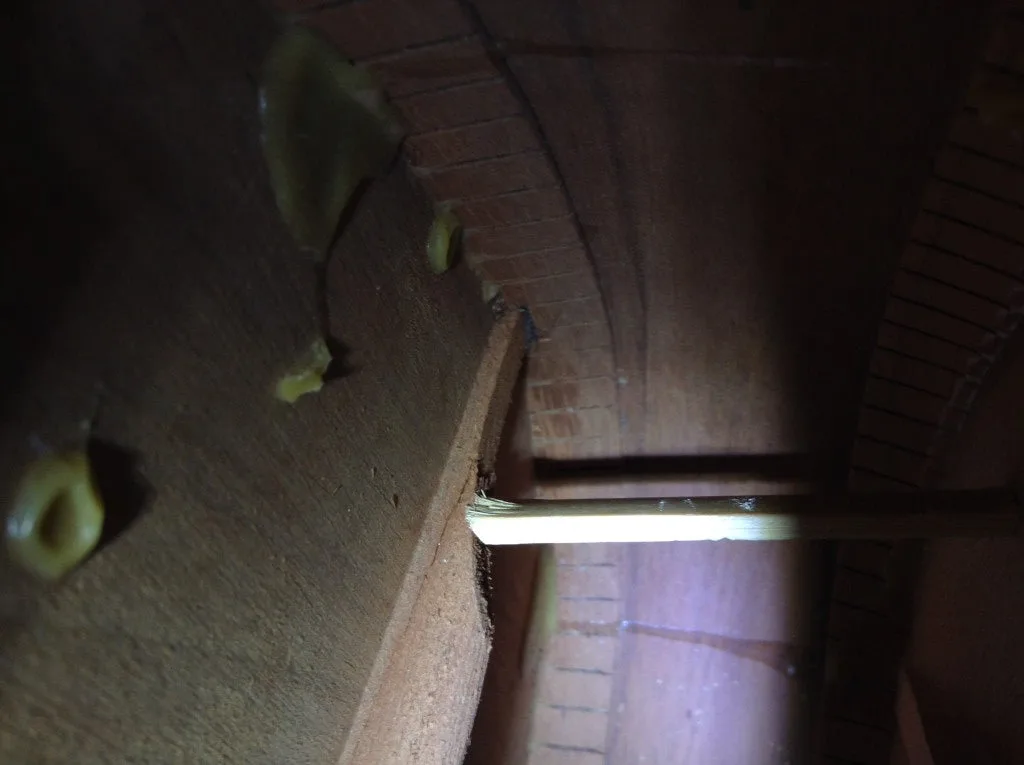
Here it is in place.

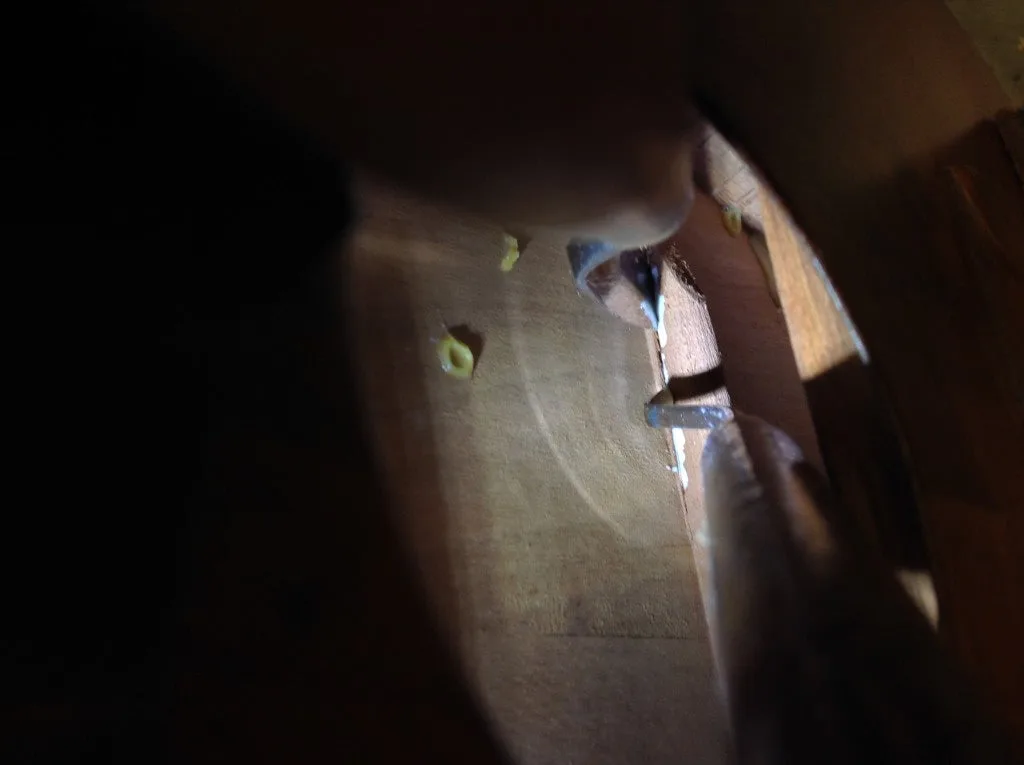
Now that I feel good about the clamping setup, I want to get some glue in there and then put the bamboo back in. Here’s a couple of thin palette knives trying to work some glue into the crack.

Now with the bamboo in place, there’s a good “squeeze-out” as we call it, which indicates a good firm closed joint.

I want to add a clamp on the outside right over the bamboo to make sure it’s as tight as I can get it.

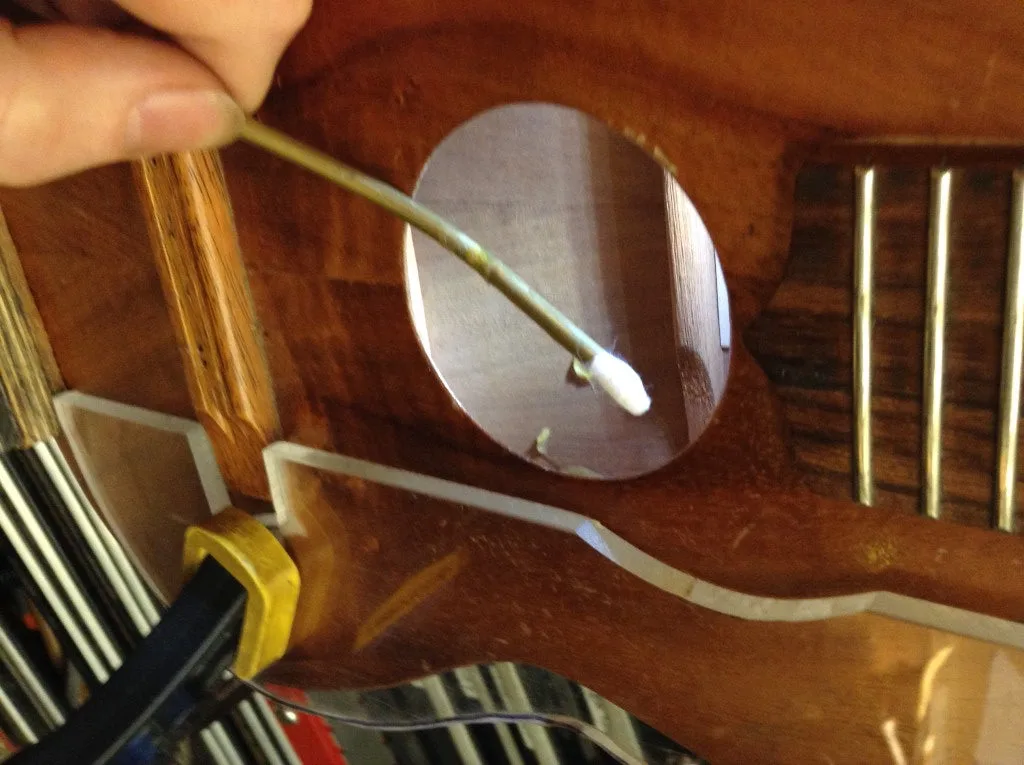
Now I need to clean off the excess glue. Through a small access this is harder than it sounds. This is a trick I learned from Alex Glasser of Iron Horse Instruments. A bendable tube with half a Q-tip in it gets down right where you need it to go.

Here it is in the case, all ready to go.

Thanks for reading!

Frank's Corner: Bridge Pins for 19th Century Guitars

With all the currently available choices in bridge pin material and style, why would I go to the trouble of actually making them myself?

Well, I suppose it’s because I had just a bit of spare time and the equipment to do the job, and as it happened, we were just finishing restoration of some old Martin guitars from around the turn of the last century. So, I thought now would be a good time to make some sets of “era-appropriate” replacement pins.

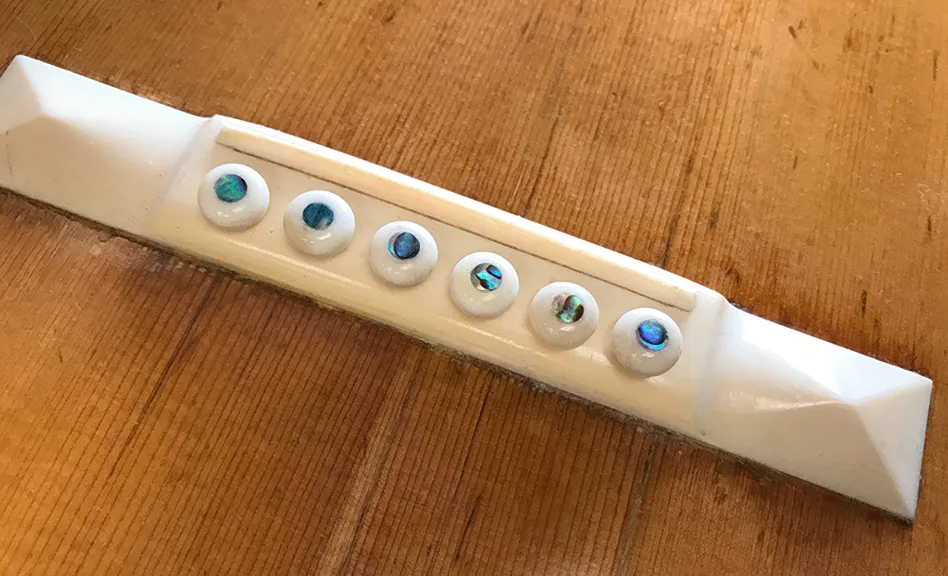
Bridge pins for those old instruments were not quite like any of today’s offerings, often with larger, more flattened tops. Modern pins just don’t have “that look.”


Bridge Pins Closeup


The guitar in the photos above is a Martin style “40” from the late 1800s, with its original ivory bridge. No doubt about it, this is an instrument that deserves period-correct fittings.

– Frank Ford

19th Century-Style Bridge Pins for Guitar »

Read more:
Reproducing Vintage Bridge Pins, FRETS.COM


The Originality Quandary

“But is it original?”

This question is raised about everything in, on, and around a vintage guitar, from tuners to tailpieces to all parts in between. For those who play their vintage guitar only casually, acquiring the exact match for a missing tuner can be a fun treasure hunt. For guitarists who want their older instrument to play as well as a new one, the quest is often more problematic. How can you improve the function of your vintage guitar without compromising its originality, and thus its value? Just because those lightweight WWII-era tuners are original doesn’t mean they allow you to tune effectively, and you can’t plead originality when your jam mates are always waiting on you. There are some solutions that involve only a small compromise, but sometimes the very best solutions for the serious player require some real “play or preserve” decisions.

It’s unfortunate that some of the most desirable guitars come from periods when the metal parts on those instruments—tuners and tailpieces, for example—were not of the same quality as the woodworking. During the 1930s, this was often due to an attempt to keep prices down on lower models during the Great Depression. A few years after that, war-time restrictions meant higher-model Gibsons and Martins were often equipped with flimsy parts that wouldn’t be found on even the cheapest imports today.

The conflict between originality and function often goes beyond the instruments themselves. Demand for original cases (and the importance of keeping one, no matter how flimsy) brings up an interesting dilemma for those whose living accommodations do not include lots of unused square footage. Sure, you were delighted the original chipboard case came with your vintage J-45, but you’re probably not going to carry your $5,000 guitar around in it. And when you buy a real hardshell case, you then have to store the old one. In many climates, storage in a basement or garage won’t do that cute and old cardboard case any favors. If you have two or three (or more) vintage guitars with original cases, even a modest guitar collection can take up a lot of space. So what do you do? Only collect guitars that are all the same size so you just need one modern case that actually gets used?

The tuners on old acoustics are the component that is most likely to prompt vintage-guitar enthusiasts—at least those who are also players—to “go modern.” That said, adding extra screw holes to the back of a headstock can be a major turn-off to future buyers, so it’s a wise move to save the original gears and add better ones without leaving a trace. Thankfully, you can do just that with a little extra effort. Waverly, Gotoh, and other tuner manufacturers produce excellent 12:1 ratio open-back tuners that are essentially contemporary knockoffs of the iconic Grover G-98s—the tuners gracing the headstocks of some of Martin’s and Gibson’s best models during the “golden age” of American steel-string guitar production. Alas, not all Grover tuners that look like G-98s are of the same high quality. Early Grover versions used on 16″ Gibson L-5 models and on Martin’s 1932/’33 OMs have only a 6:1 ratio, and often have cogs that are soldered in place and can’t be adjusted. Such tuners can frustrate anyone who’s grown accustomed to smooth-turning sealed tuners with a 12:1 ratio, such as Schallers and similar modern-guitar gears.


Tuner Replacement OptionsTuner replacement options for a ’45 Martin Guitar D-28


Many of the single-unit tuners Martin used on its lower models do not have the same spacing for the mounting screws as newer tuners, but as you can see in the image below, there is a modification to the new tuner plates that will allow you to use the new gears without adding more holes to the back of your vintage guitar’s headstock. While the elongated holes on the new tuner plates are visible when the gears are installed, the screwhead still tightly grips the modified gear and you have modern functionality for your vintage guitar. On top of that, you still have the option to remove the new tuners and re-install the originals should you wind up selling the instrument to a “gotta be original” buyer.


Waverly Tuner Modification


By slightly relieving the edges of the backing plates of the new gears as well (where they come in contact with the headstock), there’s little chance there will be any telltale scars. Similar slotted mounting holes can be used for tailpieces on archtops. Especially during WWII, some archtops were shipped with cheesy lightweight-steel tailpieces that have often succumbed to rust, or pot-metal castings that weren’t up to the job. While you may be able to eventually find the right tailpiece in good condition, you might as well enjoy your guitar during the search by using a new, modified version.

Whether an old guitar in need of improvement is an acoustic or an electric, this is now the formula that the vintage-guitar market’s obsession with originality requires: Improve if you must, but be sure the instrument can be returned to stock specifications with no sign of previous upgrades. As for the question of whether that original, moldy cardboard case is worth keeping, however, you’re on your own.
 

Does your vintage instrument have all of its original parts?
Make an appointment to have it appraised and find out.  Instrument appraisals »

Do you need to get your vintage instrument up and running again?
Stop by our repair department and we’ll diagnose your problem and see what we can do to help you out.  Repair services »

Read more:
Richard Johnston, “Acoustic Soundboard: The Originality Quandary.” Premier Guitar.

1933 Paramount Guitar Style D

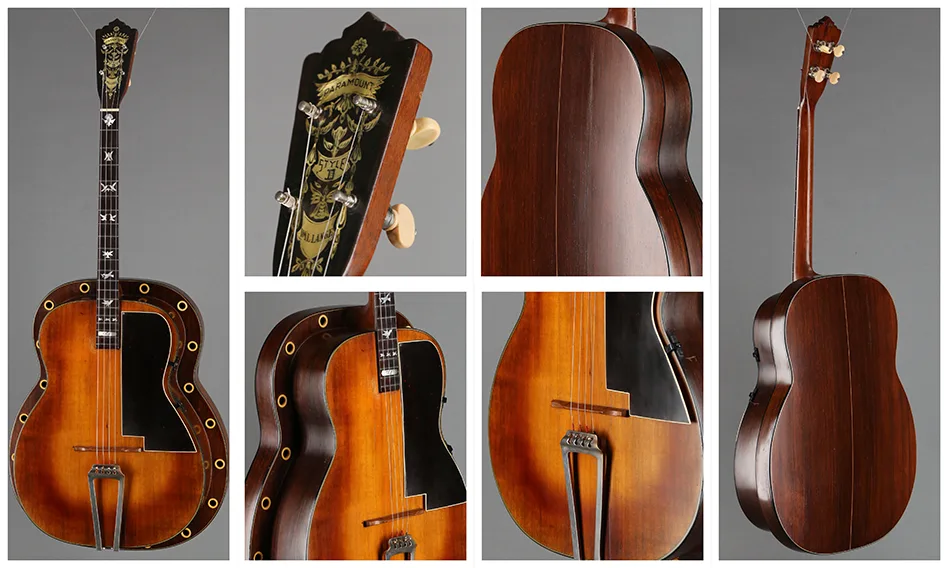
In the 1930s, the banjo was fading as a force in popular music and many companies were making guitars with banjo necks in an attempt to keep sales up. This particular instrument is perhaps the weirdest one to emerge from that period. Paramount, one of the leading banjo builders of the time, came up with the idea of making a guitar with a banjo-like resonator and hired Martin to build them. The idea was to make an instrument that had the punch and power of a banjo and the mellower tone of the guitar. Their efforts were basically successful and this guitar/banjo hybrid is simultaneously loud and sweet. Sadly, the world was not very interested in such a thing and Martin only made about 30 of them for Paramount.  More details »

1933 Paramount Guitar Style D (made by Martin)1933 Paramount Guitar Style D (made by Martin)


See examples of the Paramount Guitar Style D’s ancestor, the Tenor Banjo »


Crunchtime: 1967 D-28 Martin Guitar Structural Repair

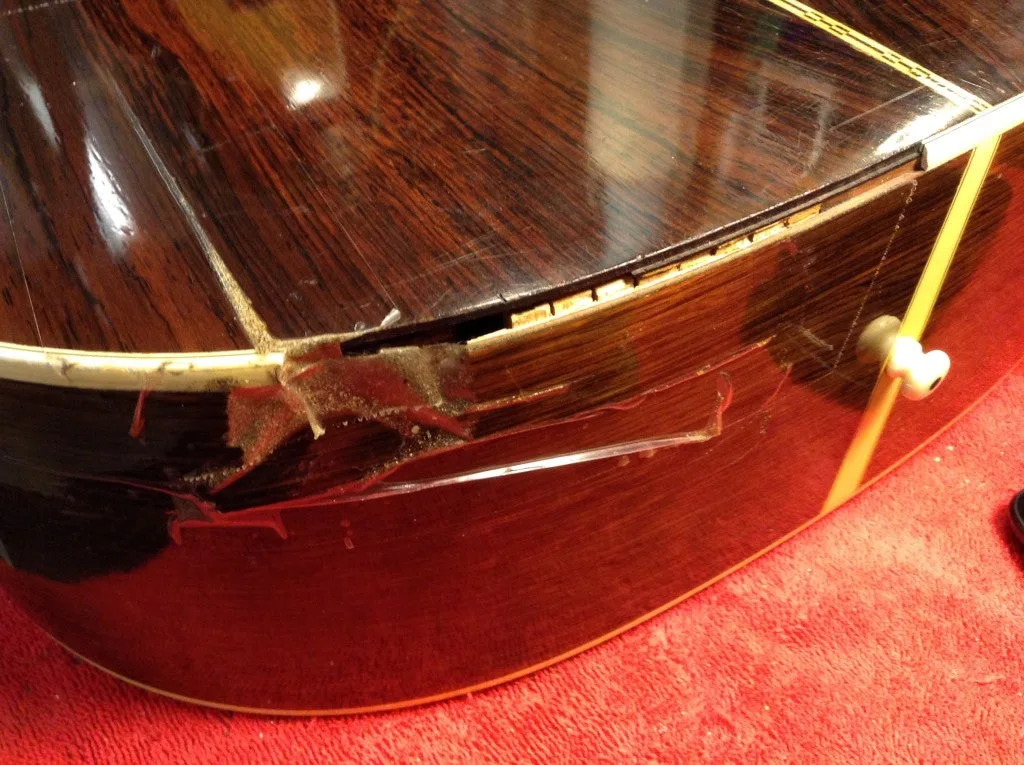
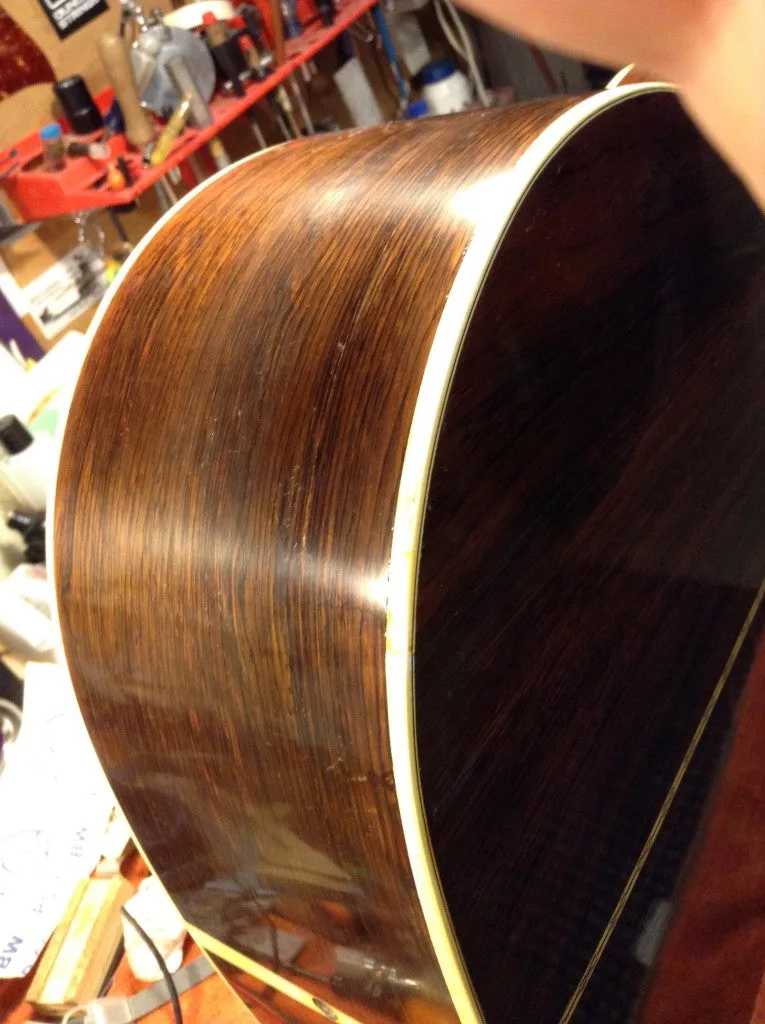
I had this 1967 Martin D-28 on my bench a few months ago. It came in with clear packing tape over the damaged area trying to hold loose pieces in place. It looked like it had been in this state for some time, heavy crunch and missing binding.

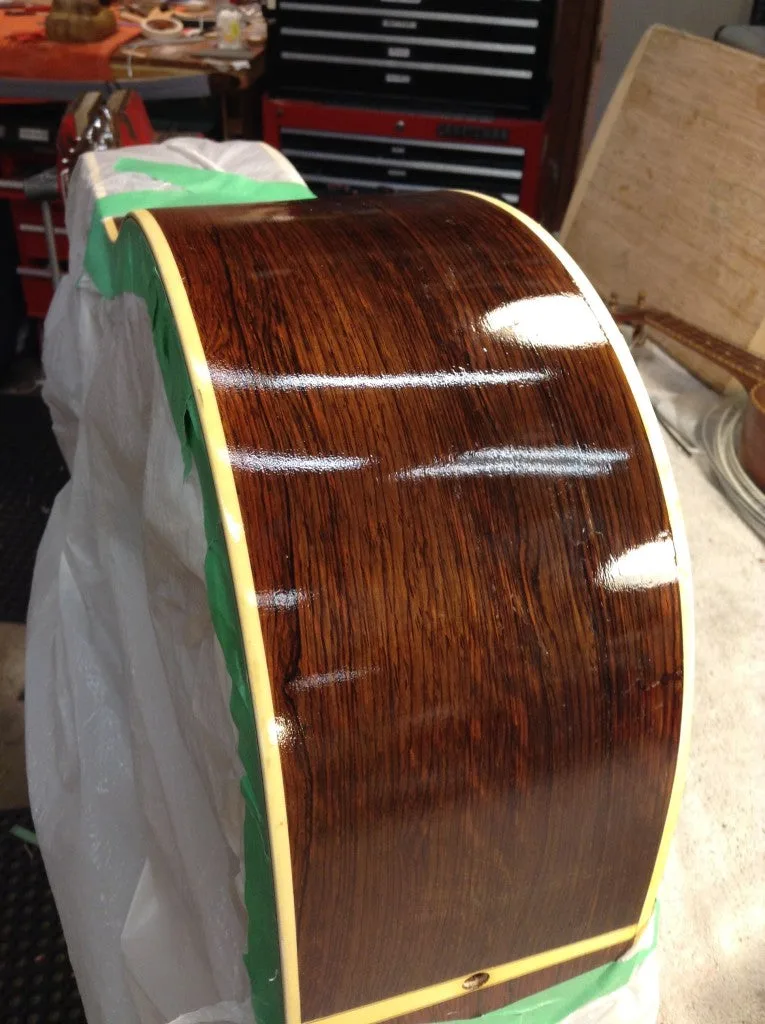
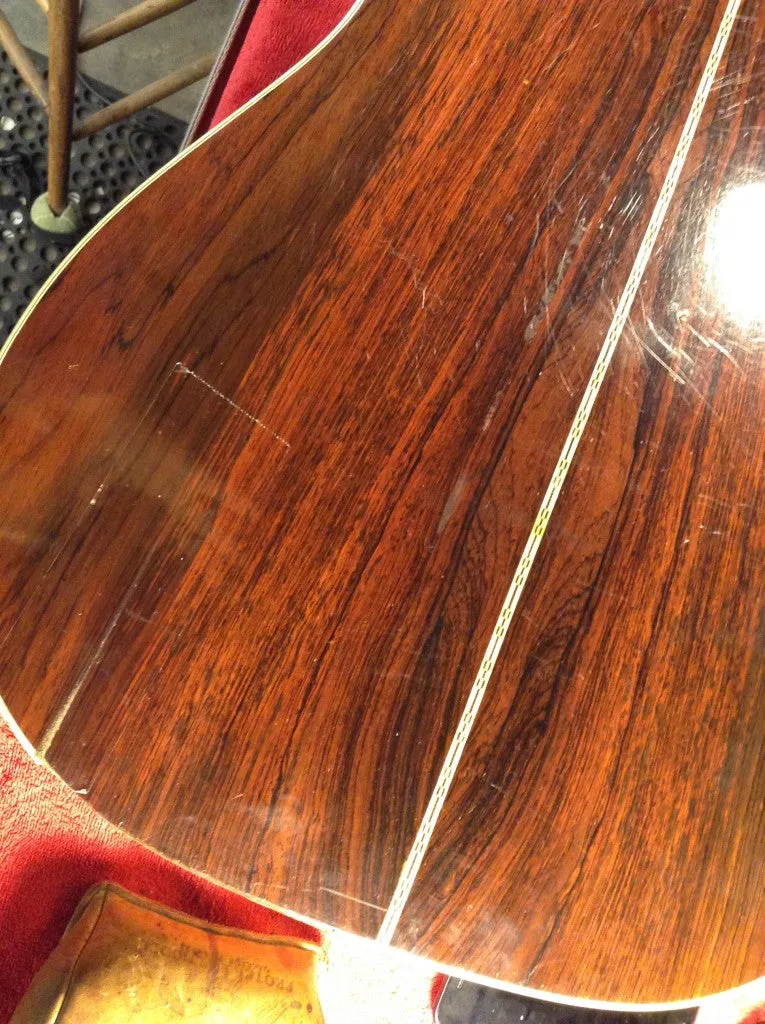
In this photo you can see what a stunning set of Brazilian Rosewood this is. Lots of color variation, grain definition and interesting structure. It’s worth putting some time into fixing it up.

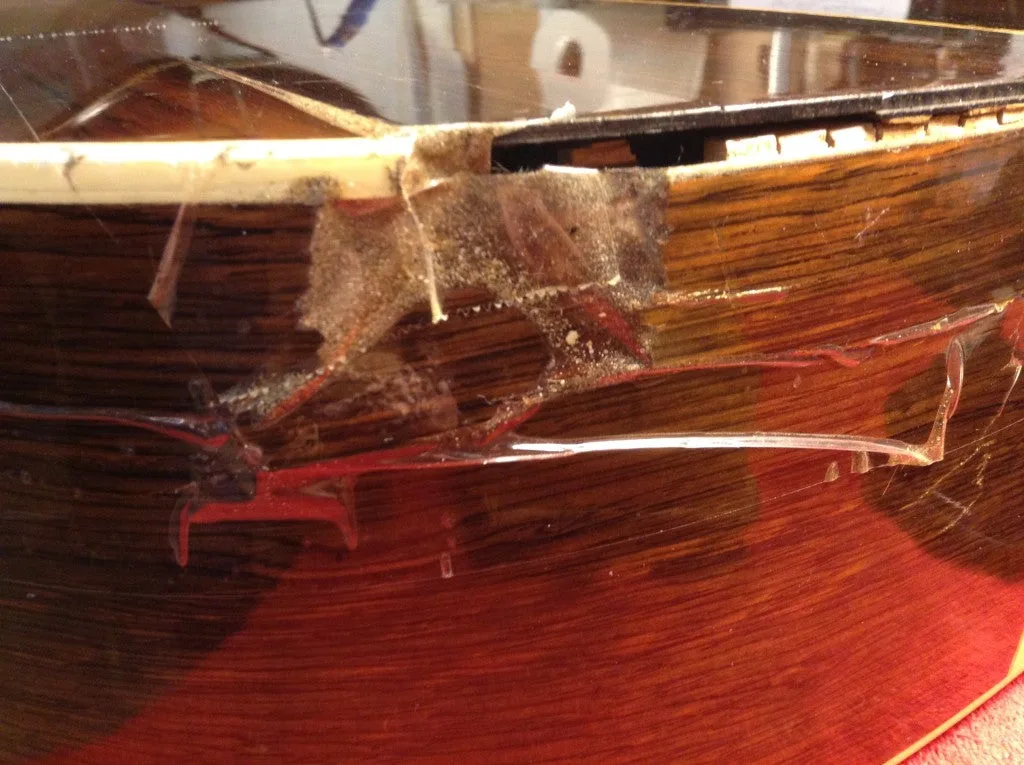
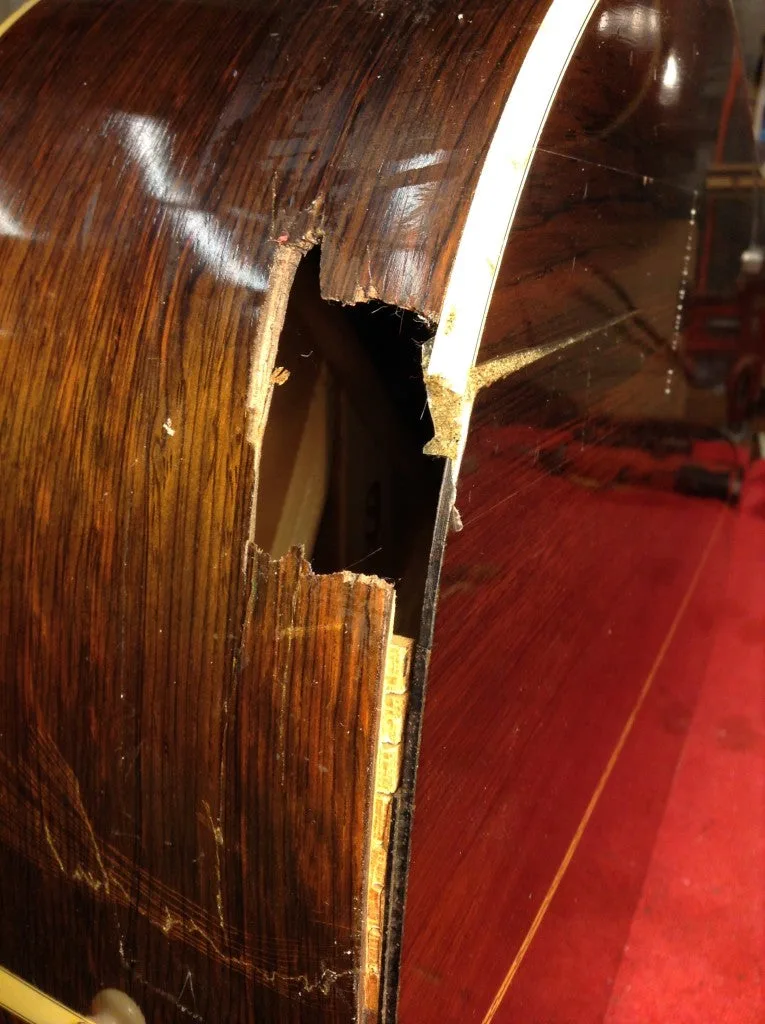
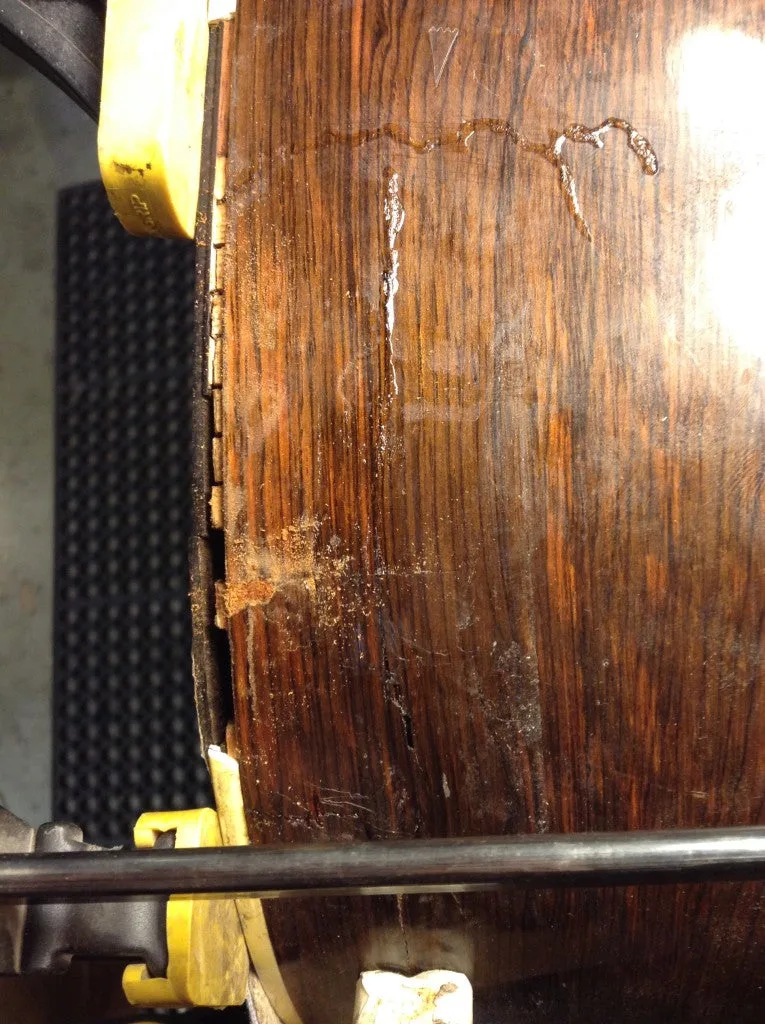
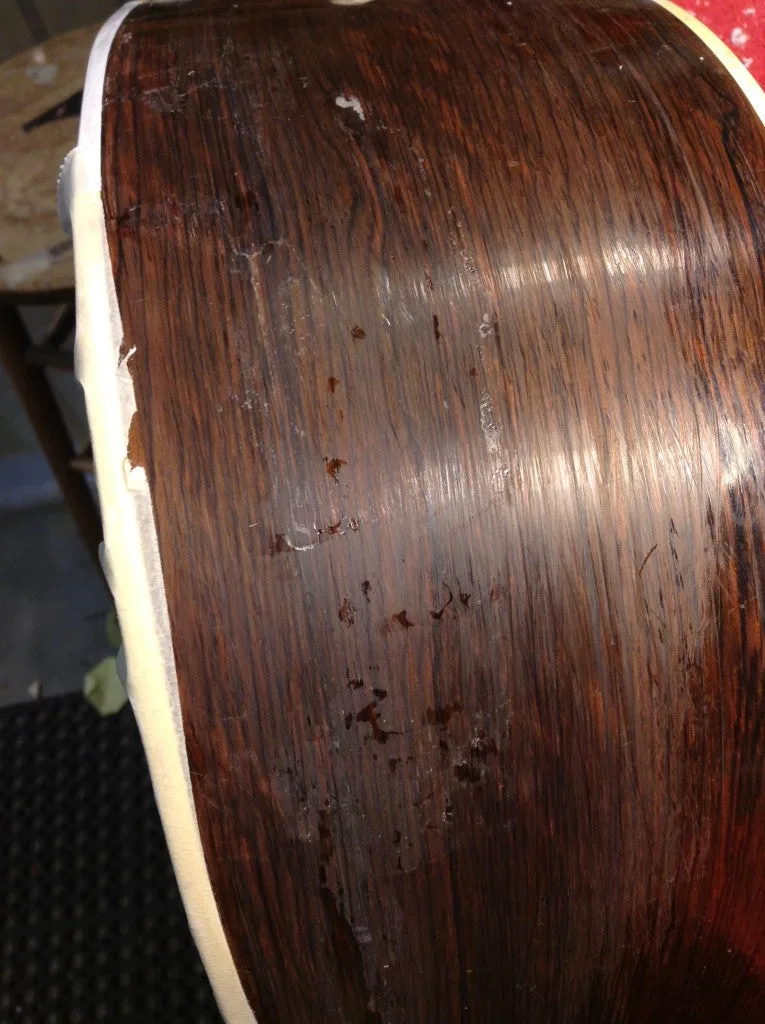
Once the tape came off, this is what I had to deal with. It turns out some of the damage had been glued up already, which we didn’t know. It was unfortunately glued out of alignment.

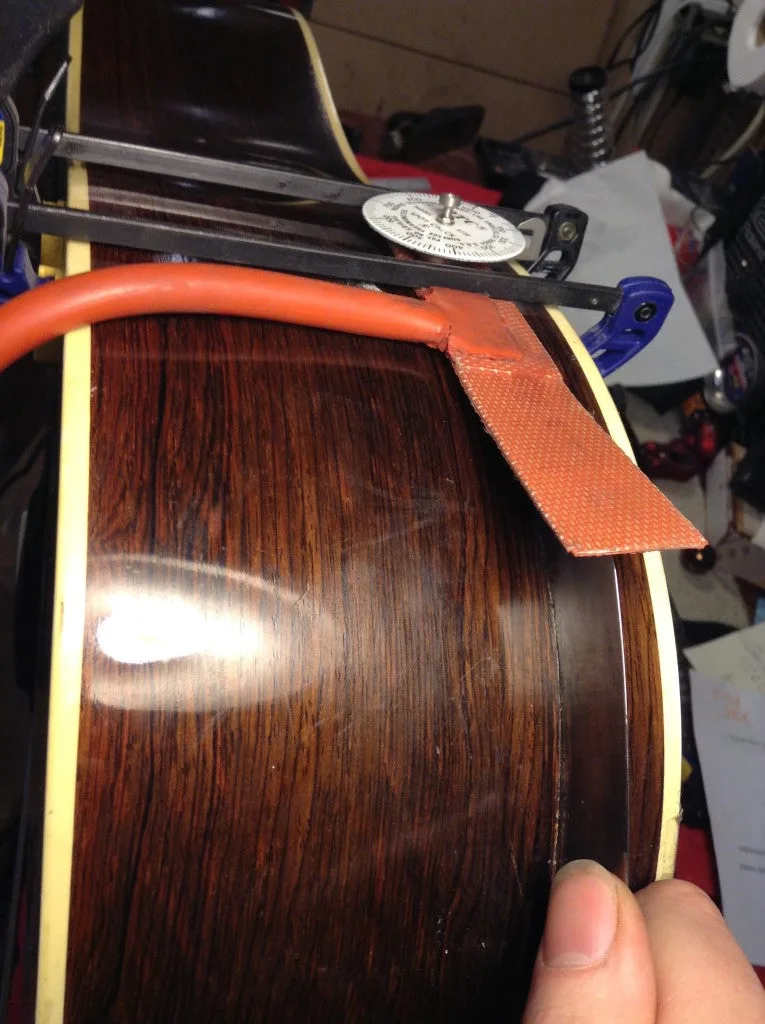
Here I am holding a heating element onto the side with mini quick grip clamps, keeping an eye on it with a thermometer, so the glue will loosen up and I’ll be able to realign the crack. My palette knife is slightly camouflaged due to the reflection, but I’m slowly working it in to loosen up the old glue.

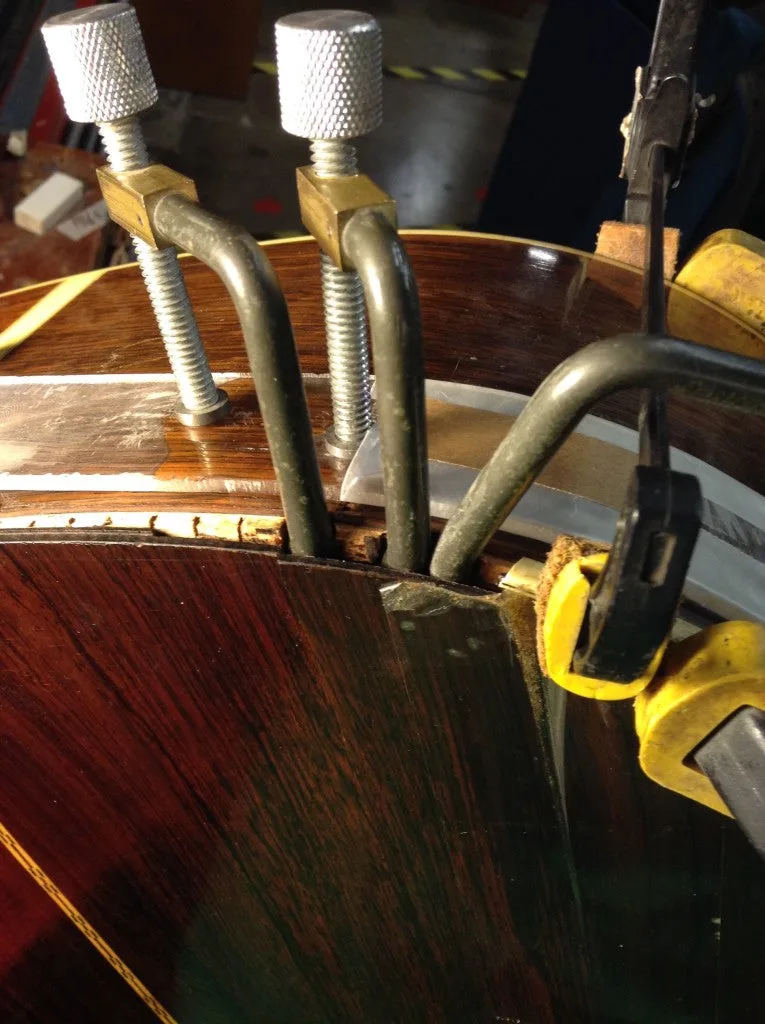
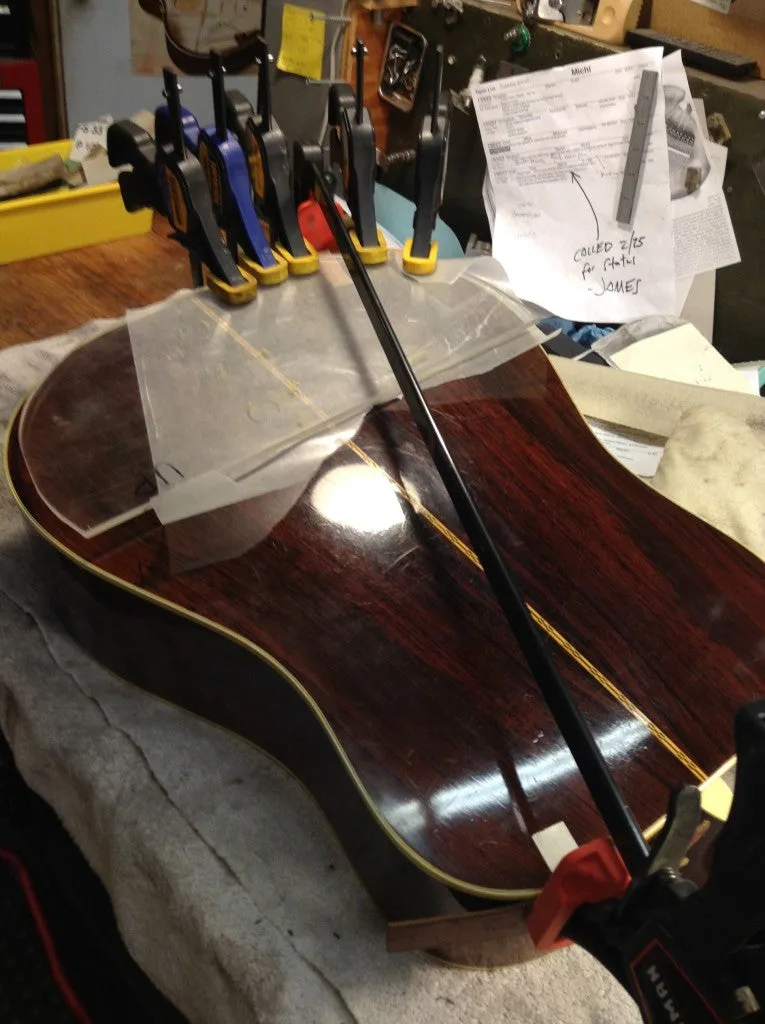
Since the back was already loose and all cracked up, I tried to use the damage to my advantage. I got some small clamps through the cracks and the missing binding area in order to clamp the side cracks up. I used flexible cauls on the inside and outside in order to get a nice firm alignment.

With the side cracks glued up, I moved on to gluing the back in place. There were some tiny pieces missing from the side, which I filled in with a little bit of matching rosewood dust mixed with acrylic adhesive.

Here’s a shot of the back being glued back on, where the big clamp across the body is pulling the side in to match the back contour:

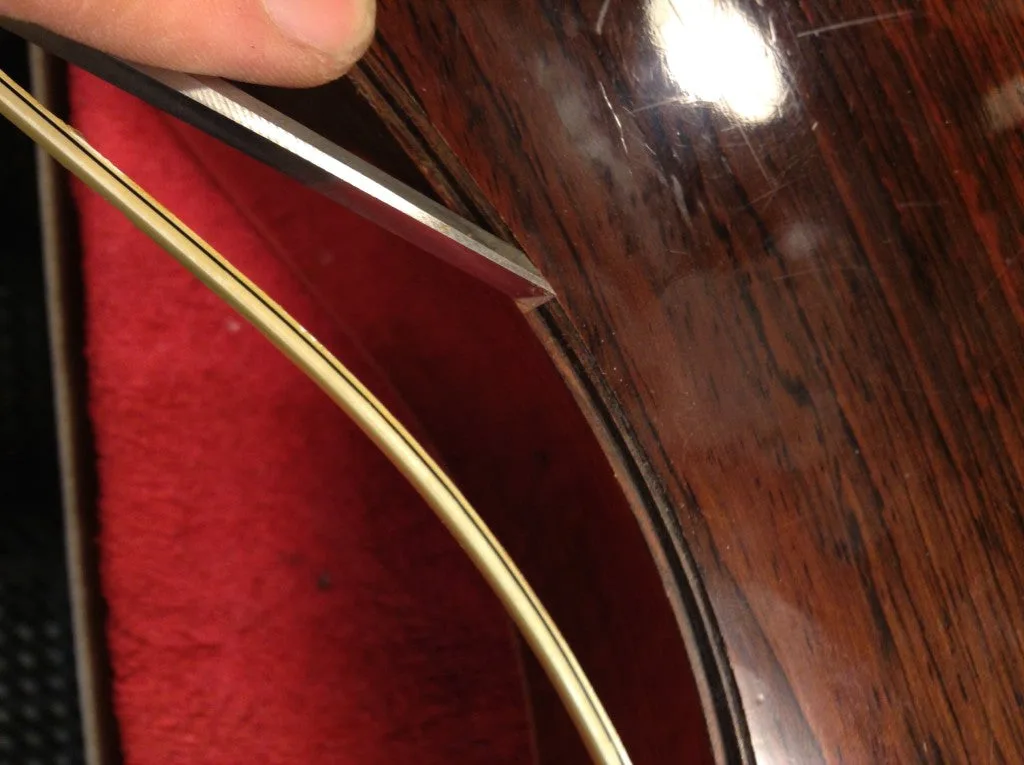
Much of the original binding had come loose as a result of the original damage, so I set about cleaning up the channel around the edge, using a chisel to chip out bits of old glue and dirt before regluing the binding:

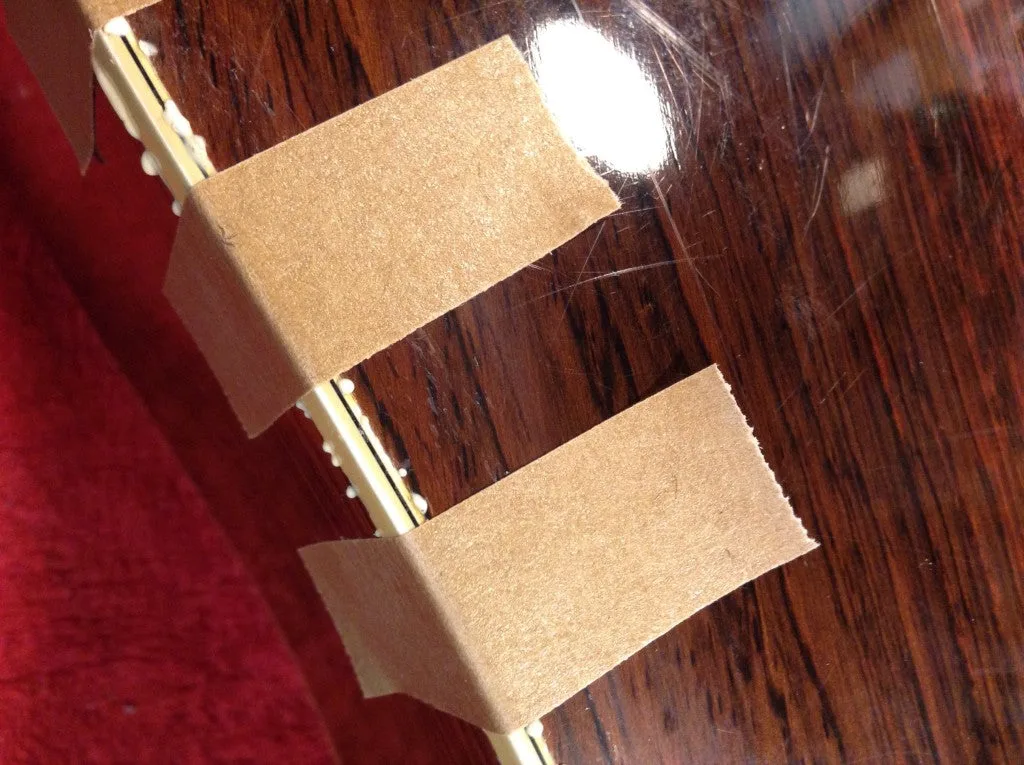
Masking tape held the binding back in place as I glued it with water-soluble aliphatic resin adhesive.

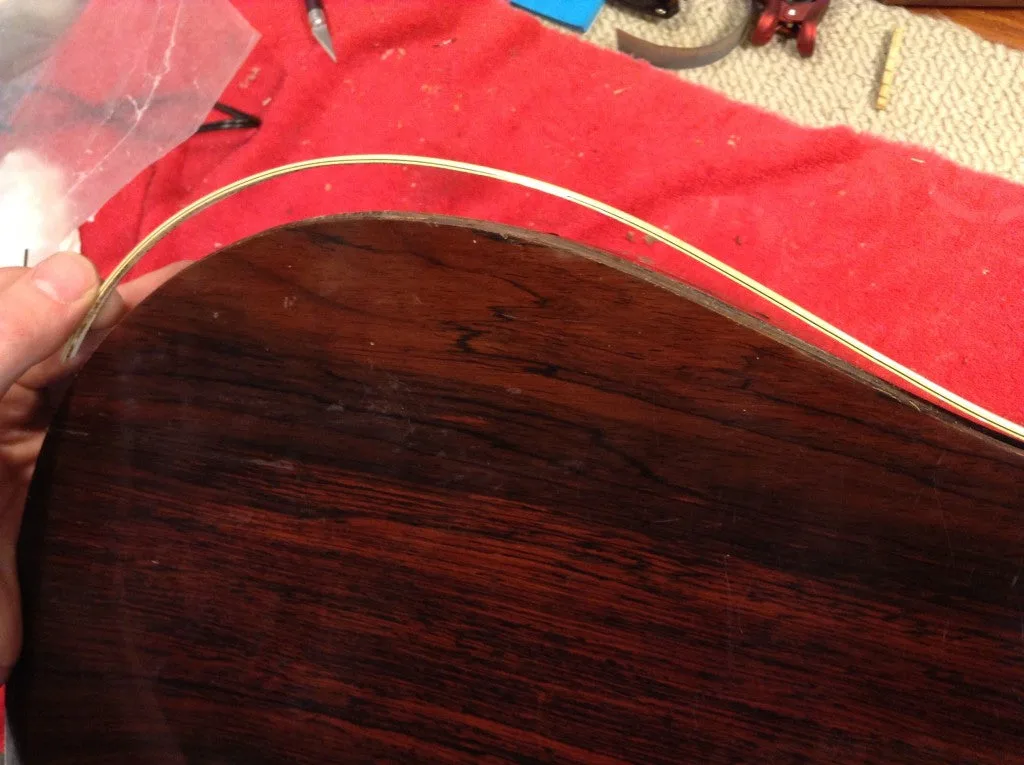
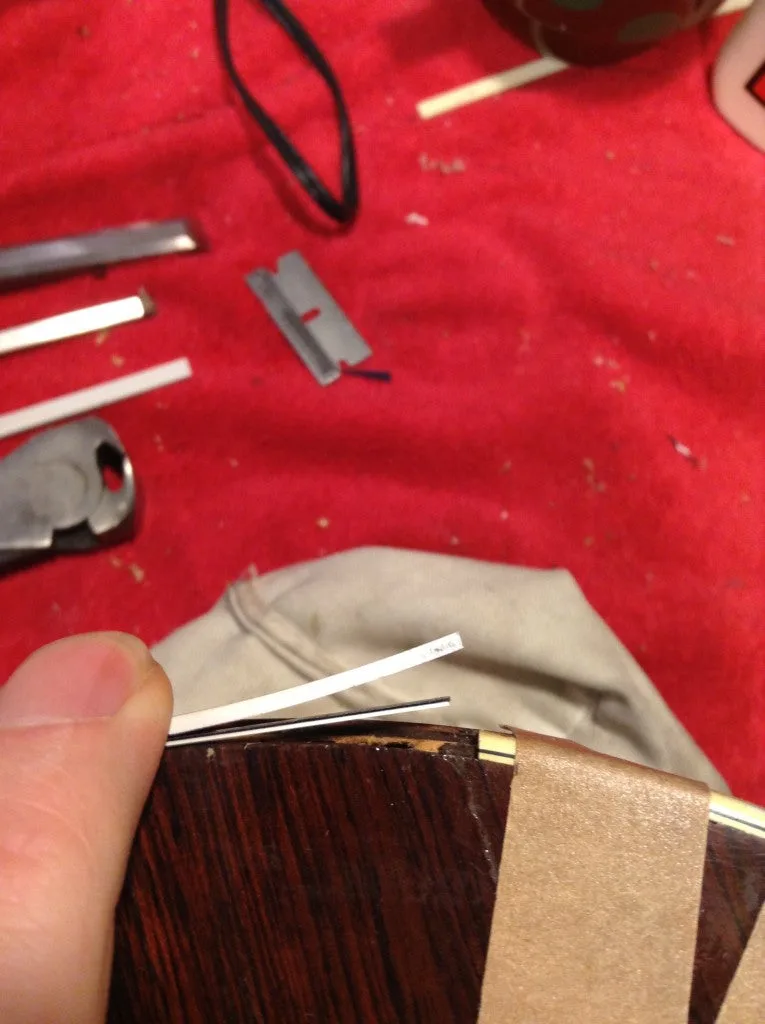
There was also a good portion of missing back binding, but luckily we had some replacement Martin plastic binding strips. Here I have the outer layer (binding) and inner layer (purfling) laid out and getting fitted to the channel.

The old meets the new.

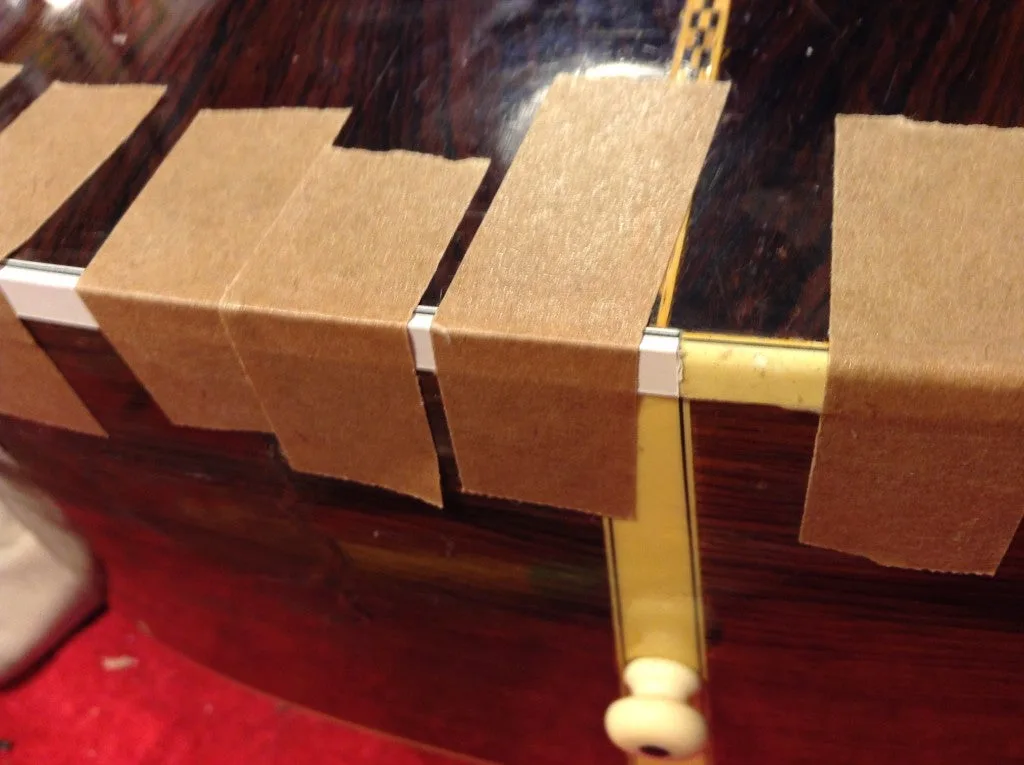
And is then cut down to match the contour.

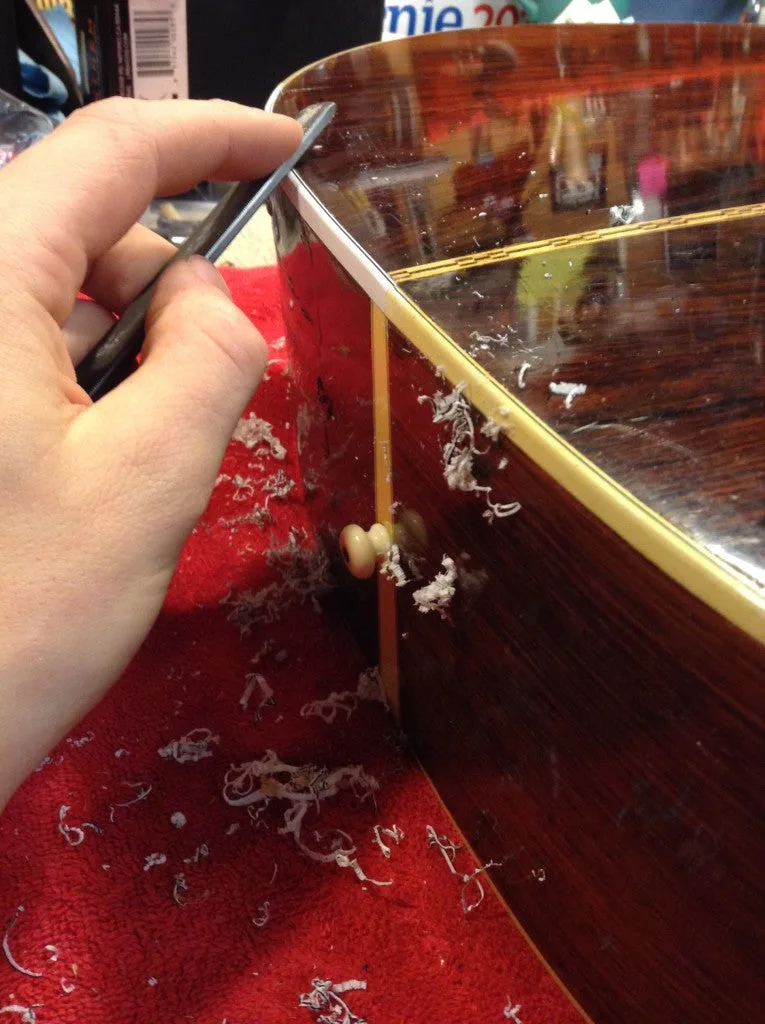
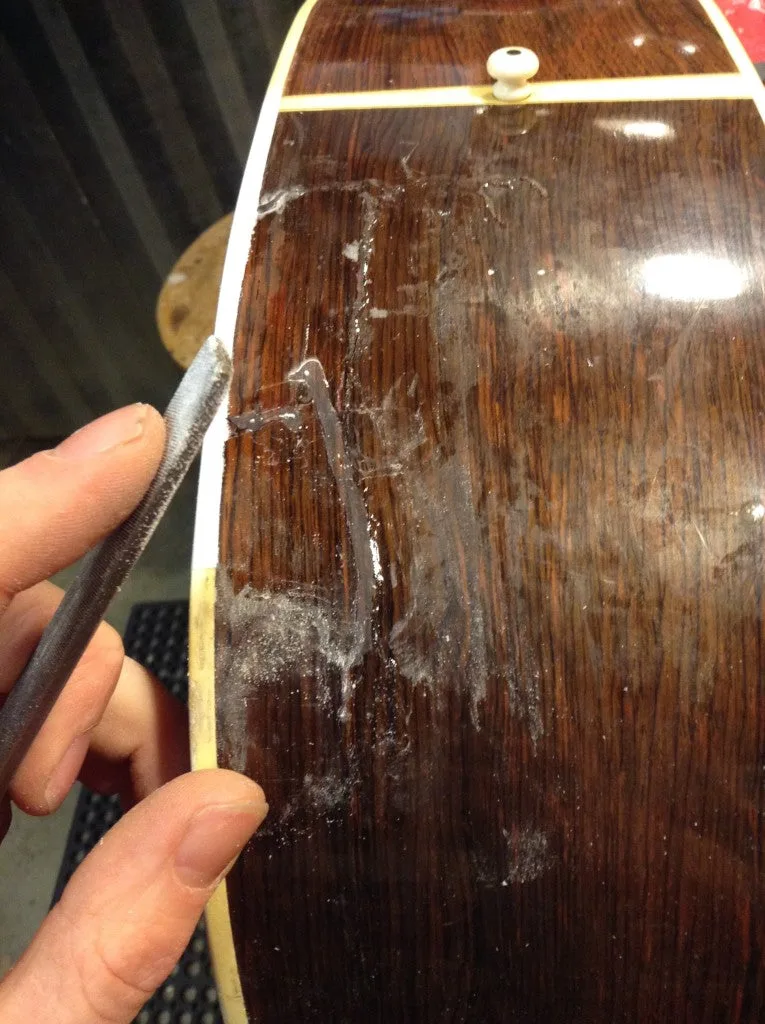
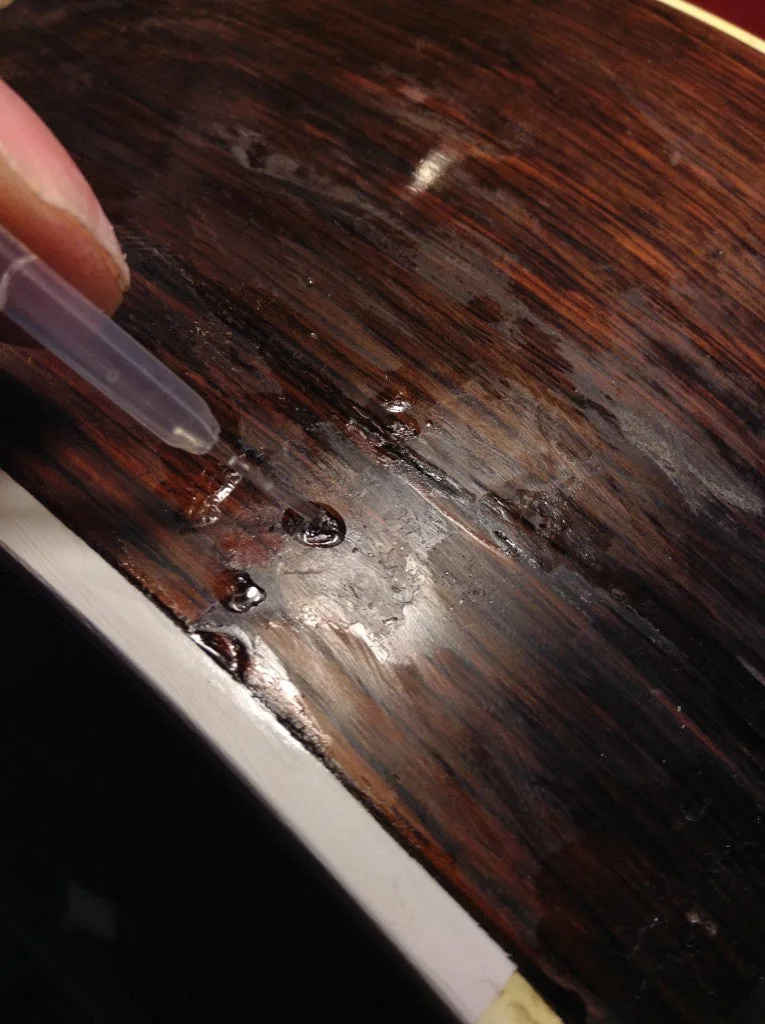
Now the major structural work is done, it’s time to start tidying it all up. It’s going pretty well, but the side area has some dips and low spots in the finish where the damage was really bad. I started filling in these low areas by adding small drops of lacquer in the cracks and crevices.

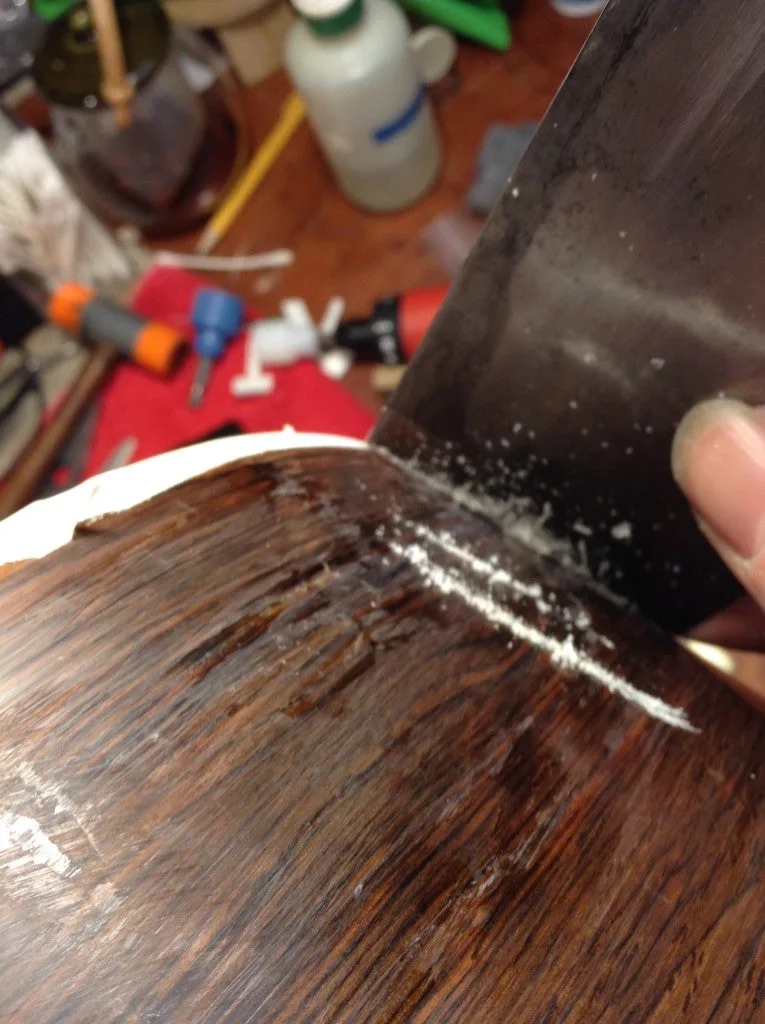
Here’s a shot of the topographical aspect of the surface. As I added material and then scraped it back again, it showed me the lay of the land, and where I needed to add finish.

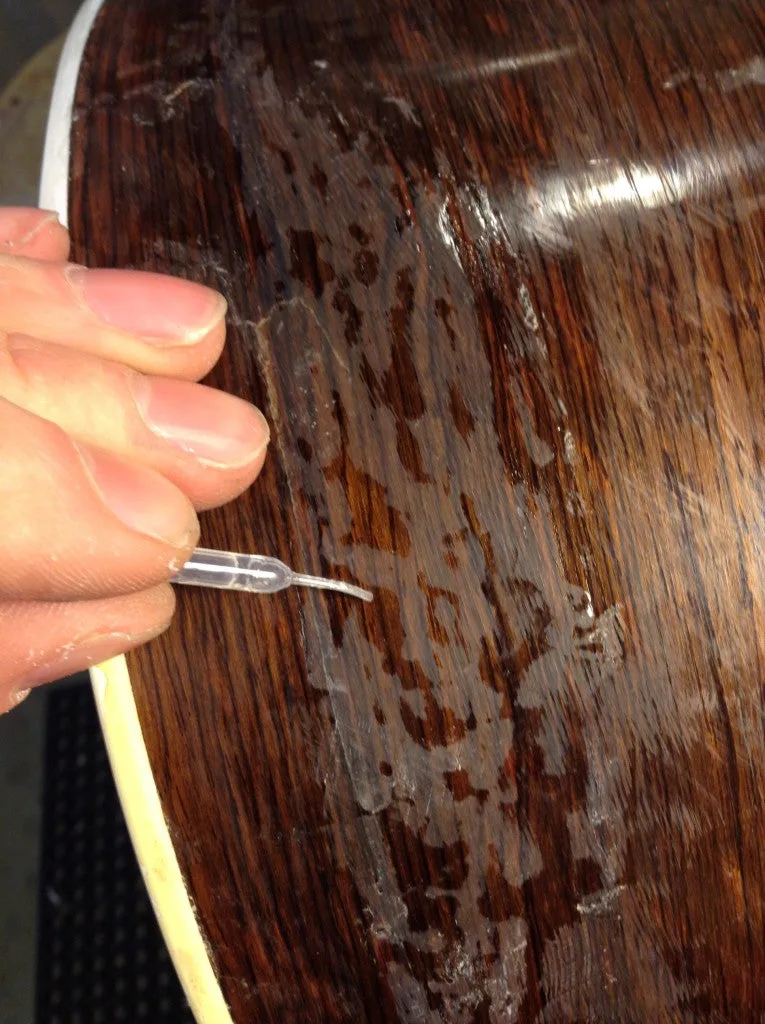
As I progressed the surface started to level out, and the divots began to disappear.

I added a bit more lacquer, scraped the high spots back, added more drops of finish, and set it aside to dry over the following weeks.

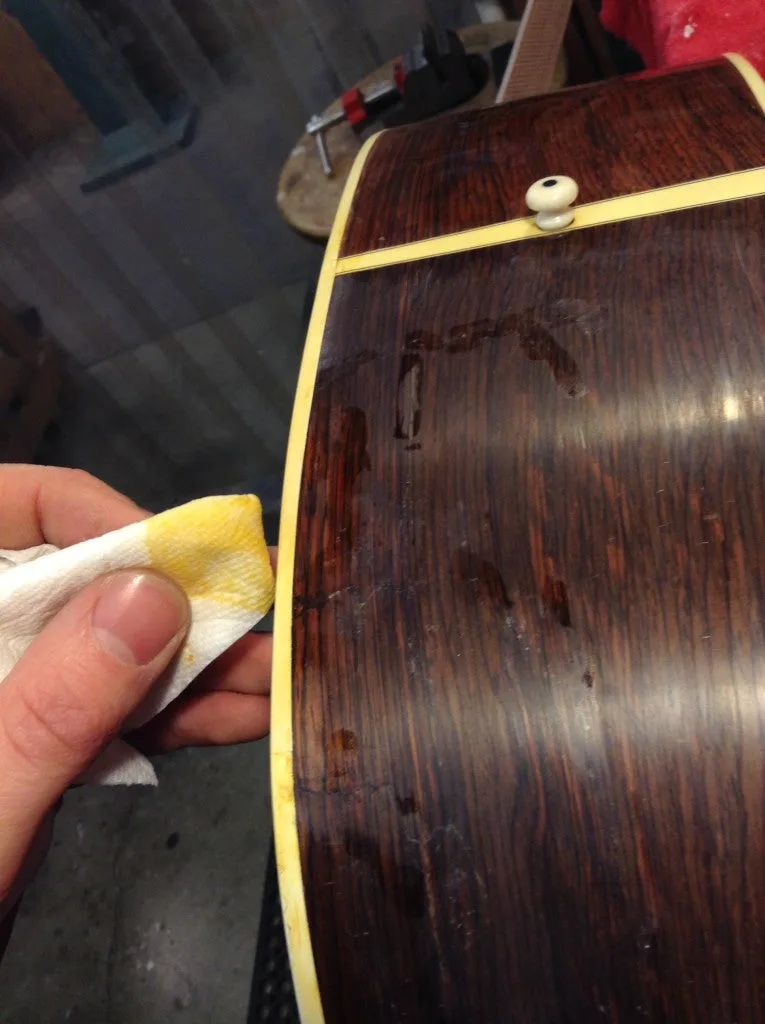
I wiped a little color on new binding section, to match the aged amber lacquer on the rest of the guitar.

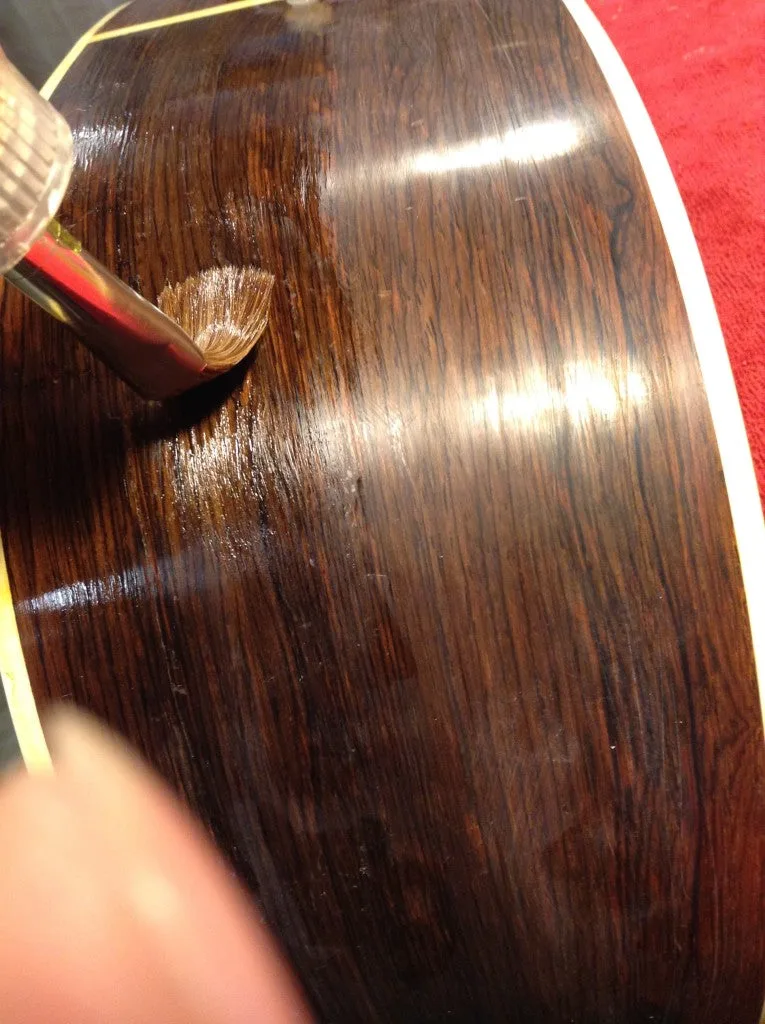
Then I was ready to start brushing on some extra coats of lacquer to meld with the existing finish surrounding the damage.

Then I hit it with a couple of new laquer coats from the spray gun to smooth it all out.

And after some finish sanding and buffing, it’s as solid as it was before the damage, and looks almost new again.