We started carrying Kentucky mandolins in the early 1970s, not long after we opened the retail store. The KM-150S was our recommendation for anyone who wanted a good start on learning the instrument. Back then, the lower priced Kentucky mandolins were built with laminated backs and sides and the solid tops were pressed into an arch shape rather than carved. Still, they were well crafted so they held up, they were very playable, they were inexpensive and they sounded pretty good. We sold hundreds of them over the years.
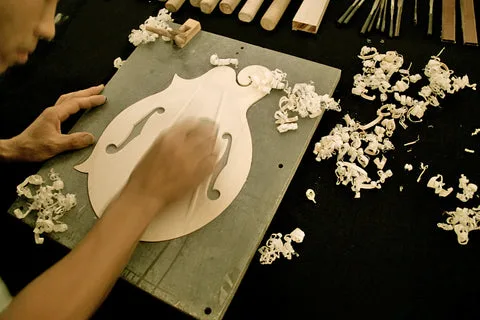
Fast forward a few decades and there are now other affordable mandolin brands out there, but Kentucky has stepped up and more than met the challenge. Kentucky mandolins come in four tiers, with the Standard Series being the least expensive. The Standard models we stock, such as the KM-150 and the KM-606, have carved, solid German spruce tops and solid, carved solid Alpine maple backs. and they sound better than ever. Mandolins of this quality would have been close to the top of the Kentucky line back in the 1970s, but now this is where the Kentucky models start.
The next tier is the Deluxe Series. Like the Standards, these mandolins have carved German spruce tops and carved Alpine maple backs, but the builders take more care in graduating and voicing them. Also mandolins have a wider range of finish colors and radiused fretboards, making them easier to play. Deluxe mandolin come in both A and F style bodies and a choice of oval soundholes or F-soundholes.
The third tier is the Artist Series. These are professional grade instruments and use the fanciest Alpine maple. They have radiused ebony fretboards and the top, backs, necks and headstocks are all fully bound. The hardware is gold-plated and these mandolins sound as good as they look.
The top tier are the Master Model instruments which offer hand-carved Adirondack spruce tops and beautifully figured carved Michigan maple backs & sides. Playability is enhanced with a radiused fingerboard, and the subtle Cremona sunburst with thin lacquer finish. In appearance, tone, and playability these latest Kentucky models are strong competitors to any mandolins available today. Master Models have always been scarce and we only get a handful every year.
Frank Ford's Bass Banjo Project
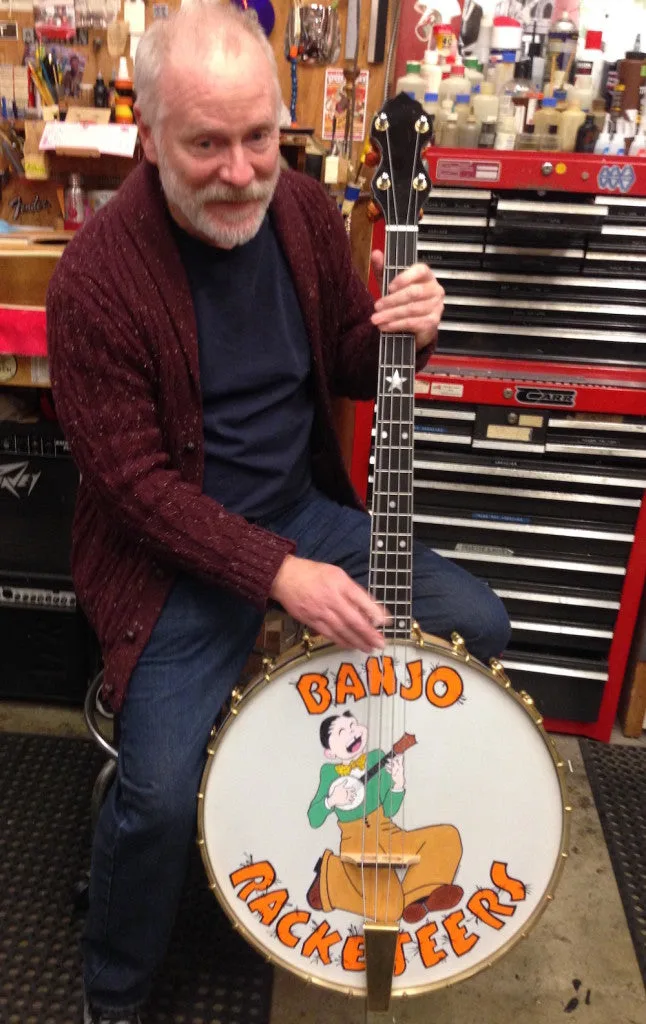
Looks like we’ve gotten ourselves into another crazy project! Our long term friend and staff member, Michael Simmons, plays with the BANJO RACKETEERS, a cool ensemble featuring banjos of all sizes, from the tiny ukulele banjo up to the giant bass banjo. Recently, their bass player left the group and took his big bass banjo with him, so it seemed appropriate to come to the rescue of this crazy bunch.
Certainly the heart of any banjo is its “pot” or shell, and many bass banjos are made from regular drum shells with a bass neck attached. Being not of sound mind, I came up with the suggestion that the Racketeers deserved a bass banjo that looked as much as possible like a regular banjo, but supersized. So, to get the project rolling, I offered to come up with an appropriate pot, starting with an idea that the Vega Little Wonder 17-fret tenor would be a good choice to scale up. After some head scratching, I came up with the notion of taking a regular size banjo and upsizing it by multiplying all the dimensions by about 1-2/3.
So, I set about measuring an old Vega, and came up with 20″ diameter as the logical choice for the head diameter. No point in making this thing an odd size, because we’d want to be able to use regular easy-to-find drum heads when replacement was necessary.
I have a fairly complete machine shop in my garage, and I’m able to reproduce some kinds of machined banjo parts, so this project is giving me quite a workout! And, it’s a nice break from making Frank’s Cranks.
Here’s how it’s going. . .
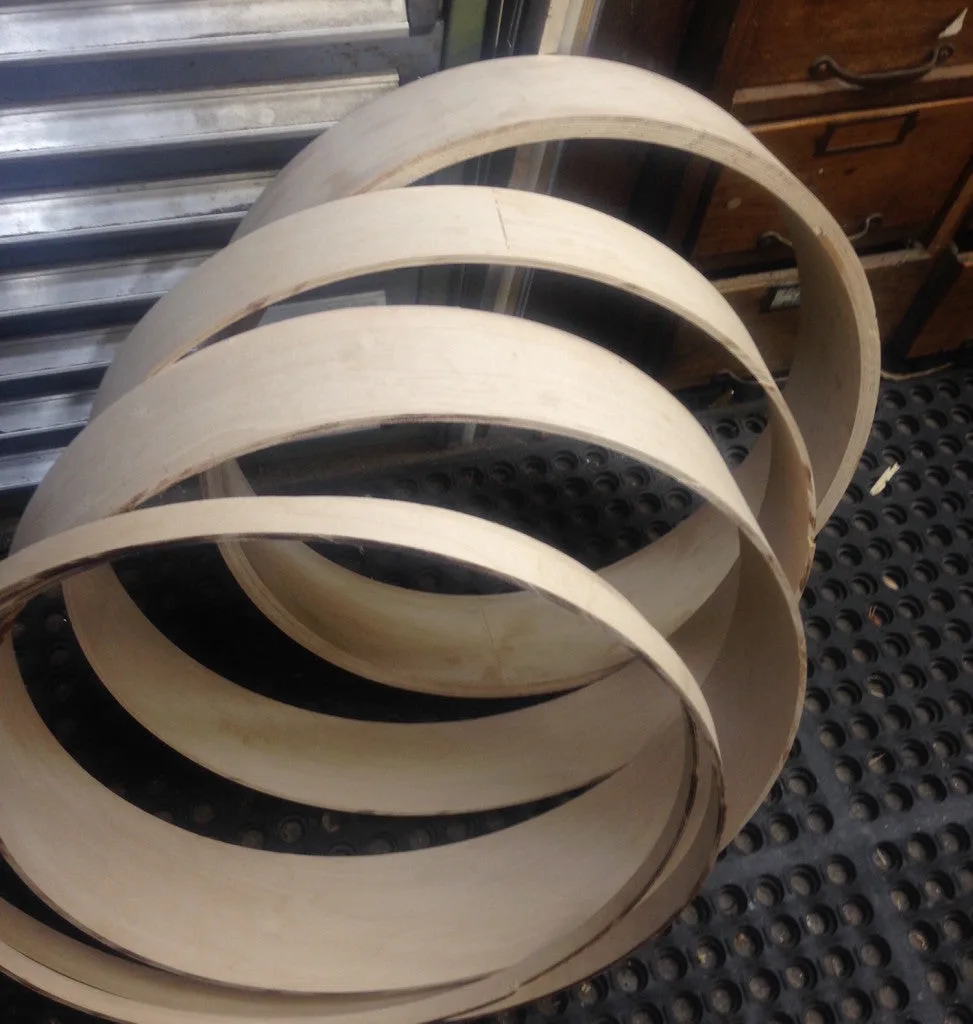
In New Hampshire, there’s a cool outfit called Keller that makes drum shells for the industry. They were my source for the rings you see above. I bought a 20-inch diameter, 24-inch long laminate cylinder that was probably intended for bass drum manufacture. Drum shells are way too thin for banjo use because two dozen banjo tension hooks generate quite a lot of force – banjo heads are generally much tighter than drum heads.
So, I set the fence on my table saw and sliced the long cylinder into 4-1/2″ rings to make the banjo shell. I cut and laminated two rings into an uncut ring for a triple-thick arrangement, that works out to about 5/8″ thick, with 24 maple veneer laminations in all.
In the photo above you can see the thick laminated banjo shell sitting behind some regular drum thickness rings.
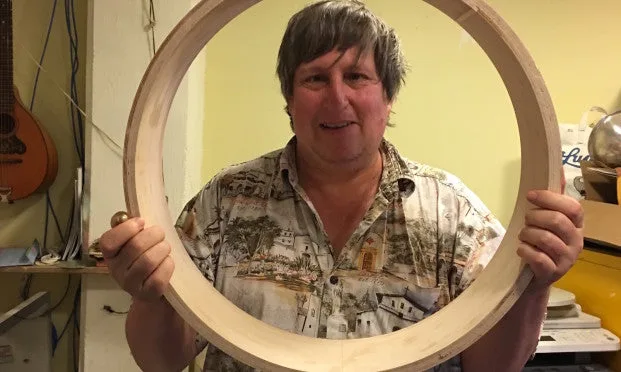
Here’s a shot of Michael – a classic pose:
This is going to be a big tenor banjo, you betcha!
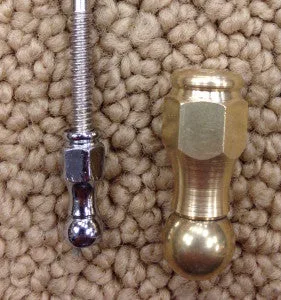
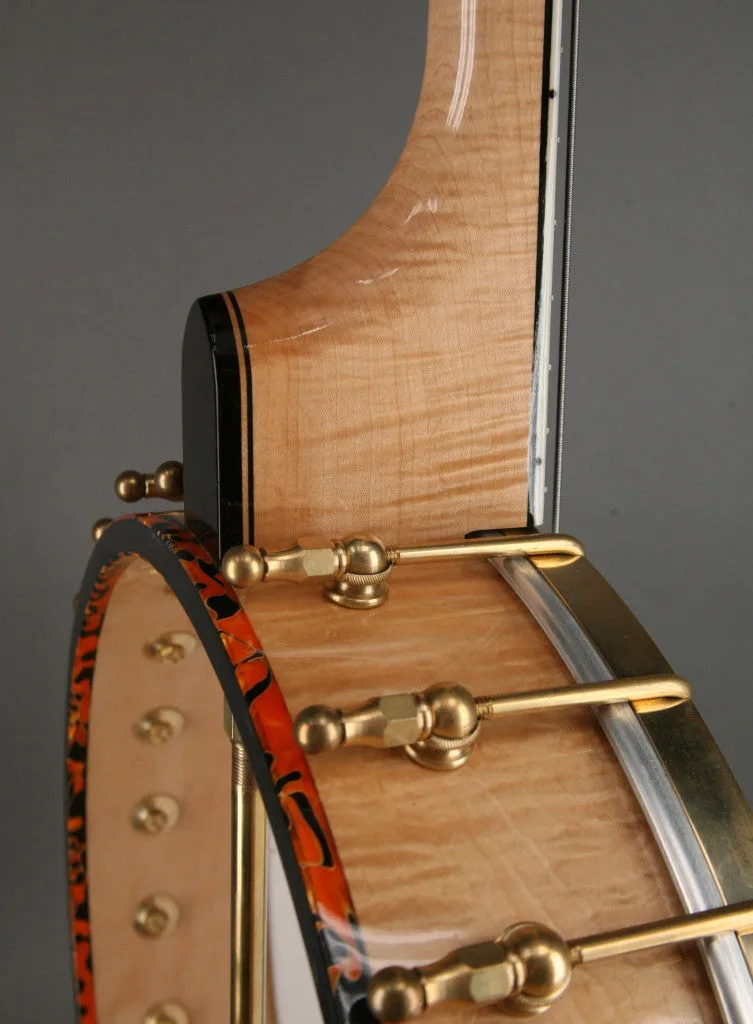
Since Vega is to be the inspiration, I figured I’d want to emulate the styling of the hardware as well as the neck and other features. As a matter of getting it underway, I decided to make the hooks and nuts first, because I’ve always liked the ball-end nuts Vega used on all those old time banjos. Here’s a shot of a real Vega unit, alongside my oversize replica:
Some decisions are being put off as the project gets underway, so at this point, we’re going with brass for all the hardware. Maybe later we’ll have it all nickel plated, but the brass has a nice “contemporary old-time” look, if you know what I mean.
Now, some of this old time banjo hardware was rather elegant in its design, from mechanical working standpoint as well as visual. I really couldn’t pass up doing a bit of unnecessary machining on the nuts, and since it’s not visible on the finished instrument, I’ll try to take some credit on this page.
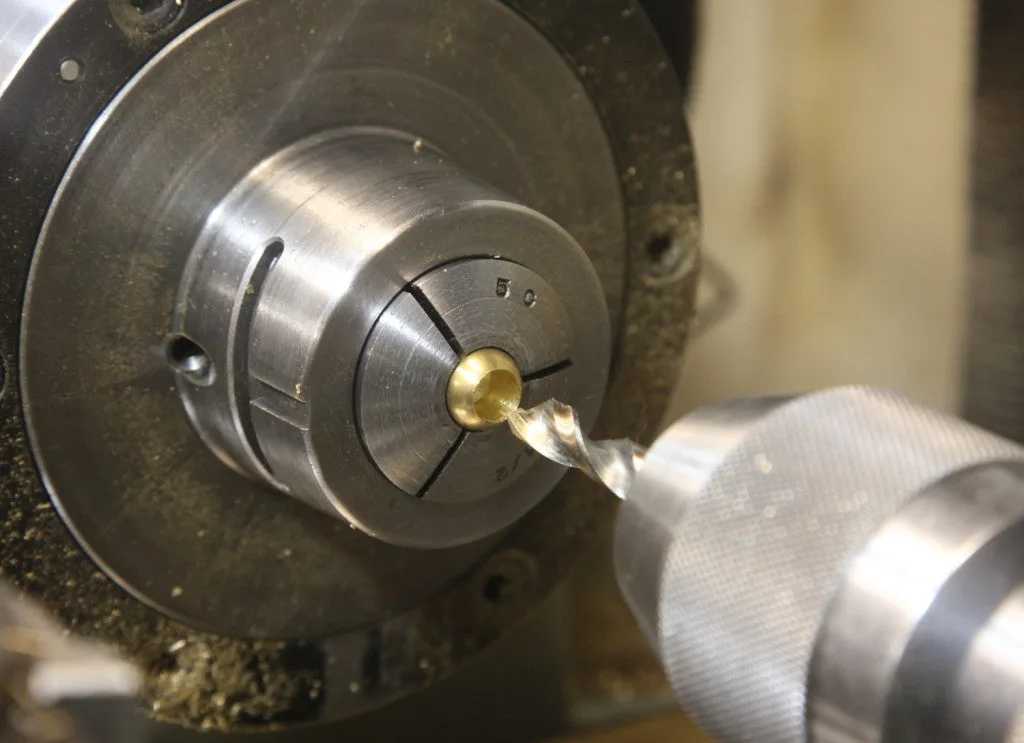
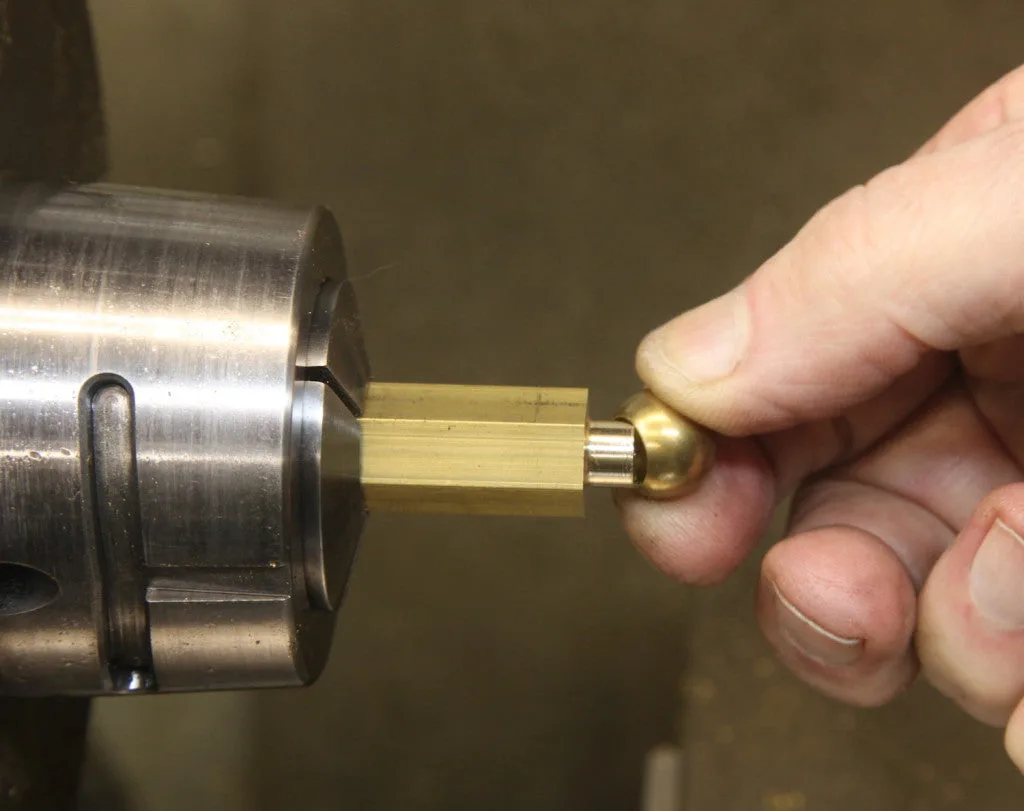
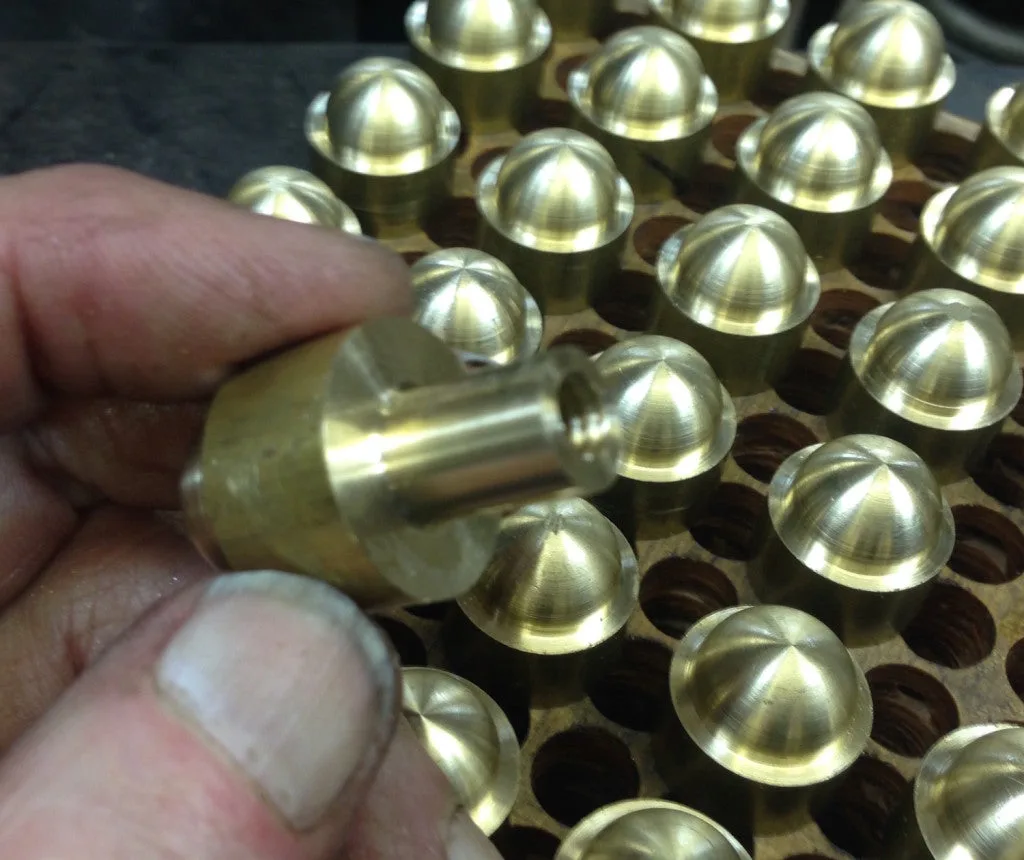
In order to make this cool nut, I worked with a two-piece design I’d seen on some from the 1890s. I bought a small supply of 1/2″ diameter brass balls, and drilled each one with a 5/16″ hole, almost all the way through, mounting the ball in my lathe collet to avoid marring its nice turned finish:
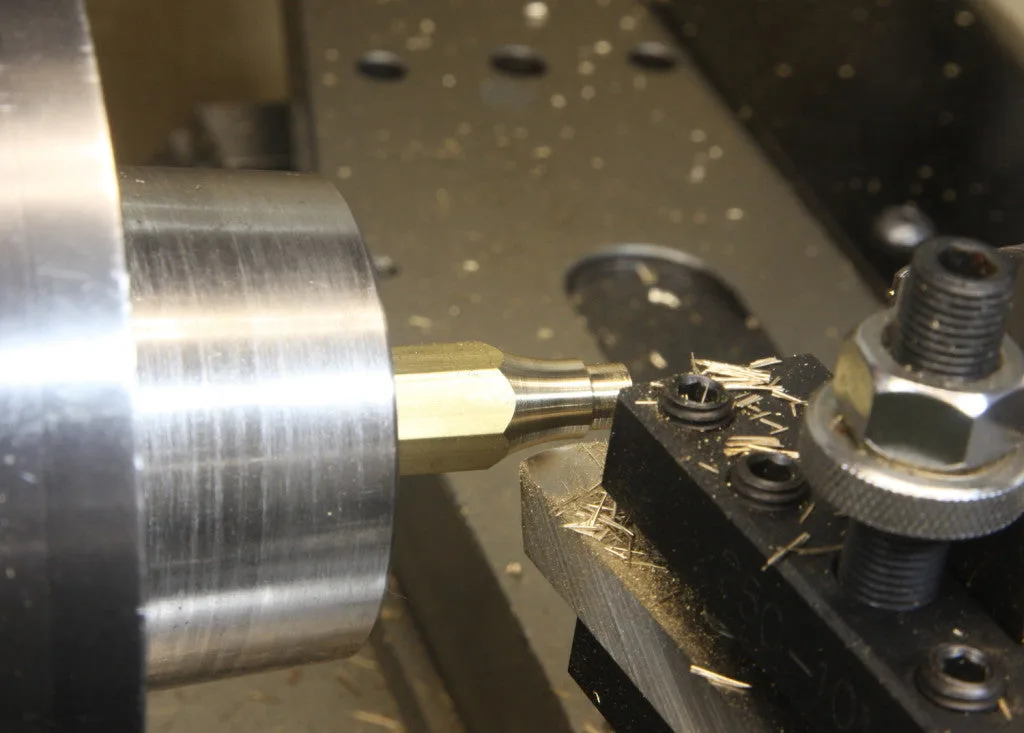
The main body of the nut was next, and I turned the end of some brass hex stock to fit the ball I’d drilled:
And, using a rounded “form tool,” I turned the nice contour where the nut transitions from the hex shape:
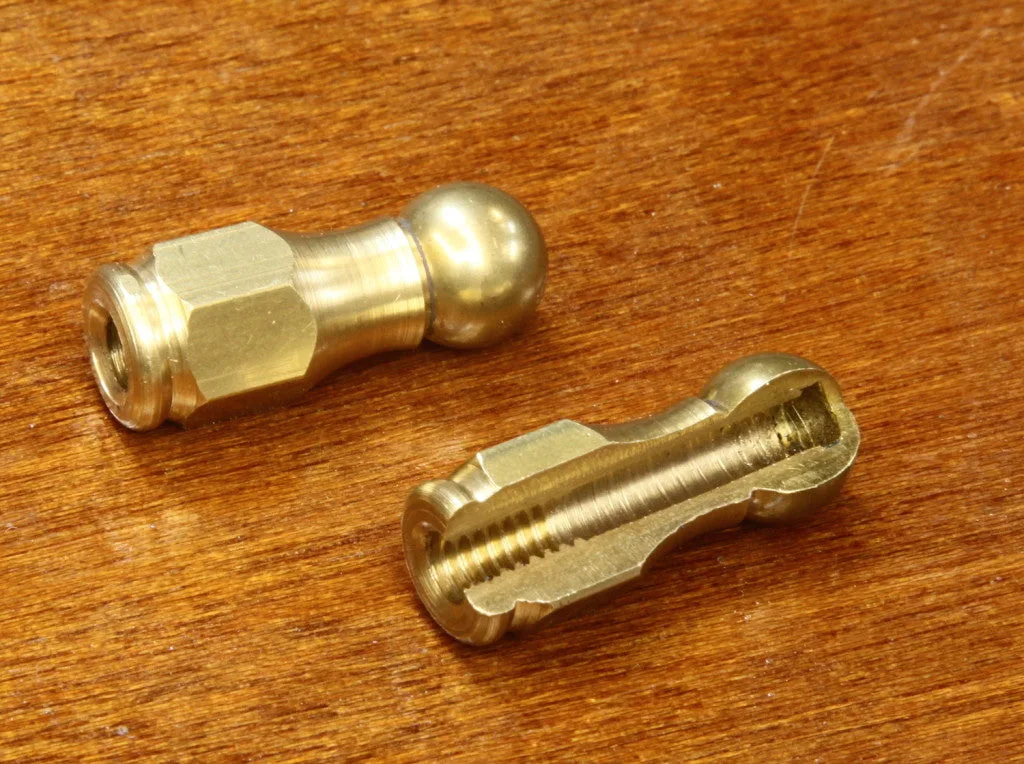
With the ball in place, the nut is starting to take shape, and only half a dozen or so operations remain to make it fully Vega-like. I drilled and threaded and formed the other end, drilled for thread clearance up to the ball, and ended up with nut that has a very pleasing shape, and is relieved to screw fully onto the hook. The idea is to be able to have lots of room for adjustment, so any variety of heads can be used, including a natural skin head if that becomes interesting. Check out the photo below, and you can see a good view of the inside:
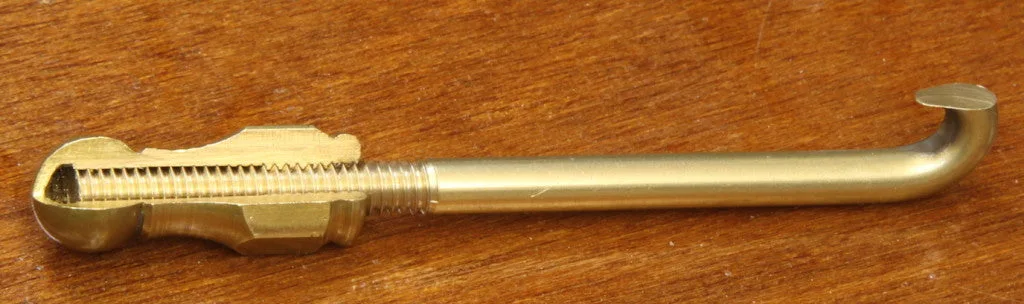
And, here it is with the hook screwed on:
This nut gives a full one inch of adjustment, while completely covering the end of the threaded hook. It doesn’t bind or drag as it is turned because only nine threads are actually engaged.
Having finished up the nuts, I really had a sense this project would get off the ground, so I got busy on the rest of the hardware. Next up would be the tension hoop, hooks and the lugs for the shell.
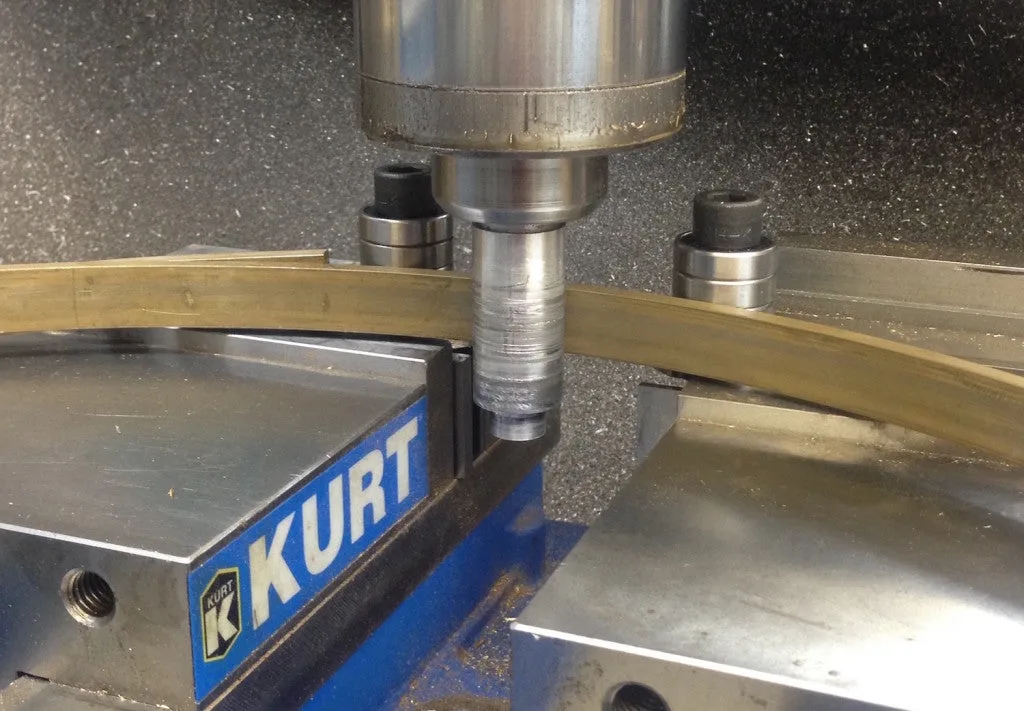
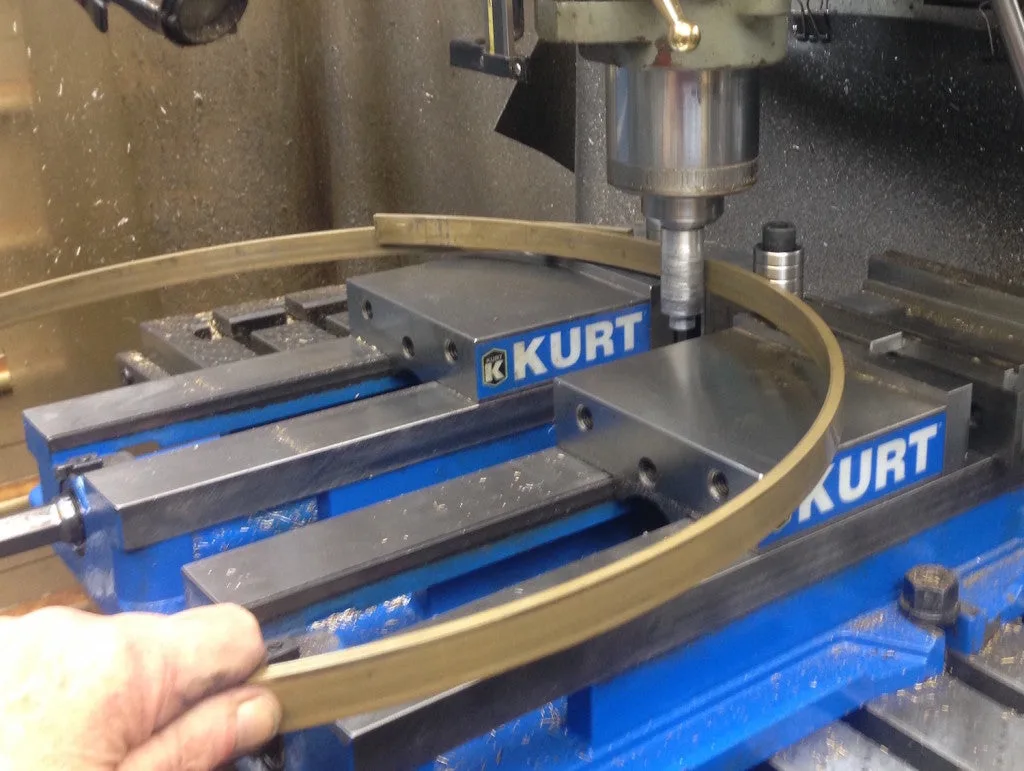
A big boy banjo like this one would certainly need to have big hardware, and the tension hoop proved to be a fairly challenging bit of bending, starting with a six-foot long brass bar 1/4″ thick and 3/4″ wide. In order to make a smooth bend, I had to rig up a bending fixture on my milling machine, so I set things up with a pair of heavy machine vises, each with a stack of ball bearings to act as rollers – that way I could easily adjust the spacing between the rollers. To drive the bar past the rollers, I used a simple one-inch diameter aluminum rod held in the machine quill. As I started to roll the bar past the uprights, I pressed it toward the rollers by drawing the mill table forward, running the machine at 50 RPM, its slowest speed:
I ran the bar through multiple times, with each pass decreasing the radius of the curve until I reached the approximate size I needcd:
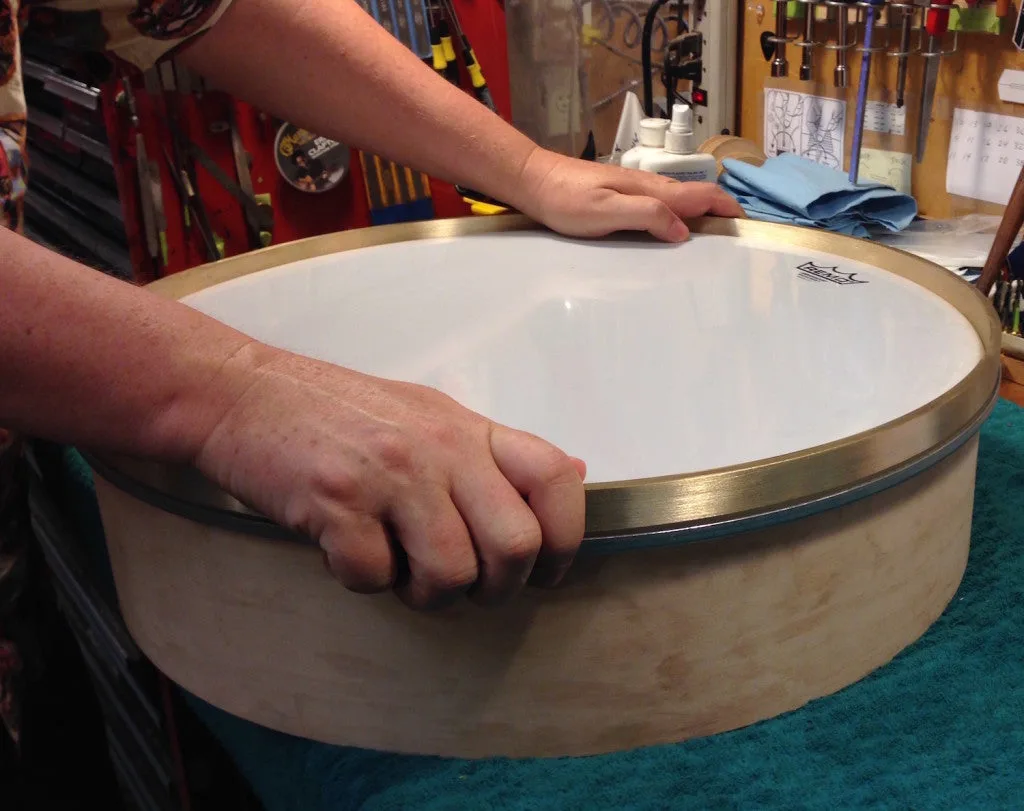
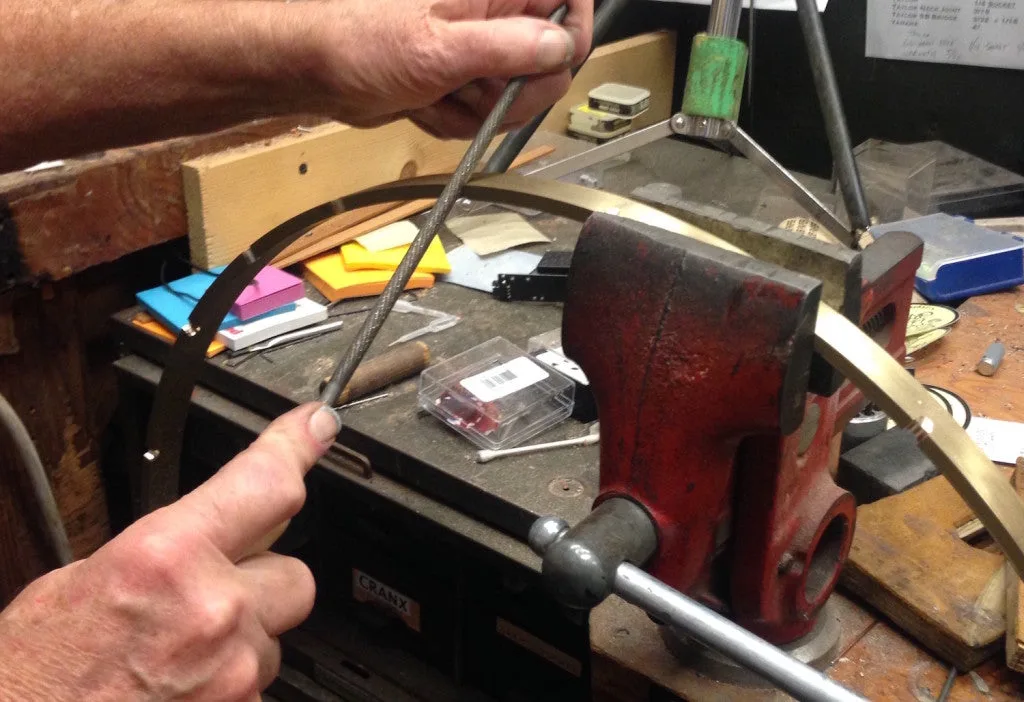
Then, it was over to the vise to cut and file a nice overlap joint preparatory to silver-brazing it together into a ring that would fit right over the head. After some serious cleanup with sandpaper and files, I had a nice fit:
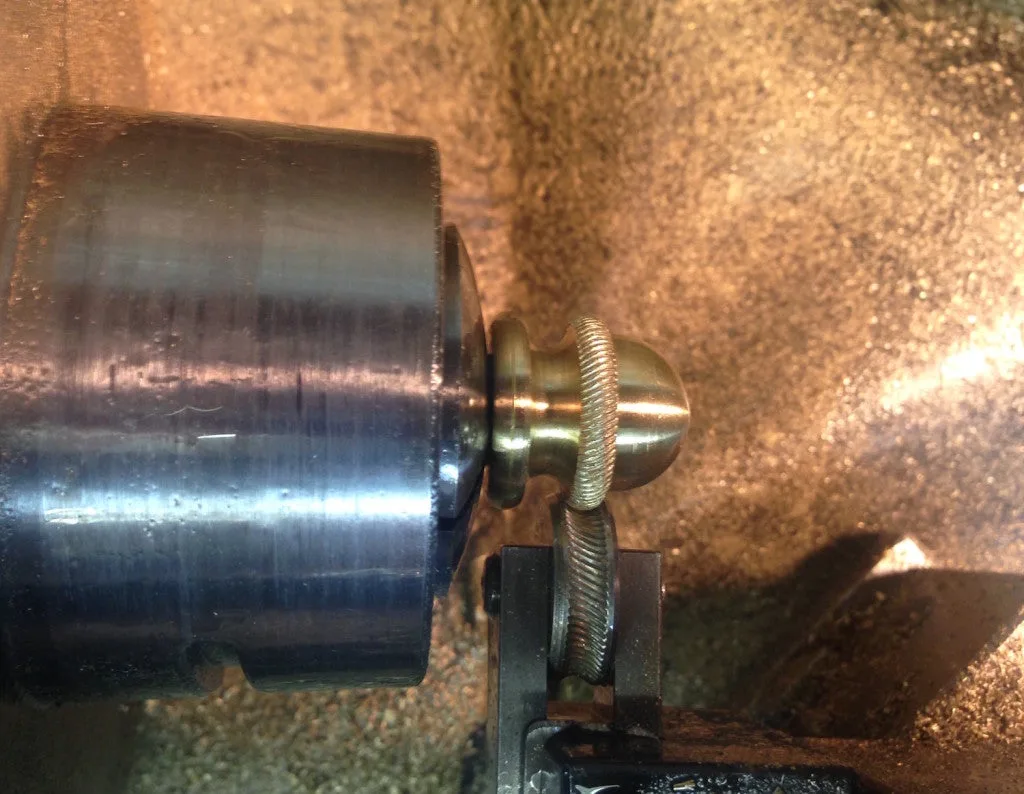
The next bit of machine work took quite a while as I machined the decorative end of all the lugs to go around the shell. I made each lug with a ball end and a turned, drilled and tapped segment that would be pressed into the wall of the shell, and secured with a screw from the inside:
Then I held the part by the stem end and turned the decorative bits with various form tools, finally pressing the decorative “rope” pattern feature using a concave knurling tool I’d made some years ago to use for some special projects:
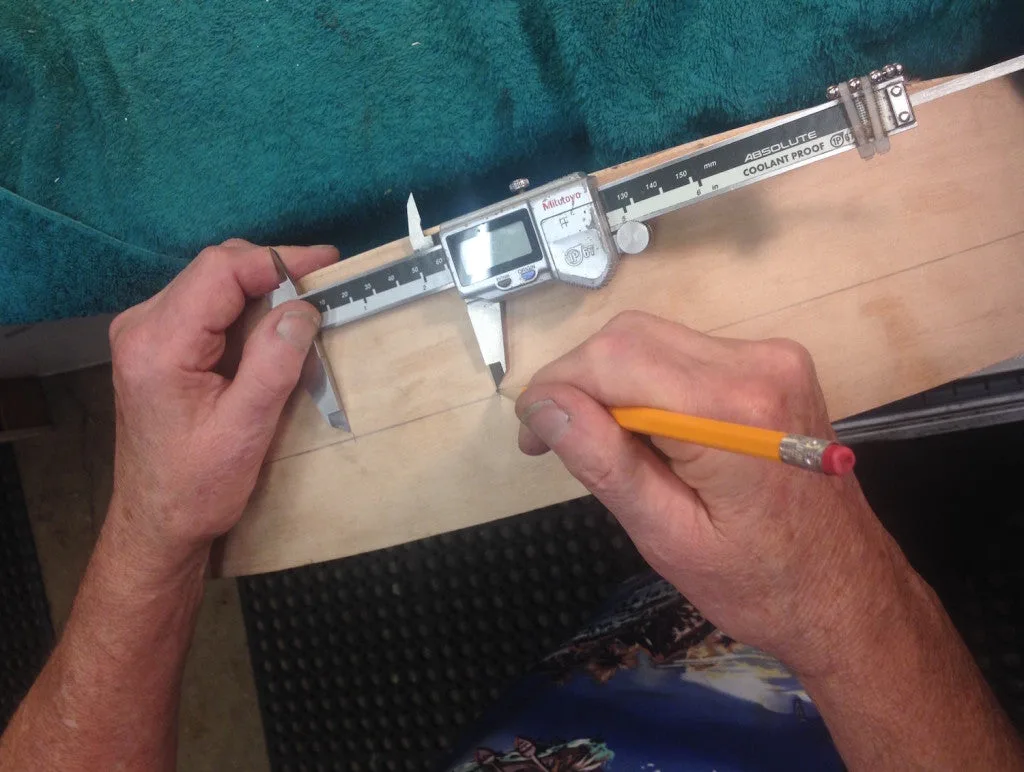
I swear it felt like it took me half a day to mark out the spacing for the 24 lugs around the shell, taking into account the need for a slightly wider spacing at the tailpiece and neck positions. “Measure twice – cut once” is the old woodworker’s adage, but this time I think I measured a dozen times before I got it right:
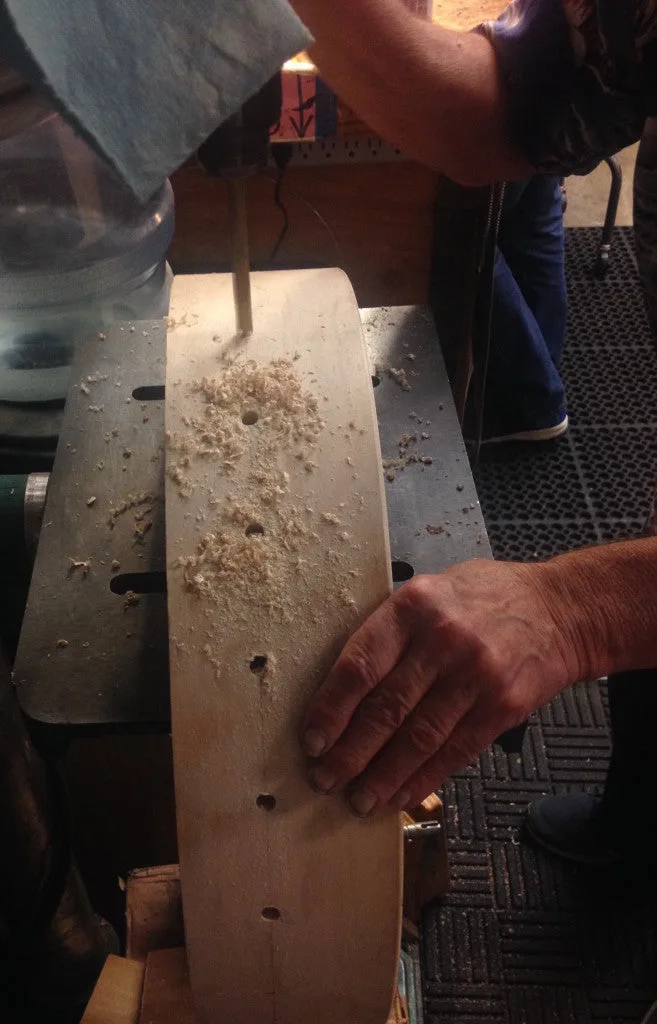
Ordinarily it can be a bit tricky to align a drill for boring holes squarely in a big round surface, but since this giant banjo actually straddled my drill press table, it was almost automatically lined right up as I drilled the two dozen holes:
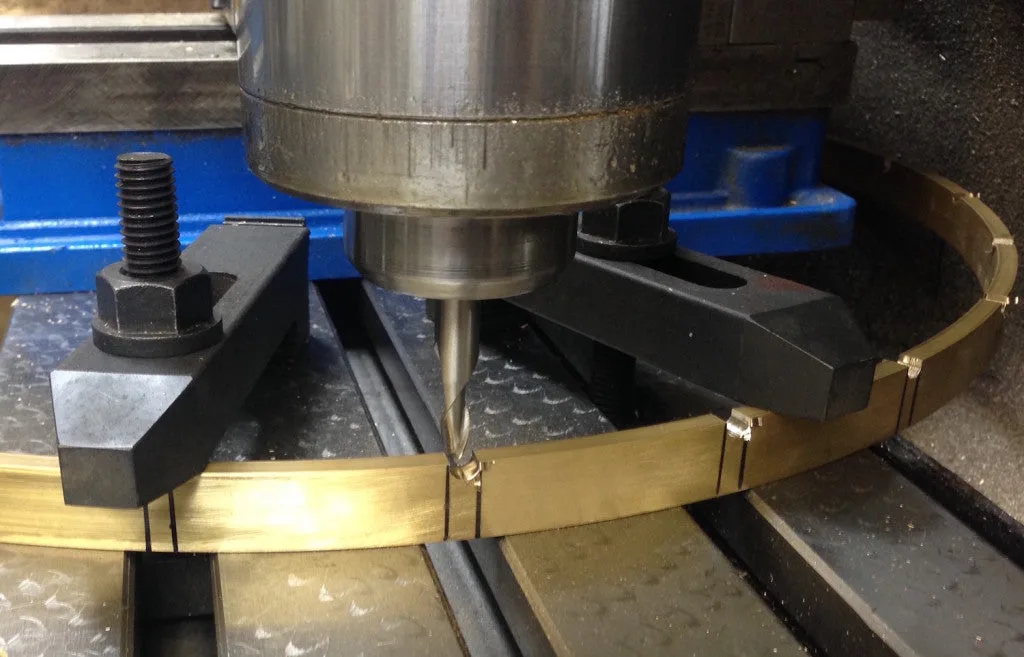
Once I had all those holes laid out and drilled, and the lugs installed I was able to slip on the tension hoop to mark the location of the 24 hooks, thereby making certain that all the hooks would line up nicely. With the locations marked out, I clamped the tension hoop to the mill table, and used a 1/4″ ball end mill to rough out a notch for each of the hooks:
It took a bit of hand filing to make the notches rounded and contour to fit the ends of the hooks. Without that little touch, the hooks might not be able to handle the appropriate tension without deforming or breaking at their bent ends:
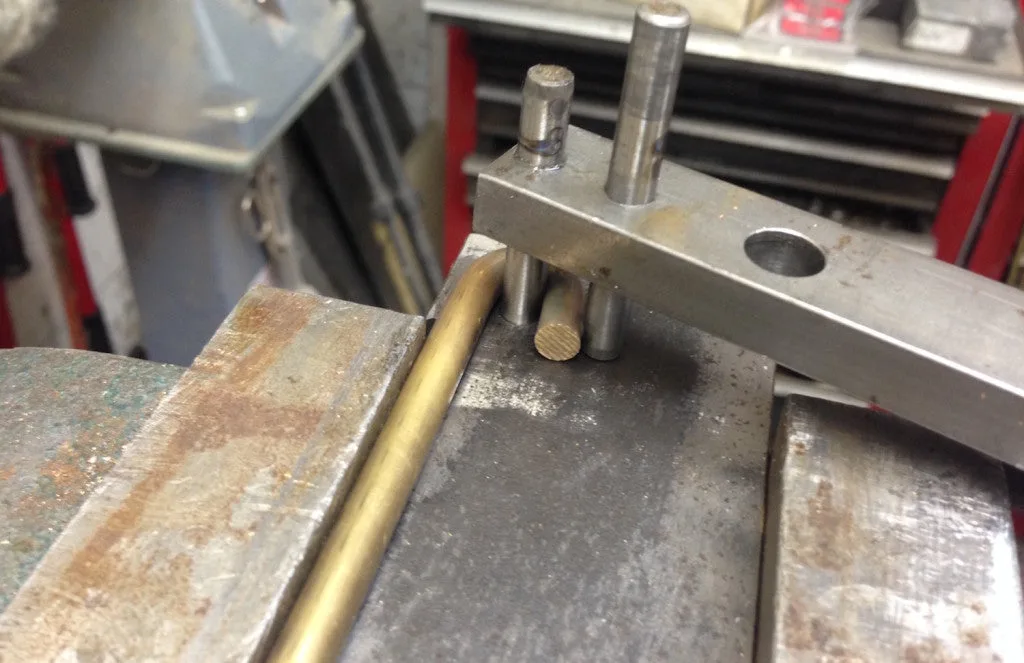
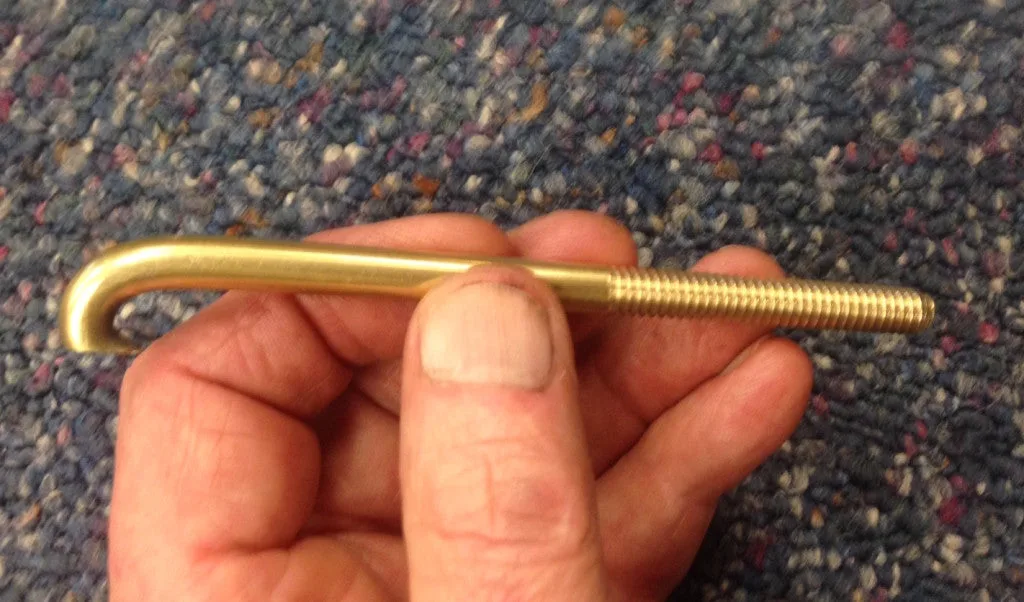
I made the hooks from brass, too, using 1/4″ diameter rod. To form this stuff to such a sharp curve, I heated the material to a dull red, and bent it in a simple, dedicated fixture I made up for this job:
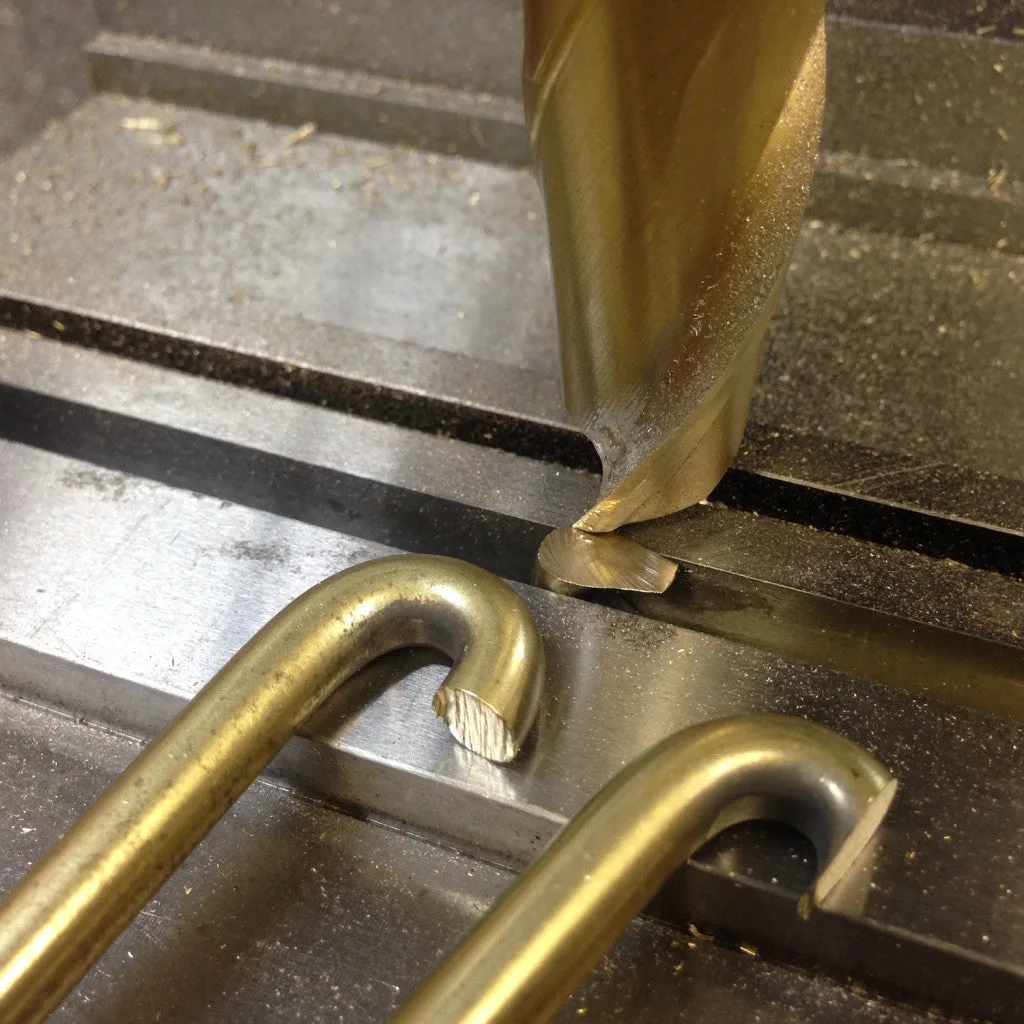
Over on the milling machine, I was easily able to trim the ends of the hooks to a nice uniform shape and length:
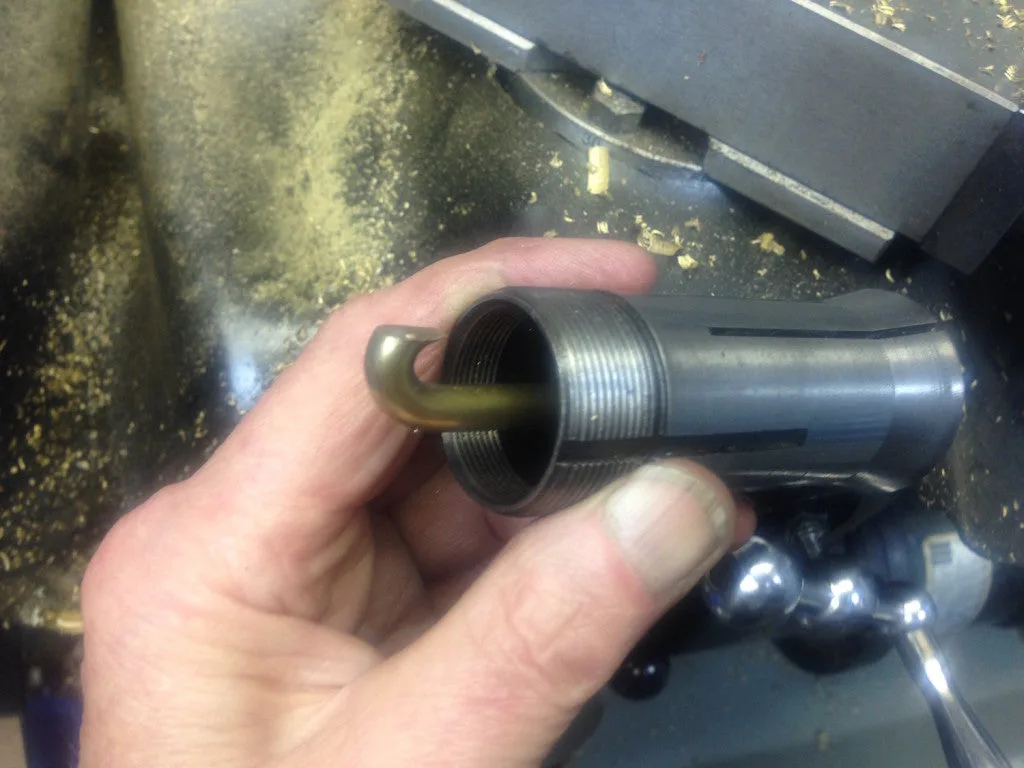
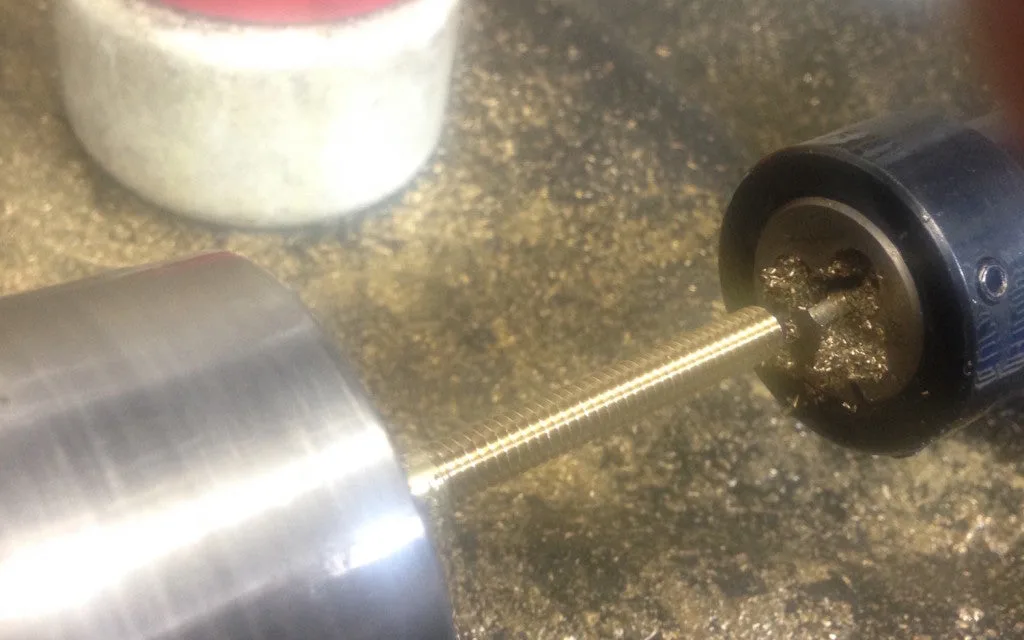
Because I’ve basically been designing this thing as I go, I actually made all the hooks before I figured out what length I’d need, so I didn’t cut or thread their ends until I had the shell together with head, tension hoop and lugs in place. Once I finally decided on length, I had a bit of a harder job threading them than I might have otherwise, but for only 24, it wasn’t too big an issue to do them individually, by inserting them backwards into the lathe collet, mounting the collet and running a threading die in the lathe tailstock:
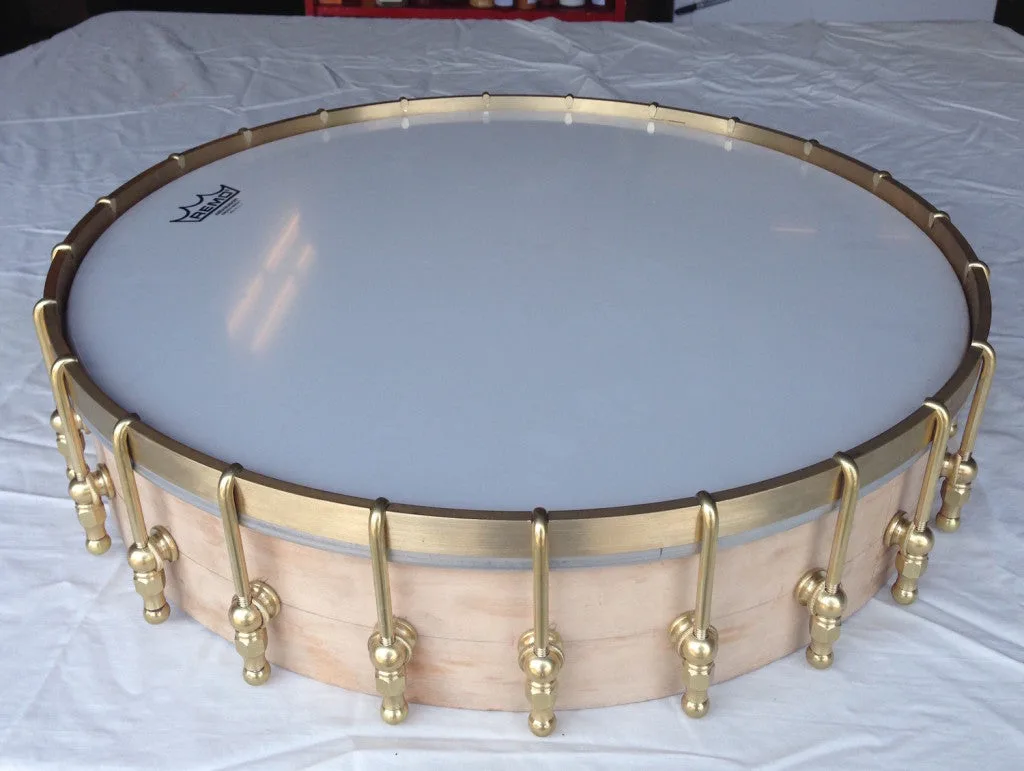
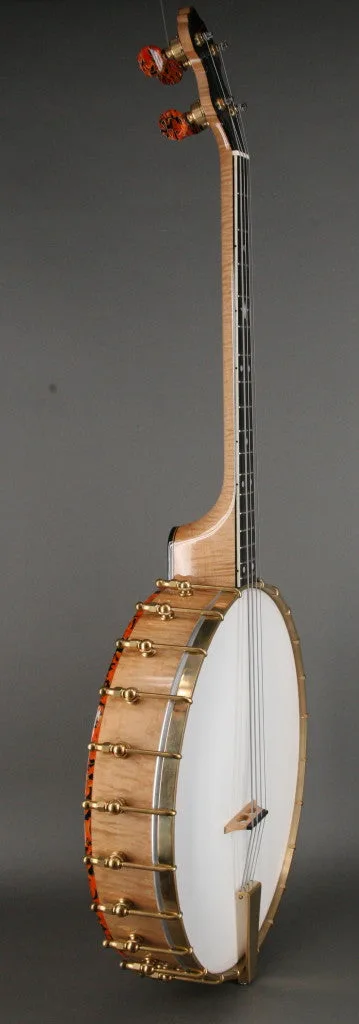
Well, here’s the shell all assembled:
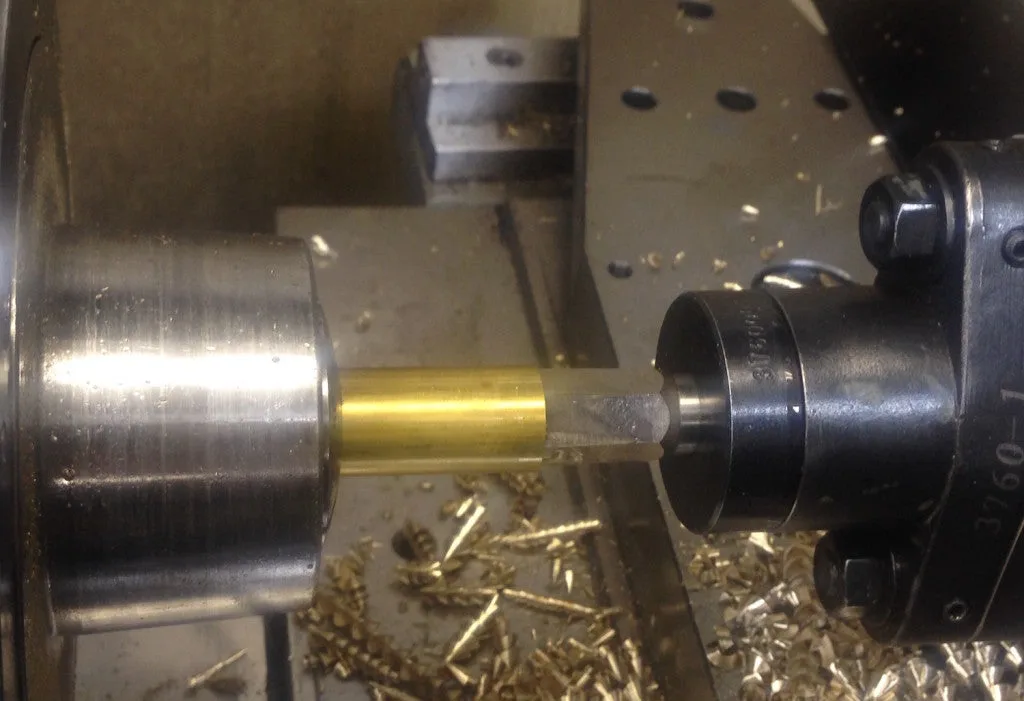
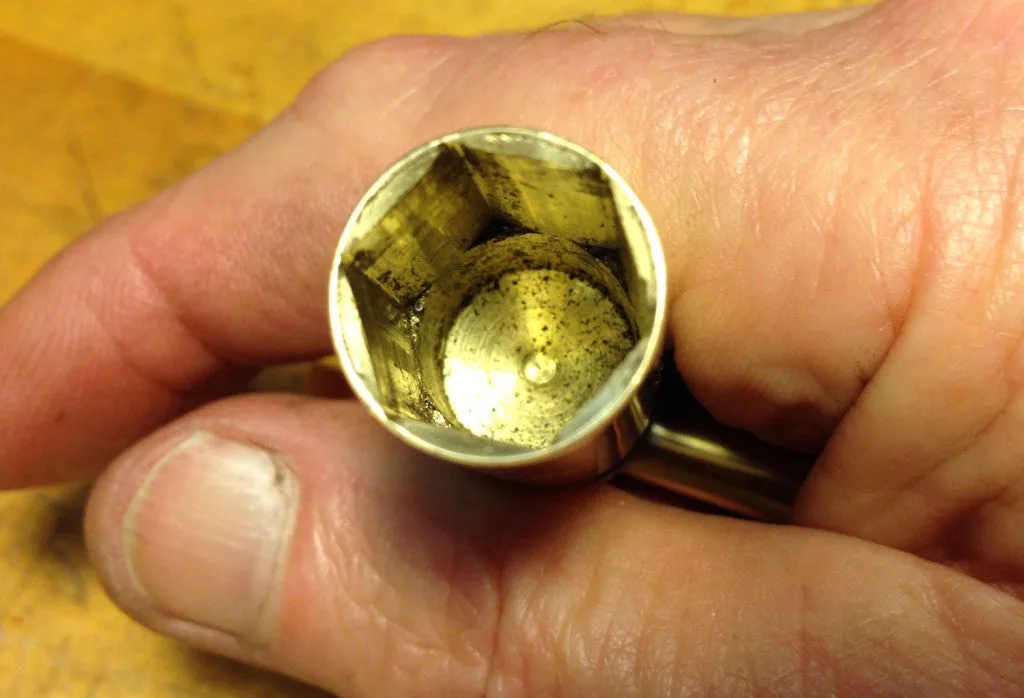
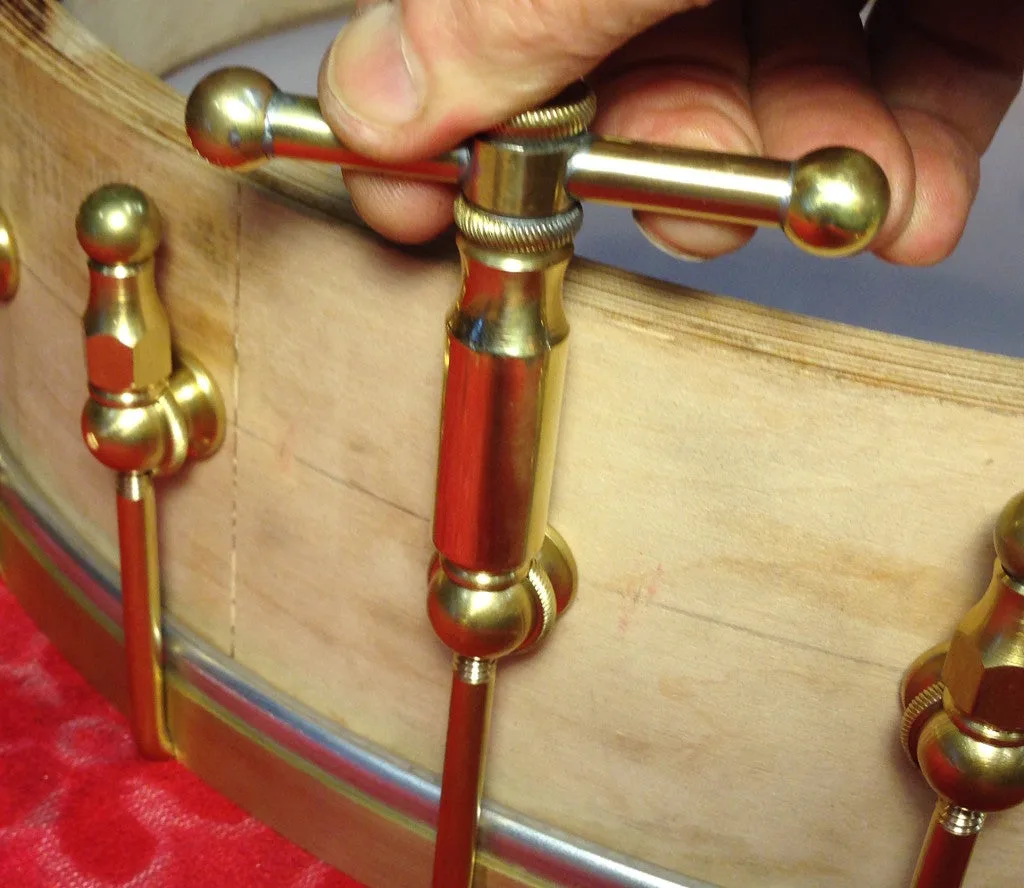
Naturally, the first thing the guys in the shop did was tease me about having a wrench to tighten the head on this big banjo, so I had to rise to the occasion, and make one up. I happen to have a tool called a “rotary broach” so I could form a hexagonal hole in a brass rod to make the 1/2″ banjo wrench I needed right on my lathe. Here are a couple of photos of the process and the finished tool:
Whew! That’s it so far, with a lot more stuff to come. Next, we’ll be laying out and making the neck, a few more small metal bits, and making some decisions along the way. This banjo will continue to be a scaled-up version of the classic 1920s 17-fret Vega tenor, so it will need a big tailpiece, an appropriate neck, and maybe a resonator.
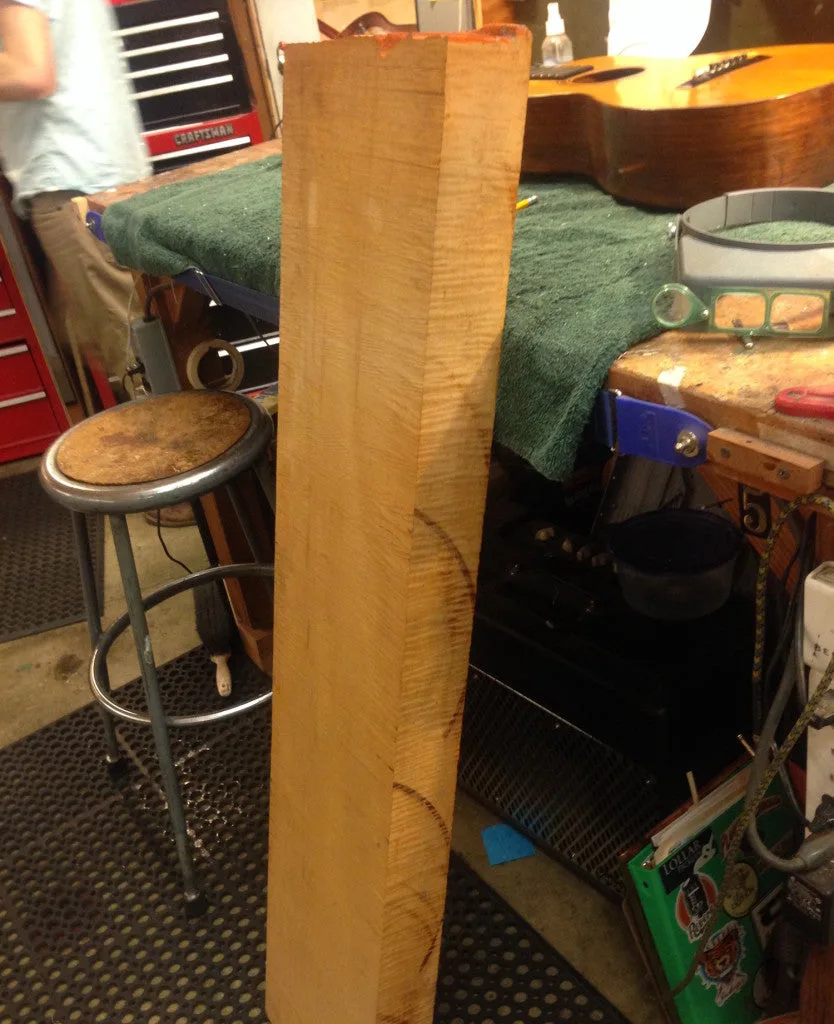
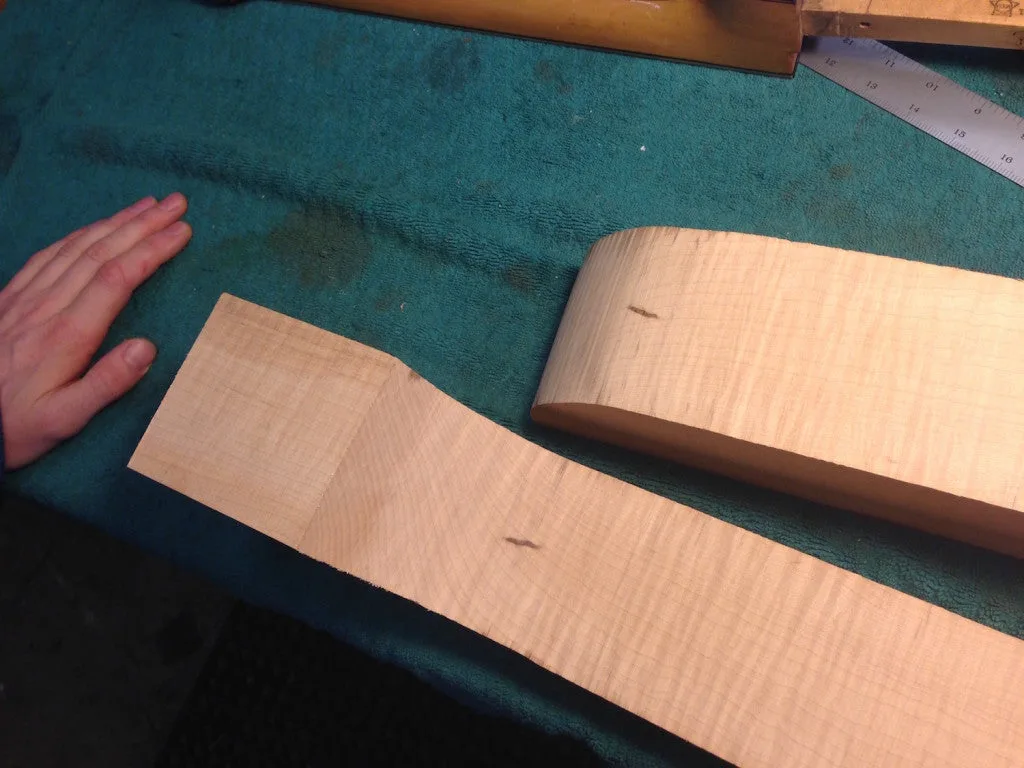
After some serious rummaging in our special wood pile upstairs, I found a likely piece of maple for the neck of this beast:
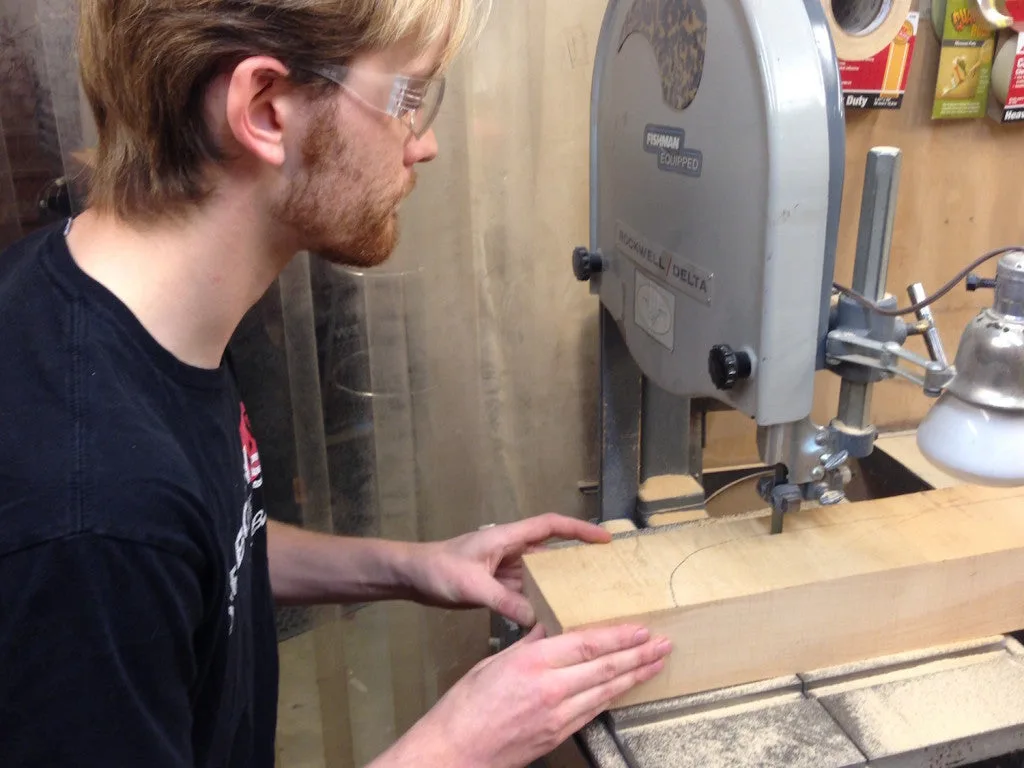
We actually bought this hunk of maple at MacBeath Hardwoods (Berkeley, CA) in 1971. It’s eastern hard maple, a solid 3-1/2 inches thick and by now rather thoroughly air-dried, I’d say! Wrestling it over to the bandsaw, we sliced off a section big enough for a one-piece bass banjo neck.
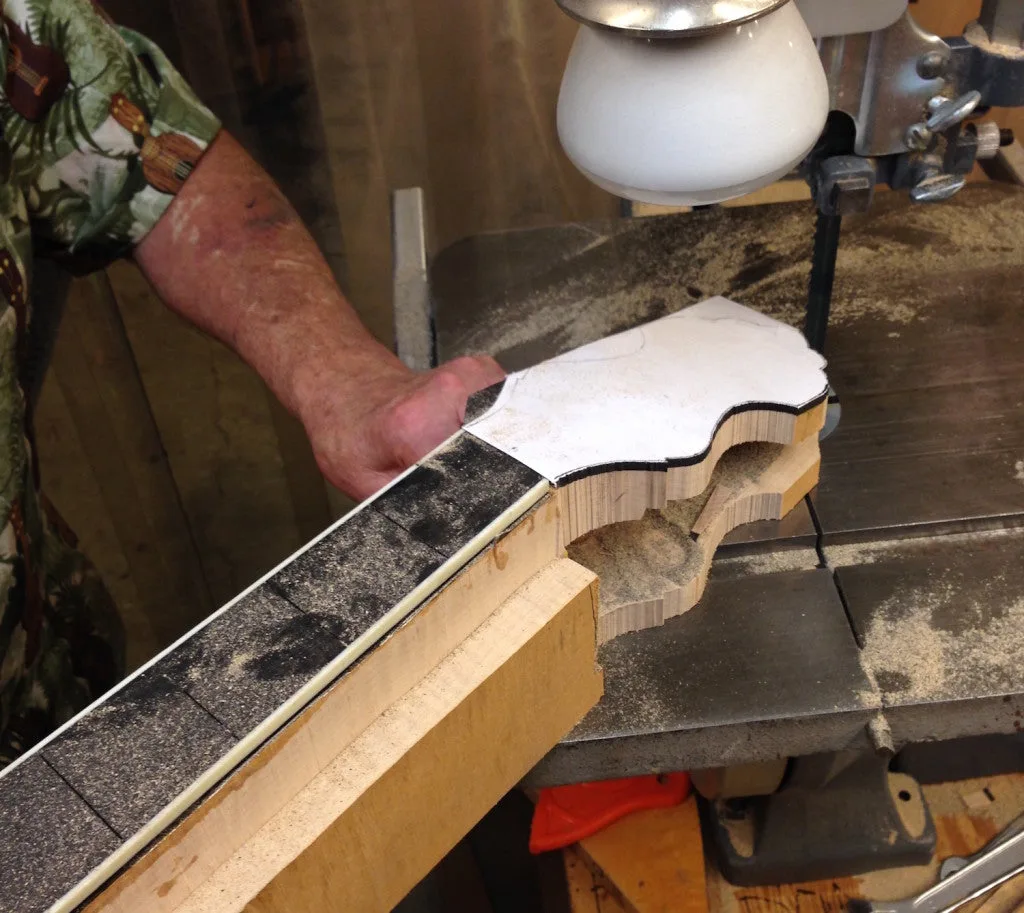
Here’s James cutting the profile, after laying out and marking the side view of the neck:
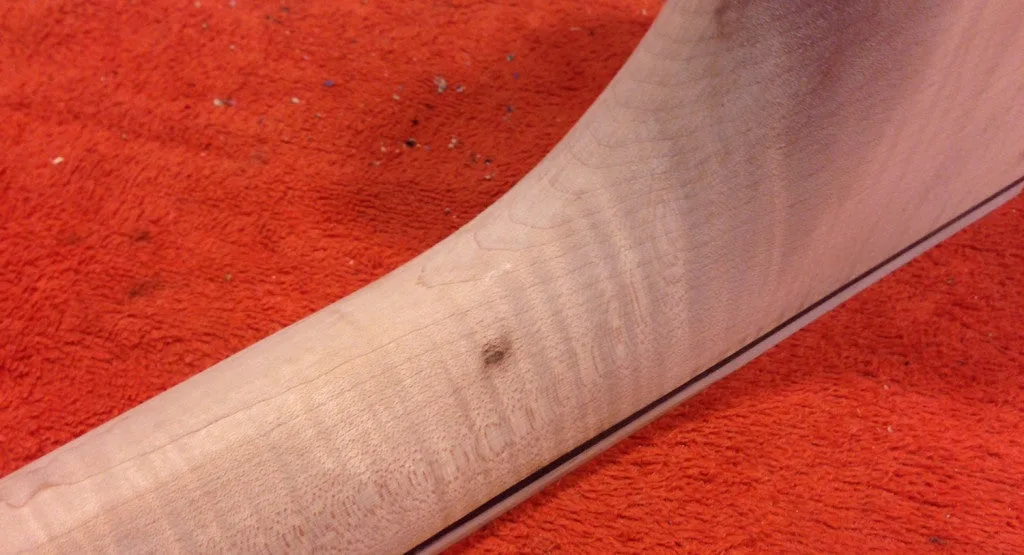
Oy – now here’s a fine little disaster! The cut revealed a little dark brown flaw in the wood, right at the curve of the heel:
It’s the kind of thing that can’t be detected from the outside before cutting, so we’ve learned to accept this kind of surprise, but, well, it is still disappointing. Had this been a different situation (and not such a giant piece of hard maple) we might well have tossed it out as unusable, but considering the scale and scope of this project, we thought a little “character” wouldn’t hurt anybody’s feelings. So, we’re going to proceed with our original enthusiasm intact. After all, it’s such a nice piece of figured maple.
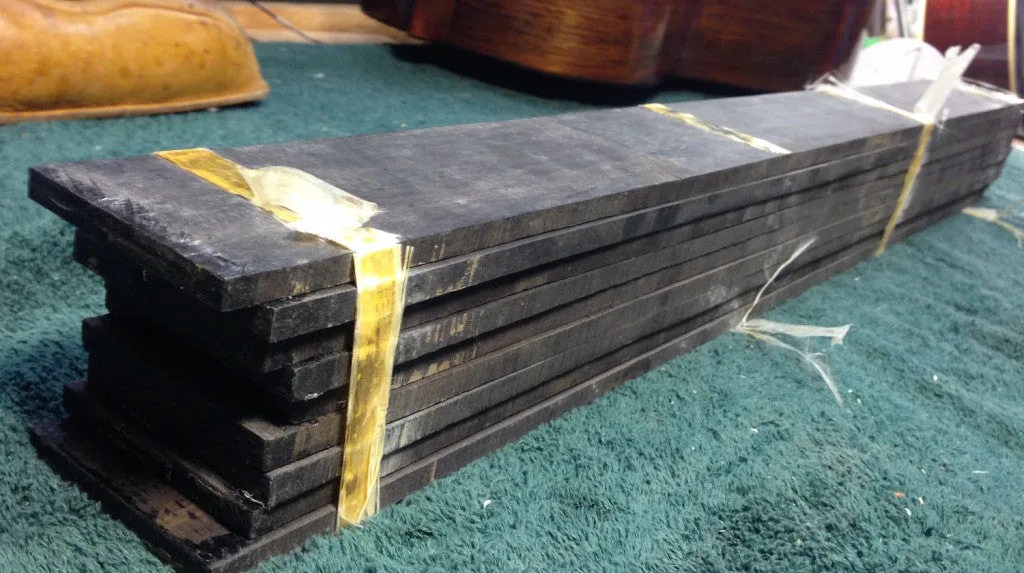
Here’s some more material from our upstairs stash:
That’s some petrified strapping tape trying to hold a small stack of fingerboards together. I don’t recall the exact date, but these date from the 1970s sometime ordered from the Vitali Imports catalog. They are oversize and overlength fine quality ebony fingerboards – just right for our bass banjo.
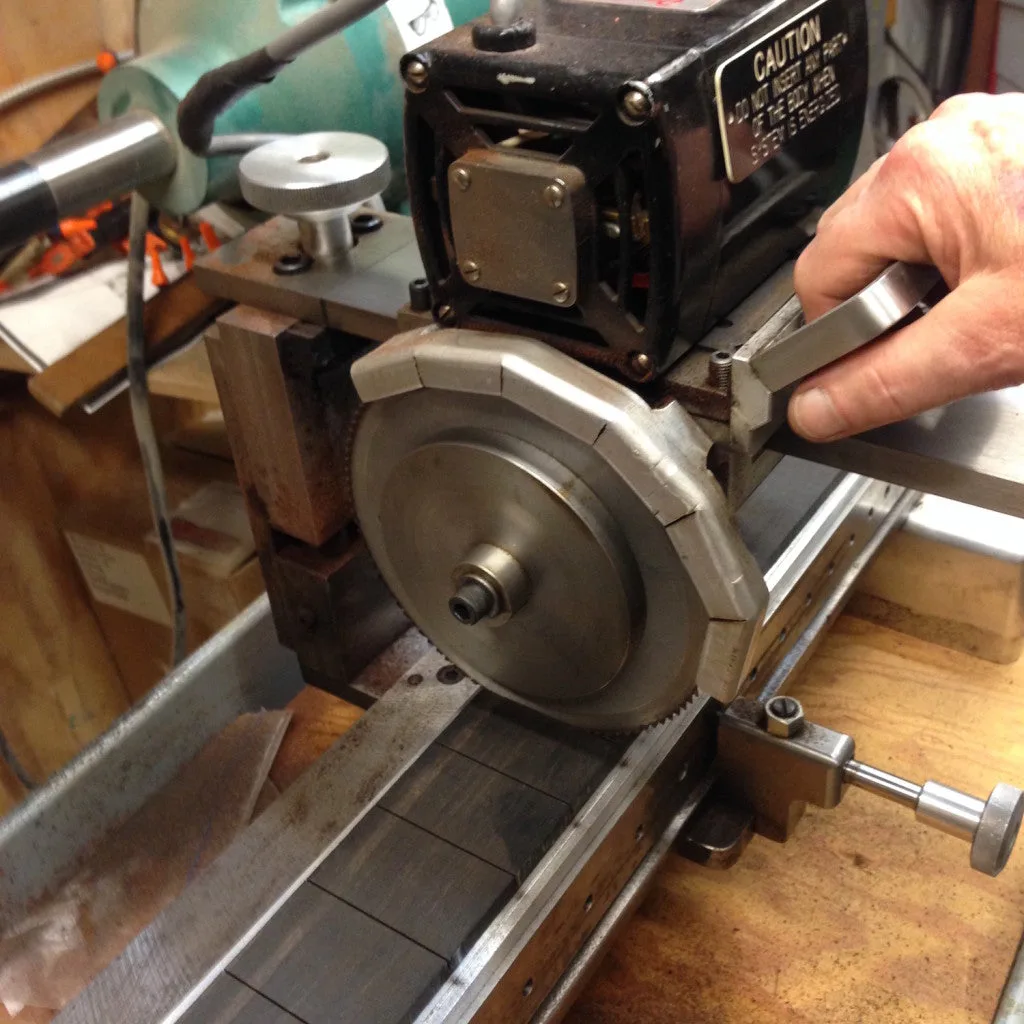
Some of the guys at Gryphon get into making electric basses, so a few years ago I’d made up templates for Gryphon’s Fret Saw to cut appropriate scale fingerboards. We’ve chosen 34″ for the bass banjo, so with that template mounted, we sliced the board for seventeen frets:
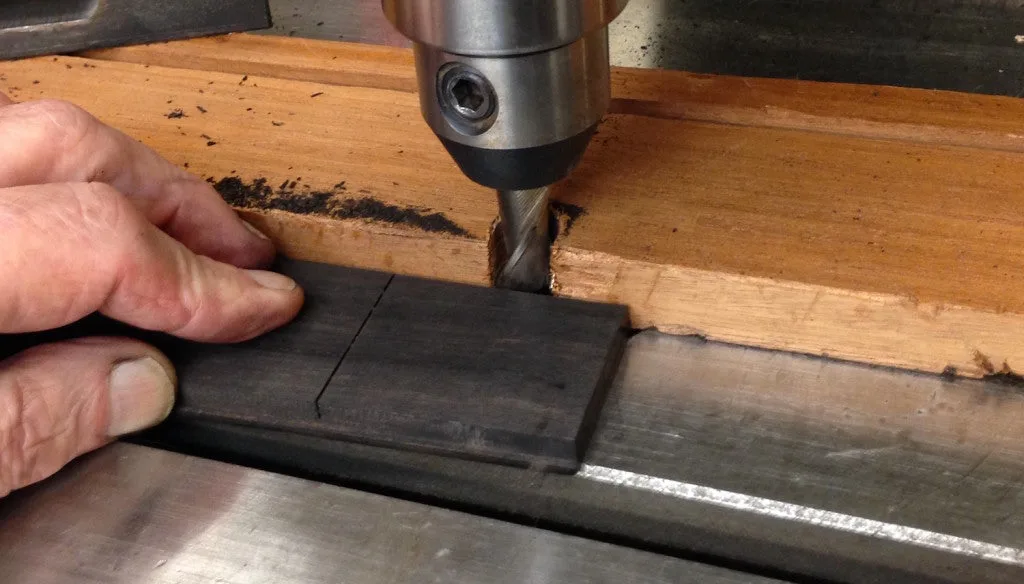
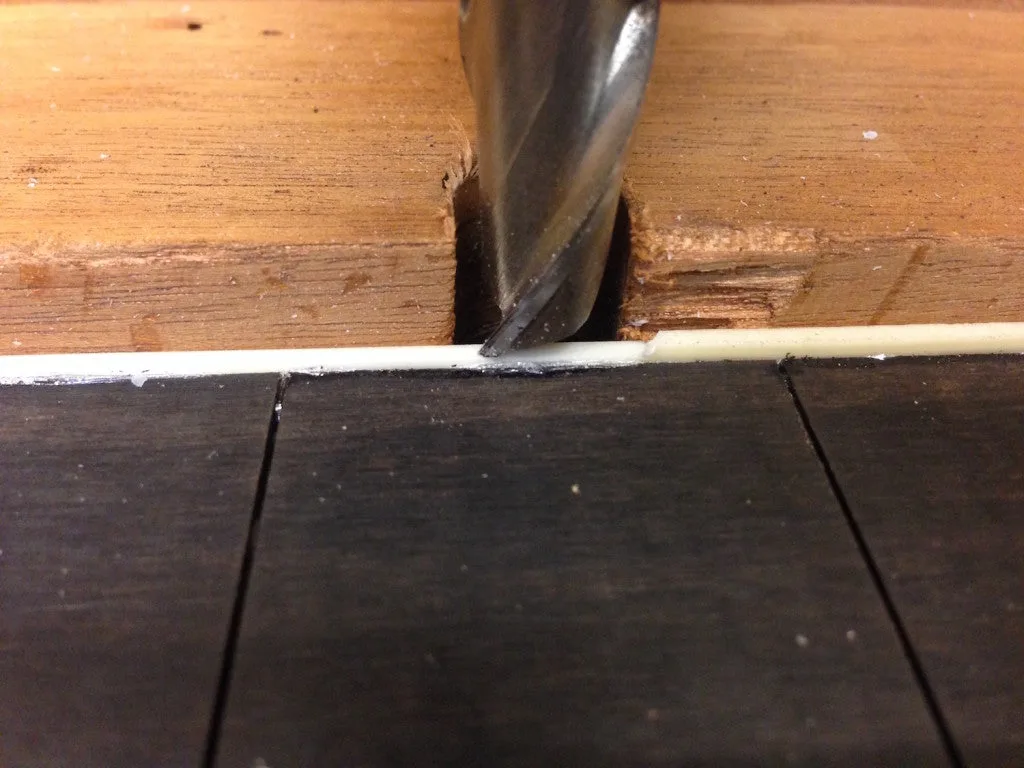
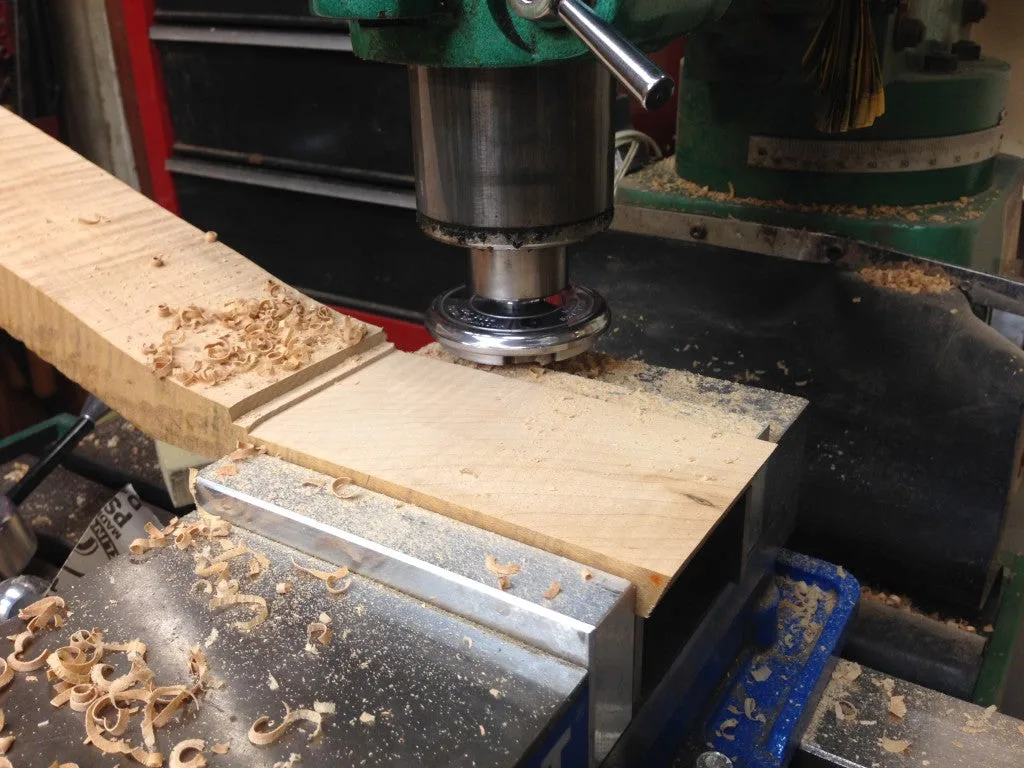
After profiling the tapered width of the fingerboard, I set up a simple wood fence on our milling machine to use a nice sharp end mill to cut the channel for ivory celluloid binding:
After the binding glue dried, I used the same setup, readjusted for height and depth, to trim the binding right in place:
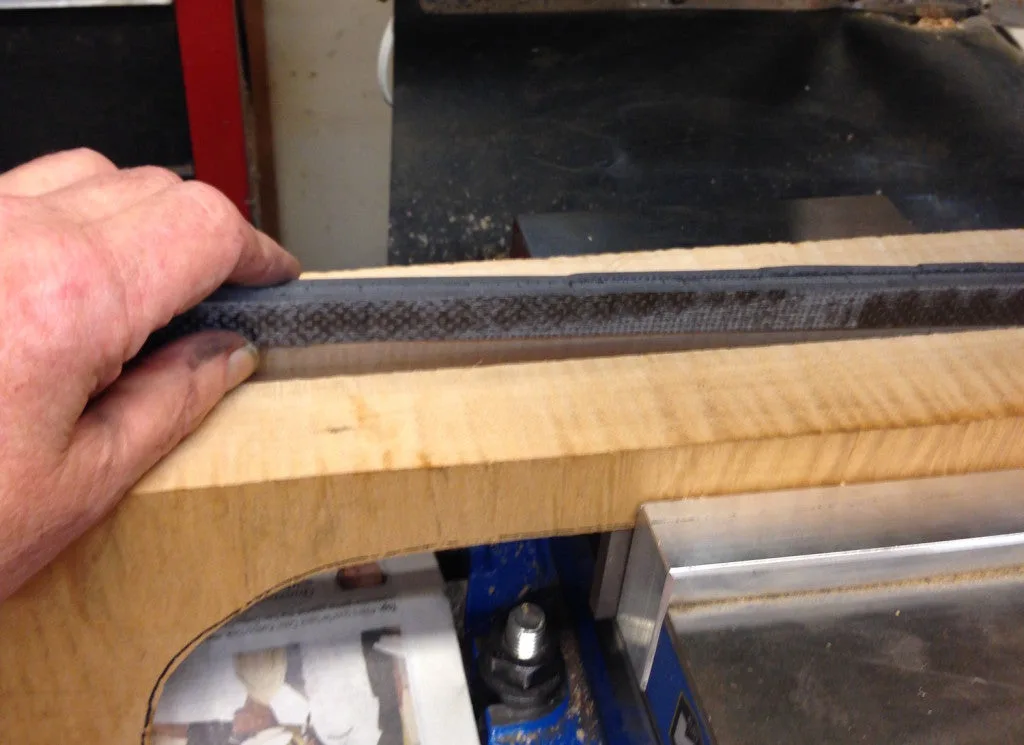
Back to the neck blank itself, here’s a shot of the heavy carbon fiber composite reinforcement we chose instead of an adjustable truss rod:
While this instrument will have the same scale as a Fender electric bass, the neck will be much heavier – more in keeping with the profile of a traditional “stand up” string bass. So, instead of a flexible, adjustable neck, we’ll have a heavy rigid one. Figuring that a bass banjo will not be used for sophisticated electric style playing, we’re never going to have to work with low action as we would with a jazz or rock style instrument.
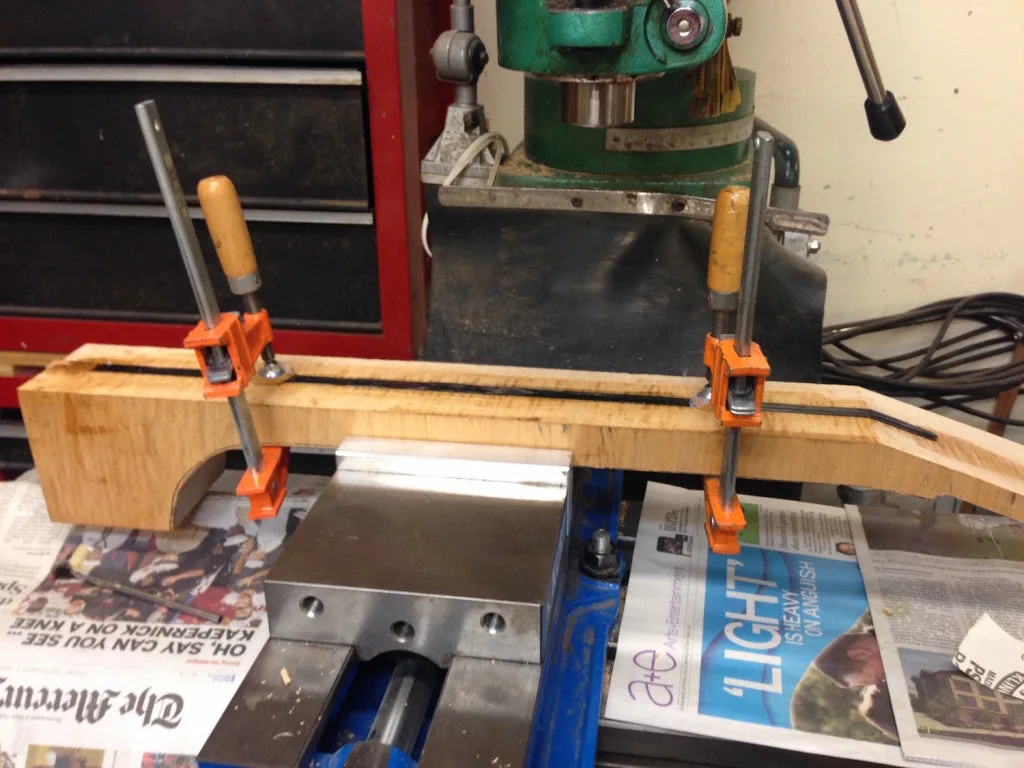
I’d used the milling machine to produce the slot for the reinforcement, and I glued the carbon fiber in place without taking the neck off the machine:
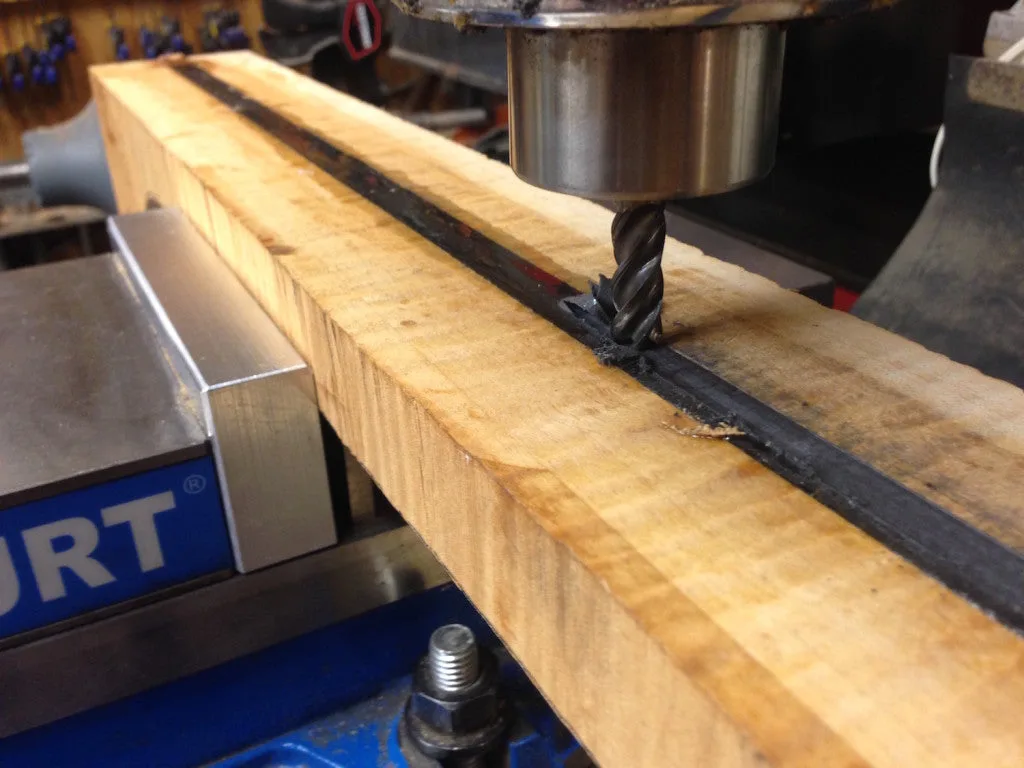
Then, after the epoxy hardened, I could easily skim off the top of the rod and true everything up nicely by plowing through the super hard composite with a slightly damaged carbide end mill:
Carbon fiber composites are notoriously hard on cutting tools, so I don’t throw out end mills that get chipped or worn, because I can still use them for abusive jobs like this one.
The classic “Wagner Safe-T-Planer” made short work of truing up the back of the peghead and reducing it to approximate thickness:
We used the same tool to smooth out the top of the peghead, and glued on a nice 3/16″ thick ebony overlay.
After gluing on the fingerboard and roughing the vertical profile of the neck, we set about covering the face of the peghead with white paper and drawing the outline of the Vega-style peghead (scaled up to proportion, of course) and prepared to cut the peghead profile on the band saw.
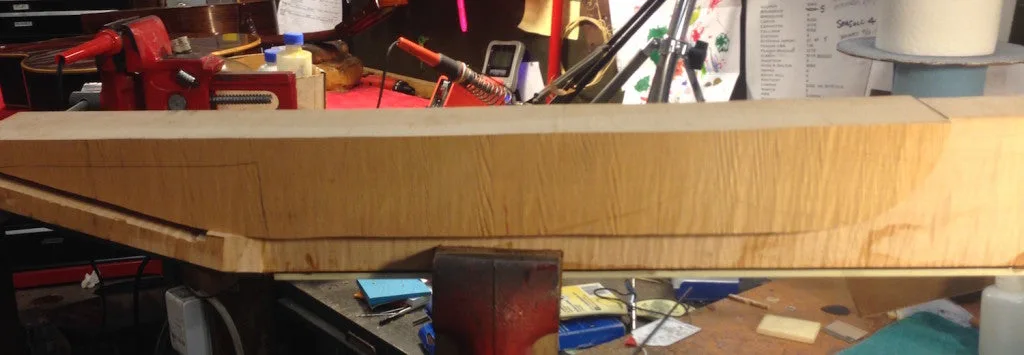
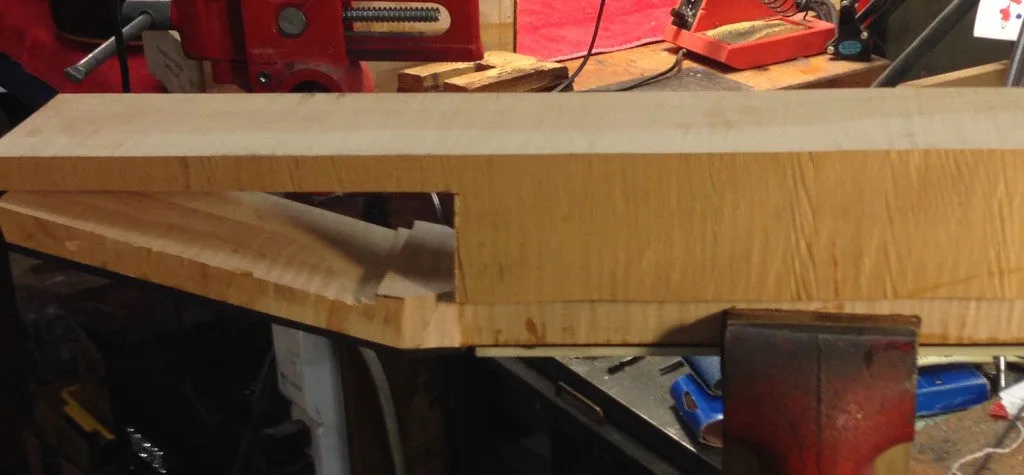
Unlike guitar pegheads, banjo pegheads have their profiles cut at a ninety degree angle to the plane of the fingerboard, so we feel it’s important to maintain that tradition, even on a novelty instrument such as this one. We figured the easiest way to handle the neck on the bandsaw would be to make a simple fixture to support it, and we thought it would be simple to glue back the portion of the lumber we’d cut off earlier, using some low strength hot melt craft glue. To avoid cutting a complex pattern through too much extra material, we prepared to undercut some of it to provide a sort of tongue:
Here’s the setup, as we cut the profile at the required angle:
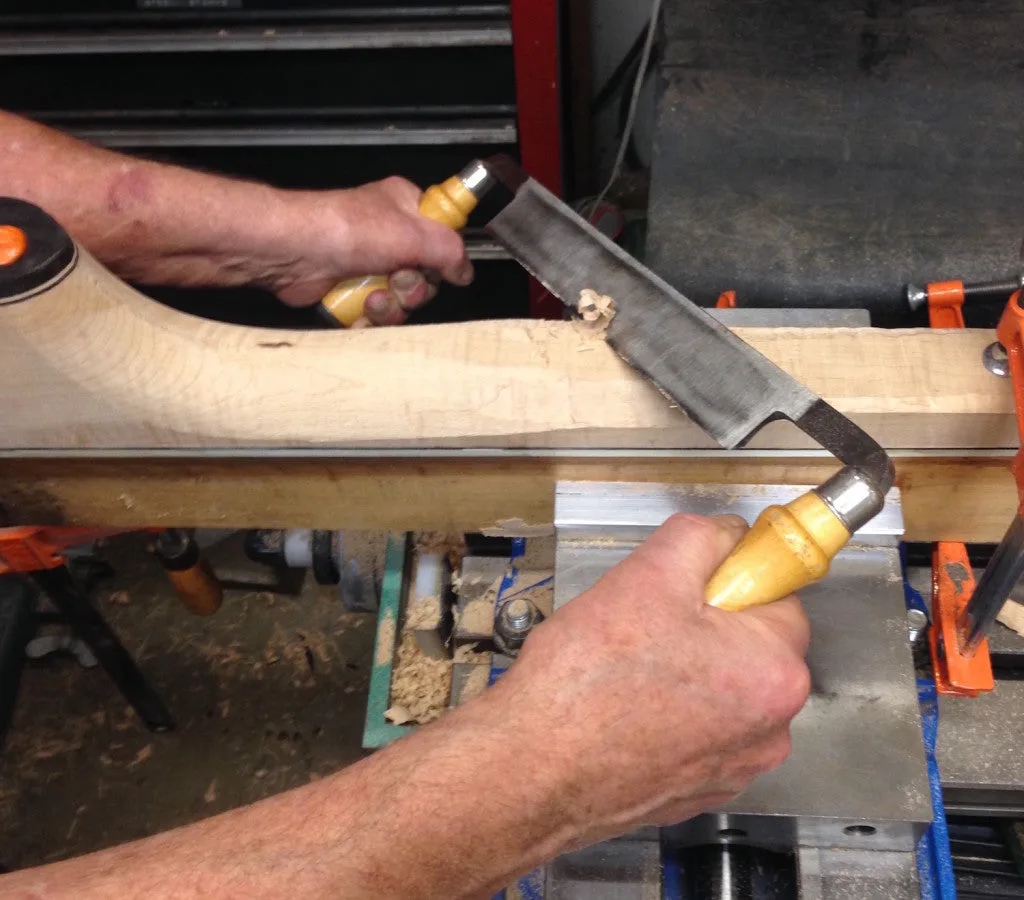
From here, it will be a fair amount of hand work to shape the neck, using the conventional draw knife, rasps and sandpaper.
Our Grizzly wood milling machine doubles as the strongest workbench in the shop, and having a height-adjustable table, it’s the ideal platform for this kind of heavy hand carving. I made up a simple wood fixture to hold the neck, and clamped it in the big milling vise, so I could really lean into the work:
Well, here’s a nice little break! That big ol’ nasty dark brown surprise spot became progressively smaller the deeper I carved on it, so now that the neck is down to dimension, the spot is only about a tenth as nasty looking:
Betcha we’ll be able to make it look presentable with a bit of creative bleach and paint work.
Well, that’s it for now – progress is slow on the carving and fitting up, partly because I’ve been spending an inordinate amount of time on the tuning pegs. That’s right – a big bass banjo will obviously need some big bass banjo tuners. You know what? I called all the logical suppliers, and they’re fresh out of oversize banjo pegs!
So, here’s a little teaser about that part of the project. After making and scrapping a bunch of trial efforts, I’ve come up with a working prototype, so it looks like I’ll actually be making a set of tuning pegs for this monster.
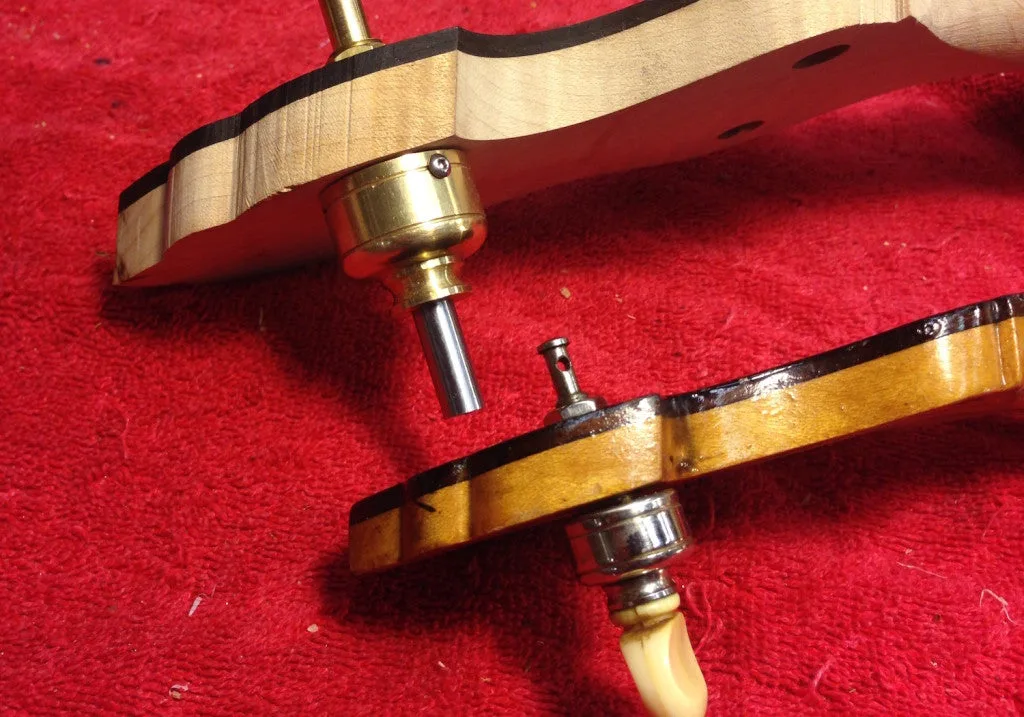
Banjos traditionally have “straight-line” tuners, that stick back rather than at right angles to the peghead, and it just wouldn’t do to jam on a set of right-angle guitar gears. While there are much more logical options, I started this project to make a complete scaled-up banjo, so I really don’t want to give up now. My model is a 17-fret Vega tenor, and it’s scaled up[ by a factor of 1-2/3 larger in all dimensions, so here’s a sneak peek at the tuner, alongside an vintage Grover mounted in the original Vega neck I’m using as a pattern:
My tuner has a 12:1 reduction, where the original Grover is 4:1. Rather than using straight gearing or planetary system, I chose to make mine with a cycloidal drive so I would be able to handle the design and construction with the machining equipment and skill I have available.
More progress photos when I can find them – something happened to my iPhone photo album.
FINISHED, at last! It’s been a busy month, with lots of small details to finish up – here’s a quick video of Ed playing the Big Banjo at a living room rehearsal with the Banjo Racketeers on October 31, 2016:
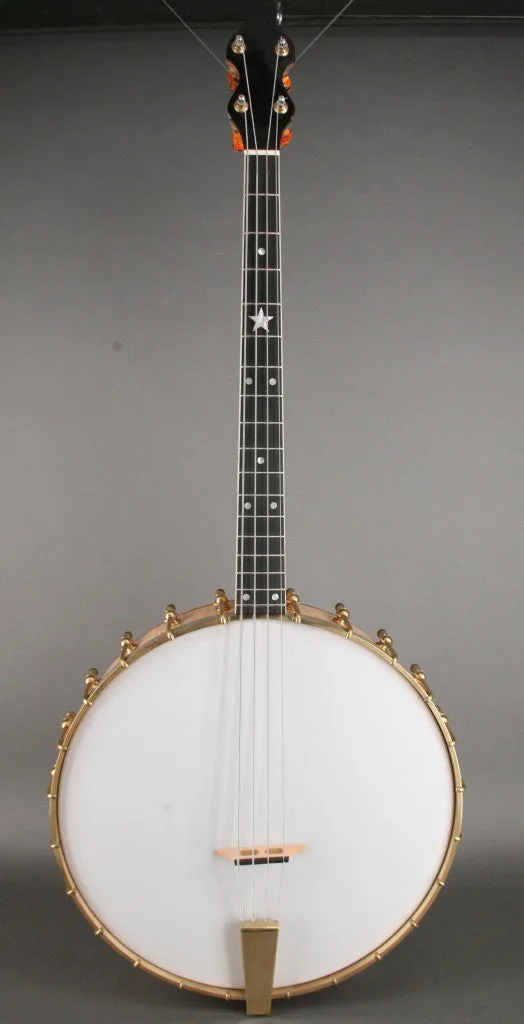
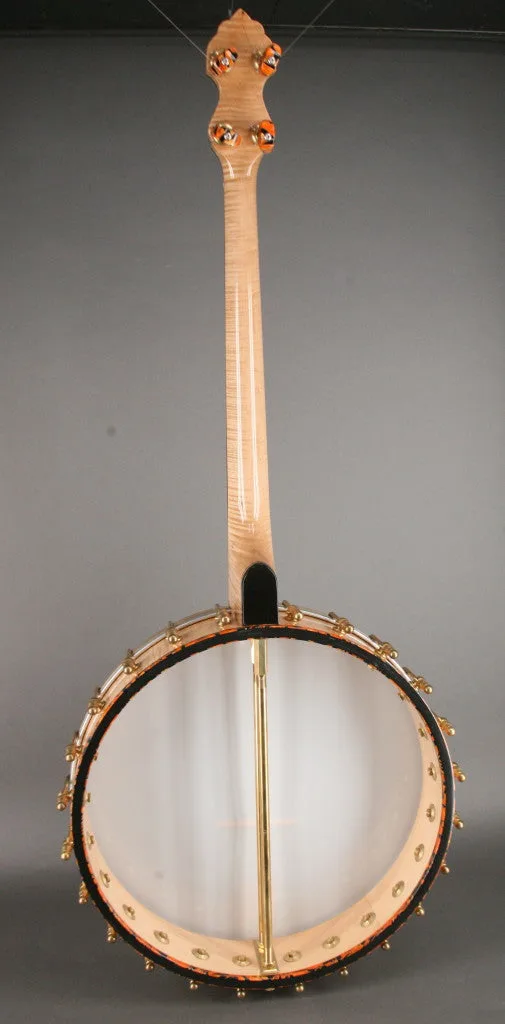
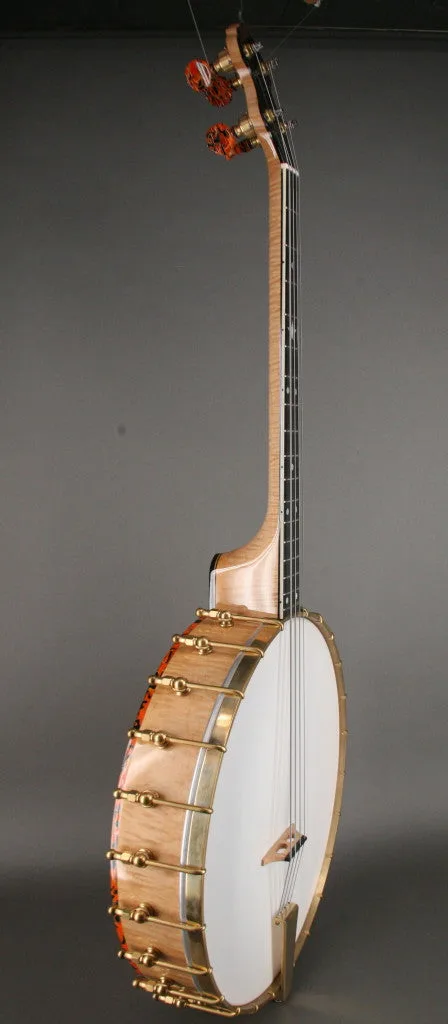
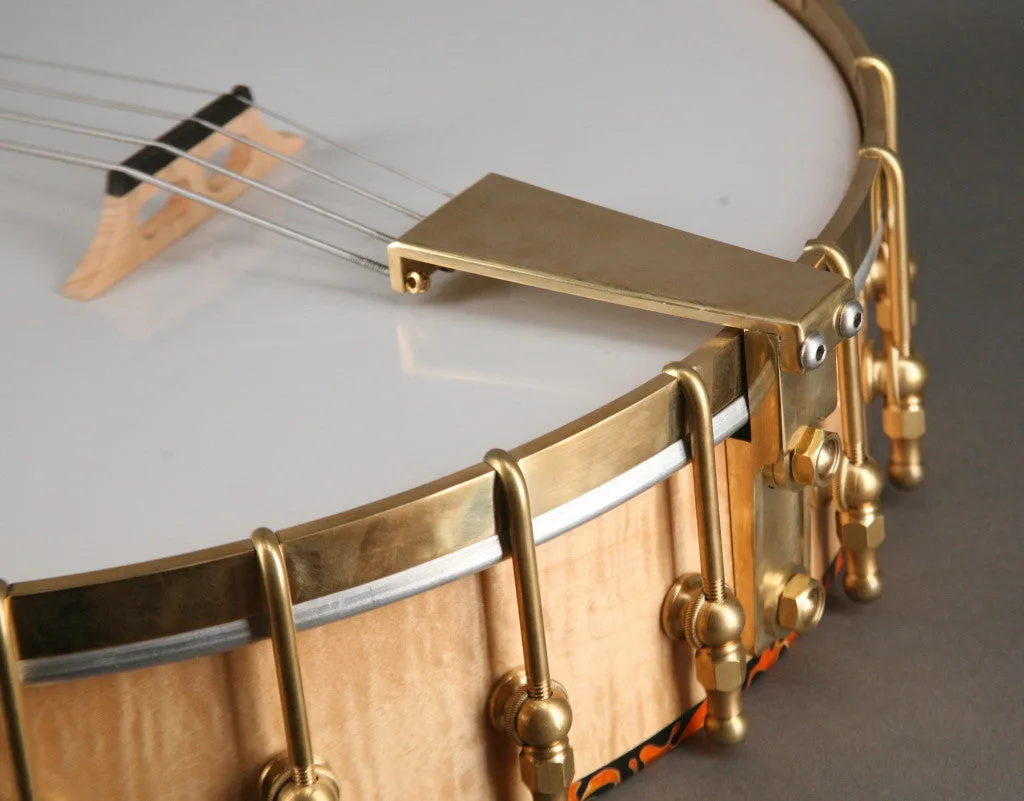
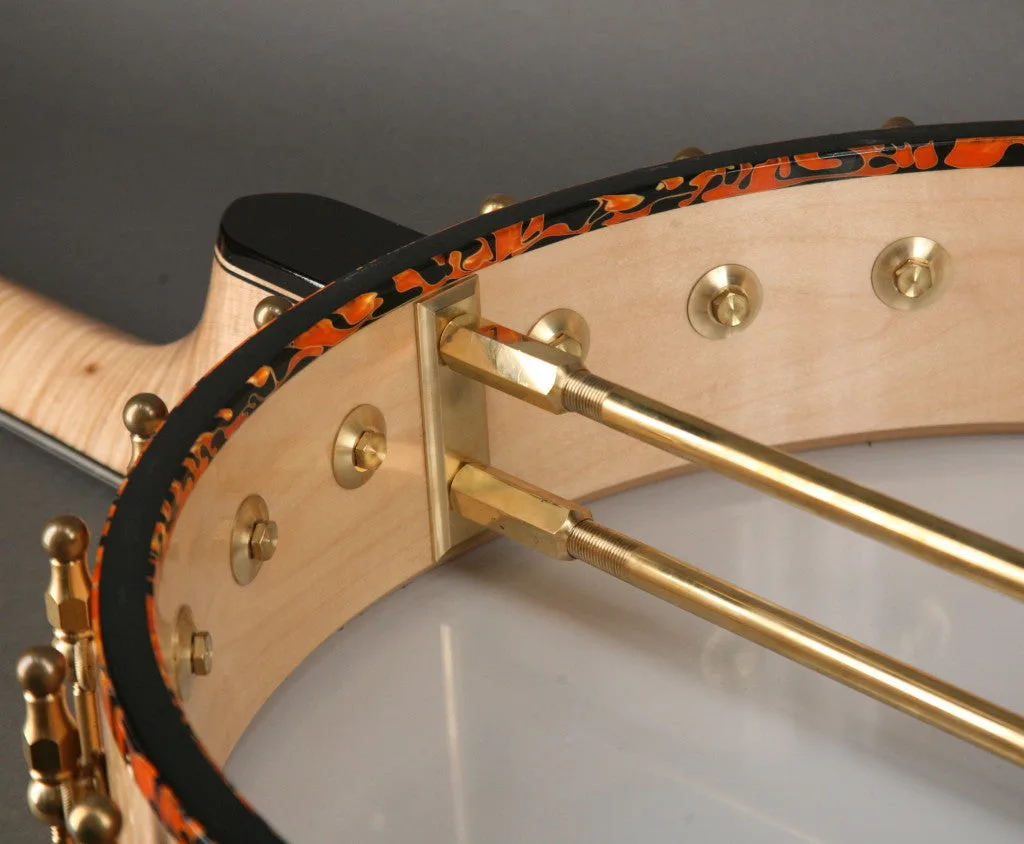
Here are some photos of the finished instrument:
And, just in time for the first Banjo Racketeers performance, our own Tom Culbertson painted the colorful head, featuring “Harold Teen,” the vintage comic strip character:
Pisgah Banjos
A few years ago, we thought we had our selection of open back banjos covered. We had Omes, Rickards, and California-made banjos by Chuck Waldman. How many banjo brands did Gryphon need? But then we got an email from Bart Reiter before he retired suggesting we look into Pisgah banjos, and when Bart talks about banjos we listen (Bart Reiter had been Gryphon’s #1 source of new open back banjos for over thirty years).
The fact that Bart Reiter would suggest that one of his best dealers stock instruments from a competitor said a lot about the quality of Pisgah banjos, and it also said a lot about Bart and the whole American open back banjo business. In fact “business” is hardly the right word, for while the folks making open back banjos in North America these days really are in business they act more like a co-operative. They make parts for each other and share tips and sources, and Pisgah Banjo Company founder Patrick Heavner is in the middle of this supportive community.
Heavner is a man on a mission that’s easy to state and even easier to understand. Since the banjo is an American instrument, he’d like to see as many banjos as possible made with North American woods and metal parts made here as well. He doesn’t wave flags and bash other banjo companies that do things differently, he just builds Pisgah banjos according to those principles and through his Balsam Banjoworks (a website offering parts) he supplies anyone who wants to make their own instruments. You have to admit that if we’re all concerned about the world’s shrinking rain forests, doesn’t it make sense to build instruments from sustainable, local woods like maple, persimmon, cherry, walnut and ash?
Calton Cases Offer Maximum Protection
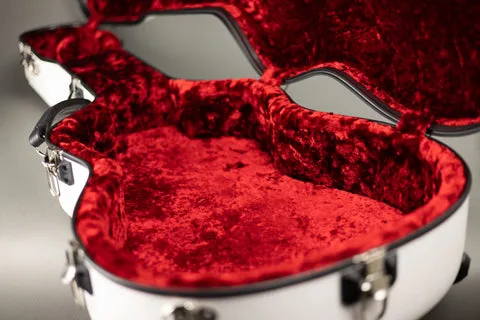
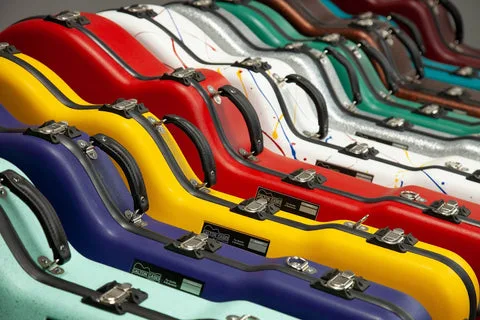
For more than 40 years, Calton Cases have offered the maximum amount of protection for your valuable fretted instrument. The newest versions of the popular travel cases are made in Austin, Texas and combine modern construction techniques like CNC machining with old-world hand work to custom fit each interior, ensuring a safe and secure home for your instrument.
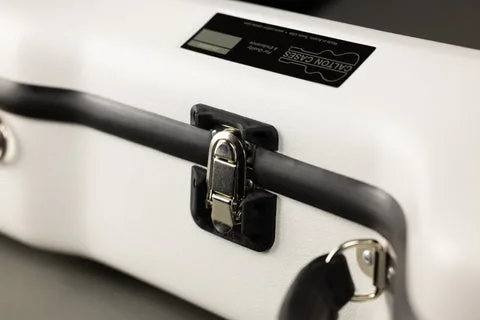
The shells of Calton cases are constructed of an outer layer of gel-coat, which gives the case its color and the first level of protection. The next layer is a composite sandwich of fiberglass and reinforcing foam, a construction process that provides for a high strength-to-weight ratio. The latches are protected by the new Calton Catch Surround, a unique hard rubber bezel that is angled to deflect a blow which would otherwise damage or break the latch.
The interior of the case is fitted with thick foam padding covered with plush, color-fast velvet which will not bleed into the finish of the instrument. The foam is custom fitted to each case which allows a snug fit that ensures the instrument is well padded and protected. Calton Cases are designed to withstand pressure up to 1100 lbs and to survive impacts from up to 9 ft. They are also designed to maintain interior humidity for at least 72 hours, even when external humidity rises or falls by 40%. The rubber tongue and groove trim keeps moisture out and helps maintain a consistent humidity level when the case is closed.
We always try to stock a handful of Calton Cases for standard guitar, mandolin and banjos sizes but we can special order a case for just about any fretted instrument in a wide range of interior/exterior color combinations. If you are looking for a case to keep your musical adventures from turning into misadventures, the offerings from Calton will fit the bill.
Kamaka Ukuleles: History You Can Play
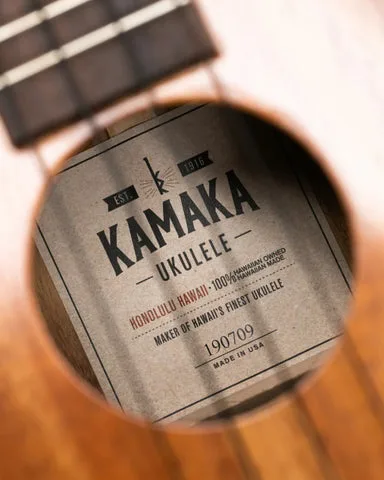
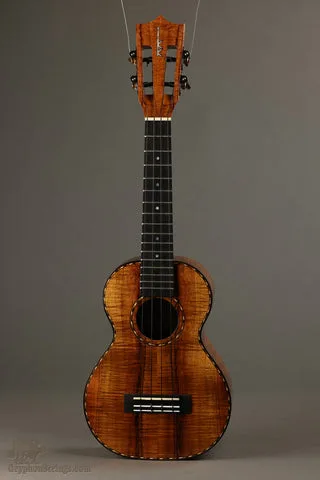
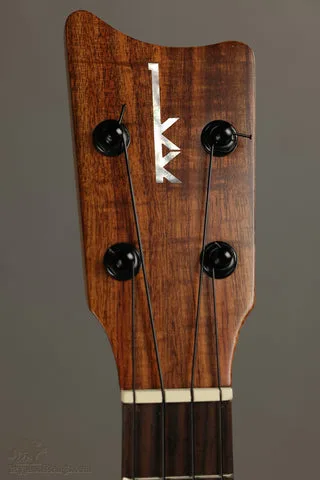
Kamaka ukuleles are not only beautifully crafted, great sounding musical instruments, they are an integral part of the ukulele’s history. Samuel K. Kamaka, the company’s founder, wasn’t present for the birth of the ukulele, but he was around while it was still in diapers. In 1910 Sam Kamaka apprenticed with Manuel Nunes, one of the three Portuguese luthiers who brought the the ukulele’s ancestors, the braguinha and machete, to Hawaii in 1879. Kamaka proved to be a quick study and in 1916 he left Nunes and started the company that bears his name.
“If you make instruments and use the family name, don’t make junk.” – Samuel K. Kamaka
From the beginning, Sam Kamaka’s instruments earned a reputation for high quality construction and exceptional tone, a tradition that has carried through to today. These days, Kamaka offers a full line of ukuleles, including soprano, concert, tenor and baritone sizes. Sam Kamaka retired in 1952 but his son Sam Jr. took over the business and his sons took over from him in turn.
To this day, Kamaka is still a family owned company and we get a small thrill when we call and get to speak to one of Sam Sr.’s relatives on the phone. In 2016, Kamaka celebrated its 100th anniversary of building ukuleles in Hawaii, a remarkable achievement for any company. We only have one complaint with Kamaka. They won’t compromise the quality of their ukuleles by rushing production or mass producing them so we can never get as many as we would like. But if it means that their ukes continue to sound as good as they do, we can live with that problem.
Kamaka’s Models
Soprano
The classic ukulele. The Soprano may be small but Kamaka’s version is loud with lots of projection. For a warmer tone, you might consider the Pineapple. Kamaka has been building Soprano ukes for over a century so they really know how to get maximum tone from such a small package.
Concert
Kamaka’s Concert ukes are more popular at Gryphon than sopranos. They’re a little bigger and the longer scale means the frets are a little further apart so chord positions are easier to finger thanks to the extra room on the fretboard. Concert ukes still have the sparkling tone of the soprano but have more volume and presence.
Tenor
The Tenor size is our best-selling Kamaka ukulele, hands down. We think this model’s versatility is part of the reason. It sounds great with the traditional “my dog has fleas” tuning but it also works well with the Low G tuning, too. Players find that complex chords are easier to finger on the bigger neck, and the larger body produces a warm, mellow tone that’s hard to beat.
Baritone
The Baritone is the largest ukulele. The Baritone ukulele was introduced in the late 1940s and it’s tuned to DGBE, the same pitches as the top four strings of the guitar. Baritone ukes were very popular in the 1950s and 1960s, but players don’t seek them out the way they used to. Still, the big uke does have a small but devoted fan base and Kamaka make just about the best sounding version out there.
Northfield Mandolins
There’s been a mandolin renaissance in recent years, both in terms of the quality of the new instruments available and also the wider range of music played on mandolins of all types. The “bluegrass, Irish, or old-time?” trio of styles that used to define a majority of mandolin music played in North America is now only where it starts, and new companies and ways of building the instruments have also expanded. A prime example of this new direction is Northfield Mandolins, and instruments by this relatively young company have played a big part in Gryphon’s expanding mandolin inventory and sales.
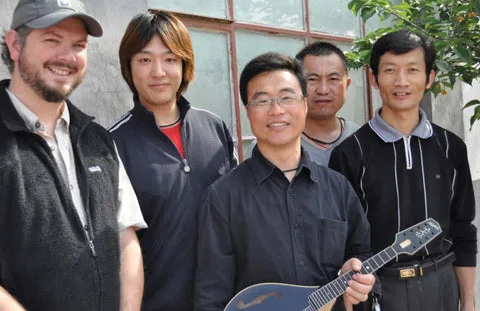
Northfield Mandolins is the brainchild of Adrian Bagale, a Michigan native who worked up to the position of Vintage Acoustic Instrument Specialist for Elderly Instruments in Lansing, MI before moving to San Francisco in 2002. We tried to hire Adrian to work at Gryphon but failed as he’d already done retail and wanted to try something new while still staying with the guitars and mandolins he knew so well. He was quickly hired by Saga in South San Francisco, the importer and distributor of a wide variety of stringed instrument brands including Kentucky mandolins. After years of importing Kentucky mandolins from Japan, Saga was then beginning to import mandolins made to their specifications in China. Adrian soon found himself Saga’s Global Liason, commuting to Japan, Korea, and China. Before long he and his family were living on the other side of the planet as Adrian was overseeing production of mandolins, banjos, and guitars for Saga. Being the highly personable guy that he always has been, Adrian soon had friends in all stages of instrument production in both Japan and China, plus a growing network of musicians and builders in the states who focused on the mandolin. Kosuke Kyomori, a Japanese builder working as a production manager in China, shared Adrian’s desire to change direction and focus on building small numbers of high-quality mandolins instead of constantly hustling to fill shipping containers with them.
Adrian and his family didn’t live in China for long, moving back to Marshall, Michigan in 2008. Northfield Mandolins soon began to take shape as a multi-national effort involving American, Chinese, and Japanese guys who all shared a love of fine woodworking and fine mandolins. As well as running the business end in Michigan, a lot of time and effort goes into sourcing wood. While most Northfield mandolins are made in the coastal city of Qingdao, China, the maple and spruce used to build them all comes from North America.
The Sino-American-Japanese team that Adrian has assembled to design and build carved top & back mandolins is ironically headquartered in an 1870s-era brick building just a few miles from Kalamazoo, where Oroville Gibson started the whole American-style mandolin revolution over 110 years earlier. Tradition runs deep in this new company!
Of course Adrian and his team aspire to building mandolins compared to the early 1920s instruments built in Kalamazoo under Lloyd Loar’s direction, but they don’t stop there and continue to push mandolin design into new territory from a couple of angles. For instance the Northfield “Big Mon” looks like a standard F style, but some of the dimensions are just slightly larger and the sound is a bit different, with a more gutsy punch in the midrange.
Along with the standard twin tone-bar top bracing used on the original Lloyd Loar F-5s, Northfield also offers a 5-bar bracing variant which offers a wider range of harmonics and increased bass response. Other experiments include a varnish/lacquer hybrid finish which retains the tonal characteristics of varnish but with better resistance to wear.
We're Expanding Our Stompbox Department!
This is just a teaser, but we’re in the process of expanding our selection of effects pedals. It’s been difficult to get many popular units thanks to supply chain issues but we’re finally starting to get things in stock. Check back regularly to see what new and used stompboxes have arrived.
Upcoming Scarcity of Instruments and Accessories (With Some Good News)
Halloween is past but we have some slightly scary news for those who are thinking of sending a musical-themed gift for the holidays. You’ve all heard of the supply-chain problems in our post-Covid economy, and we’re sorry to say that the music industry, including little ol’ Gryphon, has been affected as well. The short summary is that lots of parts and accessories, including new instruments, will be in short supply. Also worth noting is that shipping costs are higher and delivery times are longer. If you are ordering a gift to be sent to someone before the Christmas holiday, please allow much longer for it to arrive than you would have in 2019. And while speedy delivery at higher cost is an option, shippers like UPS no longer guarantee that their 3-day service, for example, means the package will arrive in 3 days. Worse yet, you’ll receive no compensation for the extra fees you’ve paid if it does not.
Most of the builders we represent have given us their projections for what will be available in the future, so we thought we should share that news with you. Both Collings and Santa Cruz are sold out for 2022, but Gryphon does have some “build slots” reserved, so depending on what model you want we might be able to get it for you before 2023. Special orders for Taylor and Martin guitars are a bit harder to predict, may not take a year to get, but they will be longer than they have been in the past. Standard models from Martin and Taylor should be available more readily as the orders we placed months ago start to arrive. (We just got a nice batch of Martins, including D-18s, D-35s, OM-28s and 00-28s, that we have been waiting for for about a year.)
It might seem that domestic guitar companies wouldn’t have the same supply issues as those companies who have their instruments made overseas, but you would be wrong. Tonewoods like Indian Rosewood rosewood and mahogany are getting scarcer and we expect the prices of new guitars made from these to start going up before too long. We also predict more builders are going to start expanding their offering of instruments made from domestic hardwoods like walnut, maple, cherry and ash. We also might see builders experimenting with domestic tonewoods that were popular a century ago like oak and birch.
Unfortunately, virtually every instrument we sell has parts not made in the US and we’re not just talking about tonewoods. For instance, whether it’s a Martin, Collings, or Santa Cruz those lovely faux tortoiseshell celluloid pickguards aren’t made in the US, and haven’t been for decades. The same is true of the ivory-grained celluloid binding (commonly called Ivoroid). Many of the tuners found on these guitars are made in Japan, and many of the components in electric models made here in the US come from overseas sources as well. So when you see photos of huge ships in US harbors waiting to be unloaded, some parts needed for your next guitar may be riding those waves.
So, things are going to be interesting in the coming months. Thanks for your understanding, we’ll continue to do the best we can to meet your needs as promptly as possible.
Uhoh…Oahu!
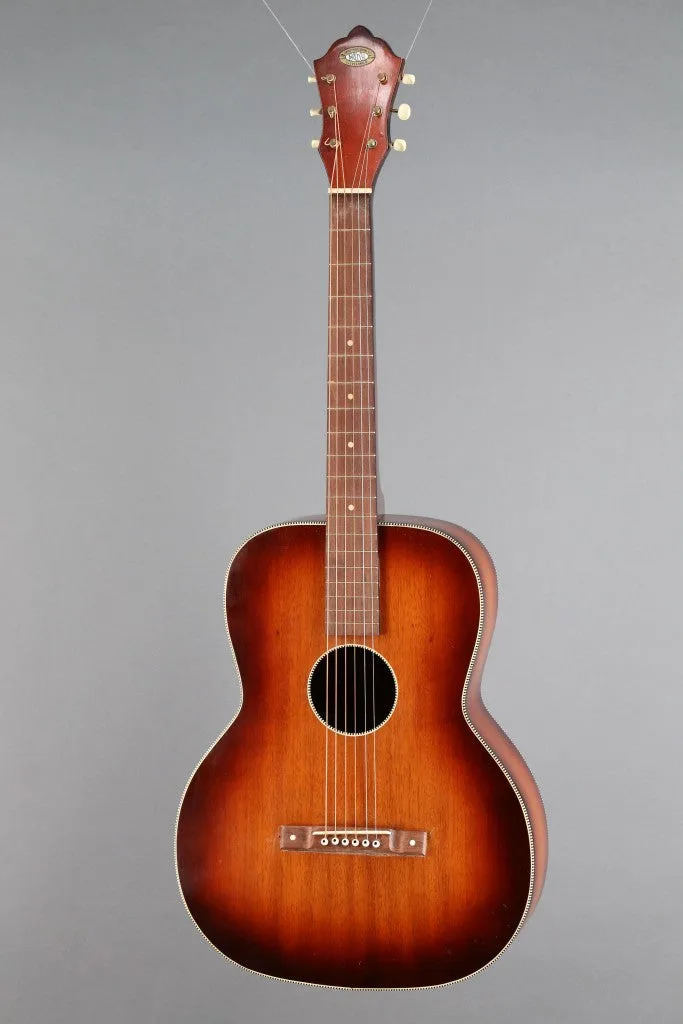
Here’s a fun old Oahu squareneck with a pretty serious problem.
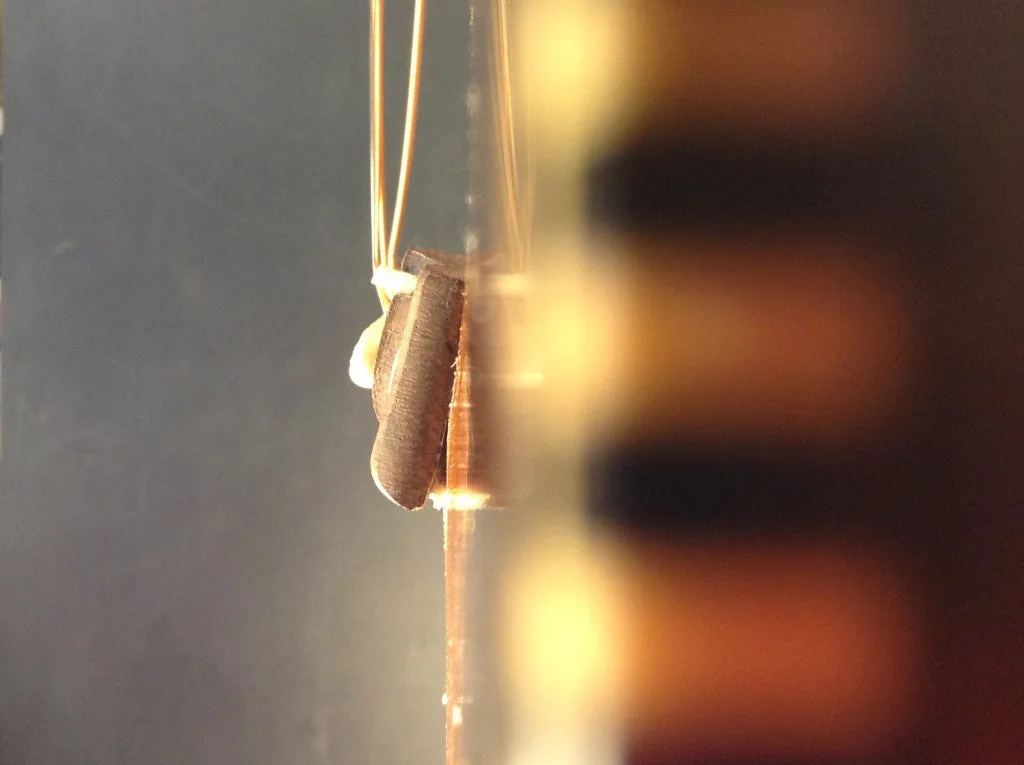
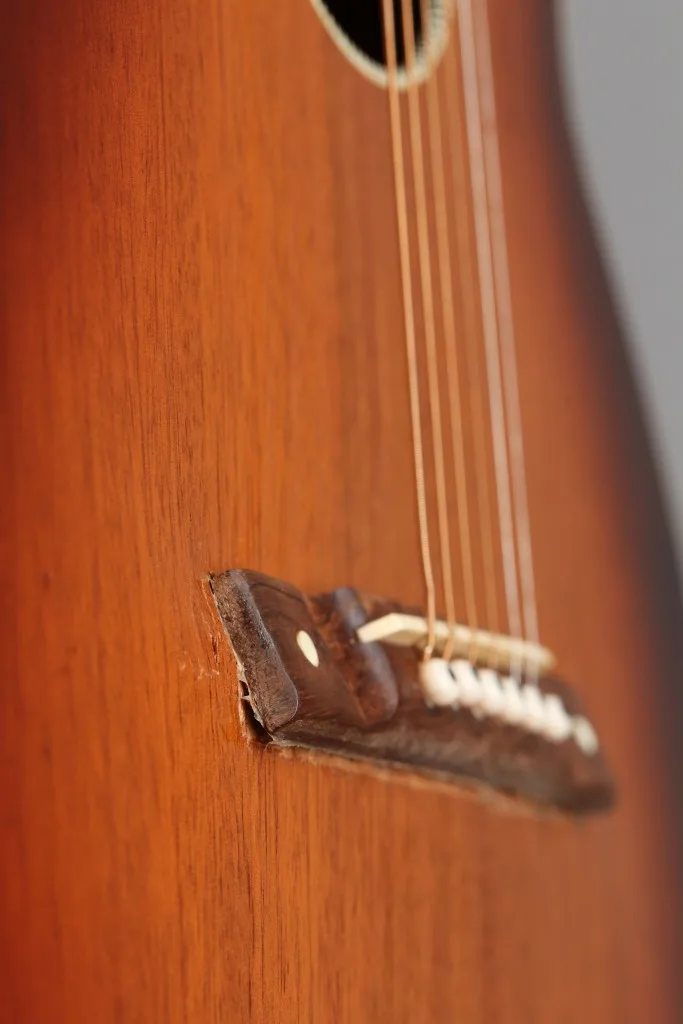
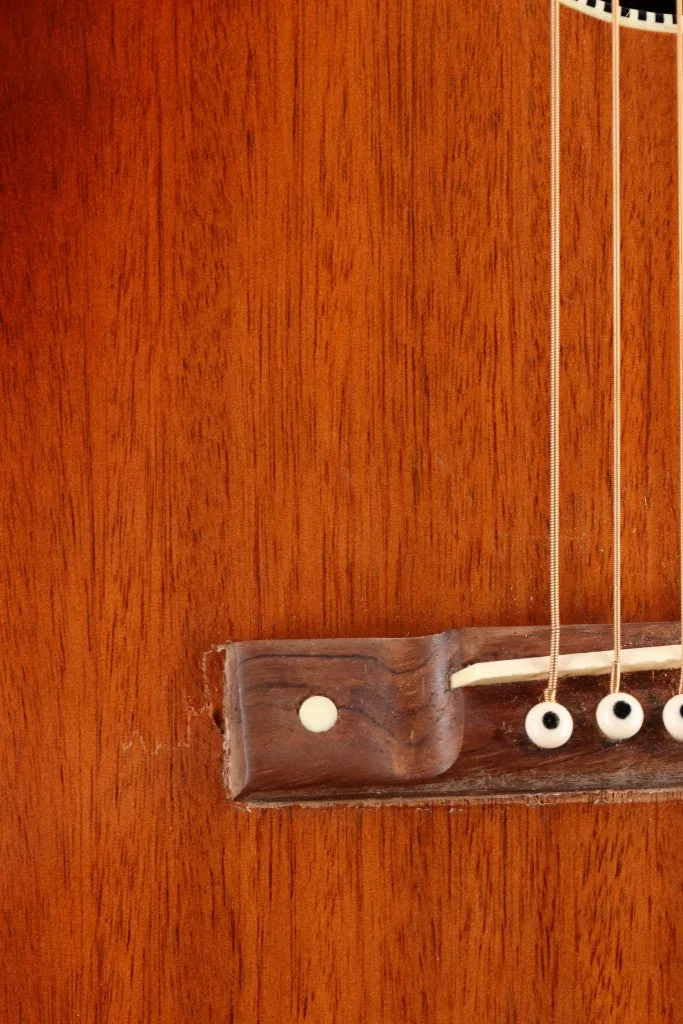
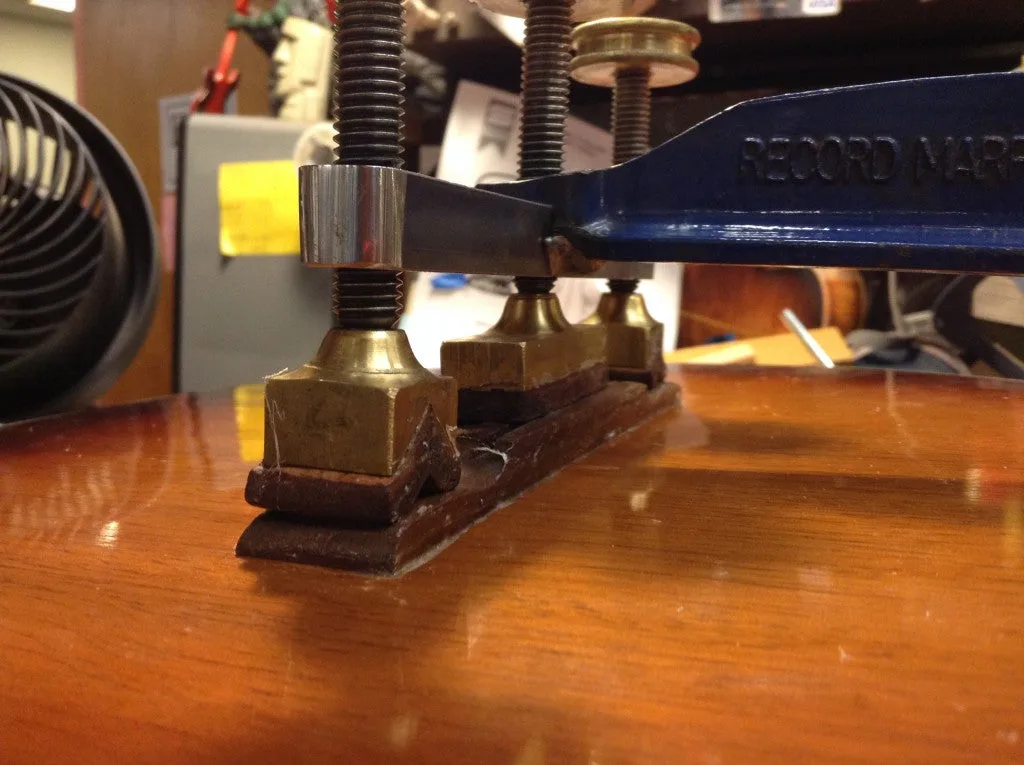
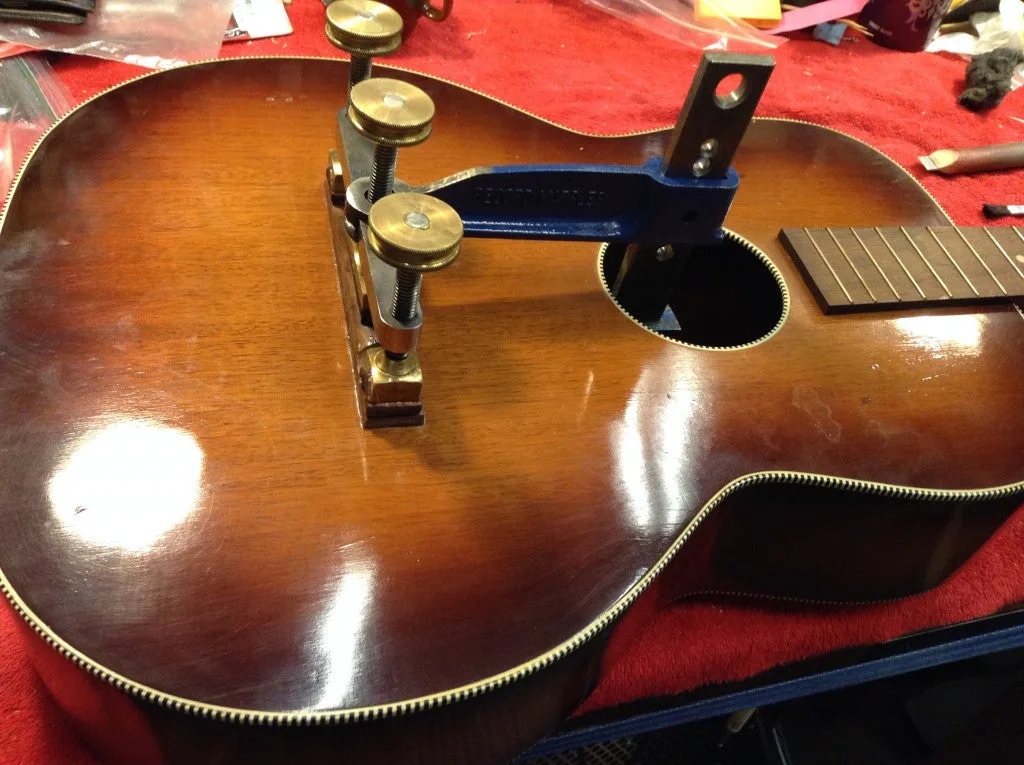
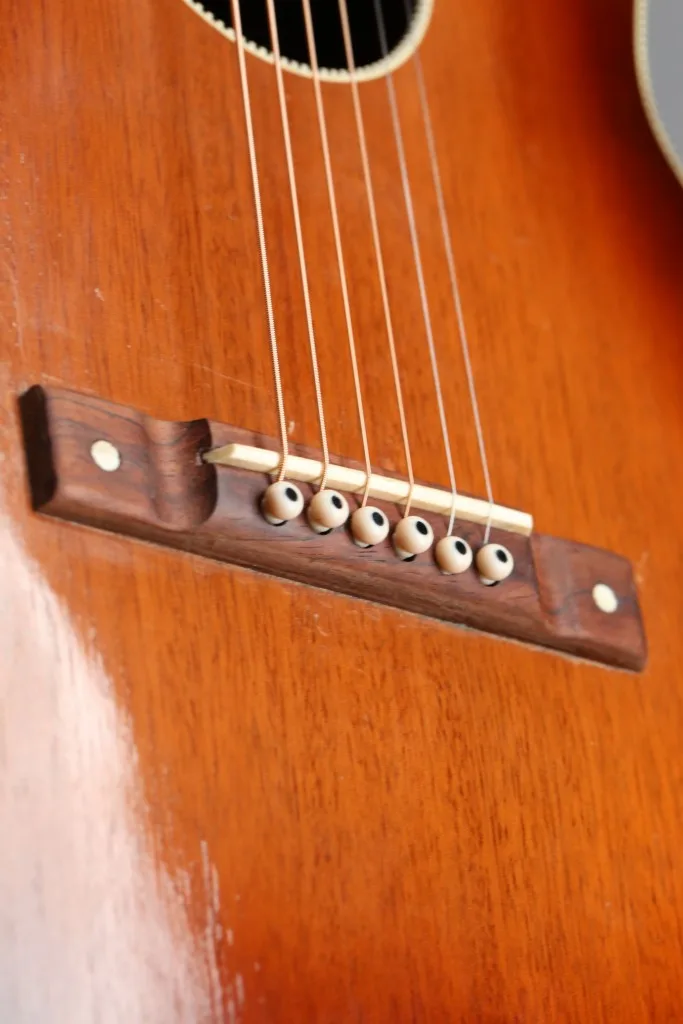
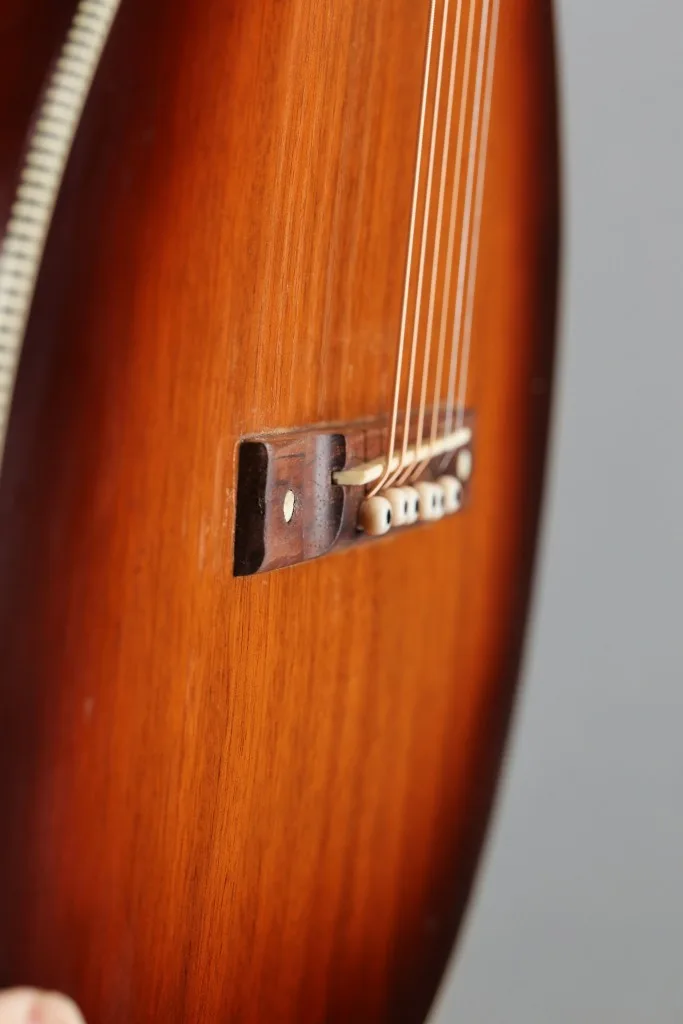
It’s a laminate top with a bolt through each wing of the bridge. As the top relaxed over time, the bolts fought back and cracked the bridge plate and the top. You can see the top belly in these side shots, with the bridge leaning at an unusual angle.
In the shot below you can really see how the bridge torqued the top and cracked it in half.
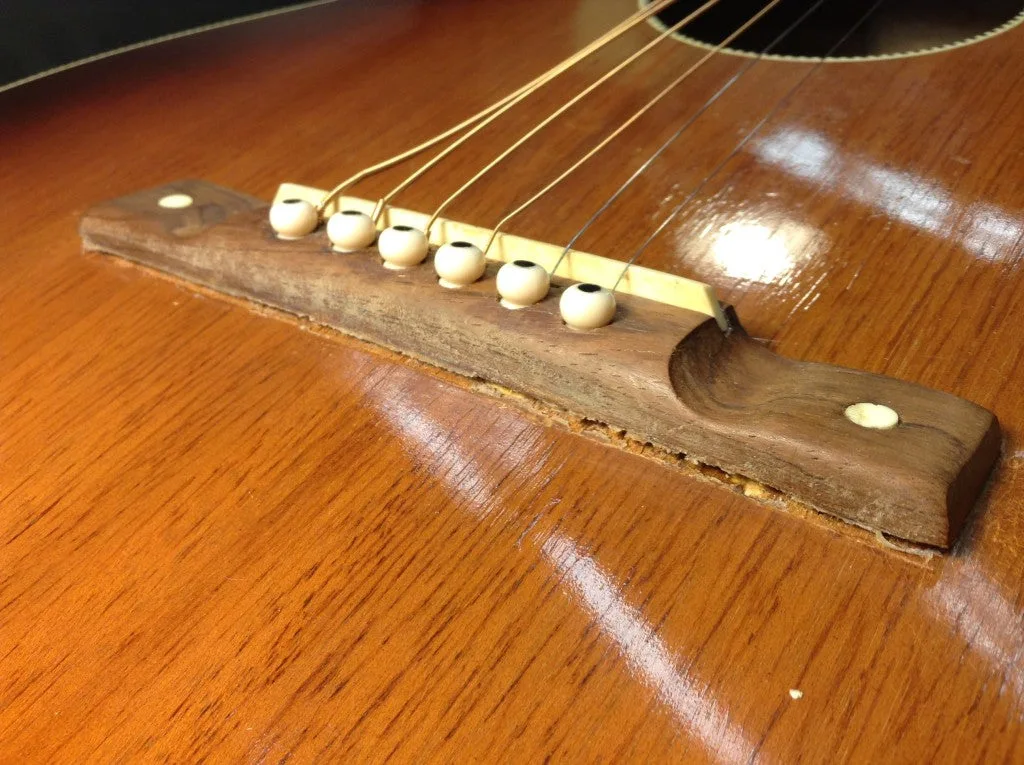
In this one you can see the crack in the top itself, just to the left of the bridge wing. It’s like this on both sides.
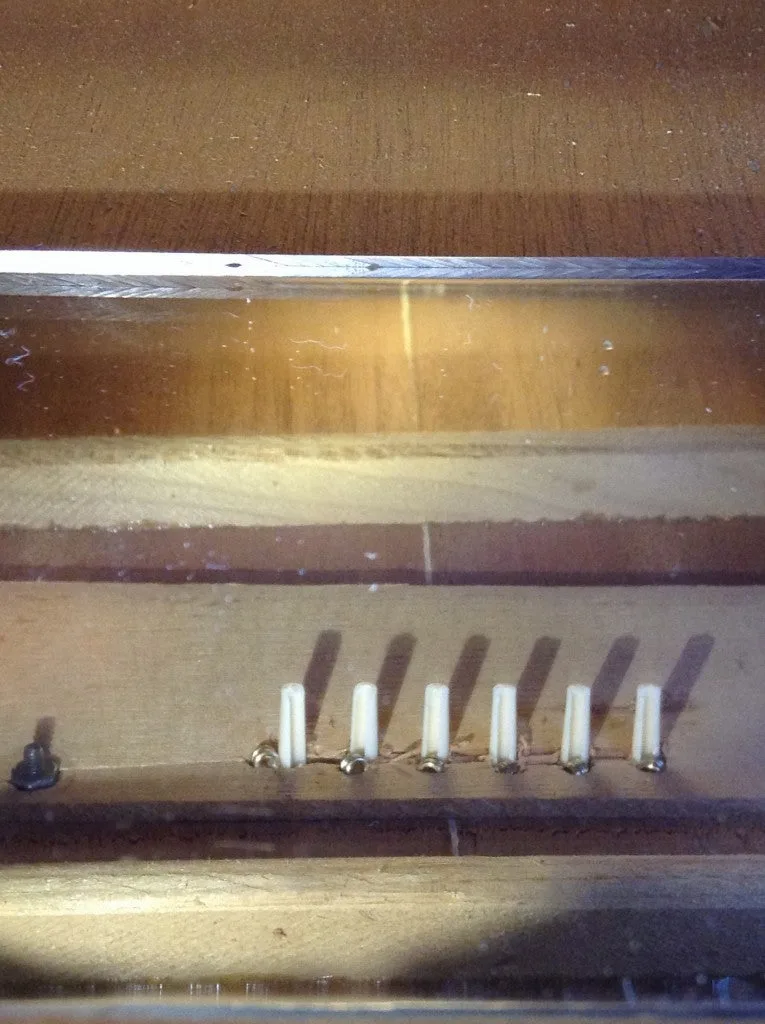
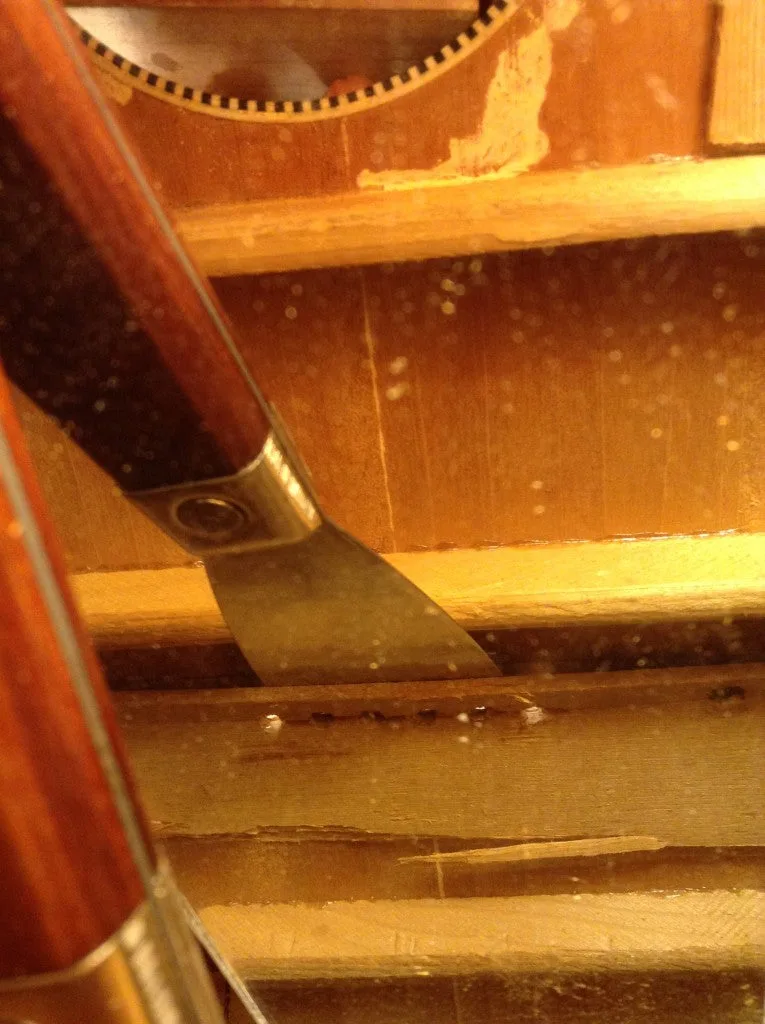
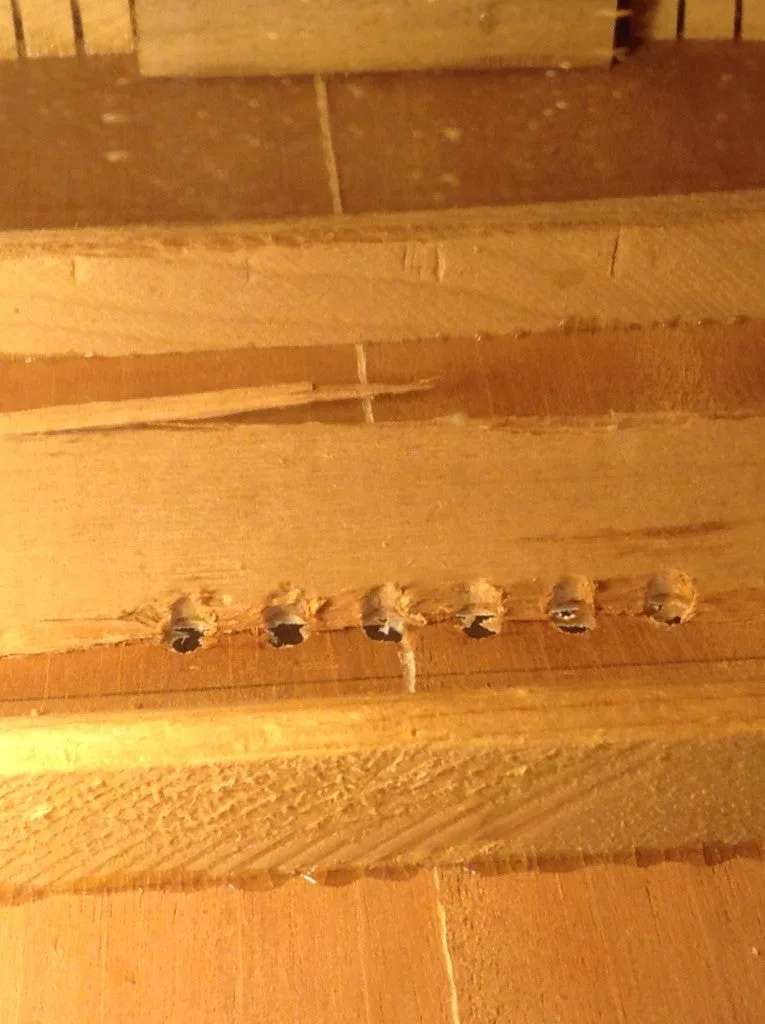
When I took a look inside, things didn’t improve. The bridge plate looks like pine or something similarly soft. It’s cracked right at the bolts, and the stringballs are working their way through the top. Also notice the grain orientation. It’s going perpendicular to the strings, making it easier for the tension to split it in half.
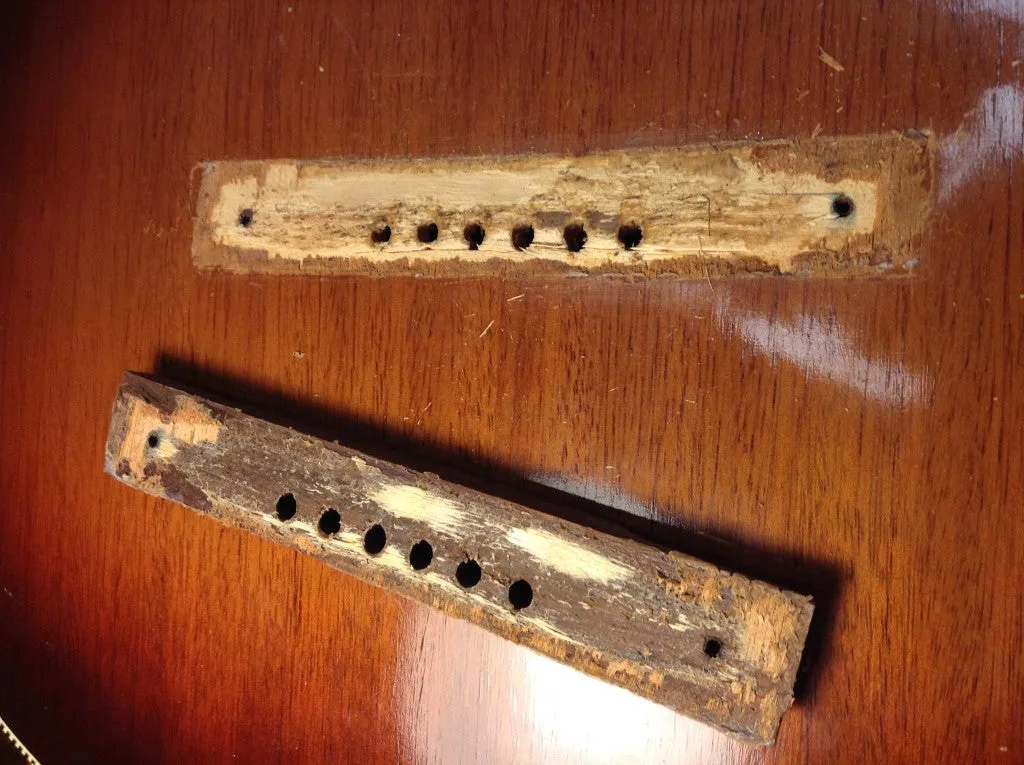
So I dove in and pulled off the bridge off.. it didn’t take much.
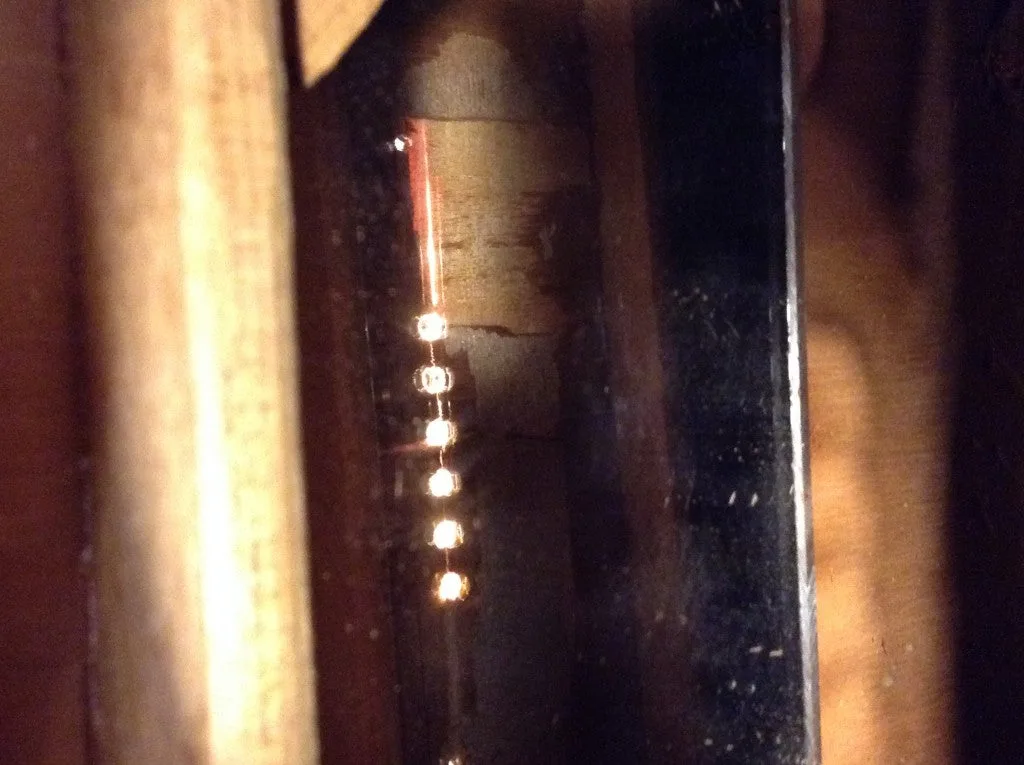
Now the bridge is off, here’s a fun shot of a light inside the guitar illuminating the long crack in the top.
So now i’m going to try and remove the bridge plate and put on a strong new one to try and help out the top.
Here goes.
The first part came out easily. The back part was stubborn. I used a variety of bent scrapers and files to pull on the back edge.
After a while the plate let go, but it left behind a pretty uneven surface. I could use a block and some sandpaper to clean it up, but I just don’t feel like bending my wrist around like that. Luckily for me, Frank has a fun tool for this purpose.
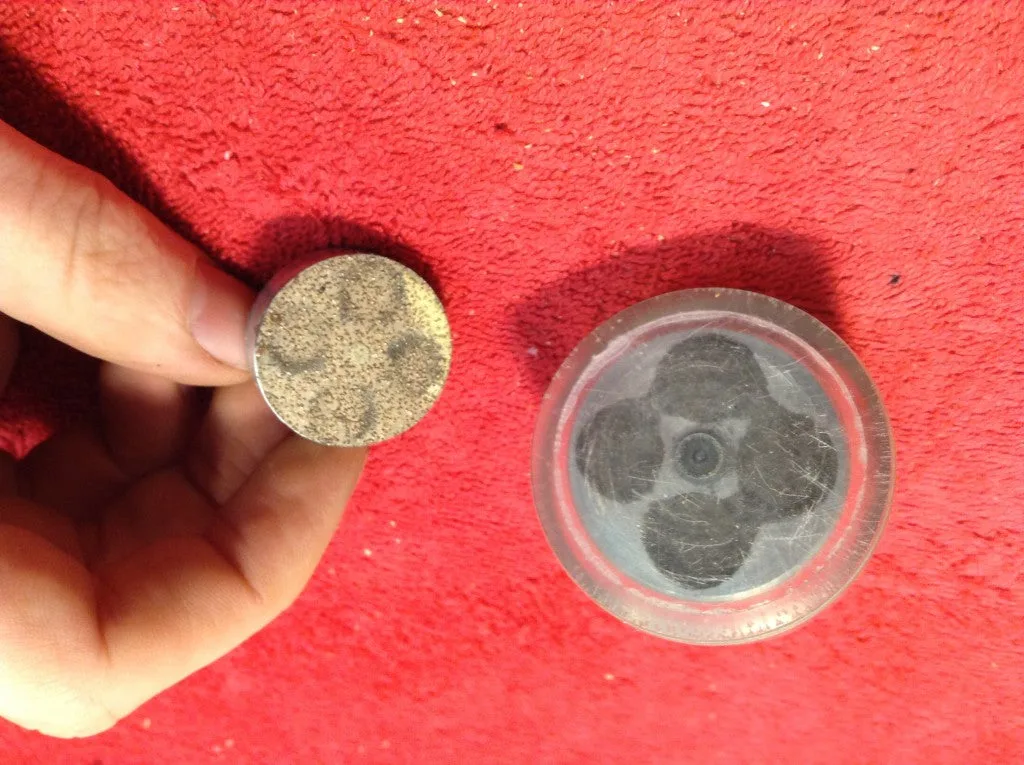
This is Frank’s magnet sander. The disc in my hand has a very aggressive coarse surface, with four rare earth magnets inside (notice the dark circles). The other part is an acrylic base with a rotating internal system of magnets that match the sander. This part gets mounted in a drill and goes on the top surface, while the sanding disc goes on the interior surface and spins away.
The really clever part is that the acrylic doesn’t spin on the outside surface and scratch it up.
It’s a little hard to describe, here’s a video of it in action.
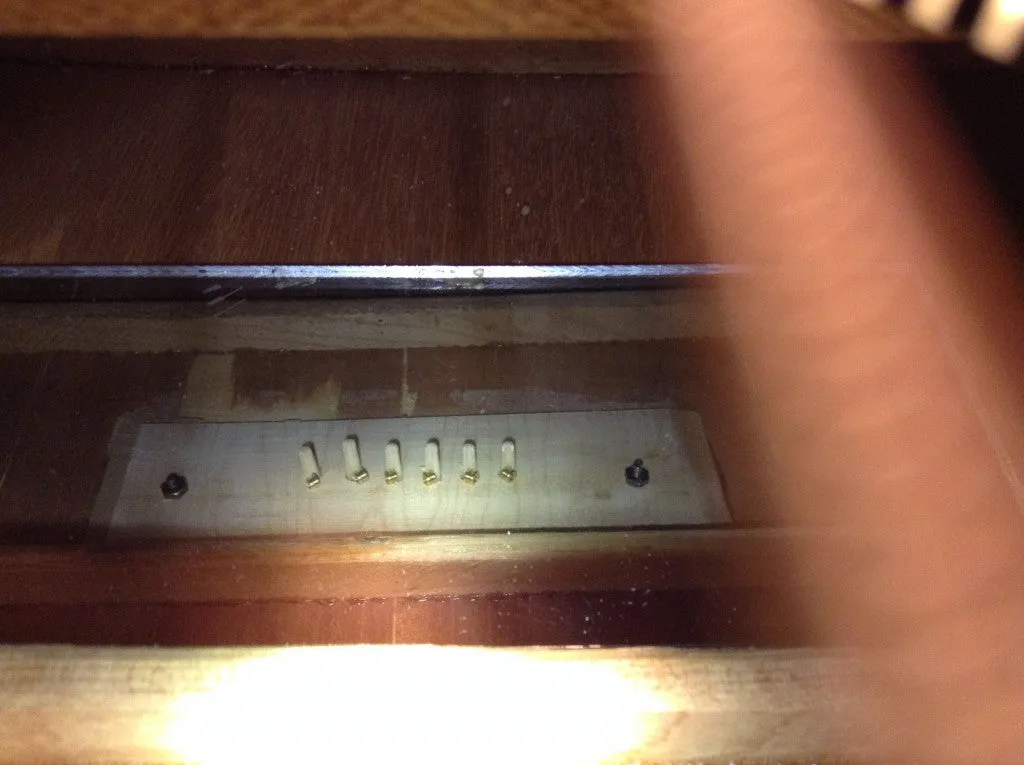
After the inside was sanded smooth, I glued in a new maple bridge plate and got a good amount of glue in the top crack. Then I glued the bridge back on and strung it up.
Ready to go!
Rules to Visit Gryphon or Schedule Repairs
Gryphon’s current repair scheduling:
All in-person repair consultation is by appointment only. Please call us at the shop (+1 (989) 498-9527) to schedule an appointment to bring your instrument in for evaluation. Due to the backlog of work, we are not able to take in repairs without an appointment.
While we can often restring your guitar, banjo, mandolin or ukulele on the day you bring them in without an appointment, it’s a good idea to call in advance to make sure we have the time free to do the job. You do not need an appointment to pick up your guitar after repairs are completed.
Gryphon’s Updated Retail Rulebook
Thanks to fewer restrictions on shopping you no longer need to make appointments to visit the retail showrooms at Gryphon!
Also, we recommend that you wear a mask but it’s not required.
Note that since our Repair Department continues to be busier than it’s ever been, repairs are still booked by appointment only.
Please stay connected with us through our website, email newsletter (subscribe on our website), and social media for up-to-date information. During these unprecedented times, we wish to continue to fulfill your musical needs as best we can while observing all necessary health and safety practices.