Frank is on the Fretboard Journal's Luthier on Luthier Podcast!
Our own Frank Ford was just interviewed on theFretboard Journal’s Luthier on Luthier podcast. He talks about the early days of Gryphon when he and Richard Johnston built and sold handmade guitars and instruments. Frank also talks about the store today, his favorite repairs, and how, thanks to Dan Erlewine, he got started in teaching.
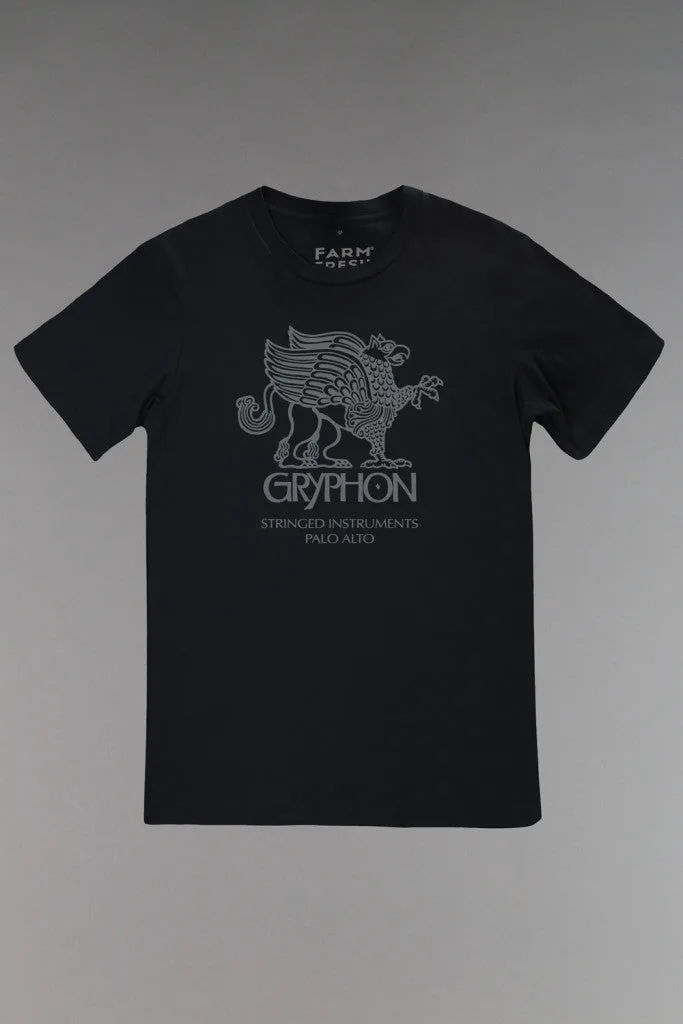
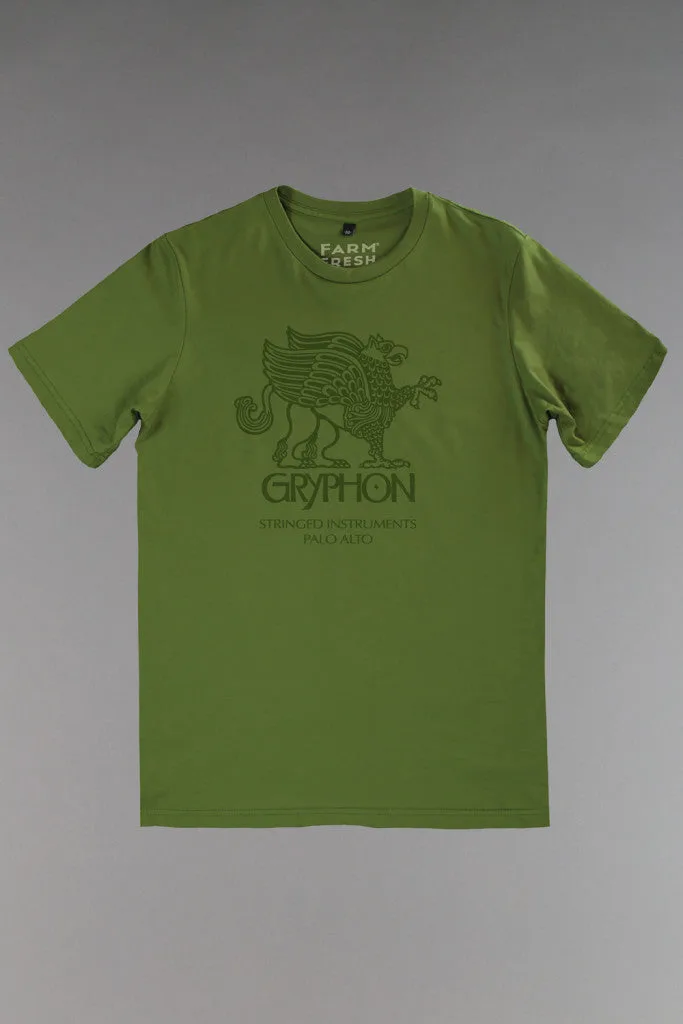
We decided to upgrade the classic Gryphon T-shirt and figured if we’re going for 100% cotton made in the U.S.A., why not step up and get the best out there? These shirts are from Farm Fresh in Sebastapol, and are 100% organic cotton, made right here in California and printed with eco-friendly, water-based inks. They’re incredibly soft but still hold their shape, the printing is top notch, and of course they get even softer with repeated washing. Available in true black, navy blue, olive green, and charcoal. 6 sizes, Small, Medium, Large, Extra Large, plus 2XL and 3XL. Small through Extra Large are $25, 2XL and 3XL $27.
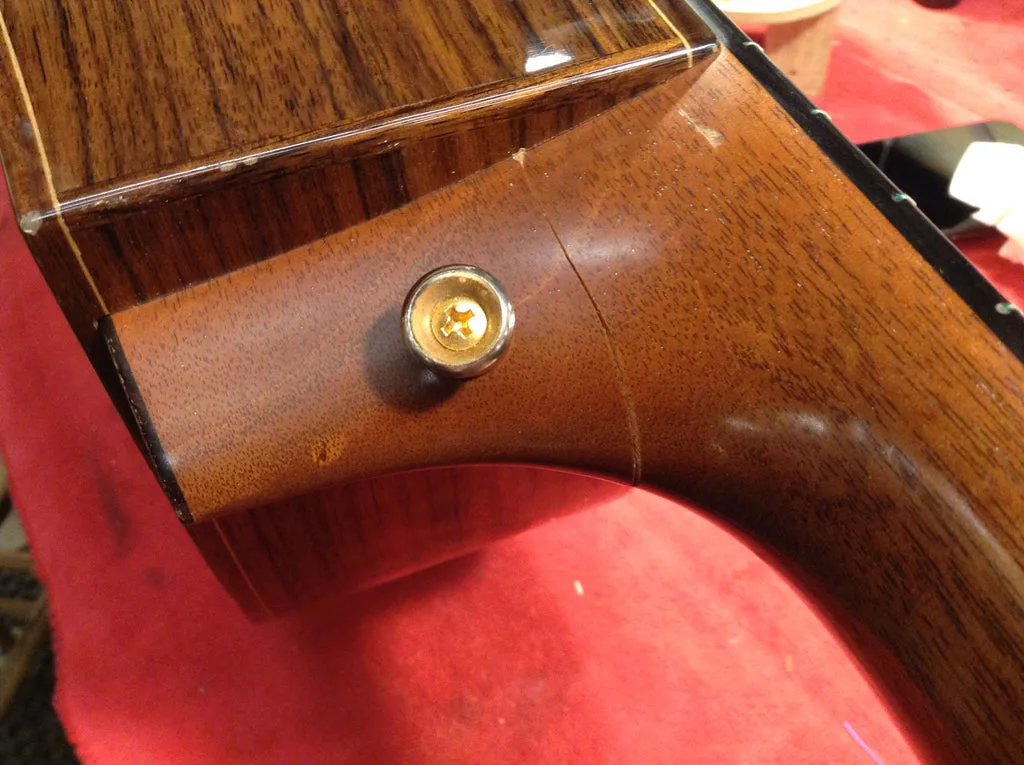
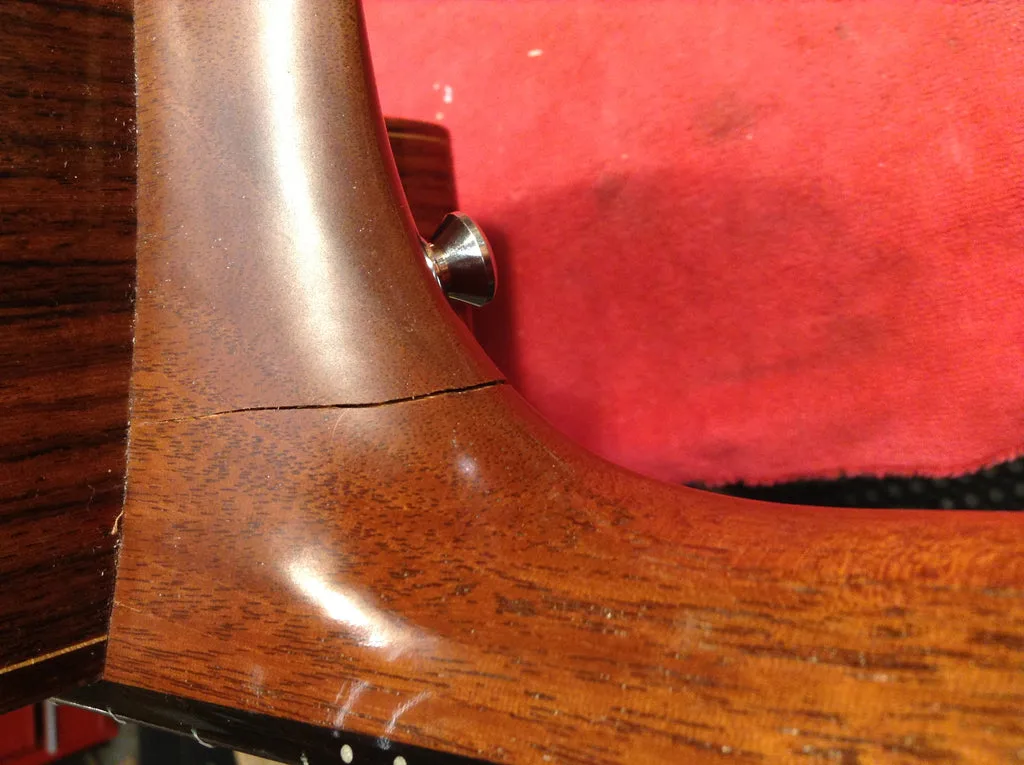
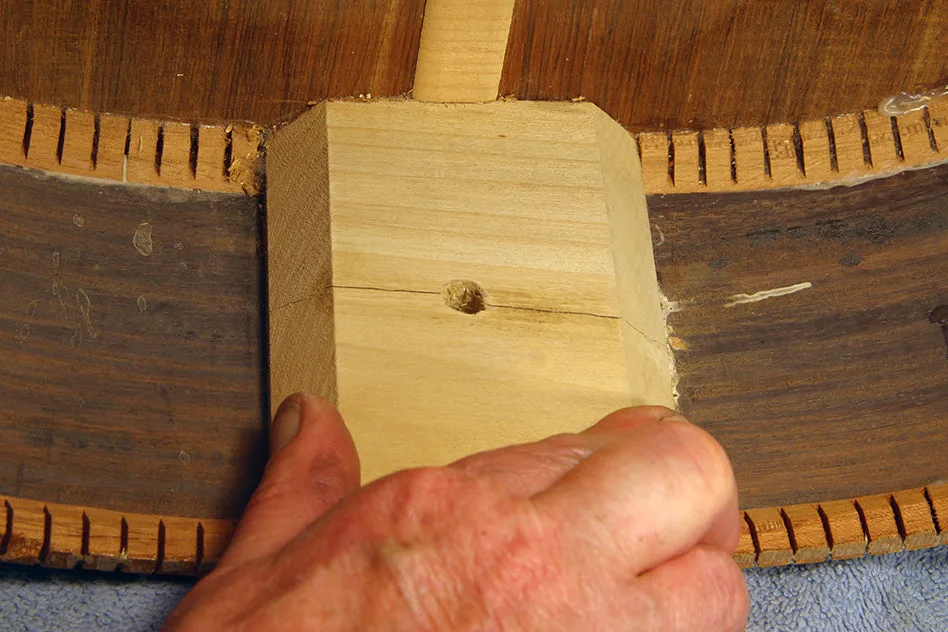
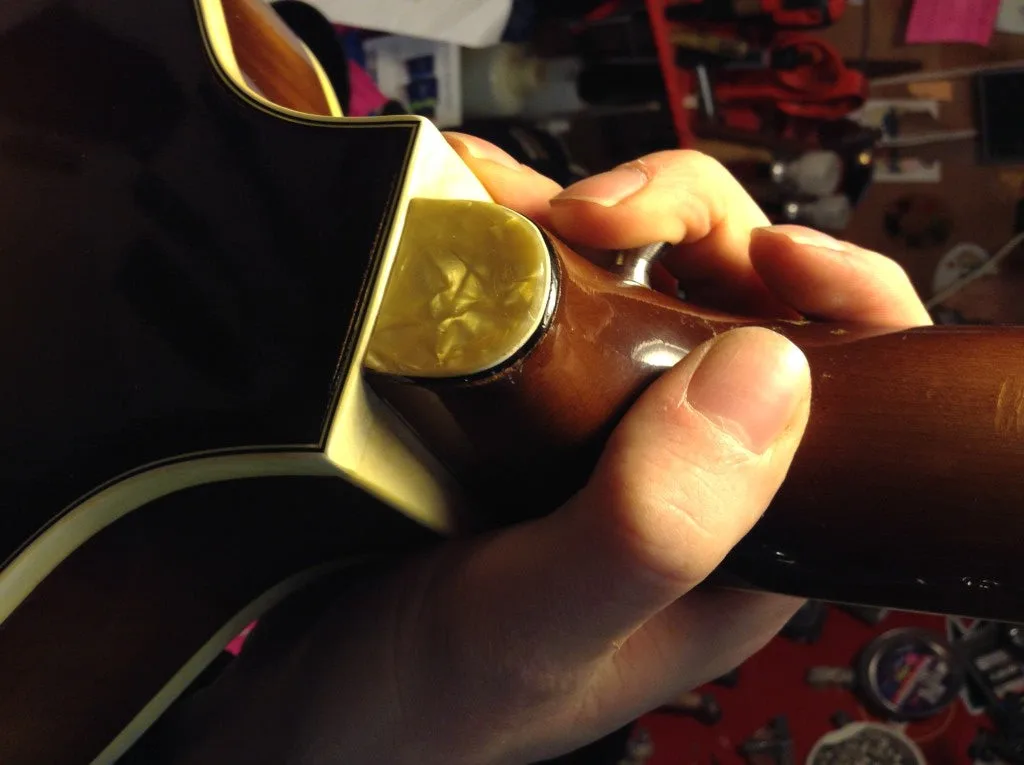
Here’s a Taylor that lost a fight with a car backing up. The heel split right in the middle, take a look.
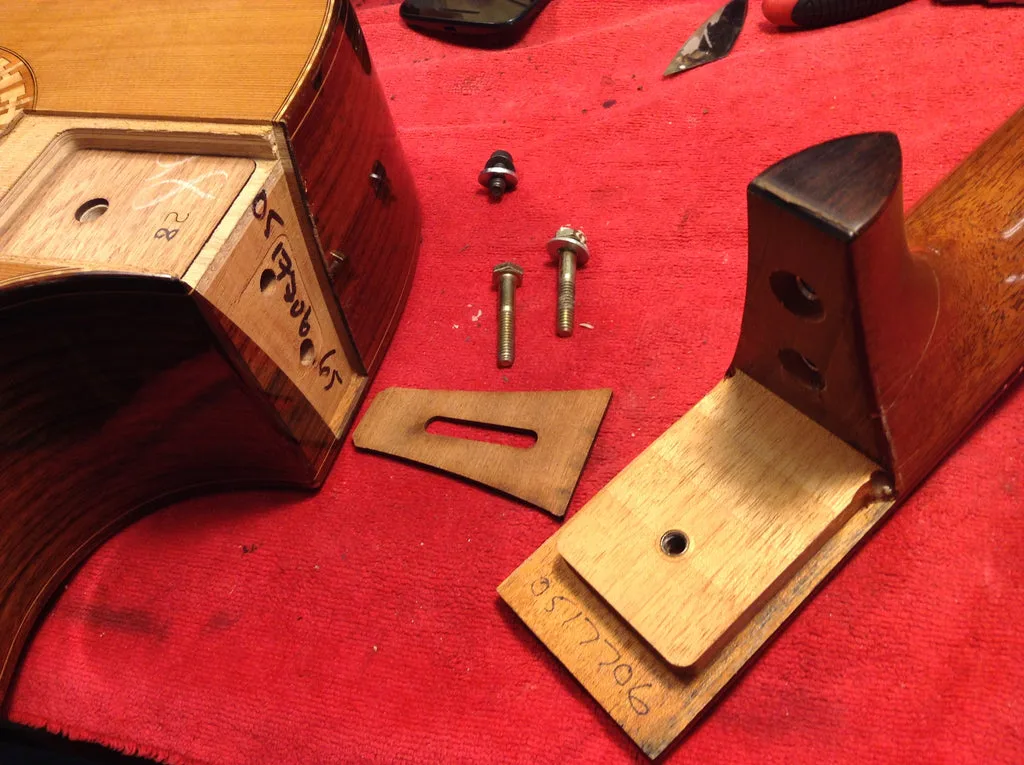
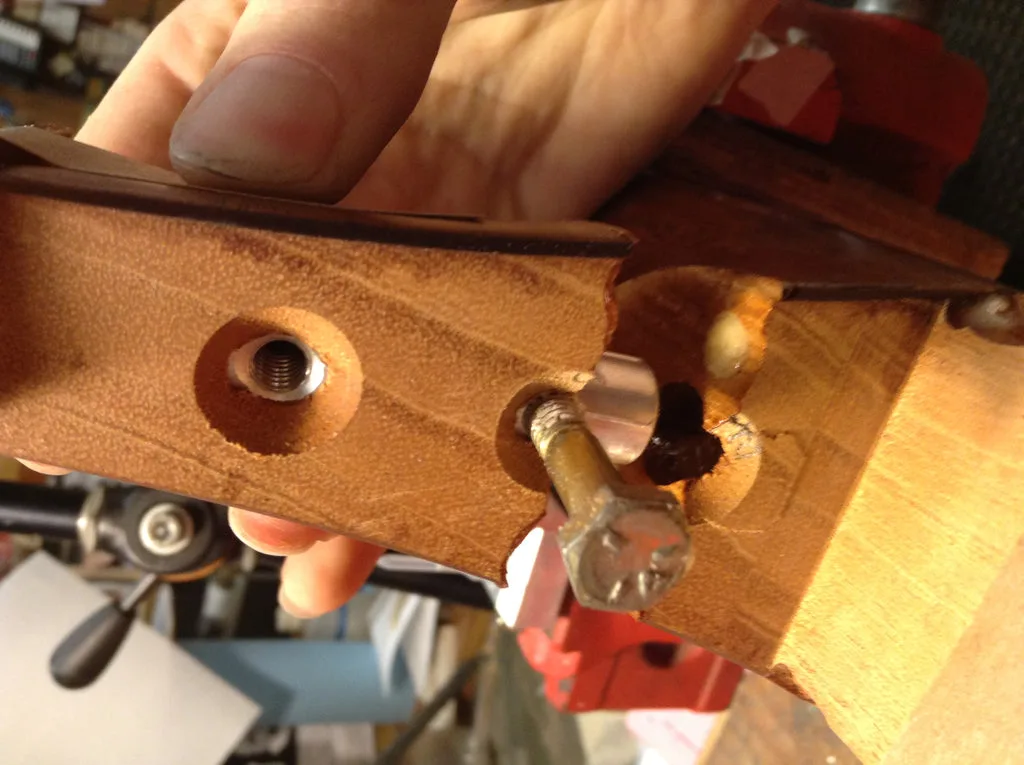
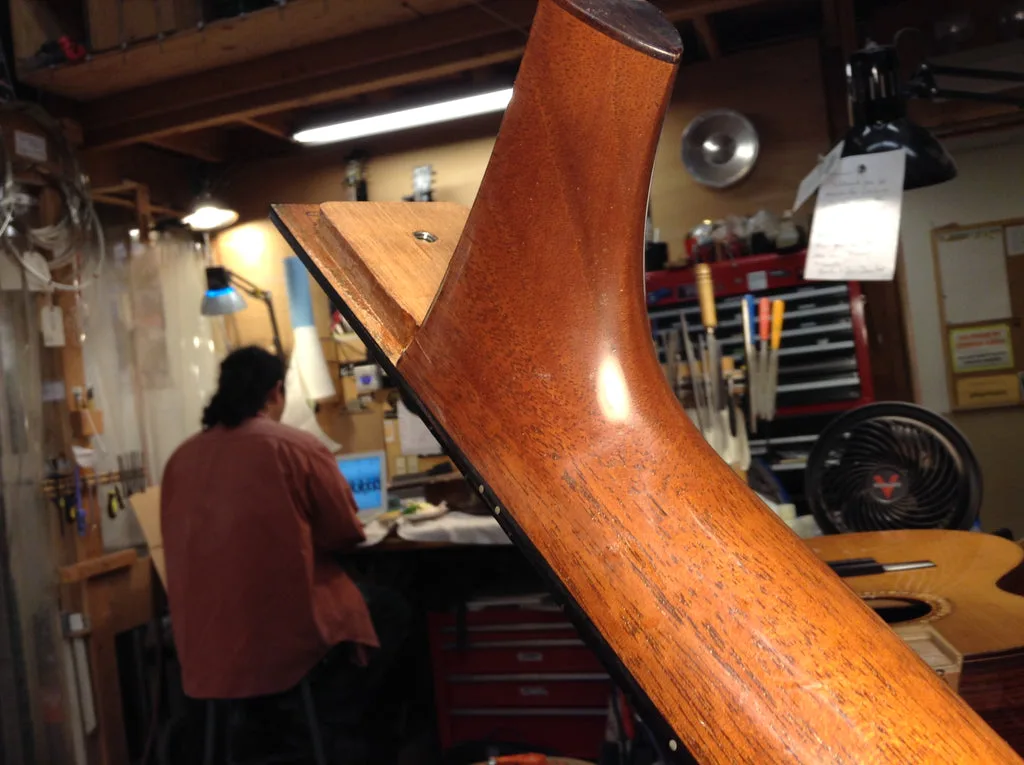
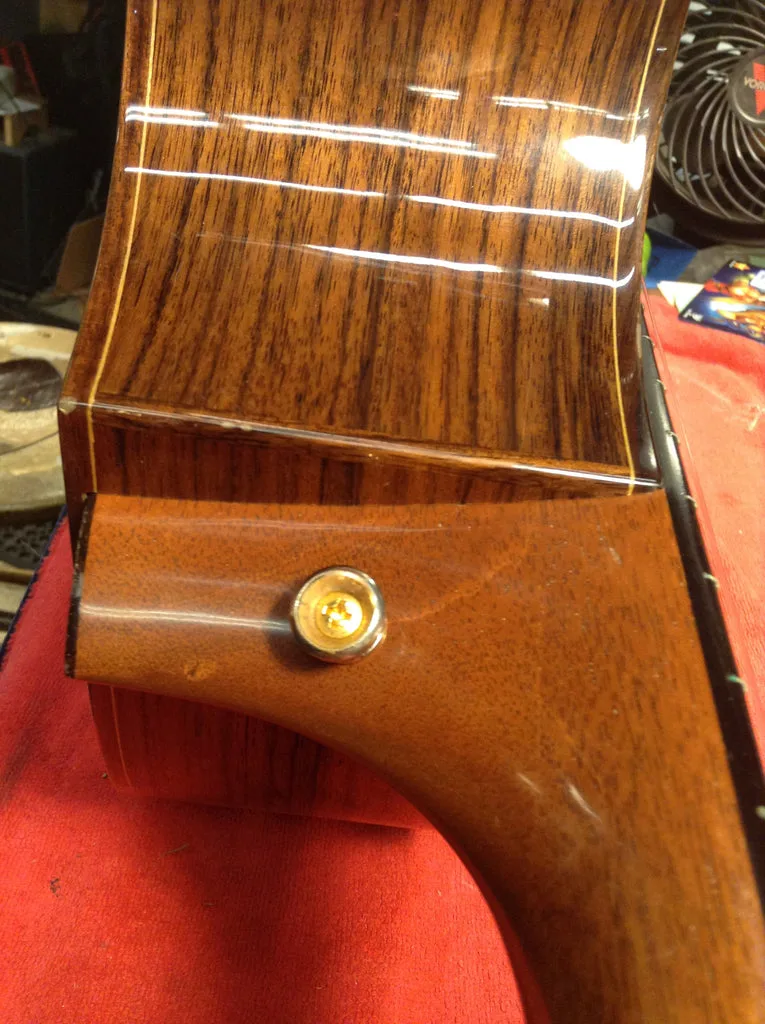
Modern Taylors like this one have bolt on necks, so the advantage here is to loosen the bolts and remove the neck in order to do the repair. Here you can see the heel has two longer bolts that go through the neck block into the heel. There’s also a short bolt that holds on the tongue (or end of the fingerboard).
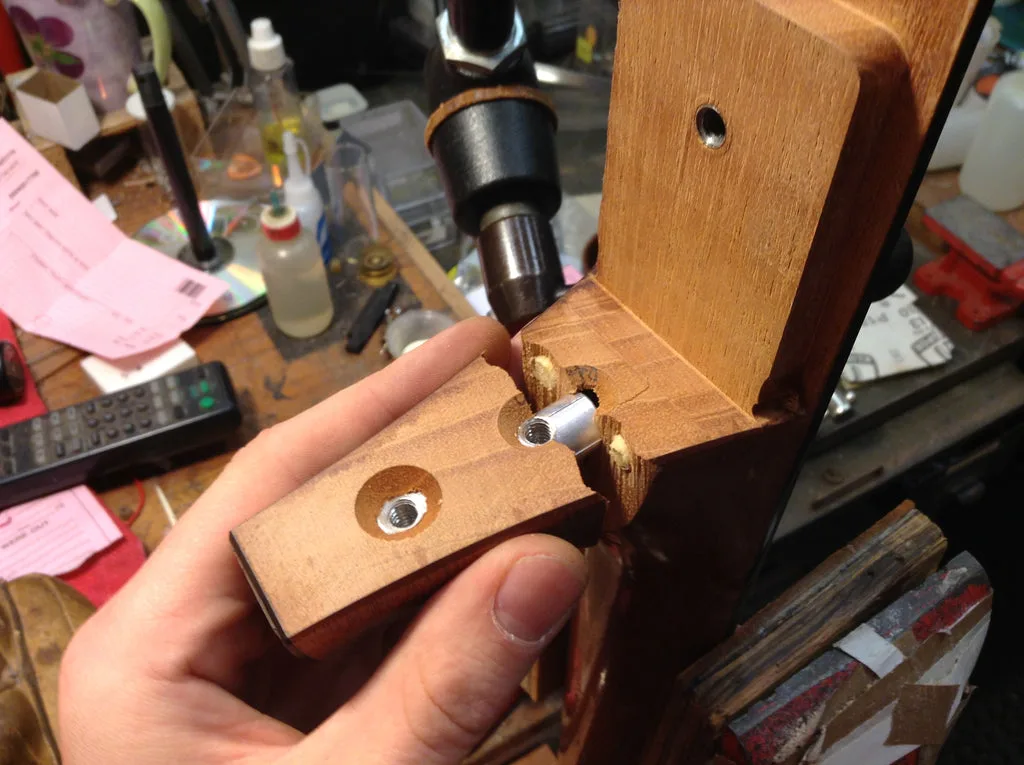
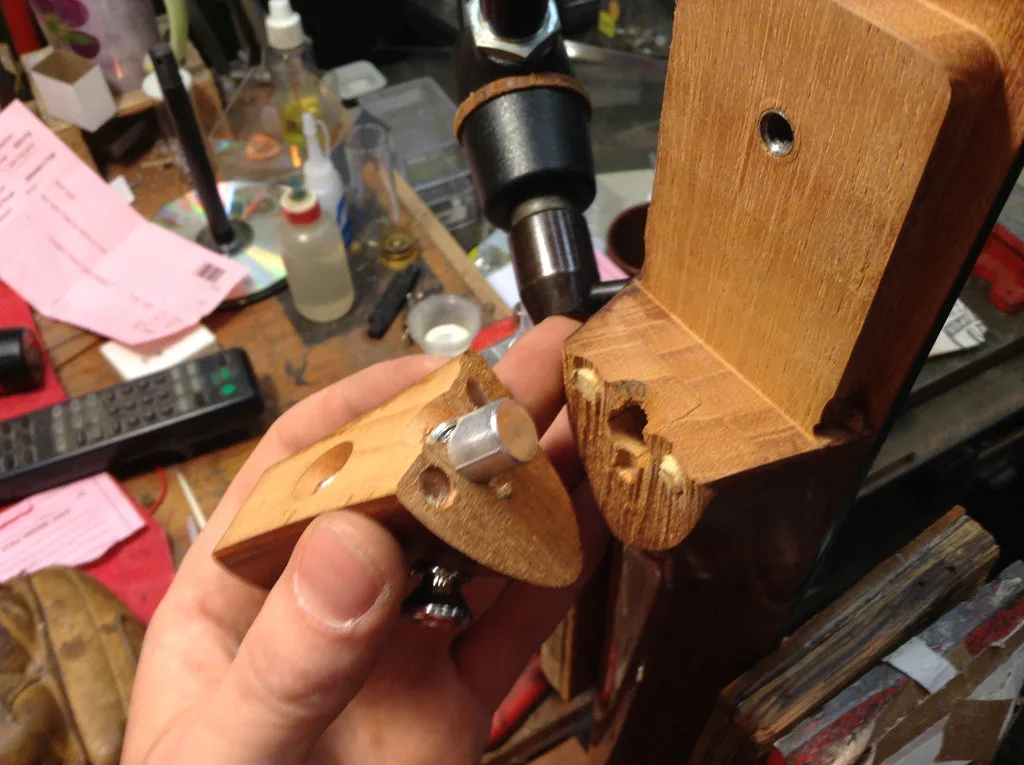
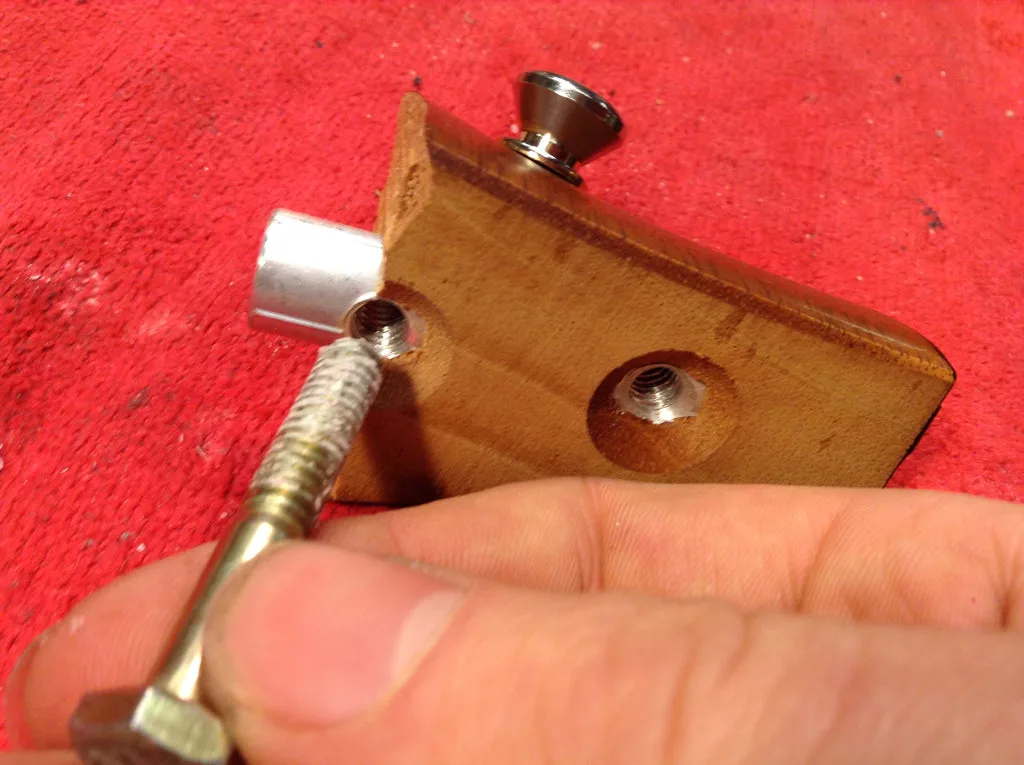
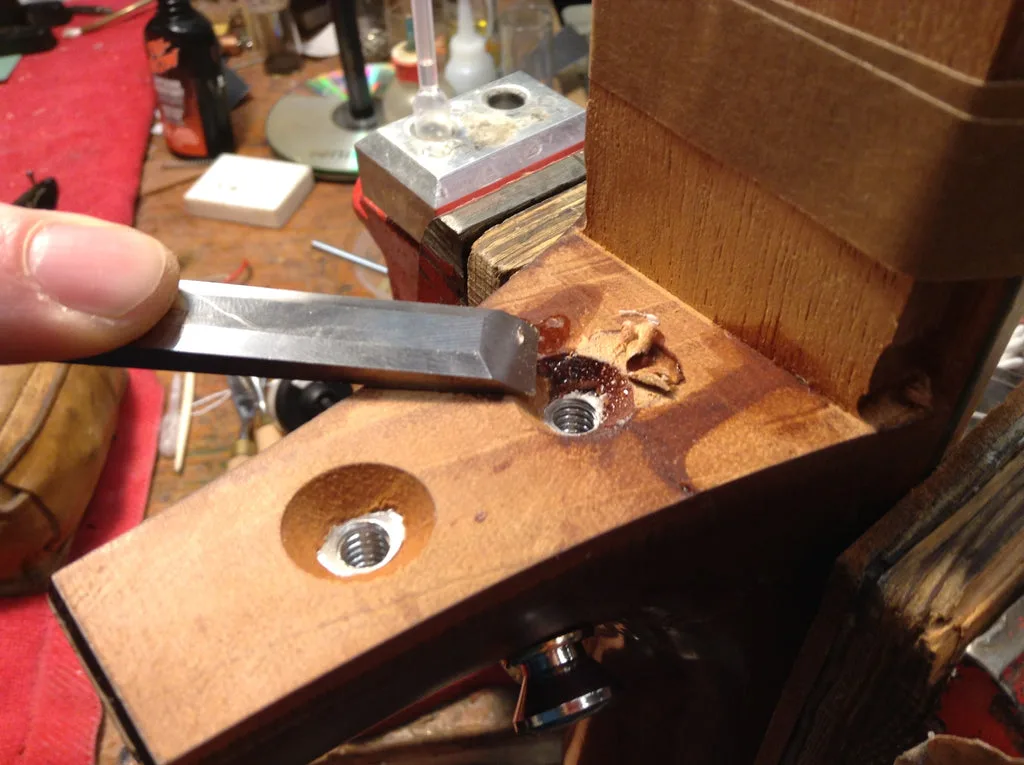
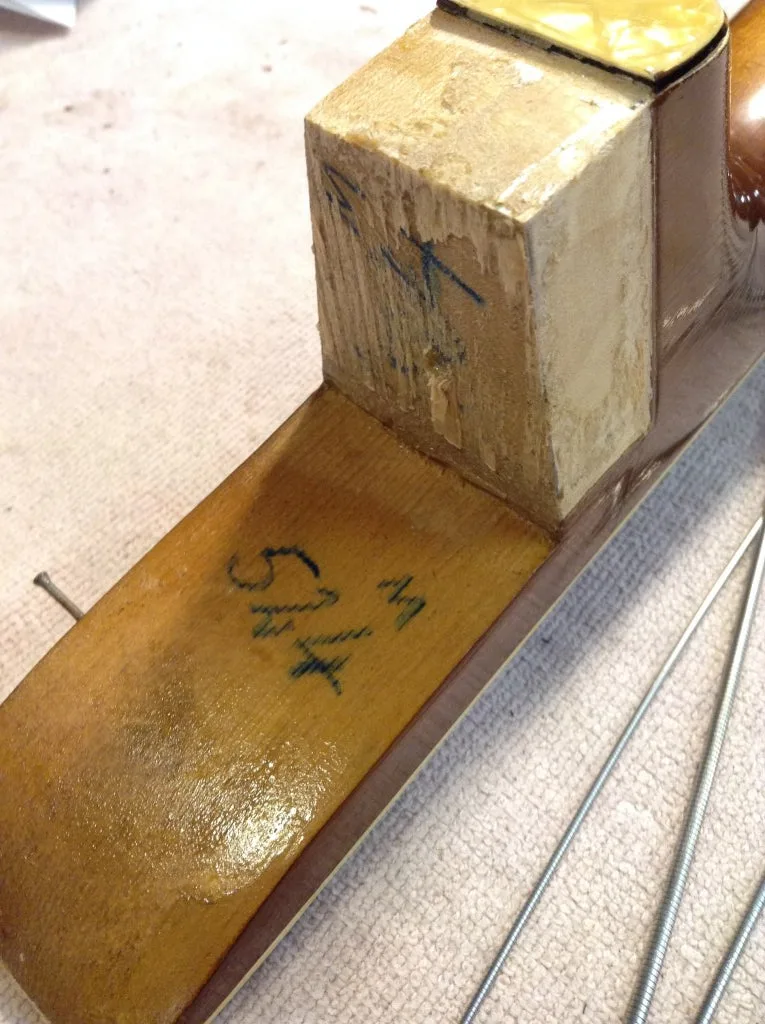
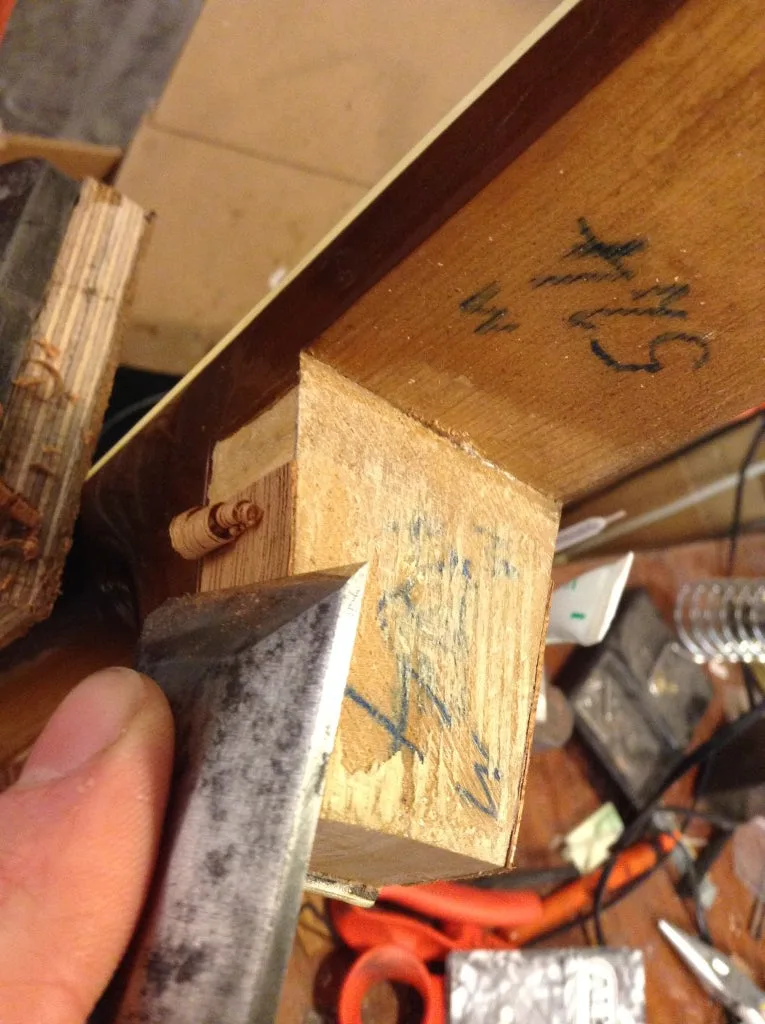
Now I have the neck off, the heel fell apart into two pieces. This is a cool break, just to display how these necks are put together. The threaded insert is right where the crack happened, and as a result the two pieces go back together really nicely when the insert is used as a pin.
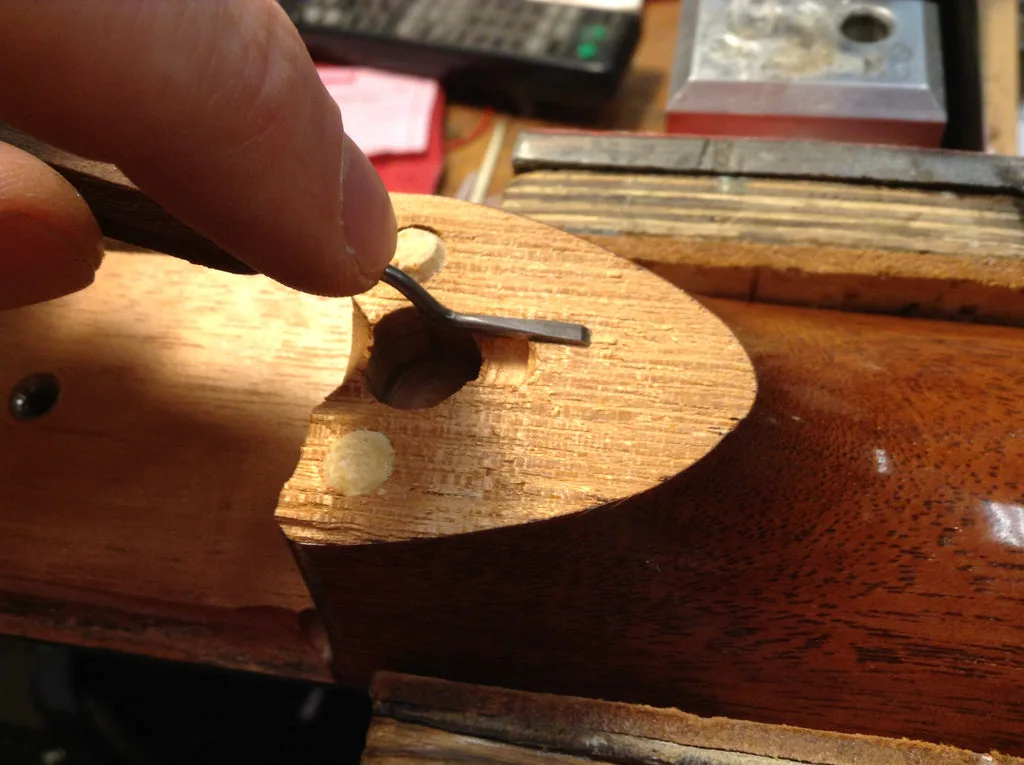
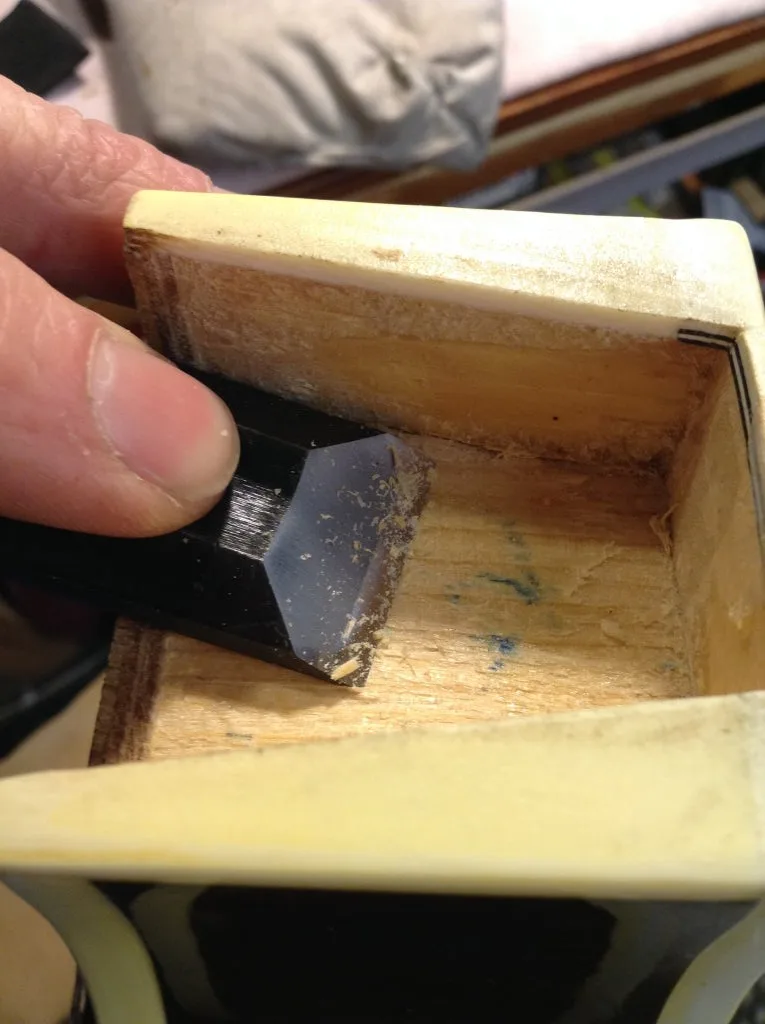
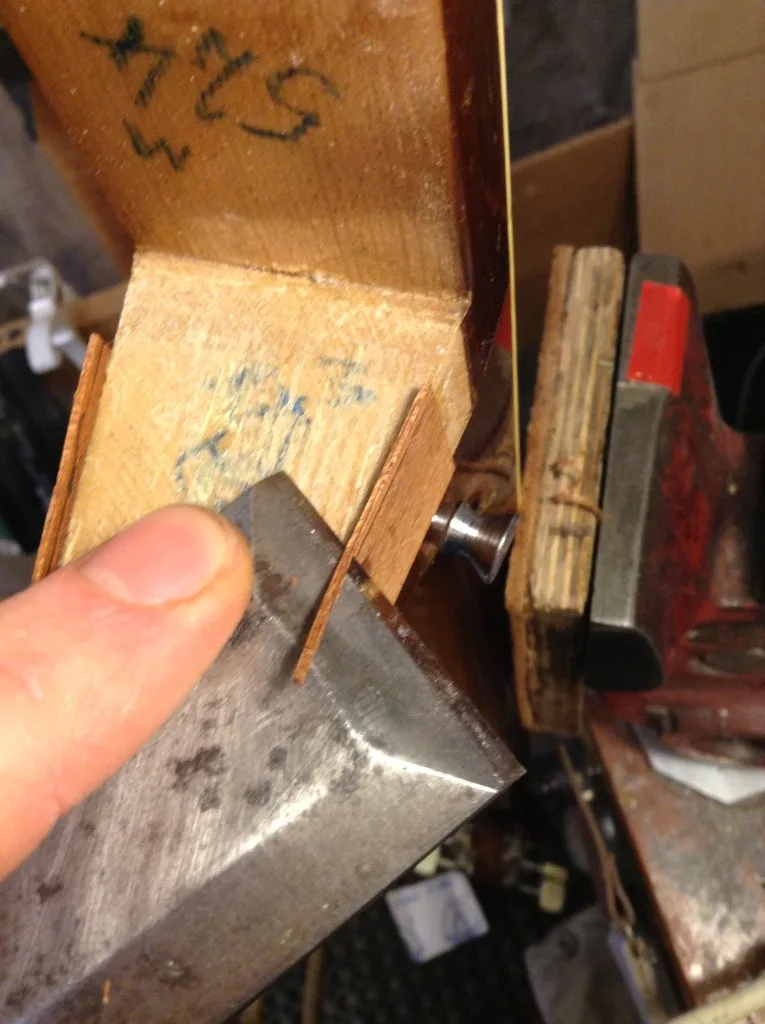
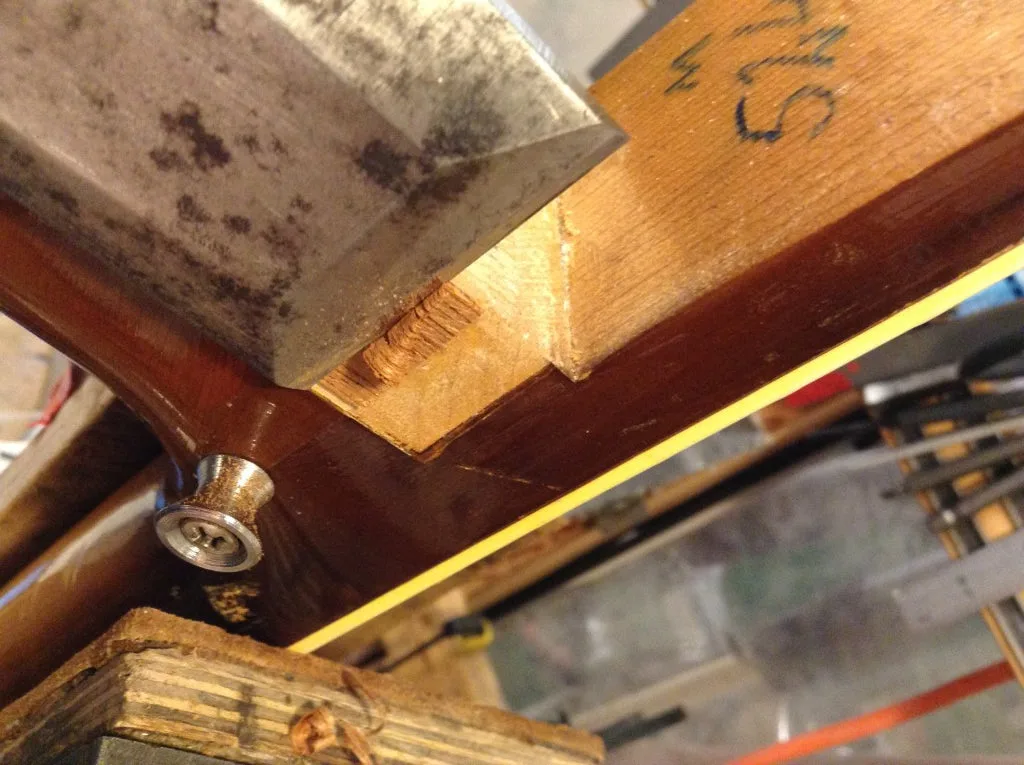
Before I glue it up, i’ll clean up any wood fibers that are going to prevent a good alignment. Here i’m using a micro chisel.
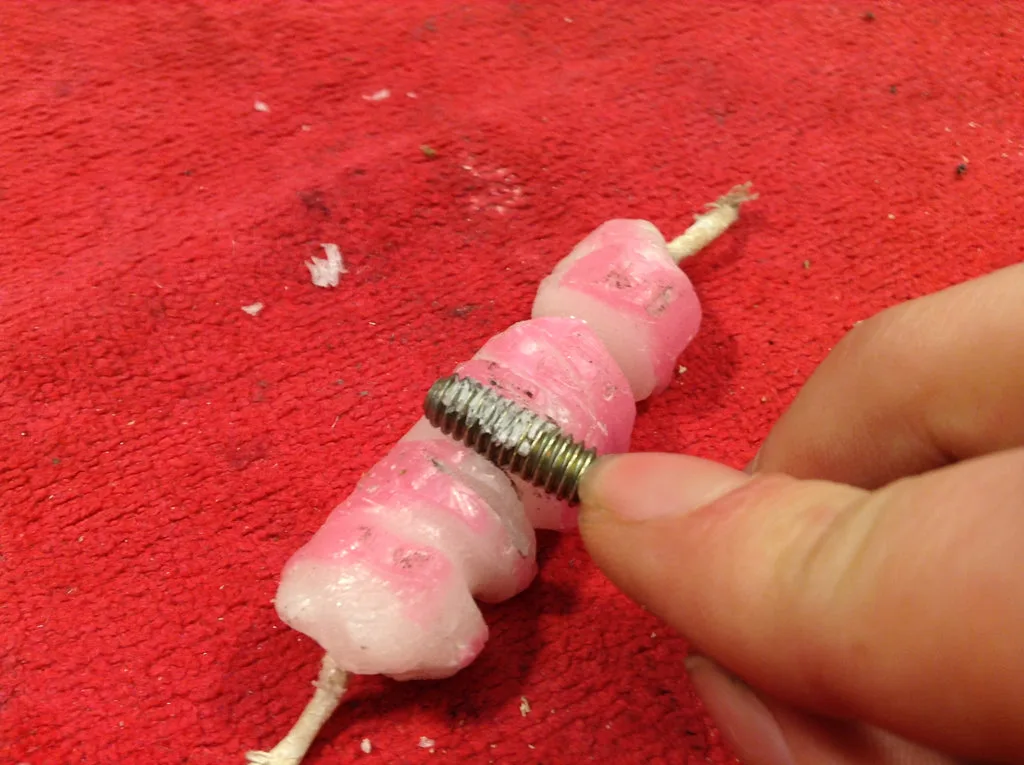
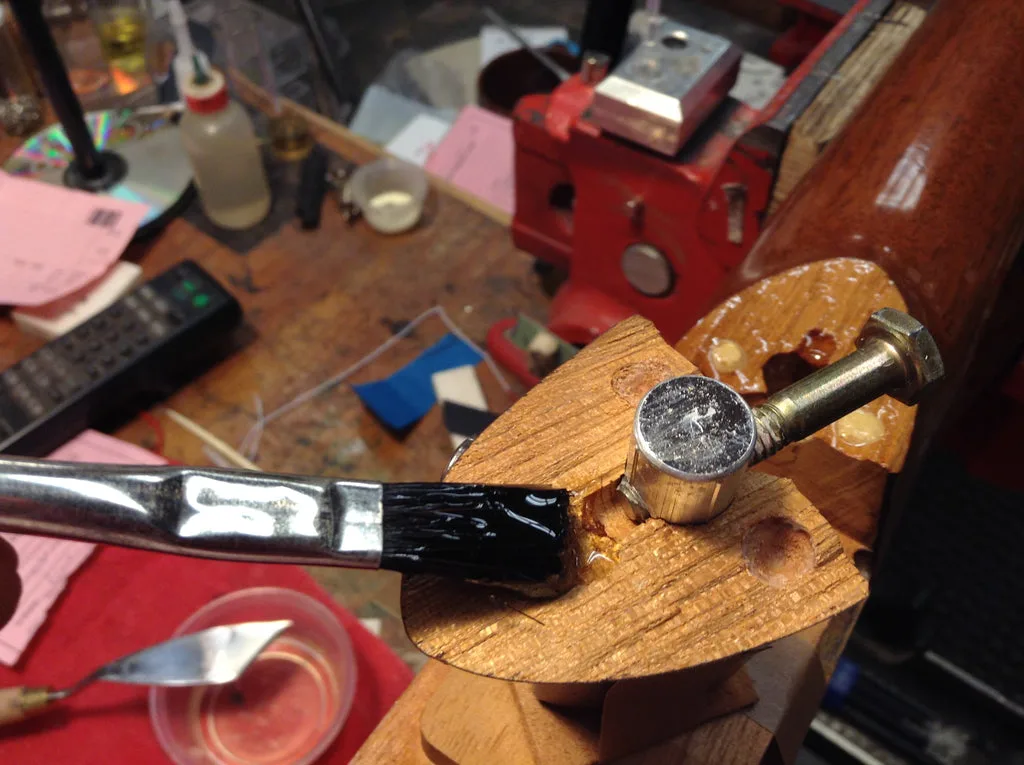
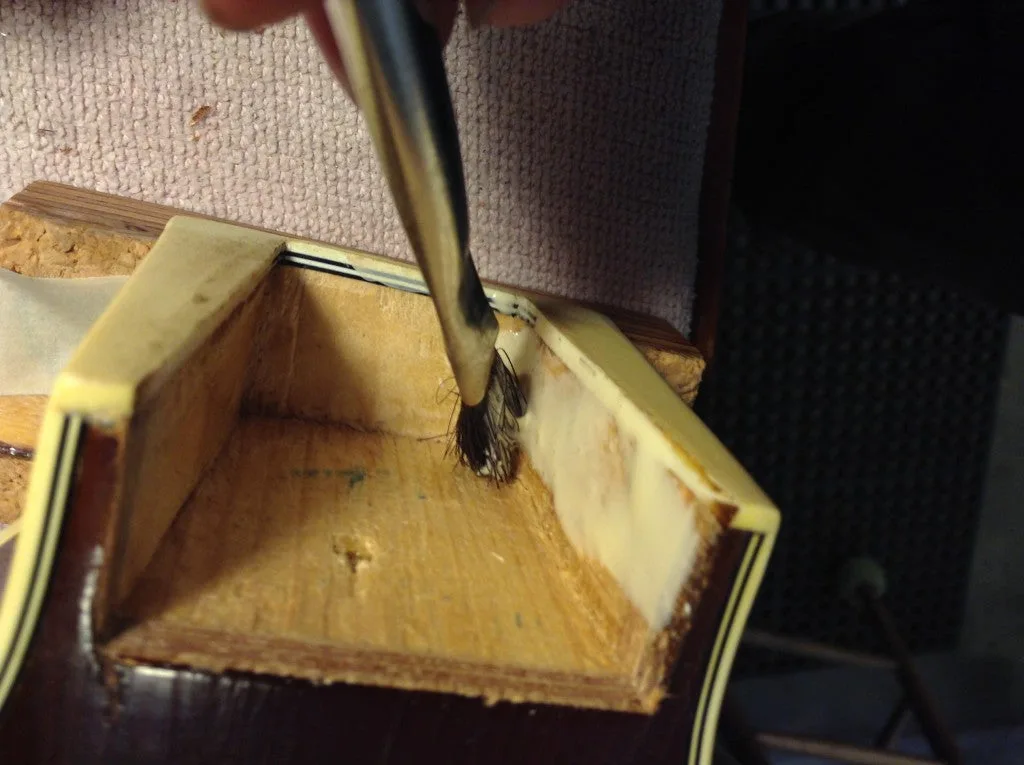
I’m going to use epoxy for this repair, so I mixed up a batch and got my brush ready. To avoid getting epoxy in the threads of the insert, I put wax from this old candle on one of the bolts and threaded it in. This will make sure I can get it out again and keep epoxy from seeping in.
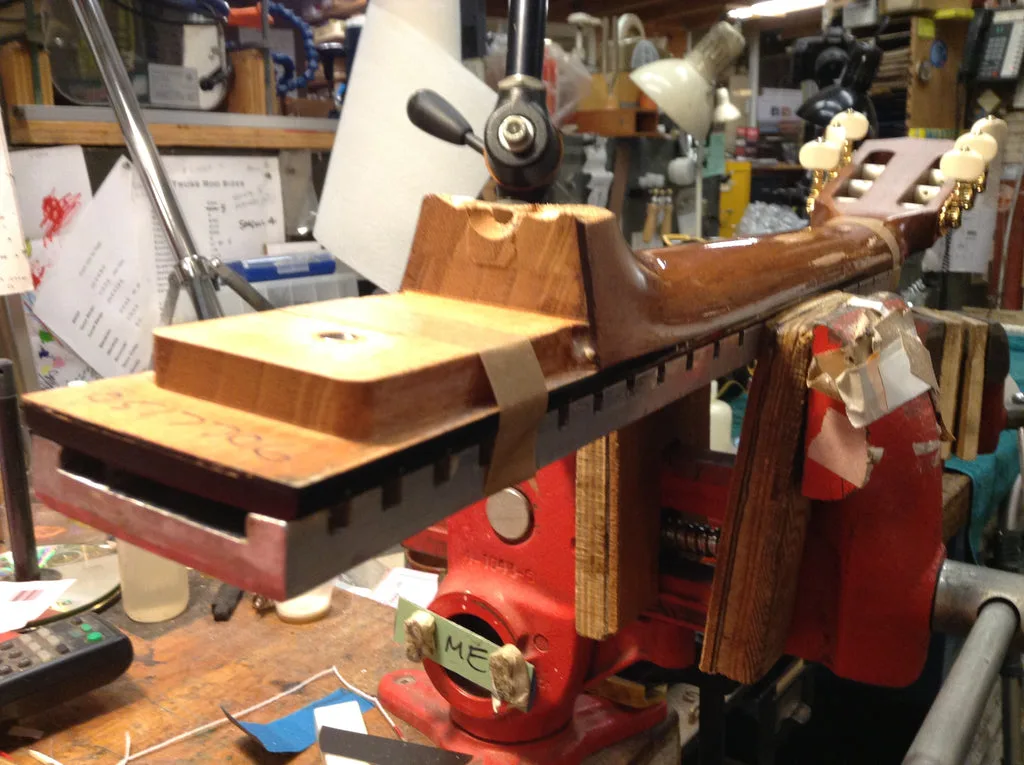
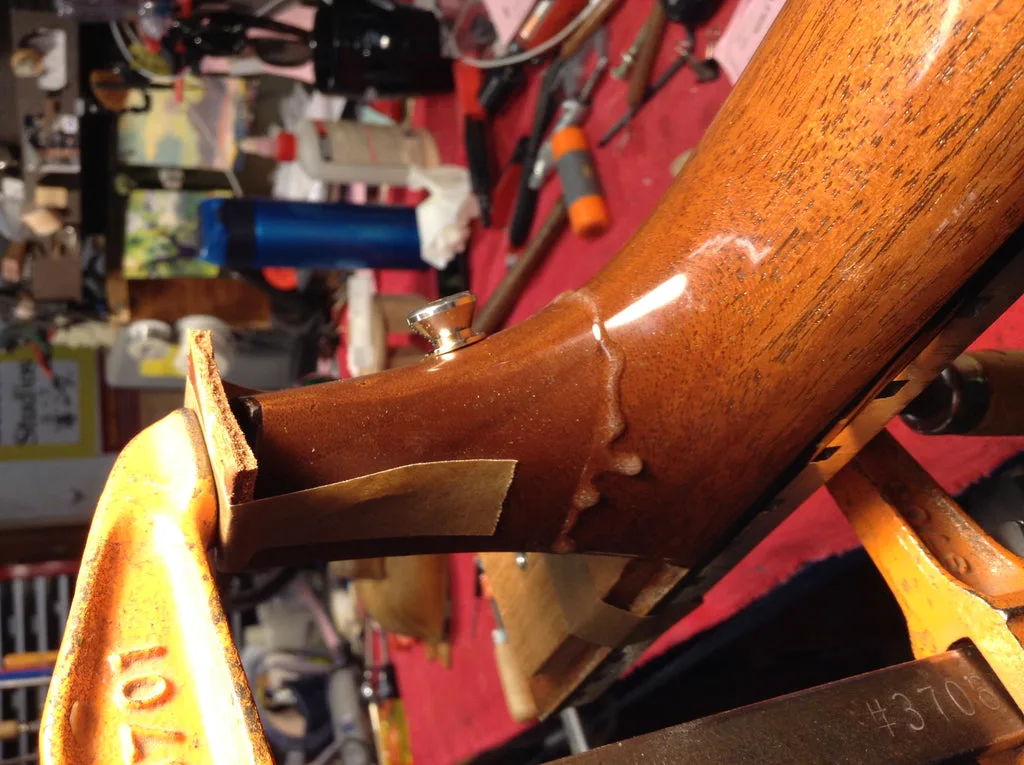
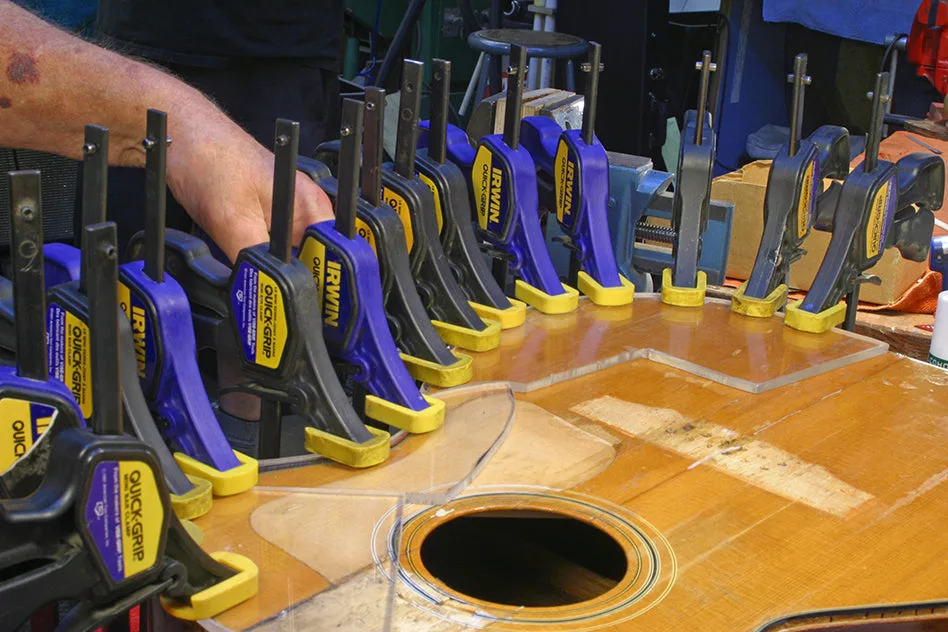
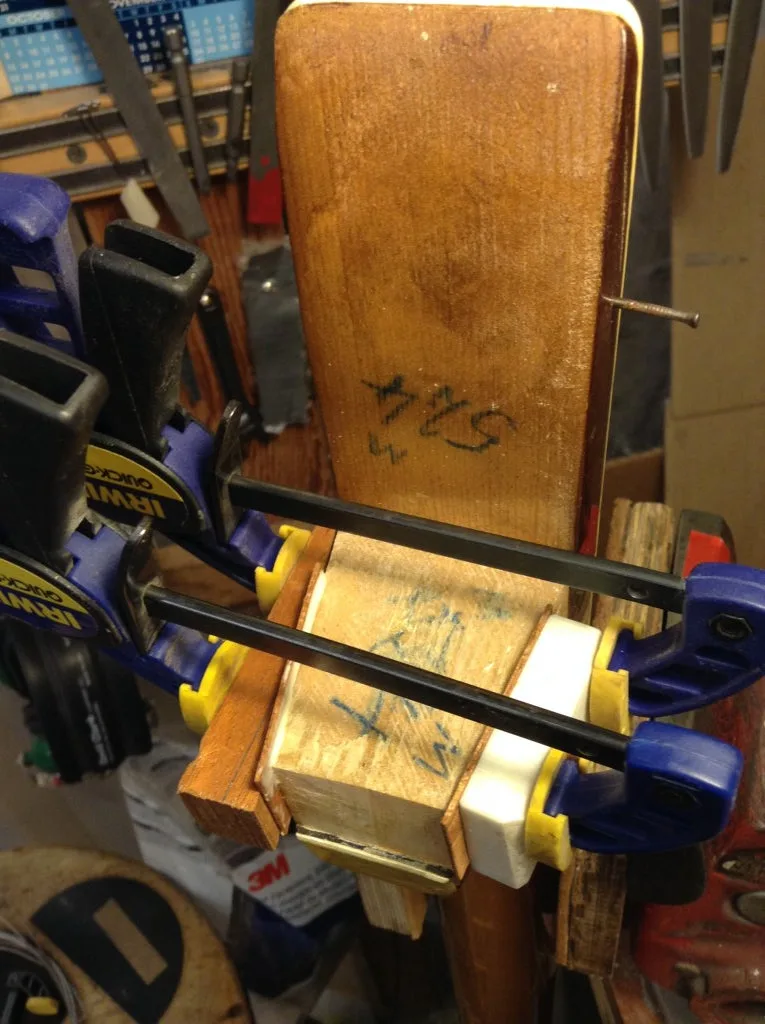
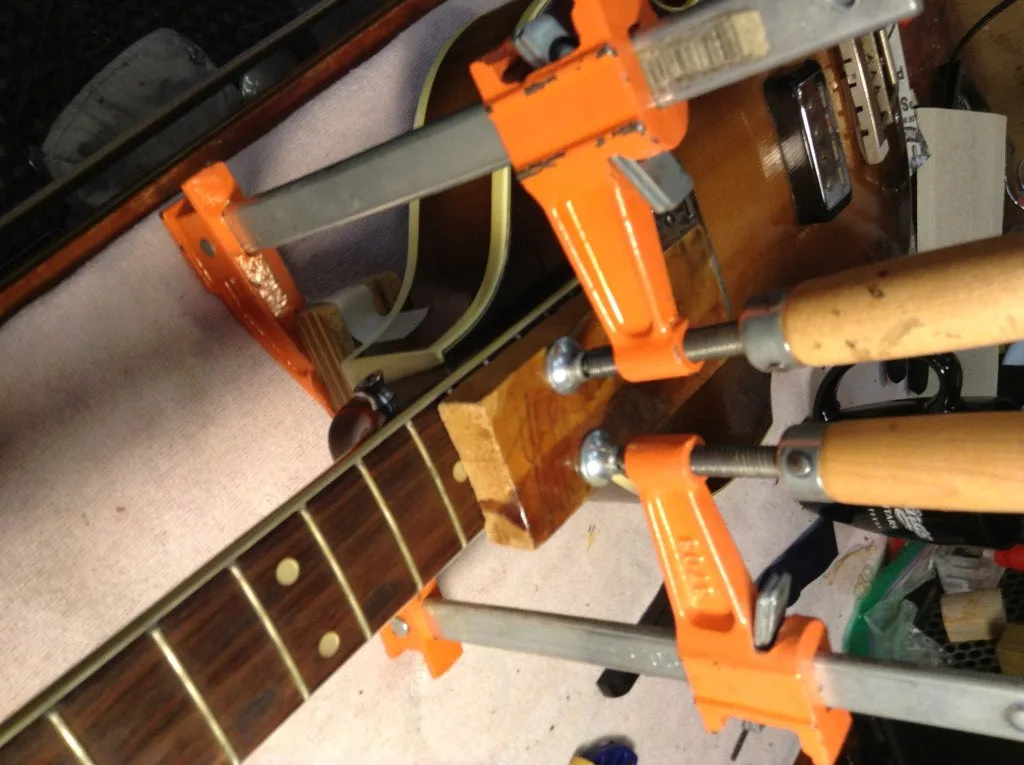
An aluminium caul protects the fingerboard from the clamps. Frank machined this out so the caul sits directly on the wood and doesn’t dent the frets or the wood. For the heel cap I taped on a small leather caul.
Now I brush on the epoxy and clamp it up.
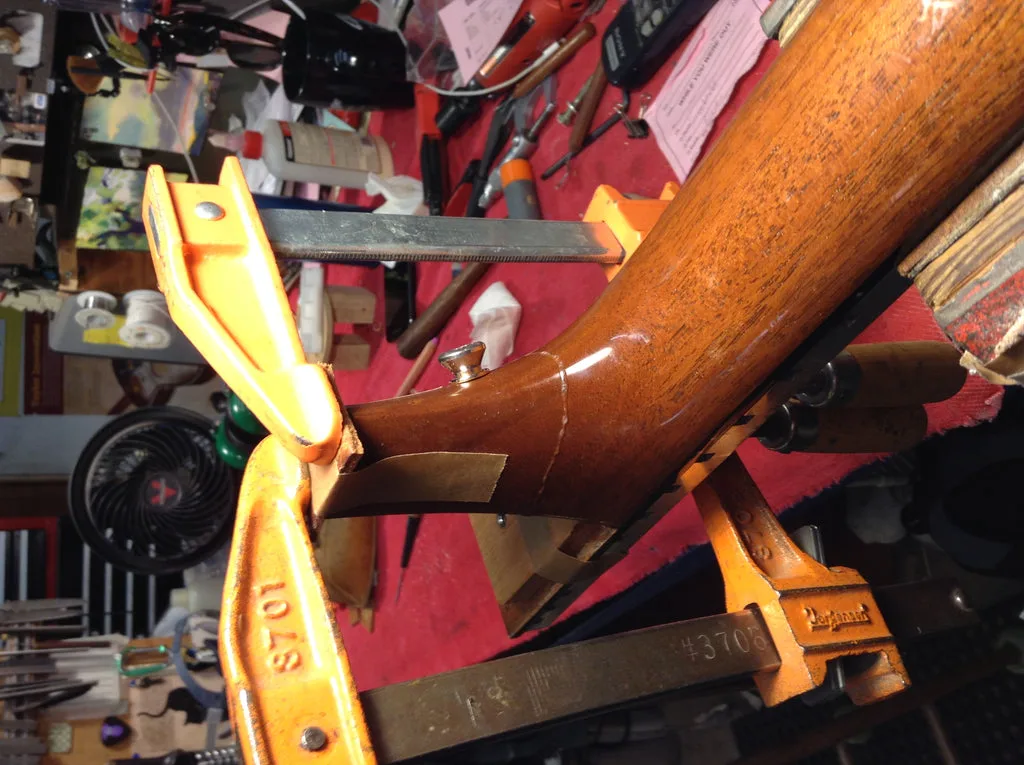
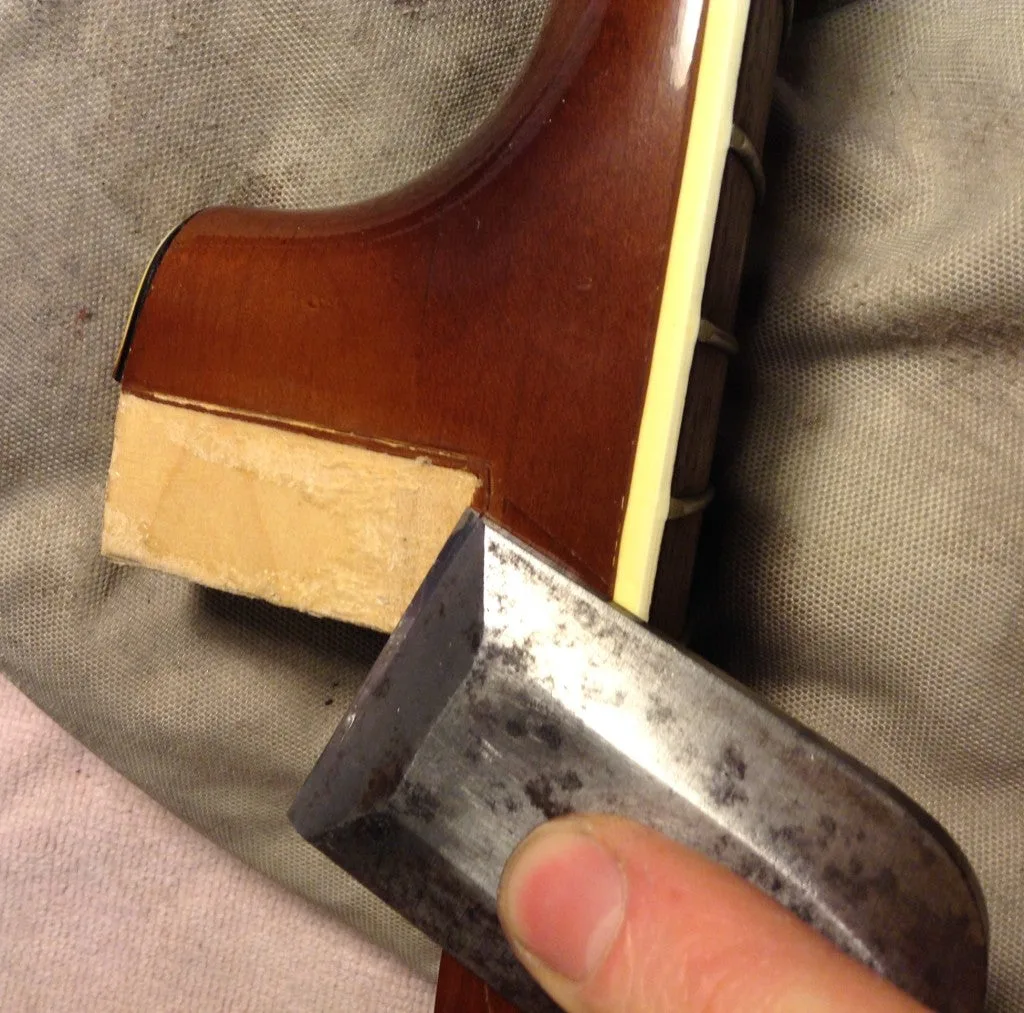
After wiping off the squeeze out, I put it aside for 24 hours or so. The clamps come off and then I need to do a little cleanup with a chisel to get off the excess epoxy on the underside. This will make sure it fits back in the neck pocket nice and tight.
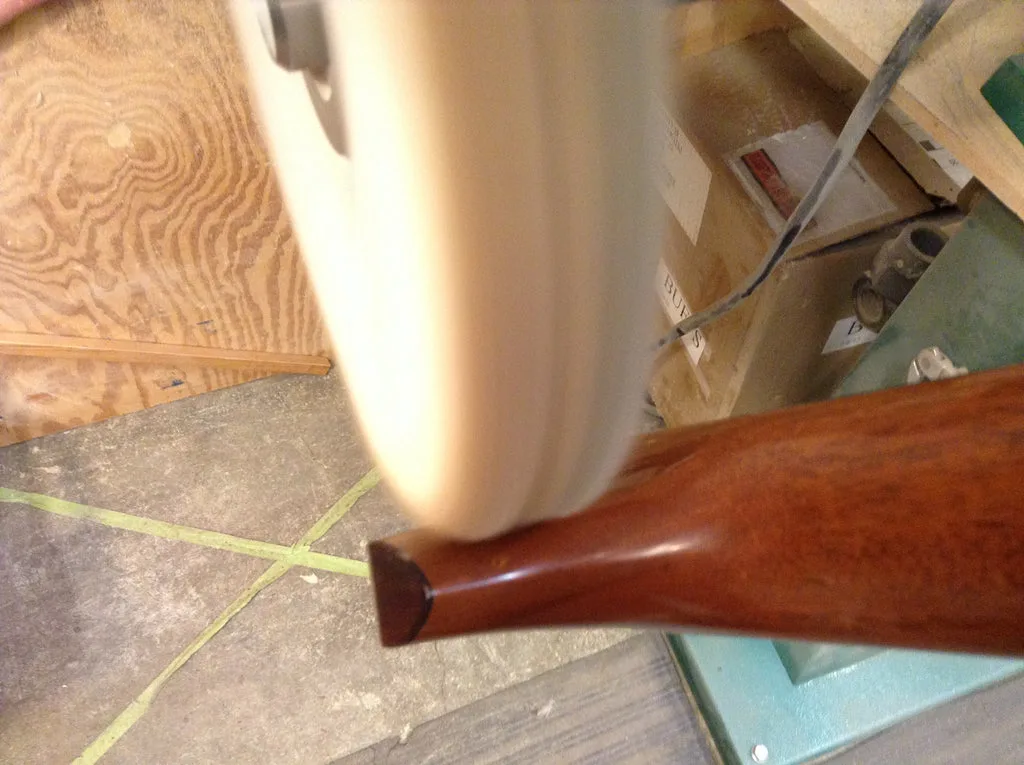
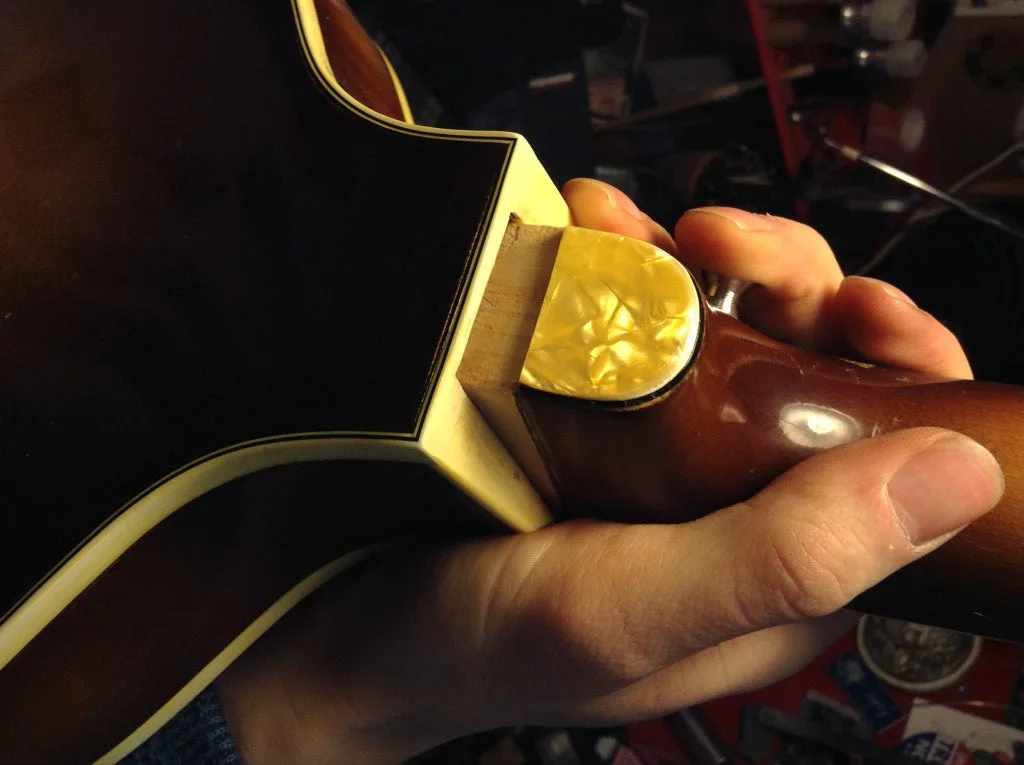
I did some very light sanding on the finished side of the heel and gently buffed it, with the wheel at the low speed.
Came out pretty good.. I’m not trying to hit Michi by the way.
Huss and Dalton Guitar Company
The story of the Huss and Dalton Guitar Company began when Jeff Huss moved from North Dakota to Virginia in 1984 in search of good bluegrass music. Once there, he quickly found a job working at the Stelling Banjo Works where he spent his days building banjo necks. After hours he spent his time in his home workshop designing and building his own guitars. He built one for his boss Geoff Stelling who liked it so much he added guitars to the Stelling line and had Huss build them. After making around a hundred, Huss decided to set out on his own in 1993. Around this time he met Virginia native Mark Dalton at a jam session. Mark Dalton was a fine musician, but more importantly, he was also an expert in finishing processes. The two men decided to pool their talents and in 1995 the Huss and Dalton Guitar Company was born.
Over the years Huss & Dalton has earned a reputation for building great sounding, meticulously crafted instruments. The guitars, which are built in Staunton, Virginia are inspired by the classic designs from Nazareth and Kalamazoo, but built with a distinct Virginia flair. The braces for each guitar are made from hand split Appalachian spruce, which they feel gives their guitars an excellent bass to treble balance. They use nothing but the highest quality quarter sawn tonewoods for the top back and sides. Here at Gryphon, their dreadnoughts are quite popular, and the rich, full tone combined with plenty of punch and projection make them perfect for bluegrass. Huss and Dalton’s smaller guitars, like the OM and the 00, are also well liked.
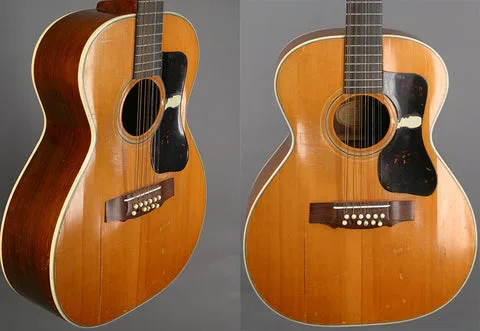
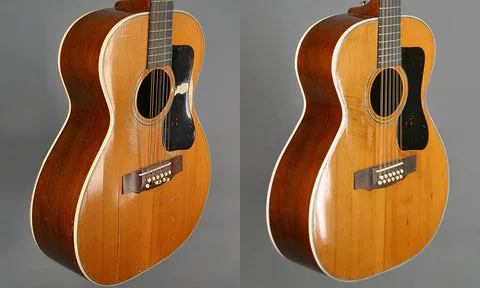
Restoring Judy Collins' Guild 12-String
“If I buy this guitar, can you restore it for me?” Now, there’s a question that ordinarily strikes fear and panic into this old heart of mine as I try to find some nice polite weasel words to get me out of actually answering.
But this time was different – it was our friend, Lisa Sanchez, asking with a real sense of anticipation in her voice. She’d just shown me a tiny online photo of a guitar on an auction Web site. It was one of several owned by Judy Collins, a 1968 Brazilian rosewood Guild 12-string. Lisa went on to spin a compelling tale of how Judy had been so important in her early interest in guitar playing back in the day. She’d followed Judy’s work and career closely, and as so many others, was influenced by her all along the way.
“Well, I dunno – even from that teeny picture, you can see the top is all cracked up, and there’s no way to know what’s left of the rest of it – but maybe.” For sure it would be a REALLY big job.
“What do you think it might cost?”
I hoped she wouldn’t ask that one, “No way to know at this distance – maybe it can’t even BE fixed.”
“OK, well I’m going to go for it, and if it sells for what I can afford (not much) then I’ll just hang it on the wall if you can’t restore it. That way, I’ll still have my piece of my hero, Judy Collins. But if you can…”
Wouldn’t you know it. All the other guitars went for pretty high prices, but this most iconic one actually took a trip to live at Lisa’s house! It is, after all, the one featured in so many situations, recordings, concerts, album covers, photos and all. It still even has the strap Judy used for so many years with the little decorative tassel things hanging down.
And, wouldn’t you know it, I got drafted. After looking it over carefully, I finally decided it was appropriate for me to dig in and give it a good effort. Lisa was clear that she didn’t want to change its appearance or lose any of the mojo of such a world traveler. In other circumstances, replacing the top might well have been the logical choice, but not this time!
Lisa Sanchez is a San Francisco based professional guitarist and teaches here at Gryphon, so as I started to work on the guitar, she was on hand to see the slow progress as I worked on it. Terrible cracks ran the length of the top, and all the top braces had been broken and/or knocked loose. Cracks in the back, through the end block, terrific fret wear, neck angle issues, broken bridge, and a decomposing peghead veneer didn’t help a bit, either.
All in all, this was big fat restoration job, and the cost would exceed the “cash value” of the guitar many times over. But that wasn’t the point. Most importantly for me it was a mighty rewarding project because of what the instrument represents in our music world, and especially what it means to Lisa.
— Frank Ford
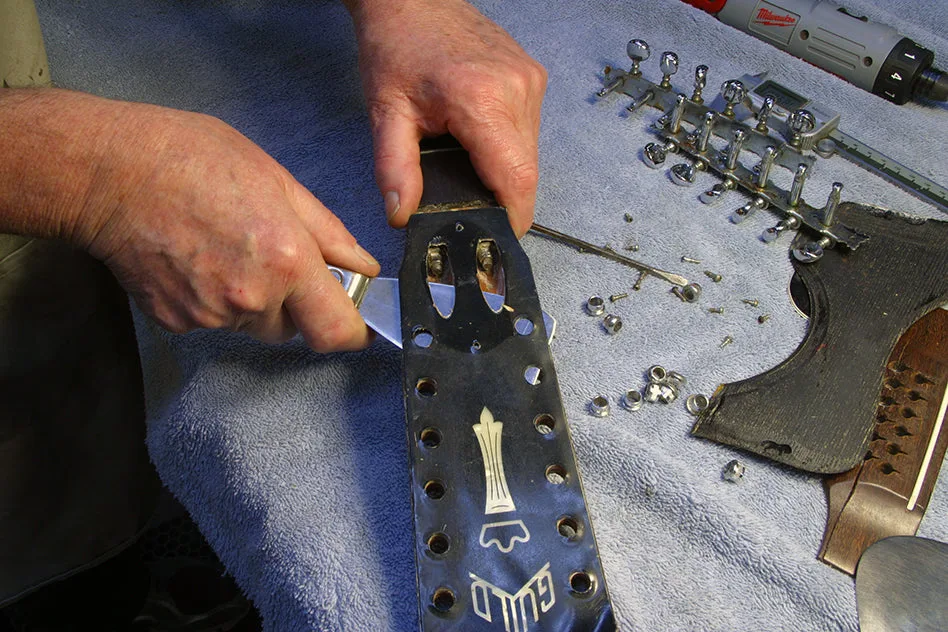
Lots of disassembly needed, and here I’m removing the decomposed plastic peghead overlay – I’d be making a new one, with new inlay work. Off to the side: tuners, pickguard and broken bridge.
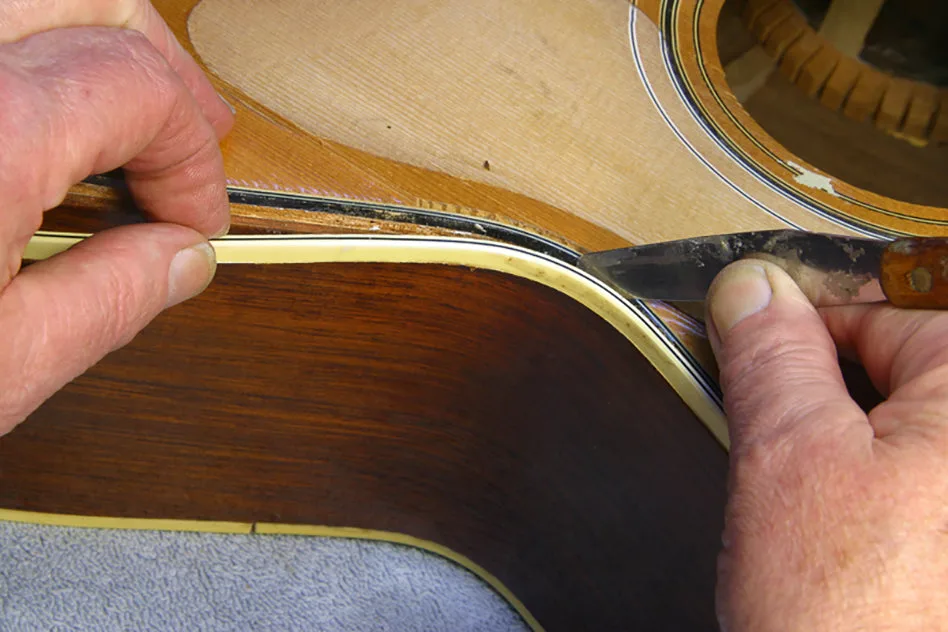
Disassembly of an acoustic guitar body is touchy work with risk of causing more cracks, so we generally try to do as much repair as we can without actually taking the body apart. But, when the damage is really severe, it’s an advantage having access to do the best reconstruction. With the top off, I’d be able to flatten the wood as I glued and repaired all those cracks.
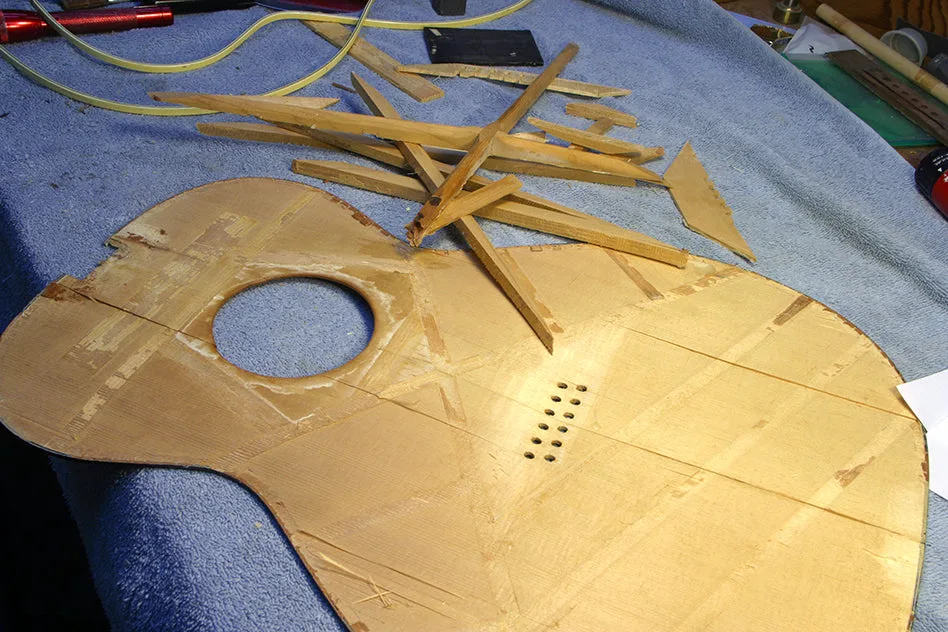
Almost all the top braces were damaged or loose, so I removed them in preparation for the crack repair. I glued up each crack individually and flattened the top by clamping it between heavy boards for a week or so after applying a bit of heat and moisture.
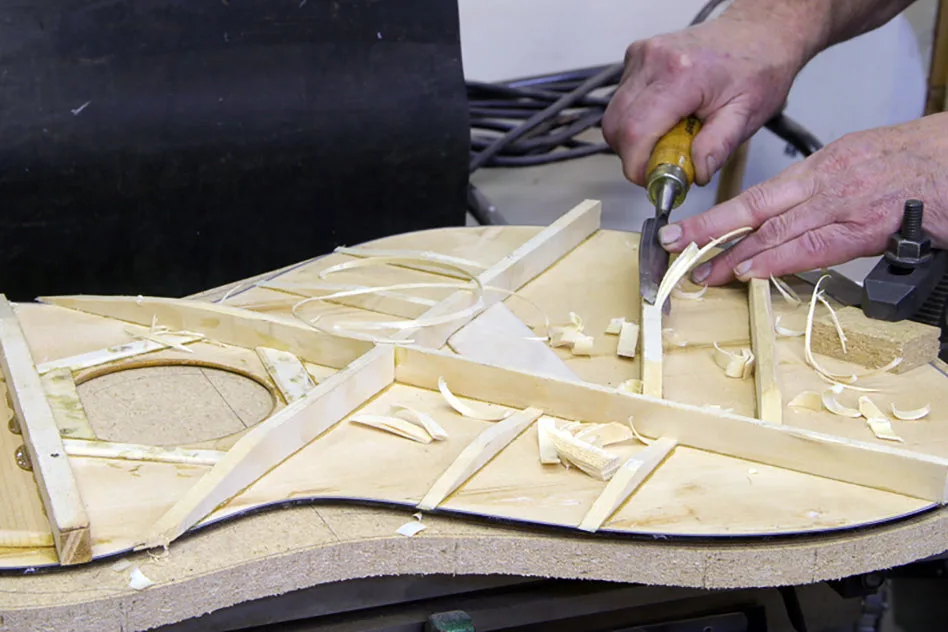
I made replacements for all the top braces, glued them in position and formed their contours with chisel and sandpaper.
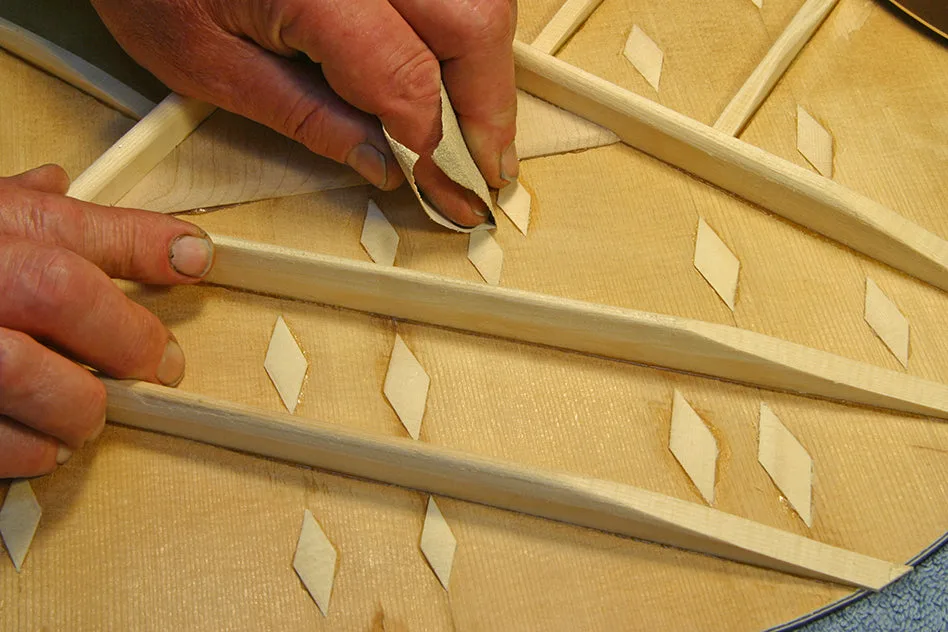
It’s customary to install nice little reinforcement patches or “cleats” to reinforce top cracks, but I didn’t want to influence the flexibility of the top too much, so I made sure to use the thinnest, lightest reinforcement I could.
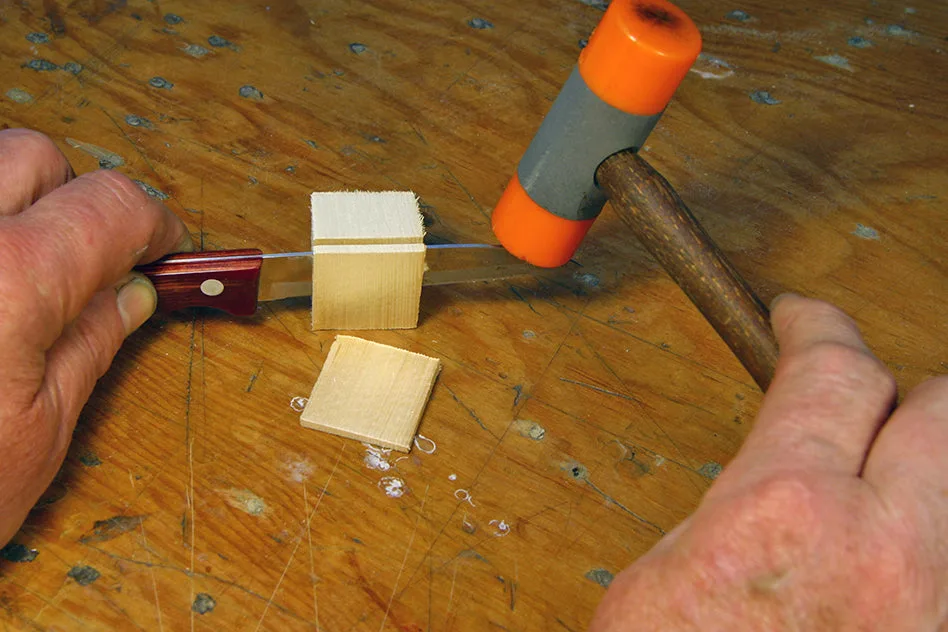
In order to make those thin pieces, I split them from solid spruce stock to be certain that the grain direction would be exactly parallel to the surface, minimizing the possibility of breakage in service.
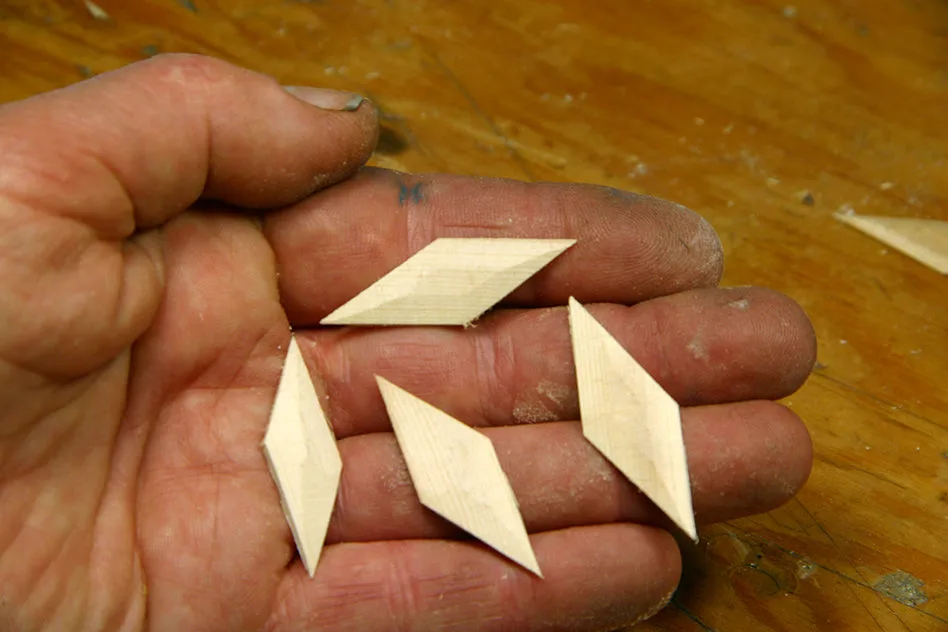
My reinforcement cleats had a maximum thickness of .040″. Once they were glued in place I sanded them even a bit thinner, tapering the edges right down to the guitar top.
It’s nice to have the assurance that the top is now flexible and strong, despite the large number of cracks.
All around inside the guitar there were other bits of damage, like this big crack through the end block – probably a result of dropping the guitar on the end pin. The pin fits into a tapered hole, and if it gets hit hard enough it can split even such a heavy piece of hardwood.
Finally, after all that interior work it came time to put the body back together again – I glued half at a time to avoid any misalignment.
On and on the work went for a total of several months – that’s Lisa in the background, keeping me honest…
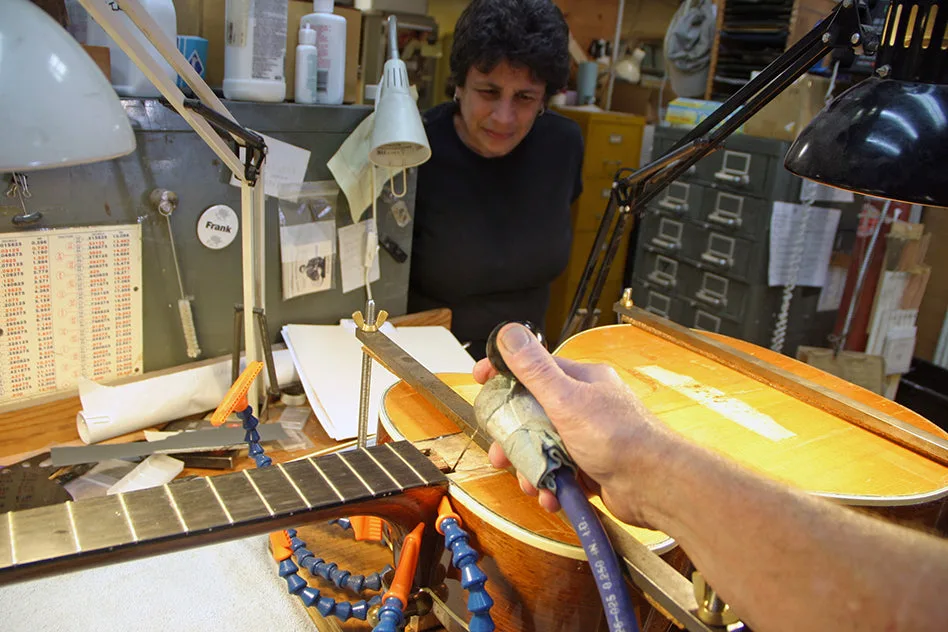
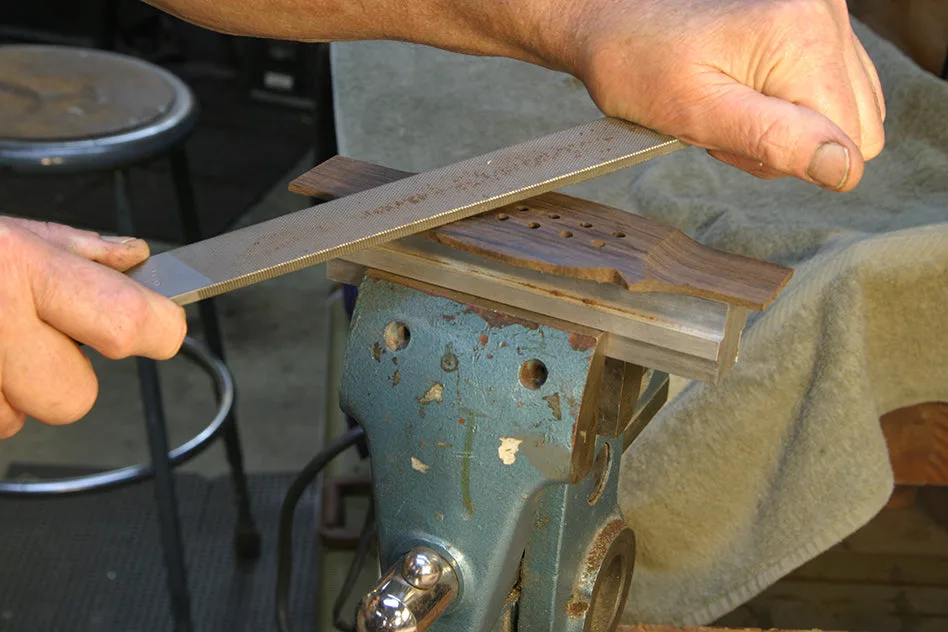
Neck removal and resetting, fingerboard leveling and refretting, peghead veneer replacement, and setup followed as things took shape.
I reproduced the original broken bridge with one I carved from Brazilian rosewood.
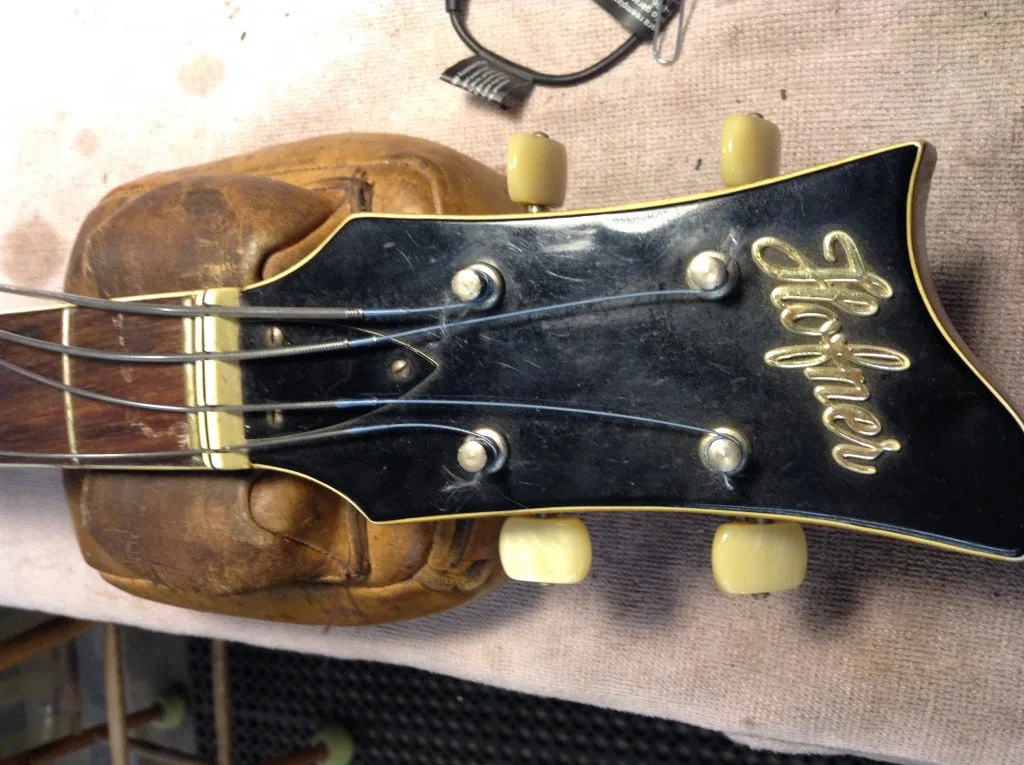
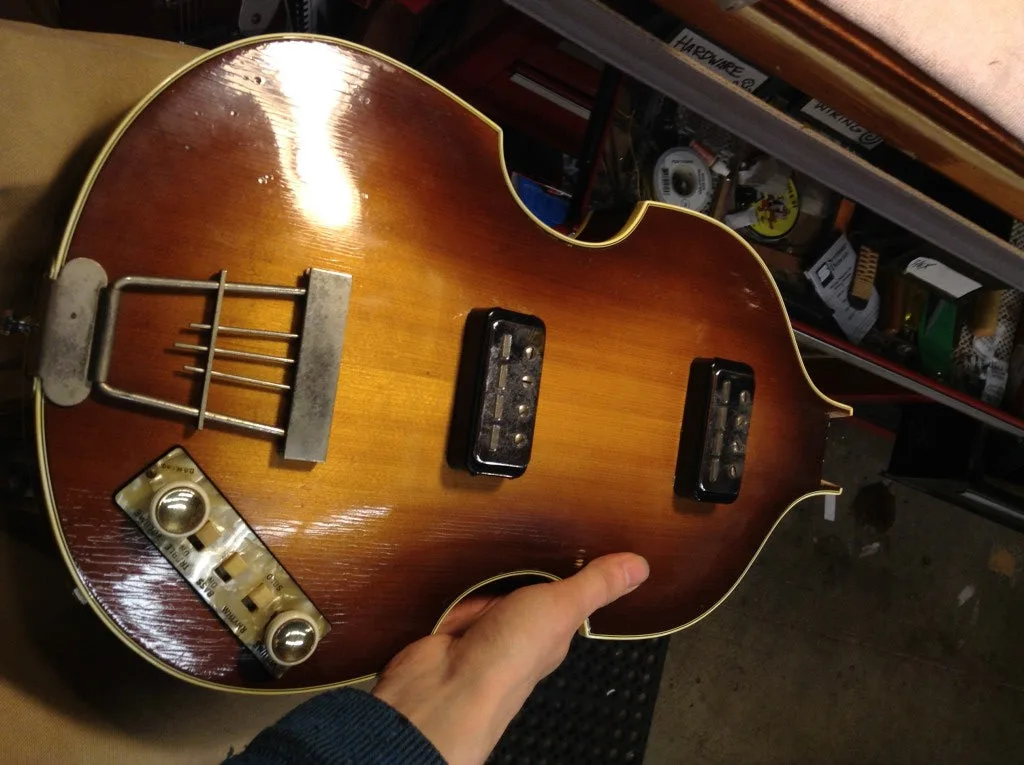
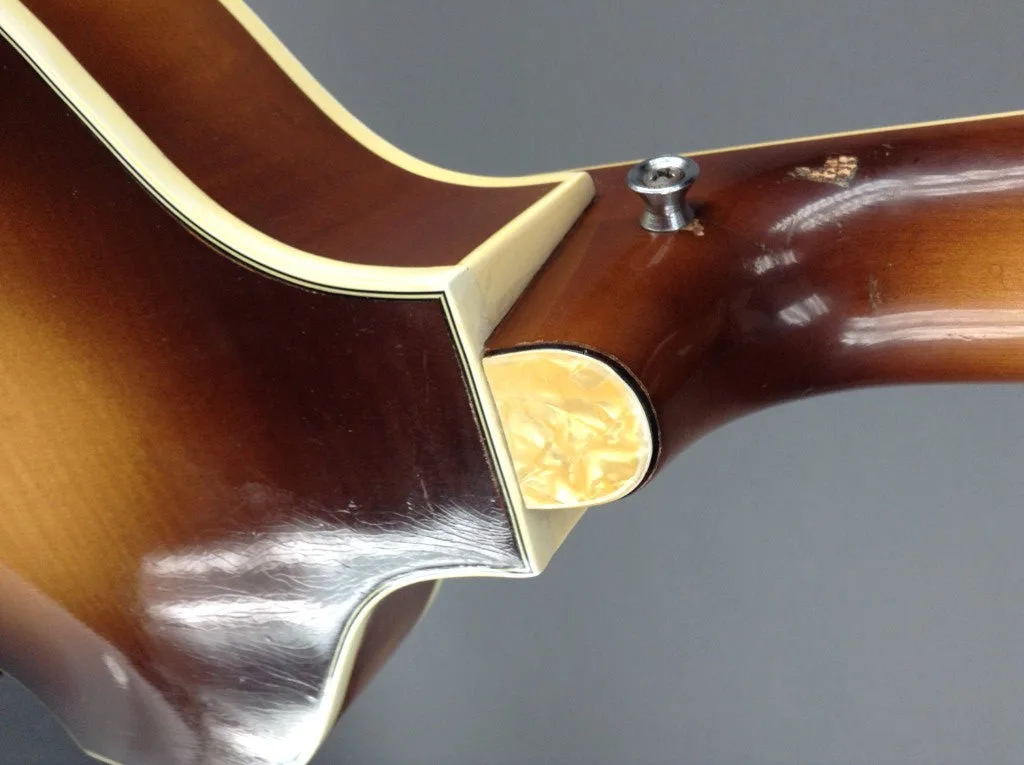
1960's Hofner Beatle Bass neck reset…
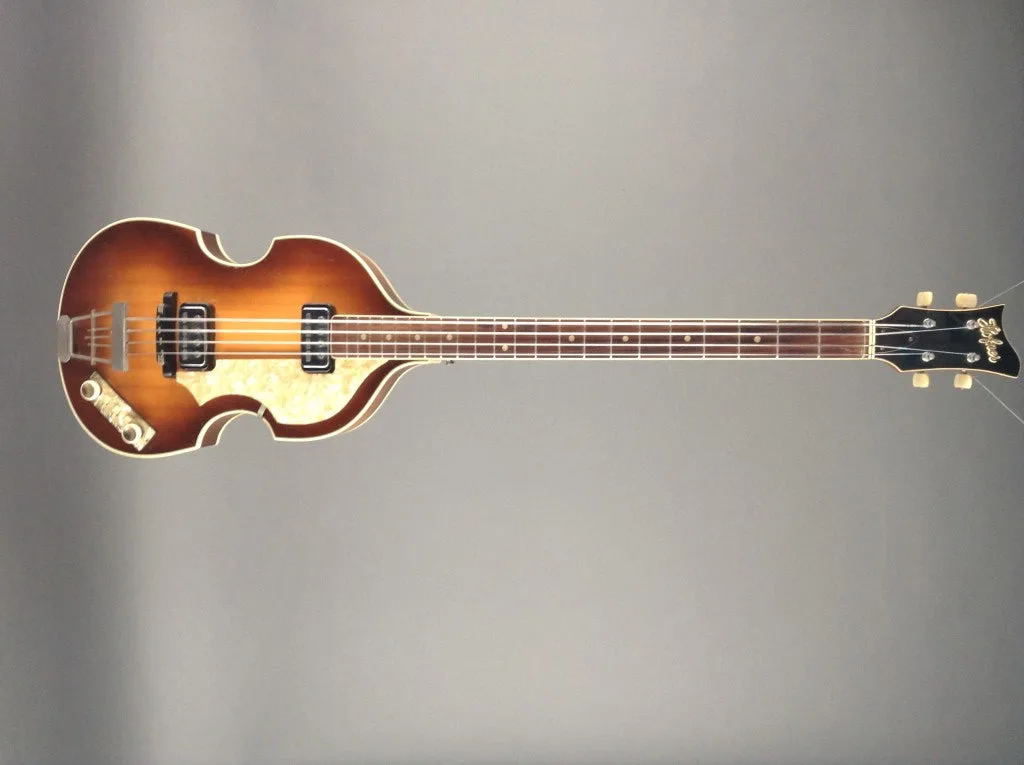
A very cool 60’s Hofner Beatle bass landed on the repair counter recently. The owner explained that the neck fell off when he last took it out of the case. There were no signs of trauma, just tired and dried up glue in the pocket and on the heel of the neck.
I took it in for a neck reset and proceeded to clean off all the old hide glue.
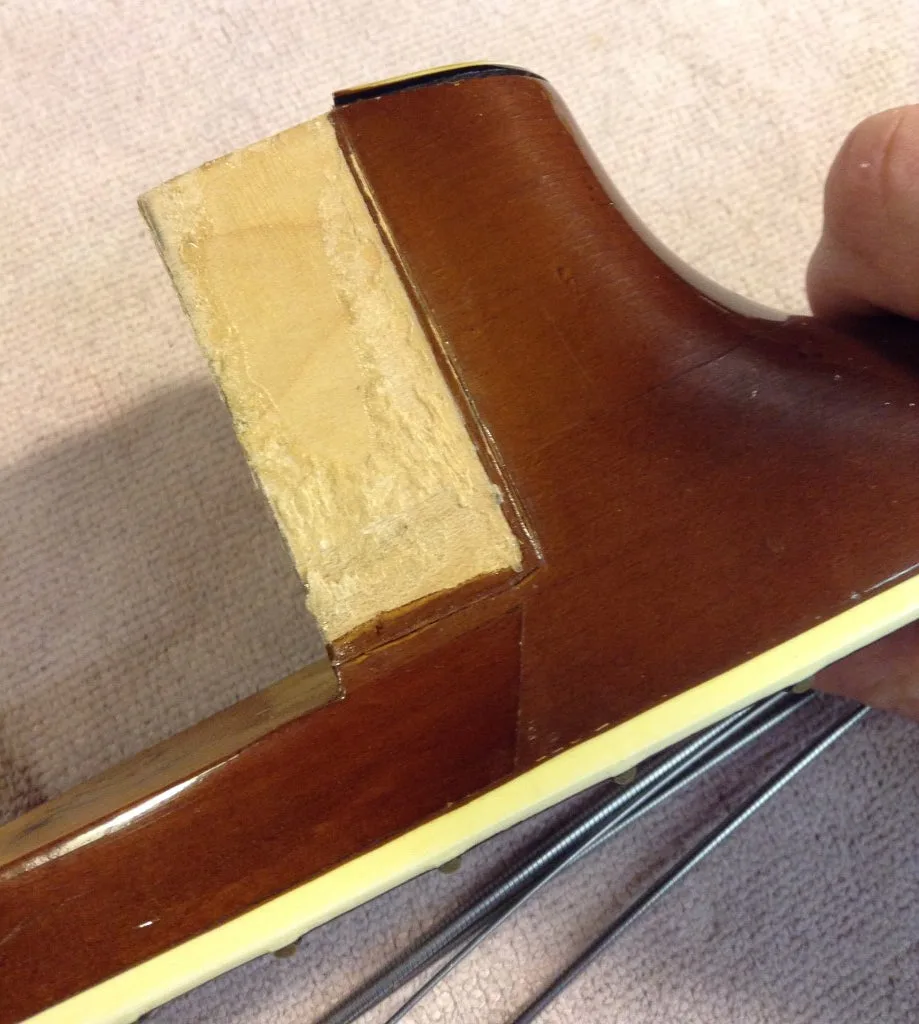
The neck angle was surprisingly good, so only a little material was shaved off the bottom of the heel. The tenon was a bit of a loose fit in the pocket though, so once the angle was set, I glued on a pair of mahogany shims order to get the fit dialed in nice and tight.
Once the glue was dried, the shims needed to be cut down to fit the pocket nice and snug.
Then after the fit was just right, I glued the neck back in.
Here it is all strung up and ready to go.
Our Favorite Yankee and his Granite State Guitar
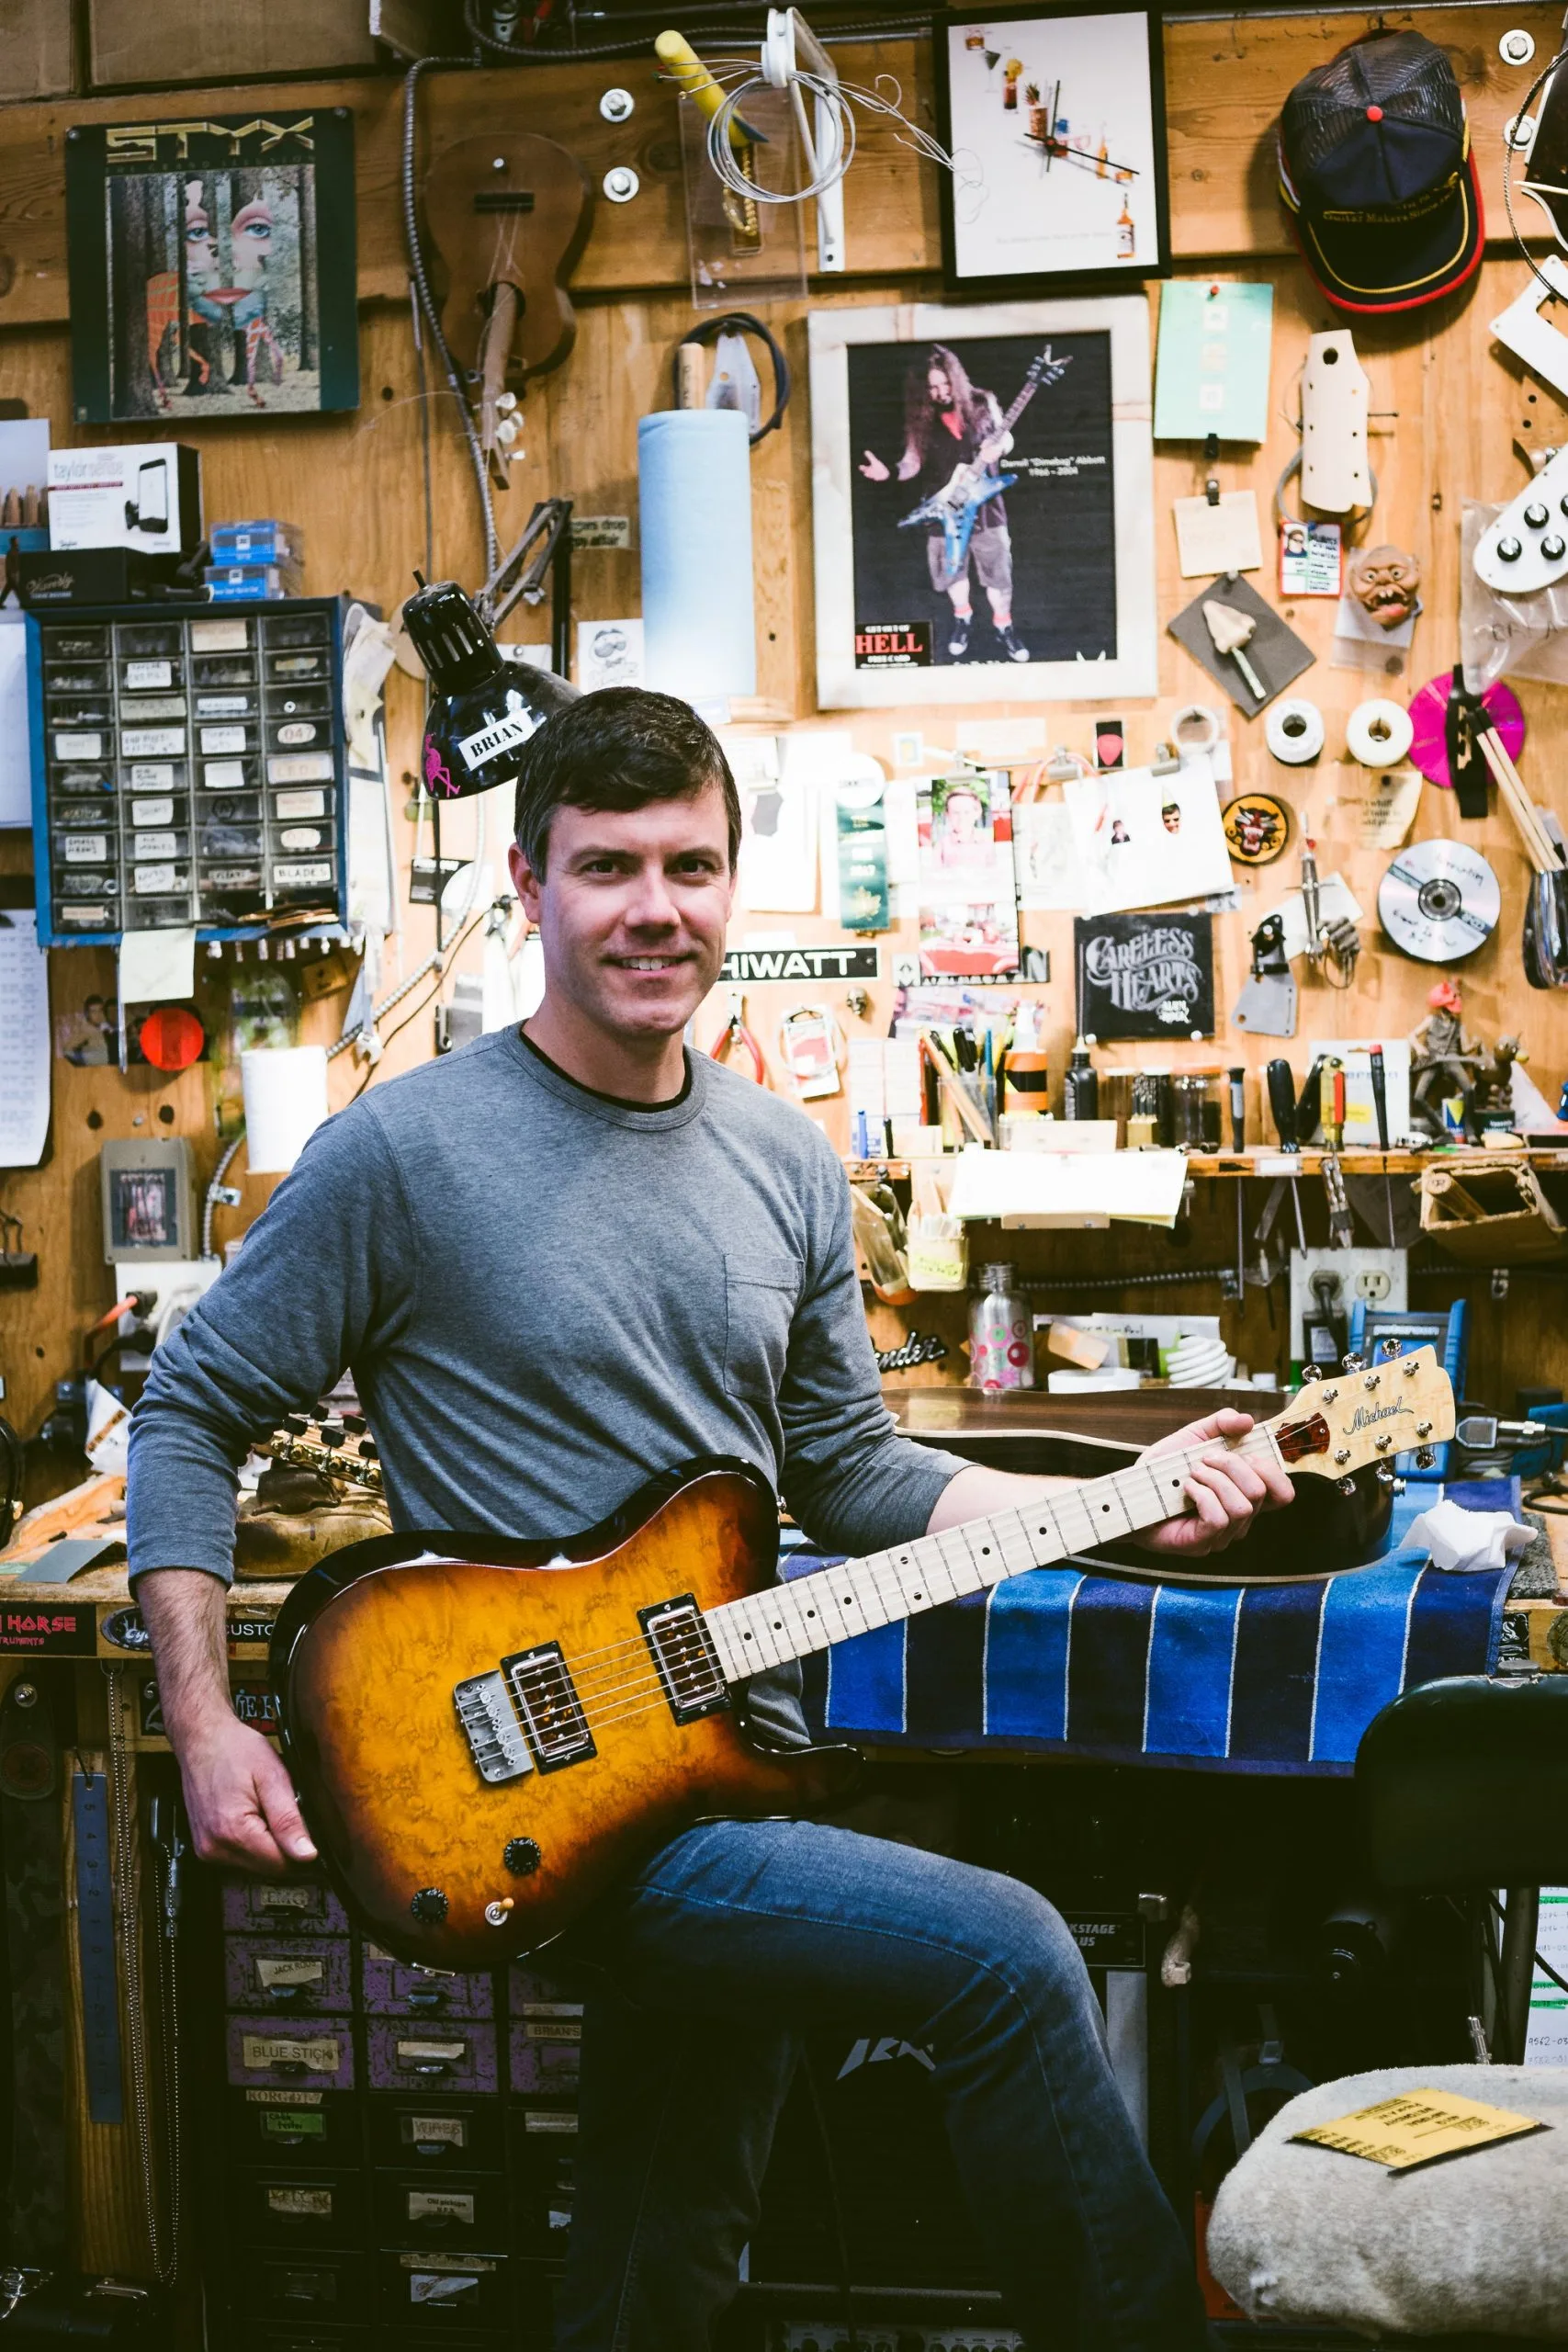
Of course Gryphon has more than its share of California natives, but repair department ace Brian Michael is from the other side of the continent. Born and schooled in New Hampshire, Brian spent a couple of years in the Granite State’s construction trade while attending community college. But at age 22 he fled New England for Arizona to attend the Roberto-Venn School of Luthiery where, as luck would have it, Gryphon co-founder Frank Ford had already been teaching two-day guitar repair seminars for several years (and still does). When we had an opening in the Gryphon Repair Dept. there was an over-the-top recommendation from Roberto-Venn’s head instructor for their star pupil and Brian has been here ever since.
The obvious question is why a New Hampshire kid would move to Arizona and for Brian such a drastic change was driven by the guitar, a romance that didn’t have an easy start. His mother wanted him to stick with piano, but by age 15 Brian was playing in rock bands anyway, and he still performs on both electric bass and electric guitar and always keeps an acoustic handy at home as well.
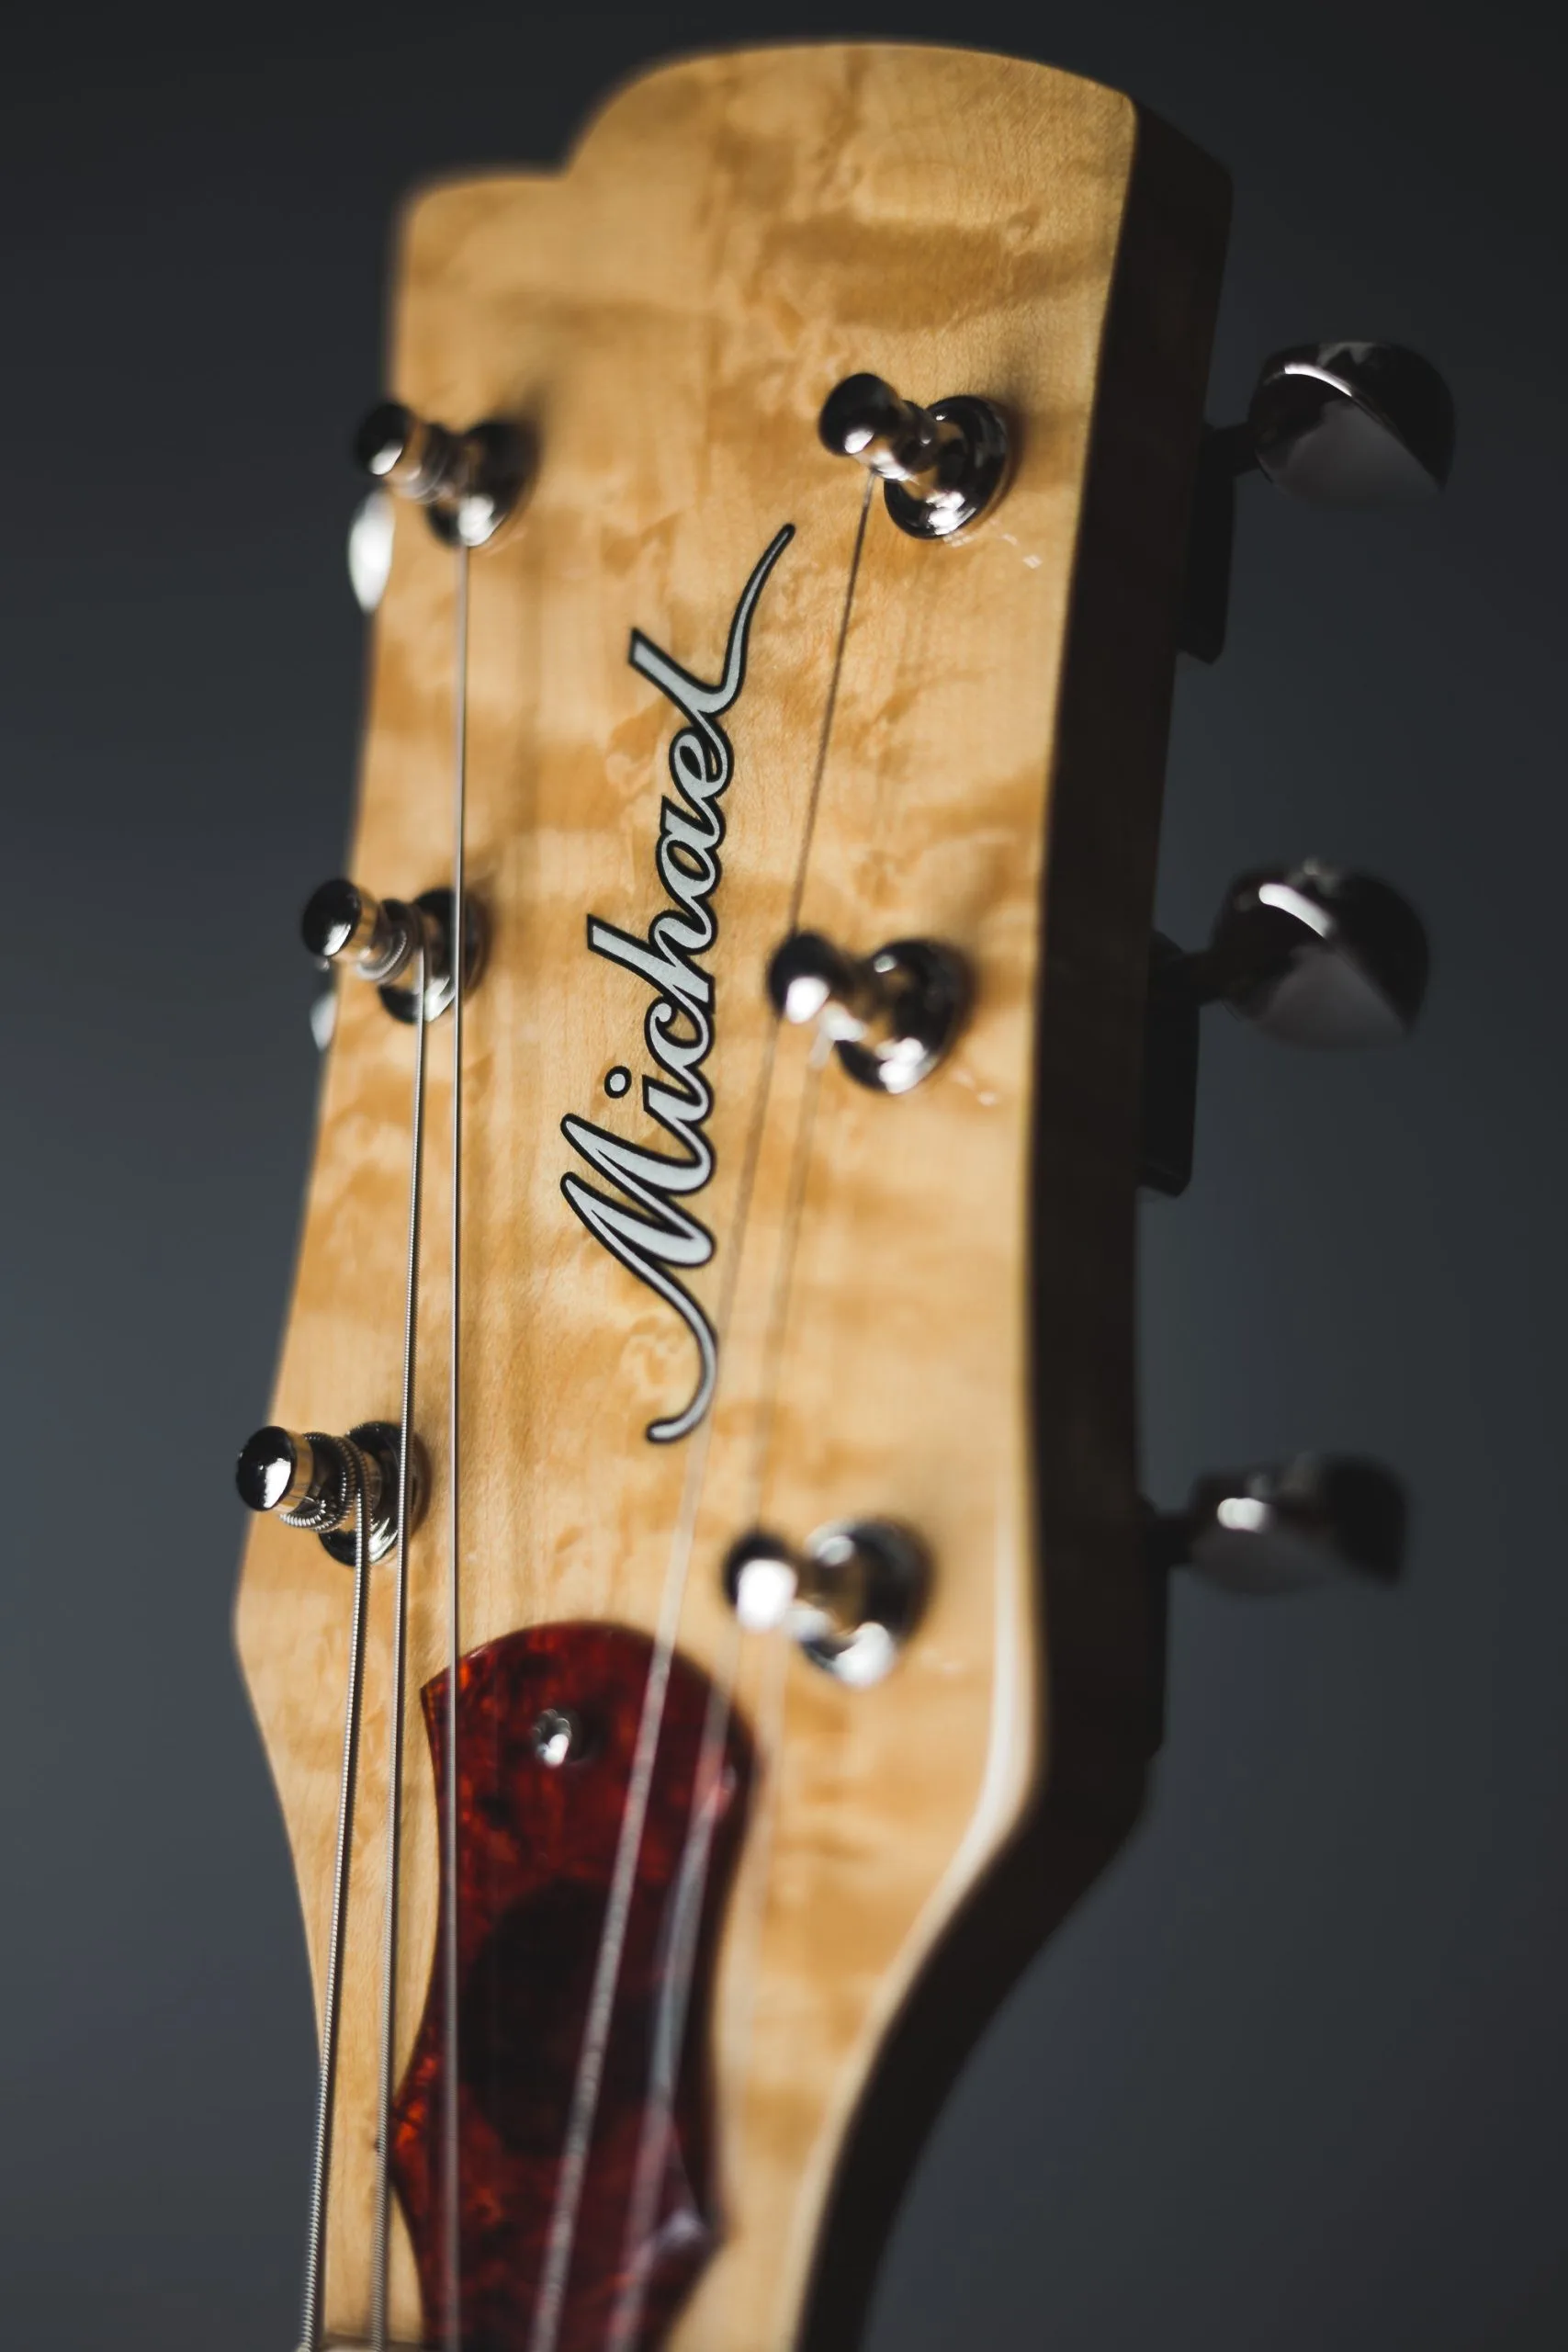
This is Brian’s sixteenth year at Gryphon, and we’ve never had any trouble keeping him busy. As a result, his guitar-building chops have been honed at home where he maintains a small but fully-equipped workshop. Since the birth of son Eli, however, the time needed to build custom electric guitars is far more limited and Brian currently estimates that about four instruments per year is his limit. Most “Michael” branded guitars are custom orders, such as the ’69 Les Paul bench copy he built from scratch for Stooges guitarist James Williamson after restoring the original.
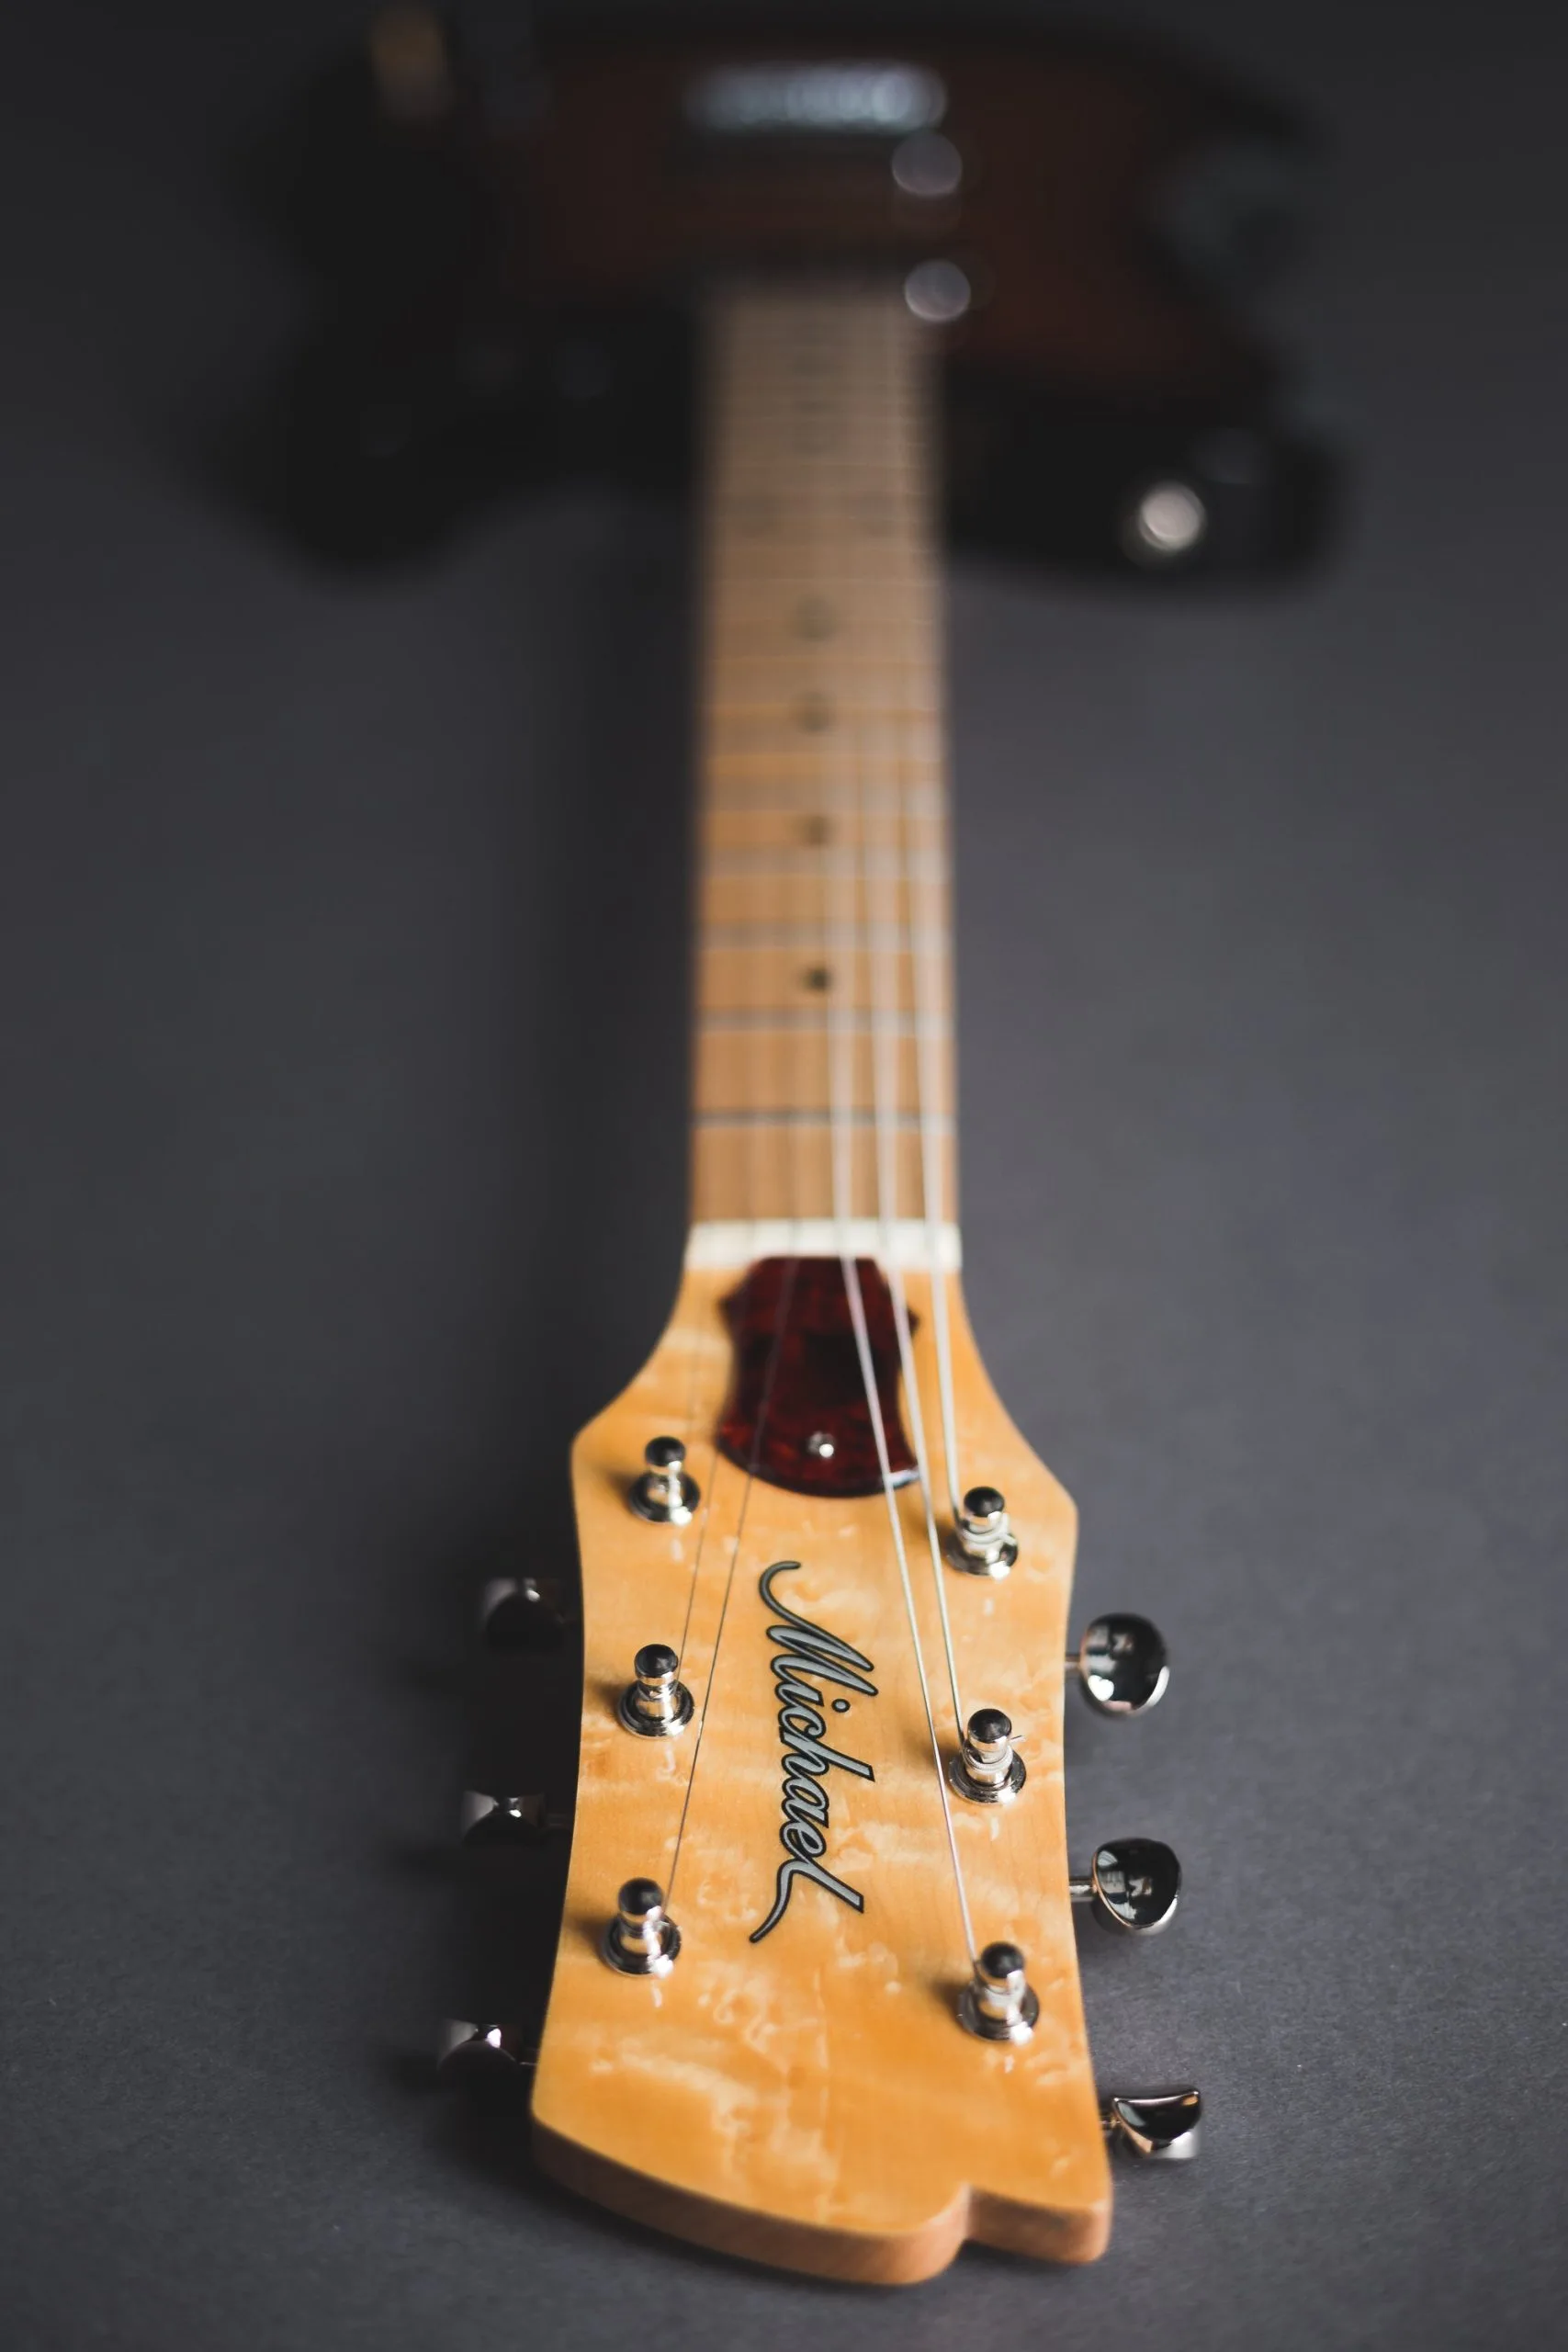
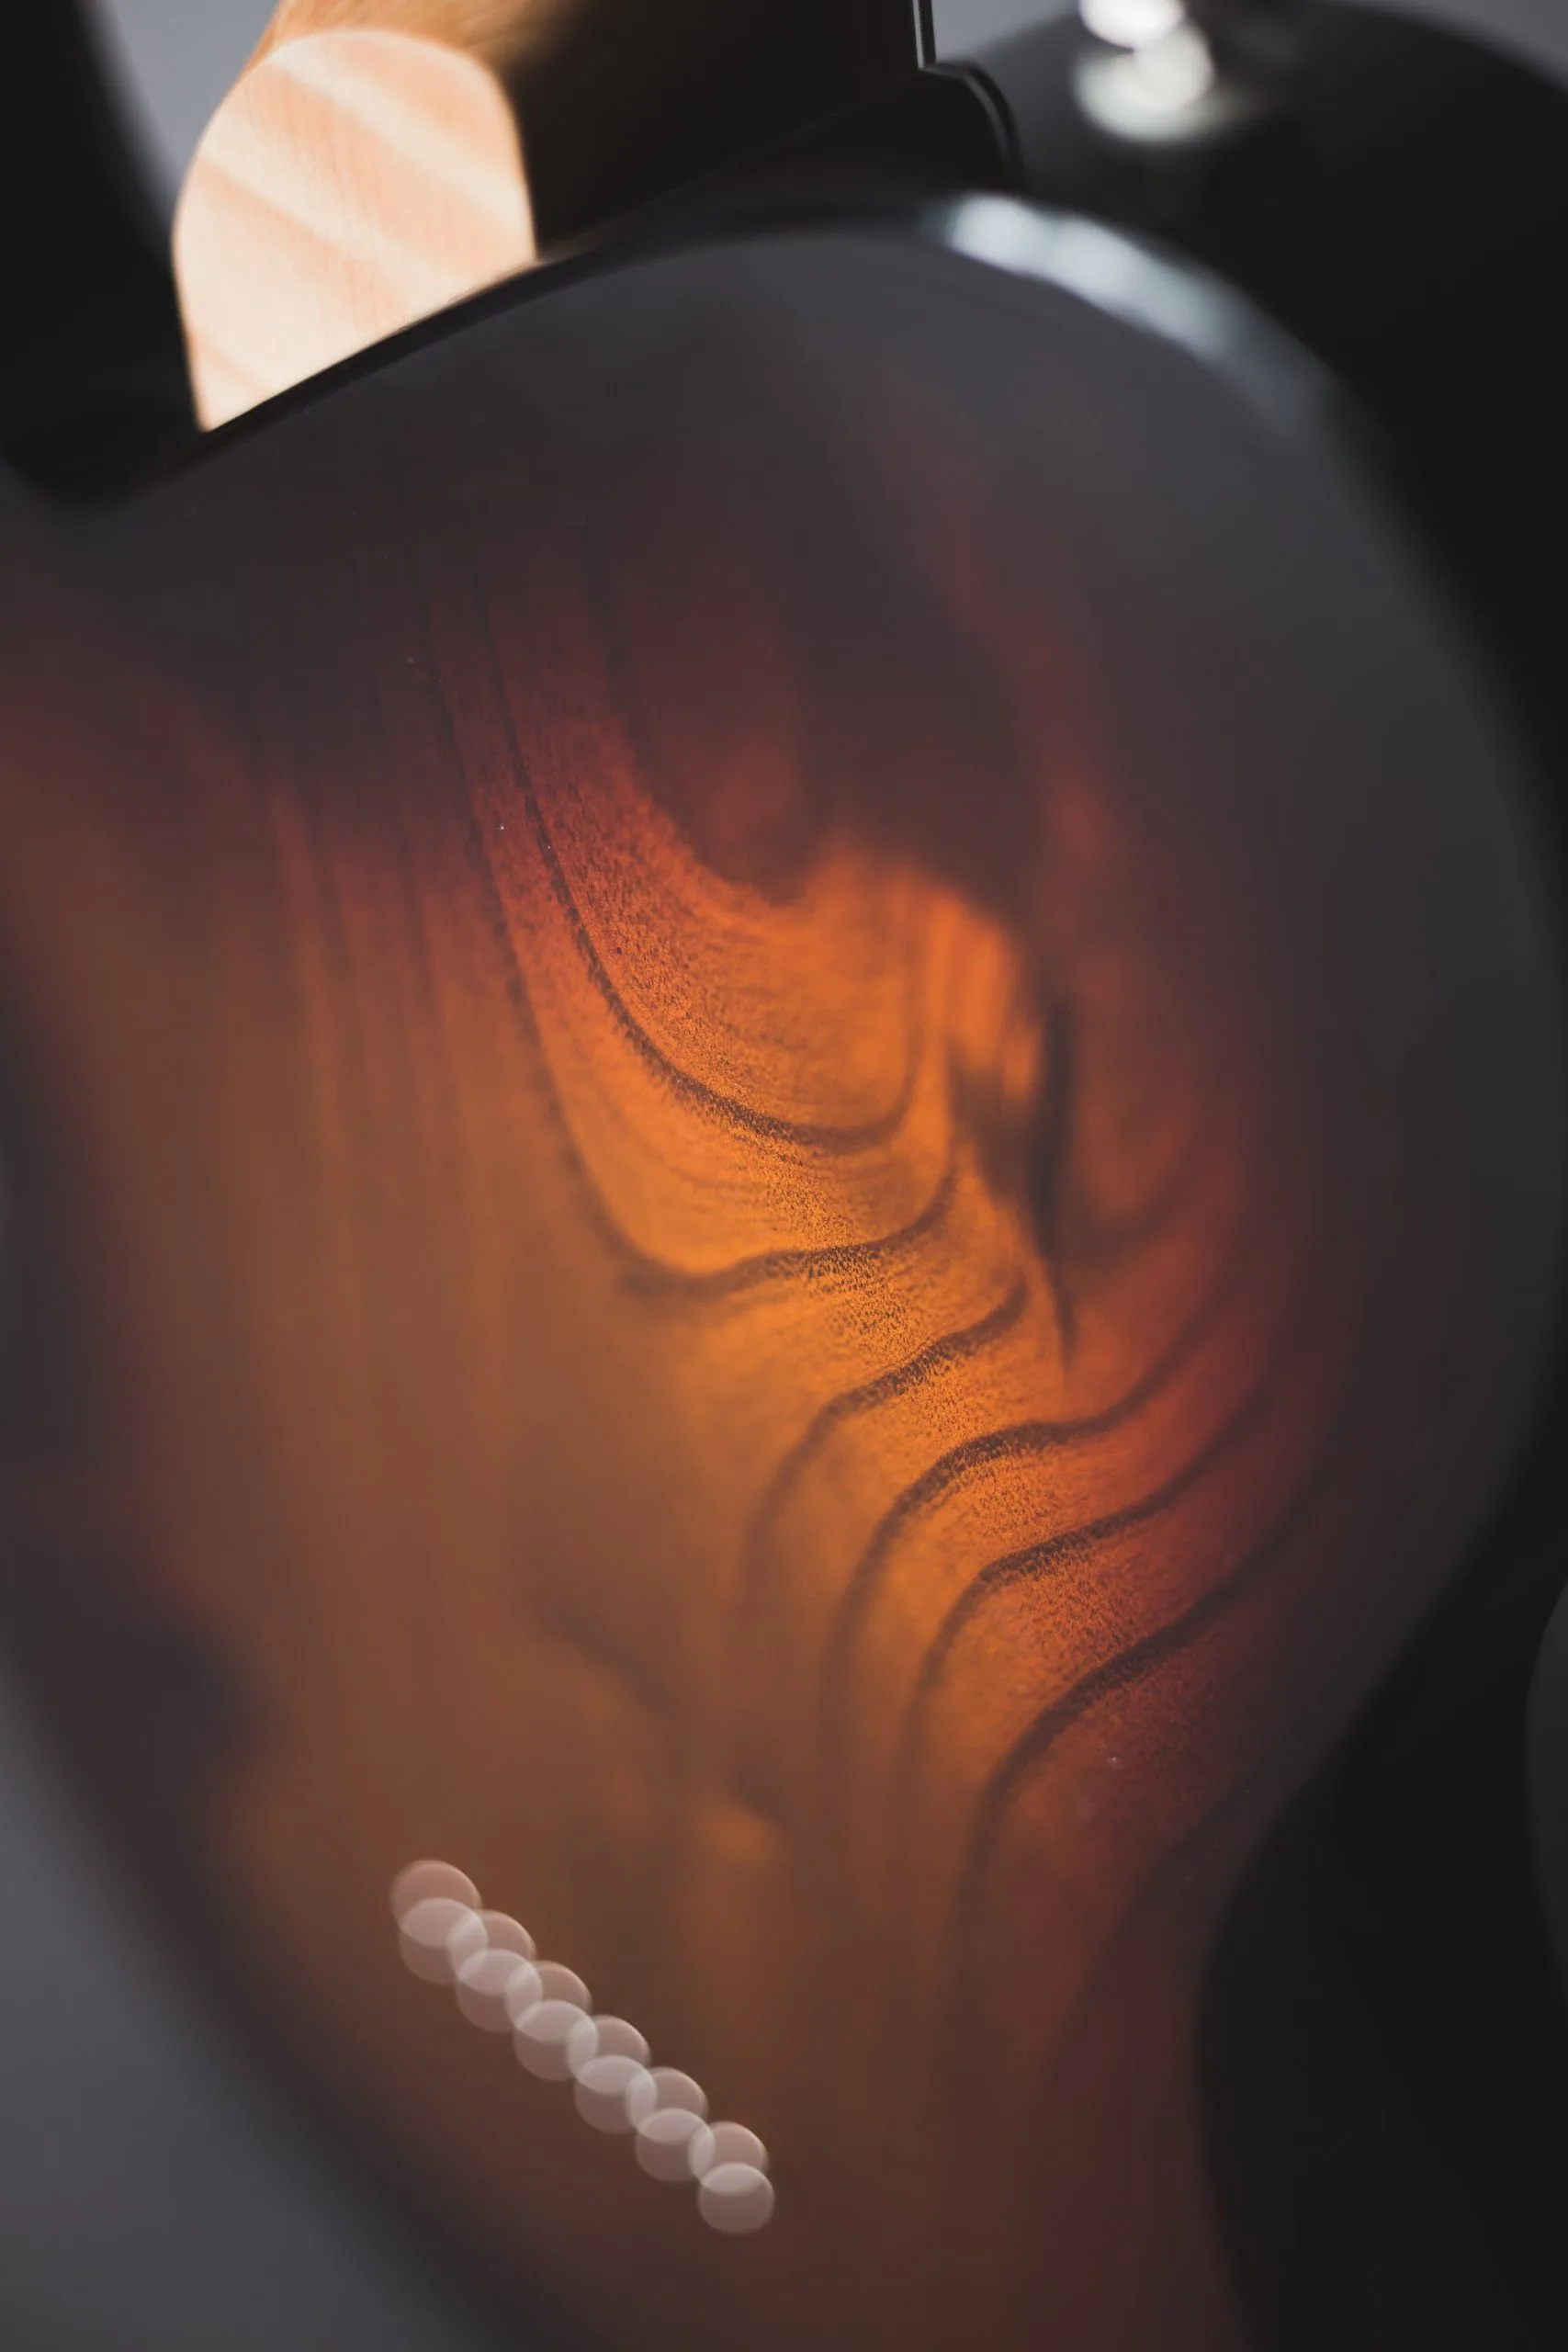
The guitar shown here is an exception to Brian’s usual builds. Called the TG Granite State, it’s a blend of Fender’s venerable Telecaster (the T) but with carved contours and a set neck like Gibson’s SG. The “Granite State” part of the model name is because all the woods used to build this guitar are native to New Hampshire. It appears to have a Fender-like maple neck, but it’s actually a maple neck with separate hornbeam fretboard. The body is made from an 85-year-old slab of butternut with a carved one-piece birdseye maple cap (butternut, sometimes called white walnut, is now a difficult wood to find, especially in this size, as butternut canker has wiped out a high percentage of the trees). Not content to have only the woods used for his TG Granite State guitar be from New Hampshire, the fingerboard nut is made from a moose antler that Brian’s father found when walking in the woods near the family’s property.
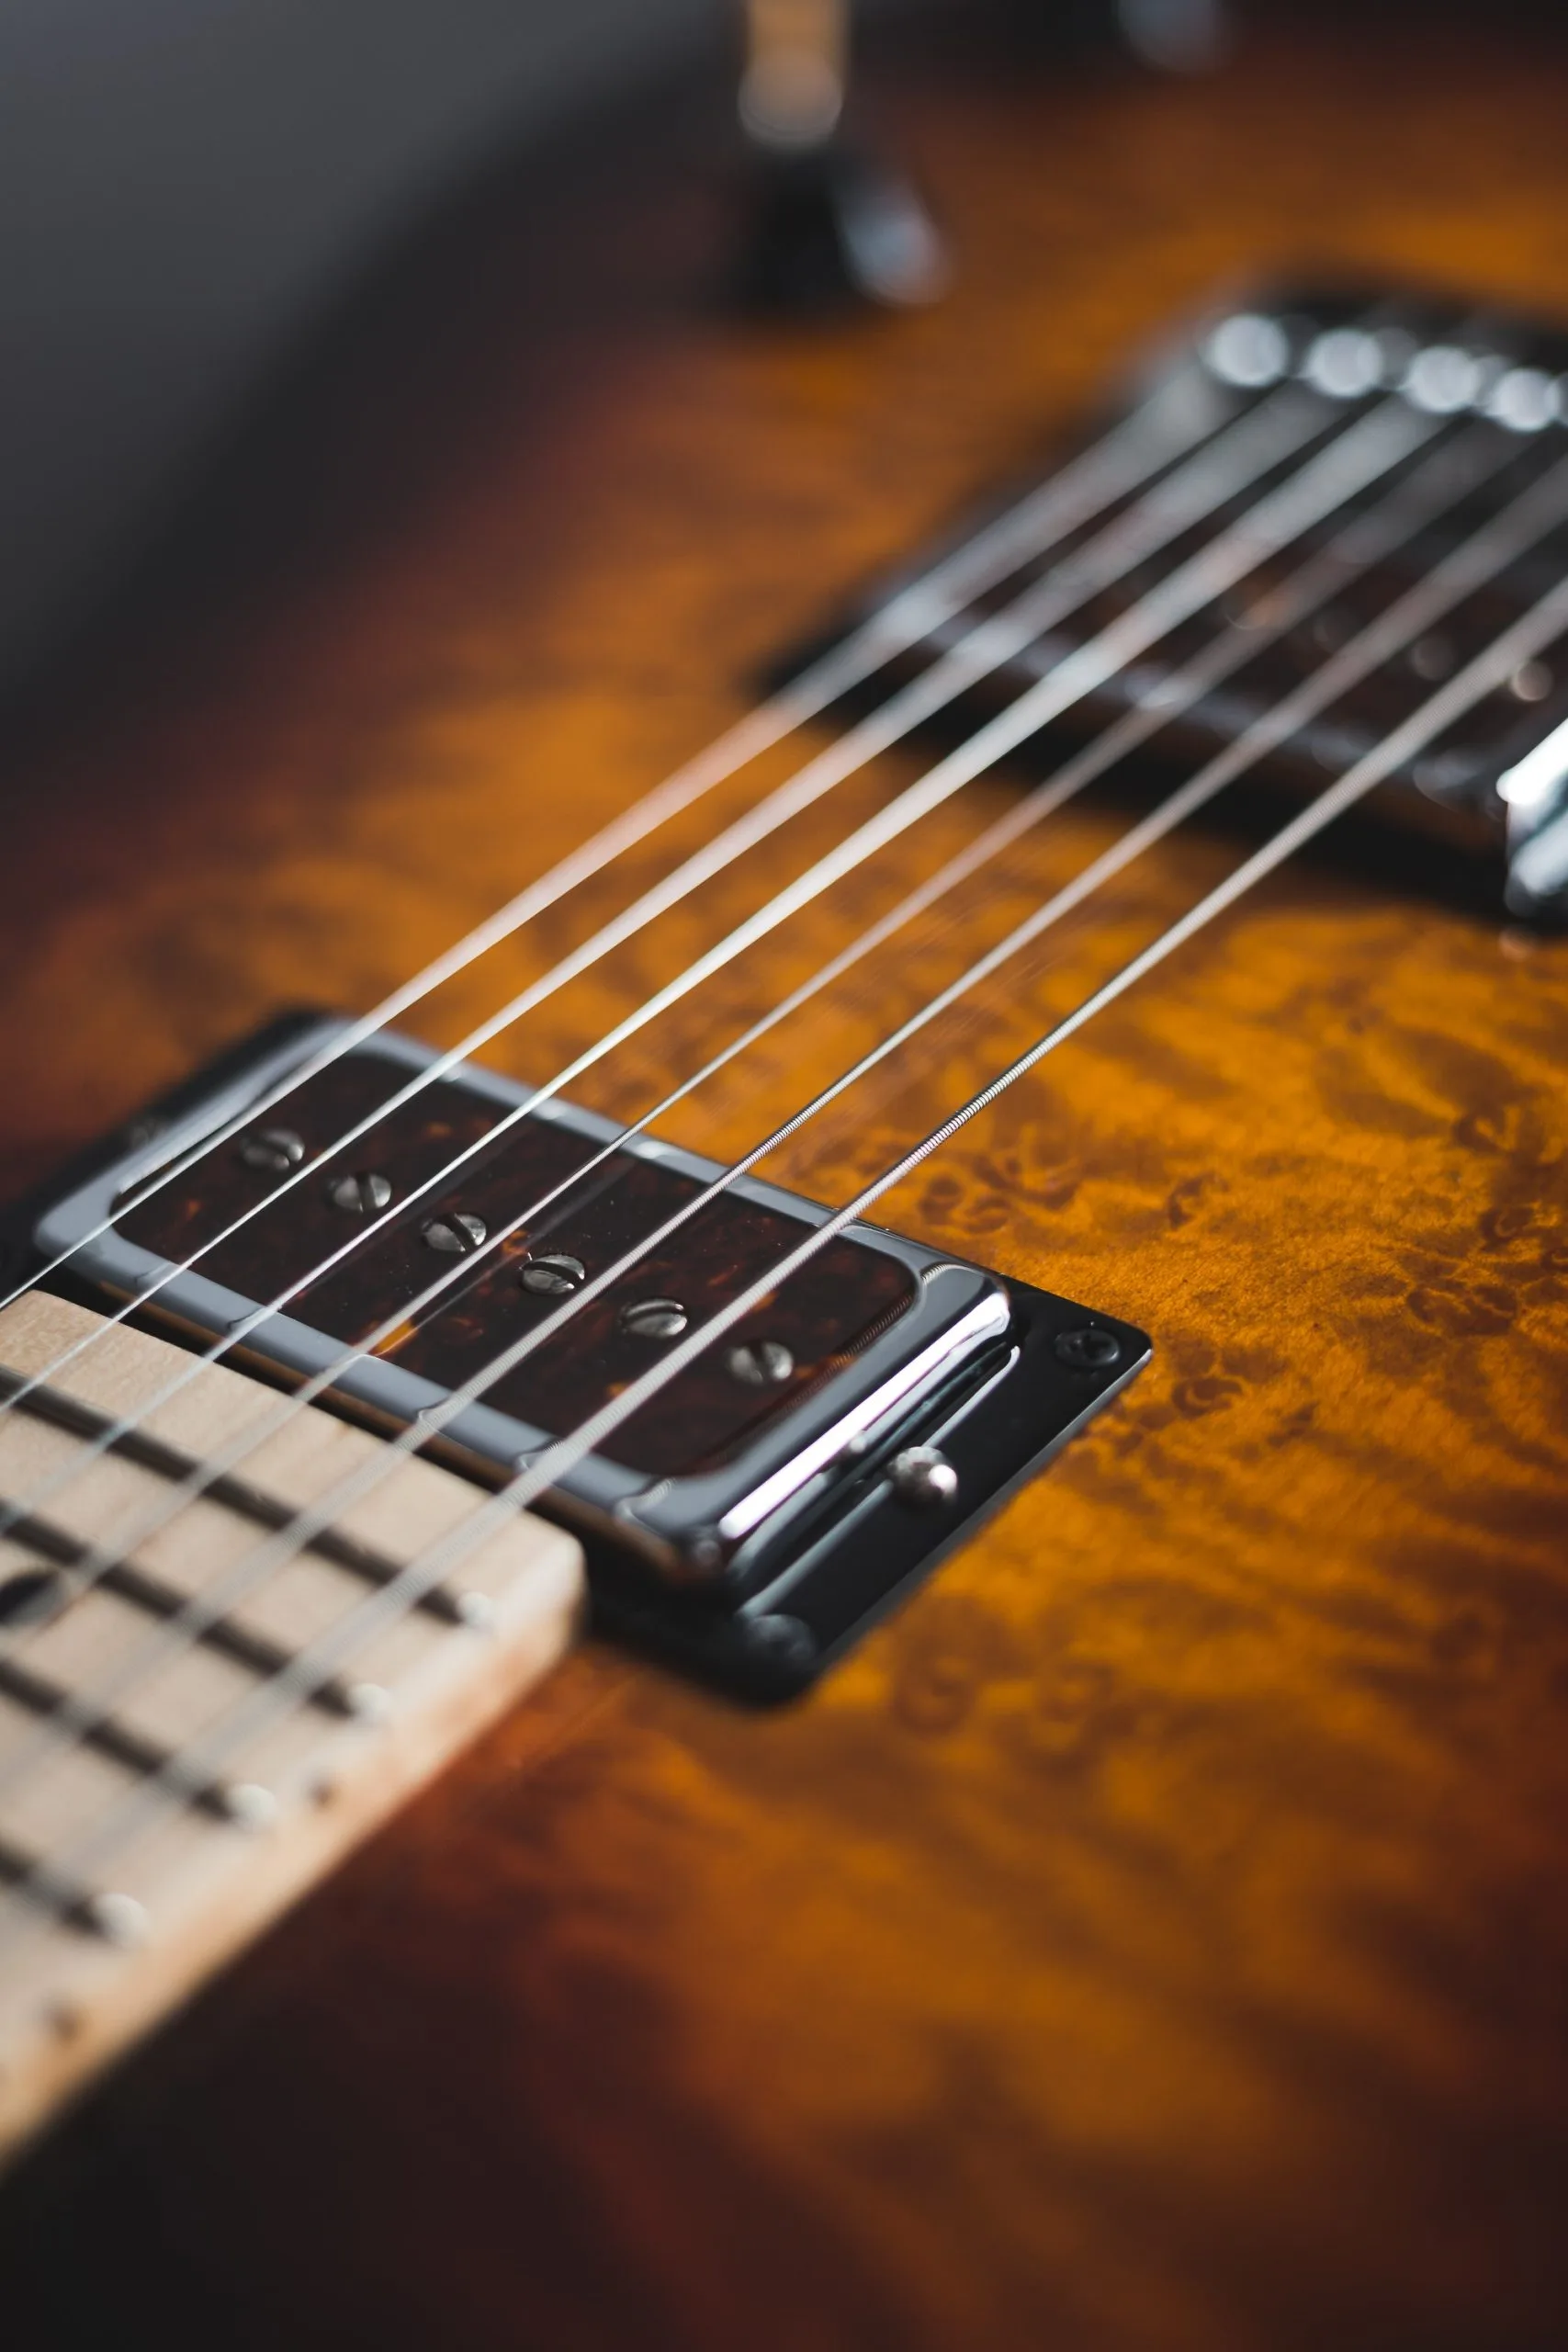
When it comes to pickups and other parts the sources Brian tapped for the TG Granite State go far beyond New Hampshire’s borders. The pickups are SCFHs from Jason Lollar in Tacoma, Washington, and the bridge is a Mastery M-7 from our old pal John Woodland in Minneapolis. The SCFH pickup code, by the way, stands for “single coil for humbucker,” which means humbucking pickups could be fitted without additional routing of the top. The faux tortoiseshell celluloid pickup facings nicely match the dots in the fingerboard, as well as the coloring of the birdseye maple top. From peghead to endpin, there’s a consistent theme to the TG Granite State resulting in a balanced, versatile solidbody electric guitar that delights the eyes as well as the ears and fingers.
We hope you’ll come in and try it out.
Why Set-Ups Count
Why Set-Ups Count (especially when giving a uke or guitar as a gift)
You’re giving a ukulele or guitar to a beginner, so making sure the instrument is set-up properly is no big deal, right? Nope, and here’s why:
Manufacturers know that appearance and sound are what people first react to, and so that’s what they focus on. Even the final stages of set-up to a little uke takes time, and those extra minutes during final assembly are often skipped in the quest for a lower price. Sometimes this is hard to spot, especially the string height at the nut, but believe it or not a proper set-up when you’re playing in first position is even more critical when you’re starting out than it is for a serious pro. Why? Because a beginner spends more of their playing time on those lower frets, and their fingers aren’t as strong yet and their fingertips don’t have a tough callous. So if making those first-position chords is difficult because the strings are too high at the nut a beginner may get discouraged, especially since a nut that’s too high can also make those chords sound out-of-tune. Of course having the string action low overall is also important for beginners, simply because the longer a beginner can practice without fatigue the faster they will progress.
The Gryphon Repair Dept. does a lot of difficult and highly involved repairs and restorations, but they also spend a lot of time doing set-ups. They set-up all the instruments Gryphon sells, but they also do a lot of set-ups for instruments people buy elsewhere, and that includes a lot of instruments sold online. Of course spending an extra $85 isn’t tragic when it’s a guitar that cost several hundred dollars, but the set-up on a little ukulele is likely to cost at least $50 and that’s a real jolt when you didn’t spend more than $100 on the instrument itself.
When giving an instrument, don’t skip making sure the guitar or ukulele you give is as easy to play as possible!
Why We Buy Multiple Guitars
Richard Johnston-
(Published in Premier Guitar Magazine, April 2018)
This article was inspired by a conversation with a long time friend of the shop, Roy Pea. Roy is the Stanford professor referred to but not named in the article.
Like many people in the music industry, I’ve long believed that guys who buy lots of guitars (Yes, they’re almost always guys.) are driven by conspicuous consumption, or would rather fuss for hours or even weeks buying guitars at the lowest price than spend that time playing music on them. I’ve recently dealt with estates, however, that suggest some collectors just don’t fit those stereotypes. What can you say about a guy who has guitars hidden behind a false wall in his closet that nobody knows about? Hiding guitars from the wife is one thing, but what if an impressive collection of mahogany dreadnoughts is hidden from everyone? What if a collector visits online forums and user groups but never mentions—let alone brags—about what guitars he owns, and only family members know he plays at least one of his guitars everyday? What’s that about?
Somehow describing such an urge to own several guitars seems like more than just G.A.S. (aka Guitar Acquisition Syndrome, a favorite code term in online forums). In talking to a Stanford professor who owns multiple guitars, I learned that the urge to buy yet another instrument similar to ones we already own might not be mere consumerism at all. Instead, the urge to compare similar instruments in detail is in our DNA.
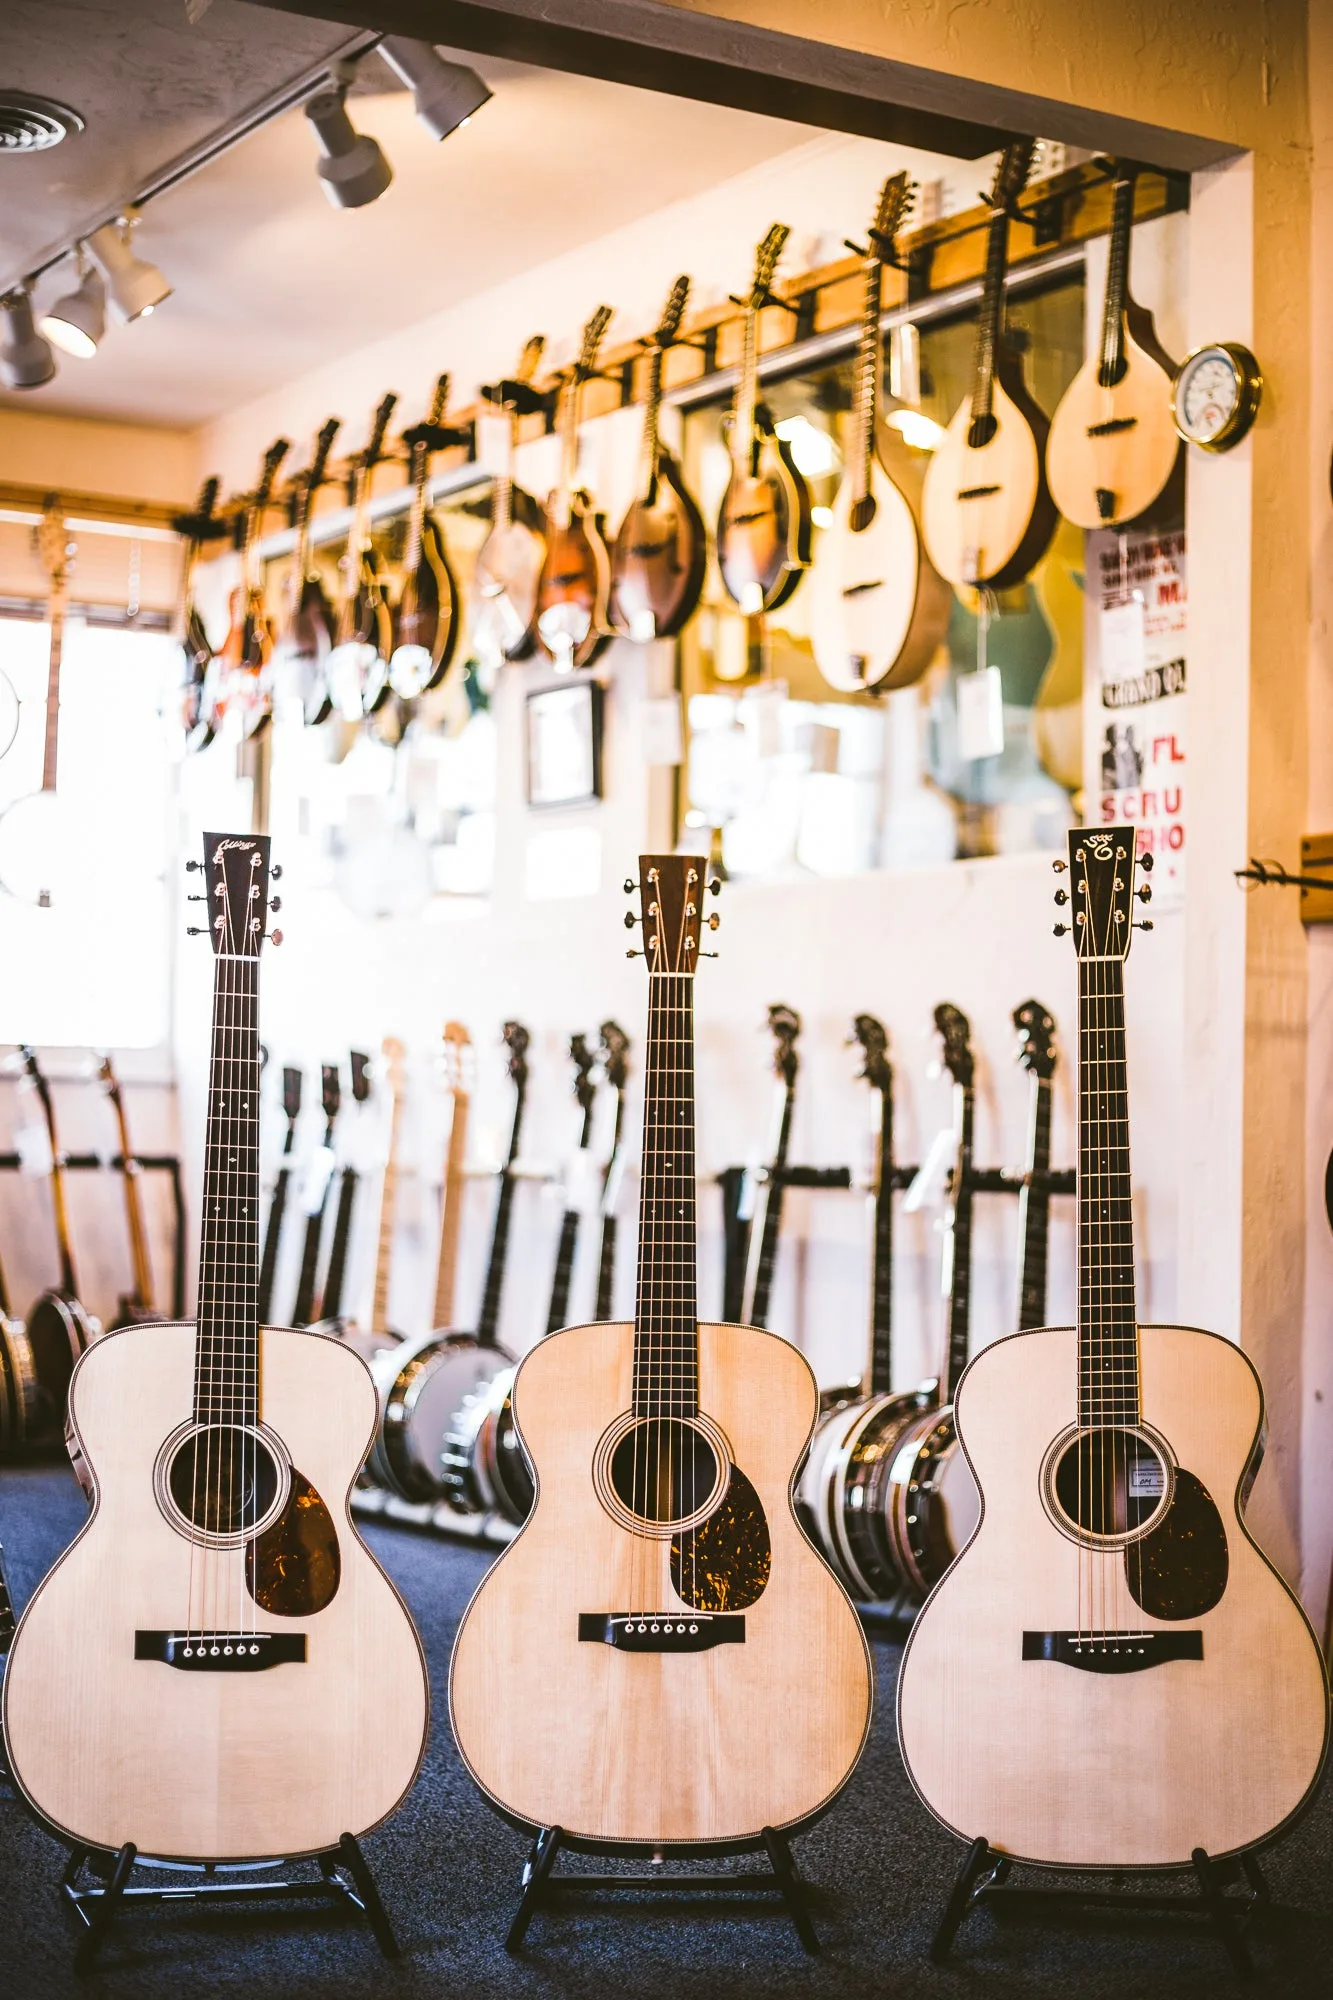
The Collings, Martin, and Santa Cruz OMs above are nearly identical in size and have similar bracing and Adirondack spruce tops but sound distinctly different.
Learning how to discern differences in things that appear to be similar is an important part of human evolutionary development. So, rather than dialing the Wayback Machine to the dawn of rock ’n’ roll and eavesdropping on the development of Les Pauls and Telecasters, let’s go back another couple of hundred thousand years.
Caveman Ben and Caveman Bob came back empty handed from the hunt, and are now gathering mushrooms since their respective families will be having soup for dinner instead of bison ribs. Caveman Bob is stronger and faster than Ben, and picks mushrooms more quickly, too, but Bob scoops up some death caps in the fading light along with the good ’shrooms. Ben’s cave family dines on thin broth and wakes up hungry the next morning, but Caveman Bob and his clan don’t wake up at all. Ben’s superior sense of smell and touch, and his urge to look carefully and critically at what he was gathering, allowed his clan to survive and his DNA to be passed down. Chances are good that Ben, and women in the tribe with similar critical abilities that anthropologists call ethnobotany, used those skills in determining what other plants were toxic and which ones had healing properties. Despite what we see on movie screens about the lives of early humans, it took more than brawny spear throwing and noggin cracking to survive.
Fast-forward to the present. Beginner Ben is a guitar player who is probably never going to take the stage or even join a jam session, but his keen ear propels him to spend hours at guitar shops testing different guitars. His pal Bob, however, is rocking up a storm in the basement and doesn’t care what guitar he plays as long as it’s loud. Thanks to the FDA and mushrooms from Safeway, Bob’s family is safe despite having to listen to “Stairway to Heaven” played on a cheap, Stratocaster knockoff with crusty strings and out-of-phase pickups. Ben is meanwhile on a tone quest and—guided by a wide range of recordings and YouTube videos from Tony Rice to David Grier and Bryan Sutton—he foregoes electric guitars and their confusing array of pickups, pots, and other factors that alter how a guitar sounds. Ben instead buys a used D-18, and soon another. He never quite gets the sound he’s seeking, but he gets a lot of enjoyment out of the search.
By reading guitar magazines like this one and visiting online forums, Ben taps into the collective intelligence of others like himself. He learns terms like “crunch” and “shimmer,” and what contributes to “bell-like tone.” He drives his local guitar shop’s repair crew crazy with questions about neck angle, action height, and TUSQ bridge saddles versus bone. And what about stainless steel frets? Or torrefied tops and hot hide glue? His endless questions are tolerated because he can’t seem to go more than a few days without buying another type of pick, or several. They could be thick picks with beveled edges, or maybe Ben’s testing classic celluloid versus polycarbonate. Be it the unslotted bridge pins or another $75 capo, Ben could stock a bluegrass-festival booth with accessories for flatpickers. He doesn’t keep any guitar for very long, but often owns a half-dozen different dreadnoughts at a time while straying to a slope-shoulder Advanced Jumbo for a while, and then to Custom 0000-size with deep sides.
In terms of his playing, this guy will always be Beginner Ben. Replicating the music of guitar heroes who drew him to the acoustic guitar in the first place isn’t what his guitar shopping is about. Instead, his satisfaction comes from testing and comparing, making Ben a lot like people who would rather taste wines than drink more than half a glass. And why not? There are lots of ways to enjoy wine, and there are lots of ways to enjoy guitars. There’s no reason that testing and comparing dreadnoughts isn’t just as valid as drowning out the banjo player’s Mastertone with one. Bill Collings and Leo Fender, after all, were the testing and comparing kind, too. If their distant ancestors ever gathered mushrooms, you can bet they only picked the good ones.
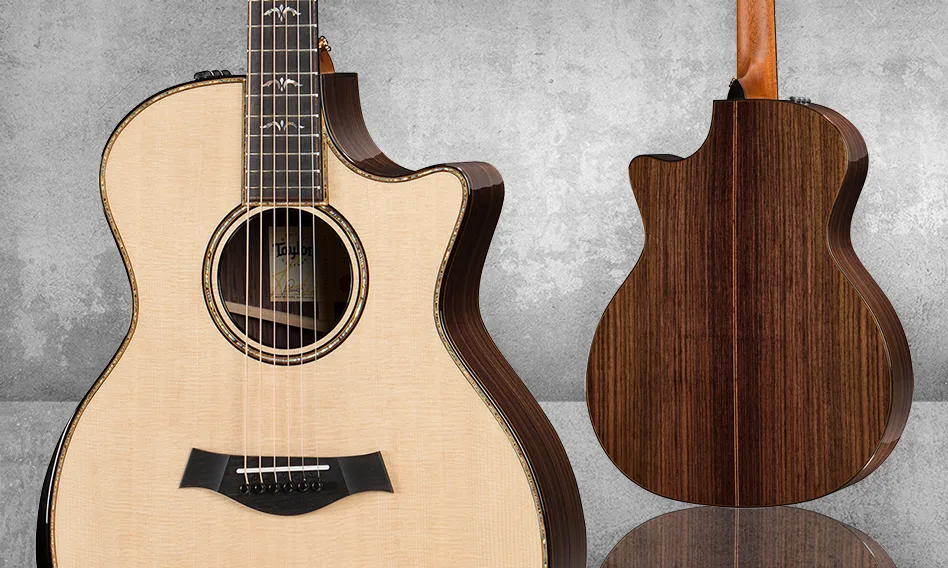
We are very excited to announce the arrival of Taylor’s new V-Class series of guitars here at Gryphon. Named for the distinctive shape of the new bracing system designed by Andy Powers, the V-Class guitars are an intriguing step forward in guitar evolution. Perhaps the most noticeable attribute of the new guitars is the increase in sustain and overall responsiveness. These guitars produce some impressive sound at the lightest touch and yet they can be played aggressively without breaking up. Another notable feature is the balance of tone up and down the neck. No matter where you play on the neck, the notes ring out clearly without any variation of timbre or volume.
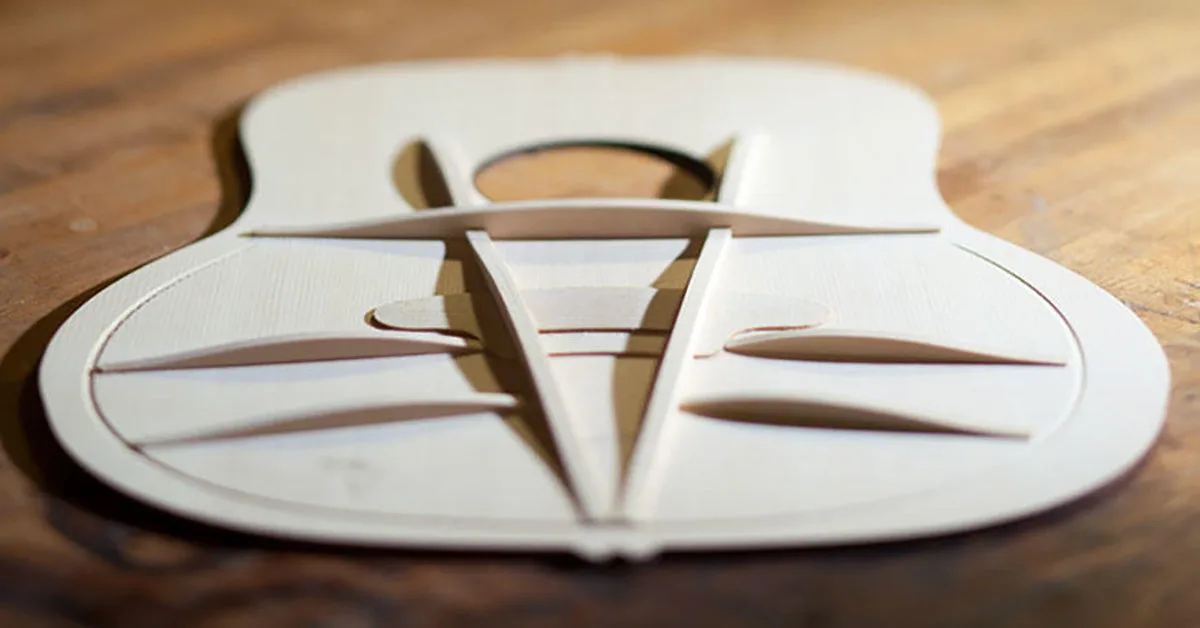
As good as the V-Class guitars sound, and they sound very good, we are perhaps more impressed with the engineering that Andy Powers has put into them. Frank Ford and Richard Johnston have been restoring and repairing guitars for almost 50 years and in that time they have seen just about every style of bracing imaginable. Tone is very important, of course, but structural stability is even more vital. The V brace delivers both. If you look at an X-braced top compared to Taylor’s V-braced top, one of the things you notice is how the upper portion of the V borders the right and left (bass and treble) sides of the soundhole, after going underneath the larger horizontal brace just below the soundhole. Compared to an X-braced top, you can see there’s a lot more bracing that’s in line with the pull of the strings on the bridge. Yes, these long continuous “legs” of that V pattern increase the guitar’s sustain, as Andy Powers points out, and at the same time that long V brace also increases the soundboard’s stability.
Since Gryphon does a lot of repair, that stability issue is a big deal to us. We’re constantly dealing with problems that result when a guitar’s soundboard just can’t withstand the strain of a set of steel strings pulling on the bridge (a set of light gauge strings exerts over 150 lbs of “pull” on a pin bridge). The top bulges behind the bridge under the strain, the top sinks in front of the bridge as that bridge rolls forward under string tension, and often the top gets distorted around the soundhole because right where the top needs to be strongest, there’s a big (sound) hole! This flexibility where you don’t want it also increases the chance of the string action going up and down depending on how the soundboard reacts to changing humidity levels.
Taylor V-Class 914ce Guitar
We agree that Taylor’s new V-Class guitars sound both different and impressive when compared to a typical X-braced acoustic guitar of similar size and materials, but we feel players will also benefit from a guitar that’s far less likely to need adjustment or repair in order to be optimally playable. If you look at the design, you can see these V-braced Taylor soundboards are a lot stronger, but only where they really need to be. To increase the guitar top’s stability while at the same time improving the volume and sustain is quite an achievement, and so far everyone at Gryphon loves the sound of the V-Class 914ce Taylor sent us. We can’t sell it yet, but you can play it. We’ll be posting videos soon, but there’s nothing like playing a guitar yourself and we hope you’ll do just that.
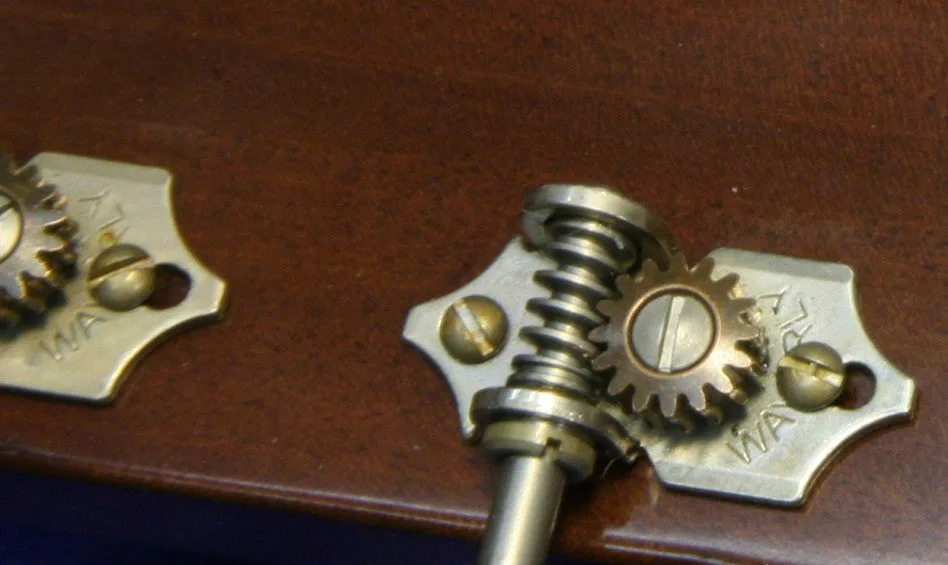
The patient is a venerable 1932 Martin OM-28 – a guitar that has been known for decades as a holy grail of fingerstyle guitars. Unfortunately, the original Grover tuners used on this model were made with a “double lead” worm gear which resulted in a 6:1 gear ratio. As these tuners wear, they tend to loosen to the point that they really don’t hold the tension of steel strings adequately. For an active player, these 6:1 tuners are quite a burden, so we often replace them with modern, higher ratio, better quality tuners.
In recent years, some of the best replica vintage style tuners have been made by Stewart MacDonald under the Waverly trademark. Accurately styled to look like the prewar Grover tuners used on many vintage guitars, these tuners have gained favor among musicians the world over. But, the mounting plate doesn’t match up with the very early 6:1 design (on the left in the photo above), and the screw holes are located such that they might require drilling new screw holes in the peghead of a valuable collectible guitar. Rather than filling and drilling holes in the instrument, I’d much rather modify the replacement tuners. Whenever possible I like to adhere to the “principle of reversibility,” allowing for a return to the original state in the future should it be desirable to do so.
In this case, I think the easiest and most reasonable approach is to enlarge the holes in the tuner plates so they can be mounted and removed easily with no damage to the guitar. Mounting the new tuners in this manner will make it possible to reinstall the original tuners with no sign that the instrument ever had the tuners changed to modern ones.
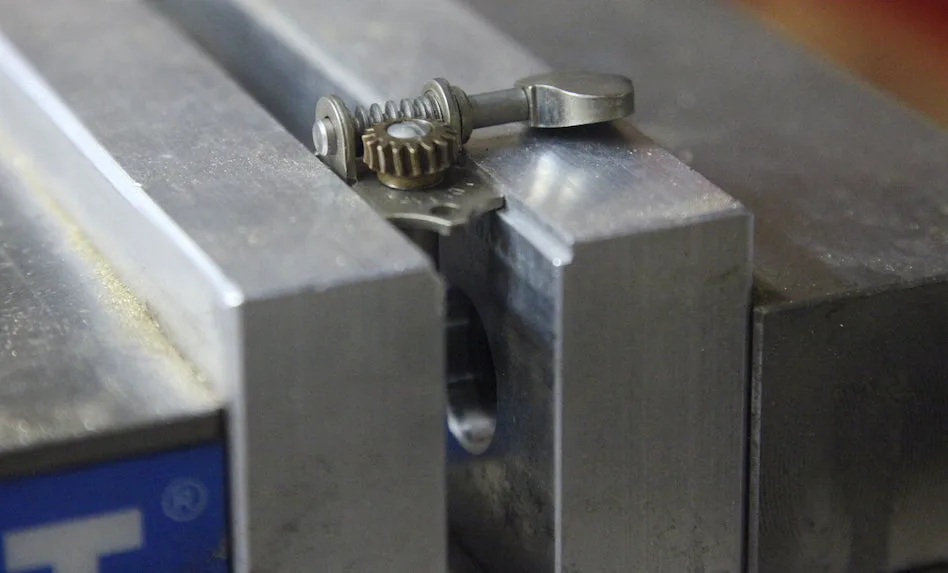
I do this job often enough that I modified the jaws of my milling machine vise to hold the tuners safely and rigidly:
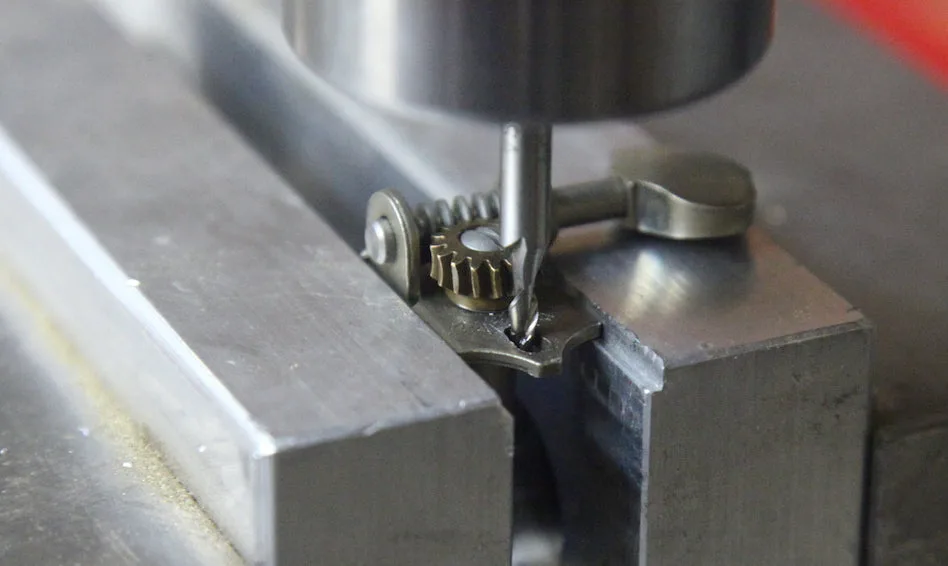
Then, it’s a quick bit of milling on each hole, enlarging it to a slot that will allow the tuner to be screwed in place without relocating holes in the guitar peghead. Lowering the mill ing cutter into the mounting screw hole, I can advance the work into the cutter to elongate it:
Years ago, I often did this same job with a tiny needle file. The milling machine makes it go a bit more neatly, and a lot more quickly.
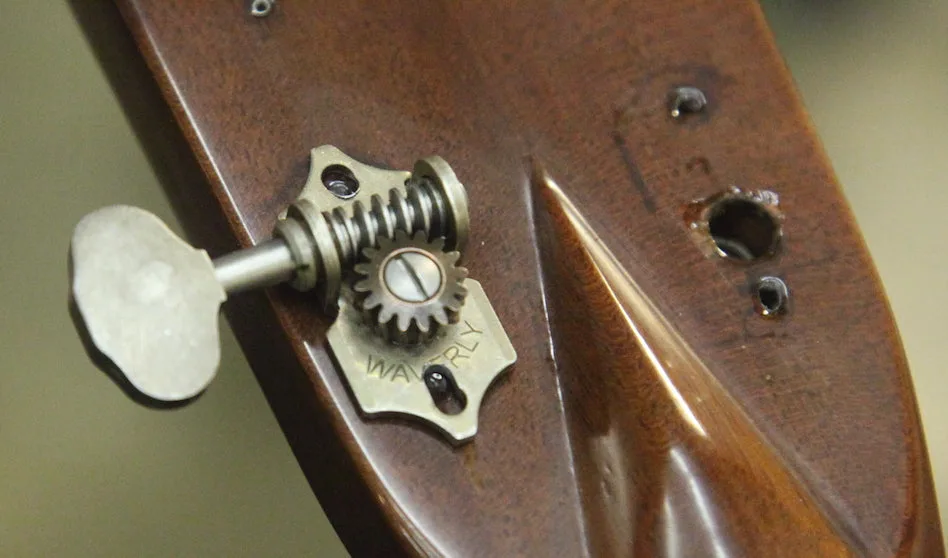
Here, you can see the tuner in place, revealing the original holes through thee longated slots:
Once they are screwed down, the tuners look pretty good on this old timer. I used the Waverly model 4076 with the optional “aged” nickel finish so the hardware would not stand out too much on a guitar that was made a dozen years before I was born:
Even the tiny mounting screws have a nice aged patina.
Back to the Future of Open-Back Banjos
Often regarded as America’s indigenous instrument, the banjo has a complex history. That’s not surprising when you consider that it’s been a big part of American music since at least the 1830s. Over the decades, banjos have evolved into a bewildering array of styles including open four-string and plectrum banjos, five-string banjos, as well as banjos with guitar, mandolin or ukulele necks. The earliest instruments came to our shores as part of the slave trade. Like so many other parts of our culture, the banjo started as an immigrant.
In their most basic form, the early banjos had a short drone string fastened part way up the neck, and most of them had five strings in total, although other configurations existed. All these instruments had a round body with a string head, and were strung with gut strings. At the time of the Civil War, banjos were tuned considerably lower than the steel string banjos of today.
As banjos gained popularity, they were often produced in small factories. Experimentation and evolution produced a variety of attempts to improve the tone and volume. Particularly around the turn of the 20th century, any number of patents were issued for such improvements, and there was fierce competition between different brands.
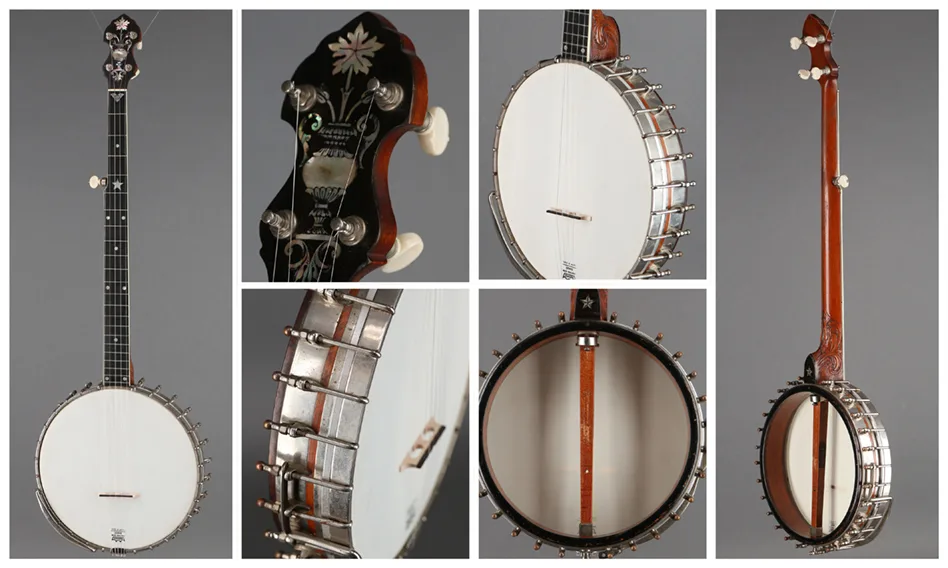
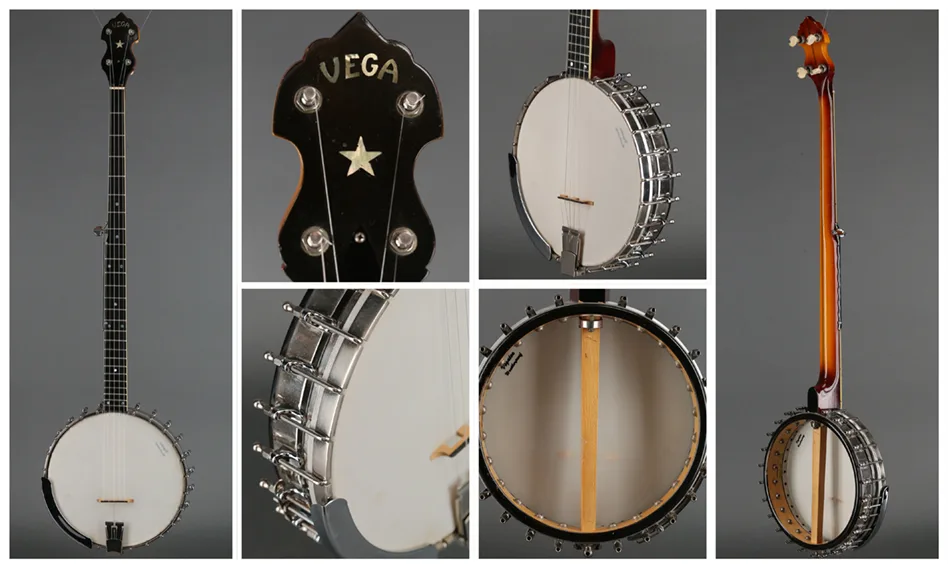
Banjos were made with wooden rings, or “shells” equipped with metal tensioning bolts to draw the head tight, and many also sported metal covering or metal structures over which the heads were stretched. Such “tone rings” modified the sound of the banjo and were often proprietary to individual manufacturers.
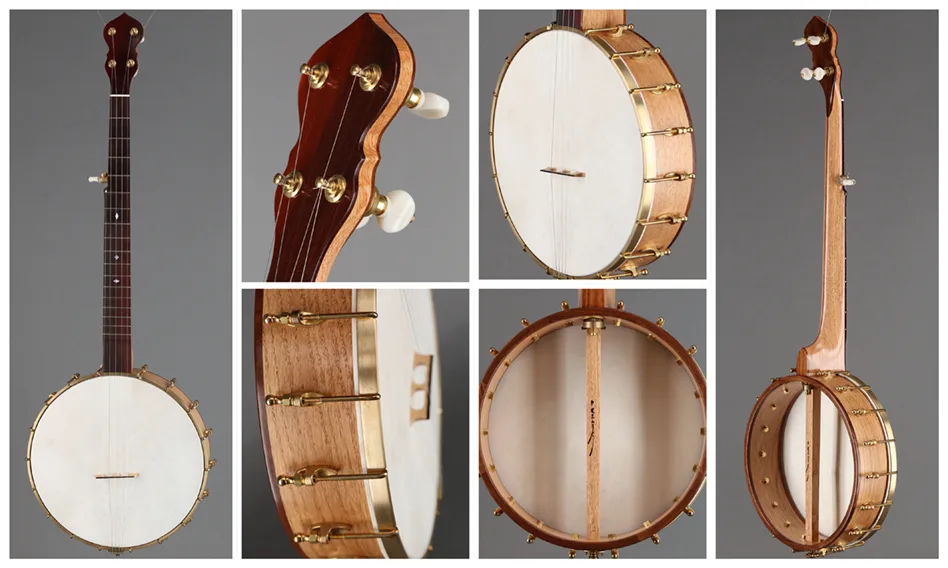
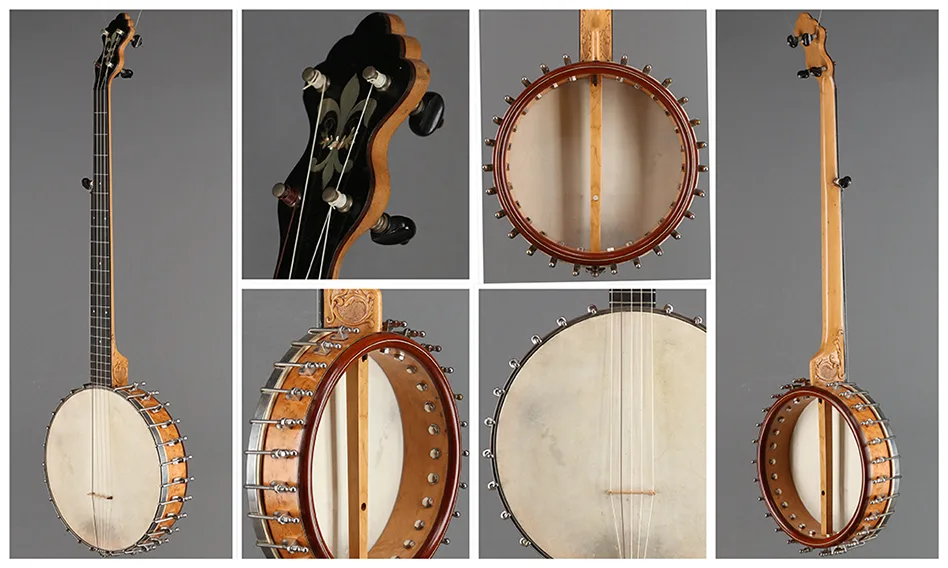
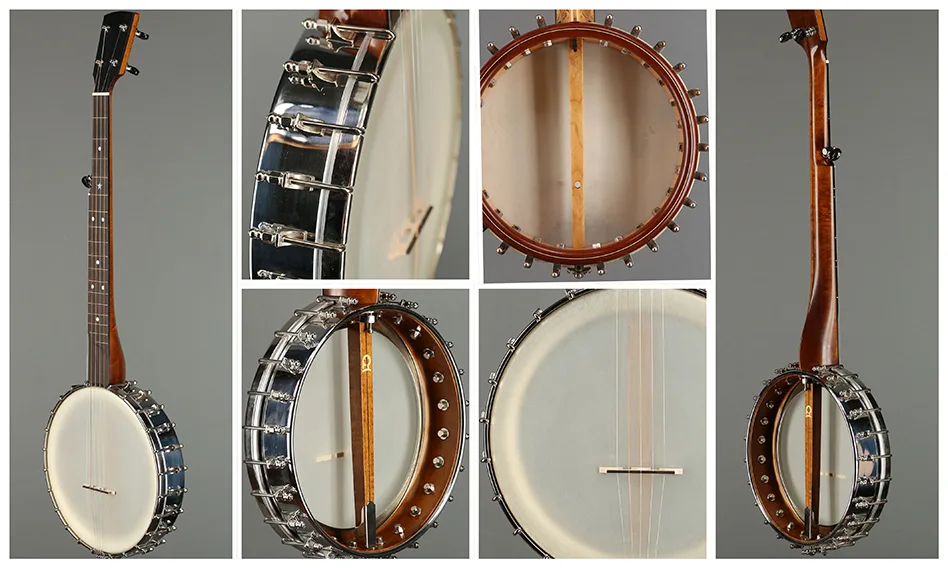
Shells: 1) Thin, lightweight wood, 2) “spunover” nickel clad wood, 3) heavy wood, 4) “spunover” raw brass clad wood
Those tone rings and shell configurations really do have an effect on tone, but exactly how they work is somewhat of a mystery. Many of the designs have been abandoned over the years, only to return recently in modified forms.
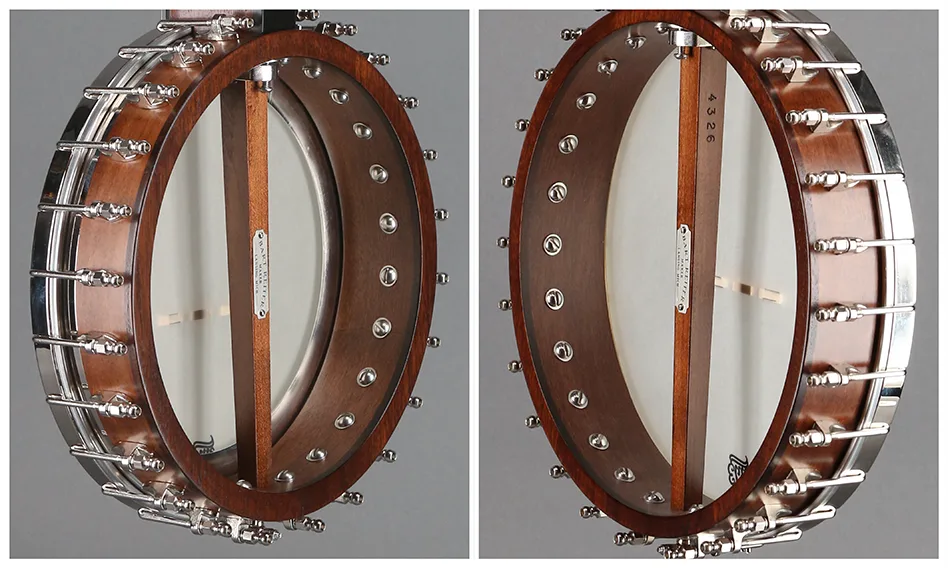
There is far more variety in open-back banjos than you might think. The body, also called the pot, comes in different sizes and weights. These variations account for the differences in tone you hear from ‘sharp and snappy’ to ‘plunky.’ This variation in tone is the result of the size of the pot and whether or not the pot includes a tone ring.
In its simplest form, a tone ring is a metal hoop that fits over the pot and under the head, adding mass and weight. This changes the volume and sharpness and brightness of the sound. The more mass, the sharper the tone. Bluegrass banjos have the heaviest tone rings of all, and have the loudest and snappiest tone. The other factor, the size of the drum head, has a similar influence. The bigger the head, the lower the frequency response and deeper and mellower the tone.
What size head and tone ring is right for you depends on what kind of music you are playing. For those of us that grew up in the sixties and seventies, the two most popular open-back banjos were made by the Vega company in the early part of the 20th century.
One was the ‘Tubaphone‘ and the other was the oddly named ‘Whyte Laydie.’ (The Whyte Laydie was made of blond maple, which was new in Vega’s production at the time, and took its name from the pale color of the wood.) Both of these have fairly heavy tone rings making them the loudest open-back models with the most projection. They are great for old-time string band music and work well for solo banjo players, as well. For years, most modern open-back banjo makers based their designs on one of these two instruments.
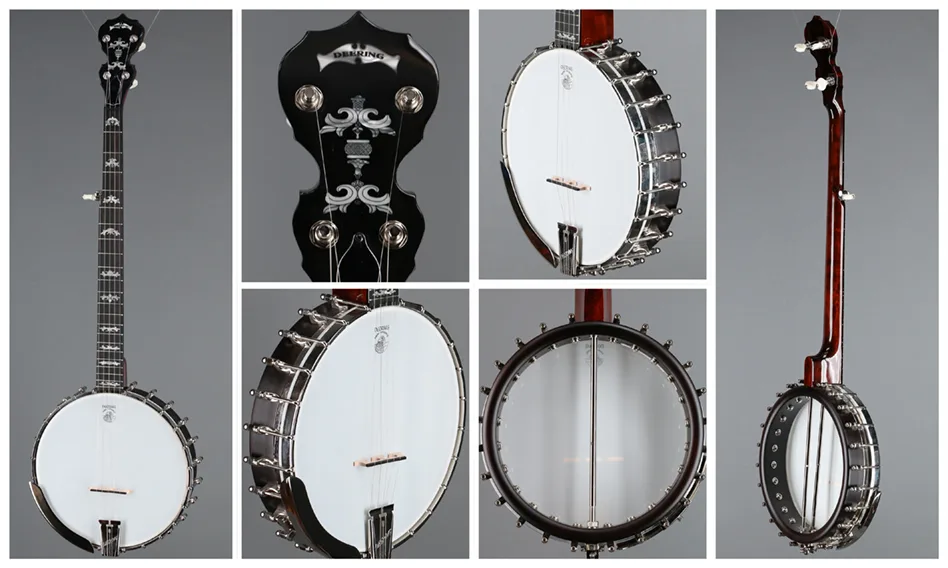
The professional grade Vega banjos, such as the Whyte Laydie, used an external bracket band around the exterior of the rim, providing great strength to allow the tightest head and strongest voice possible.
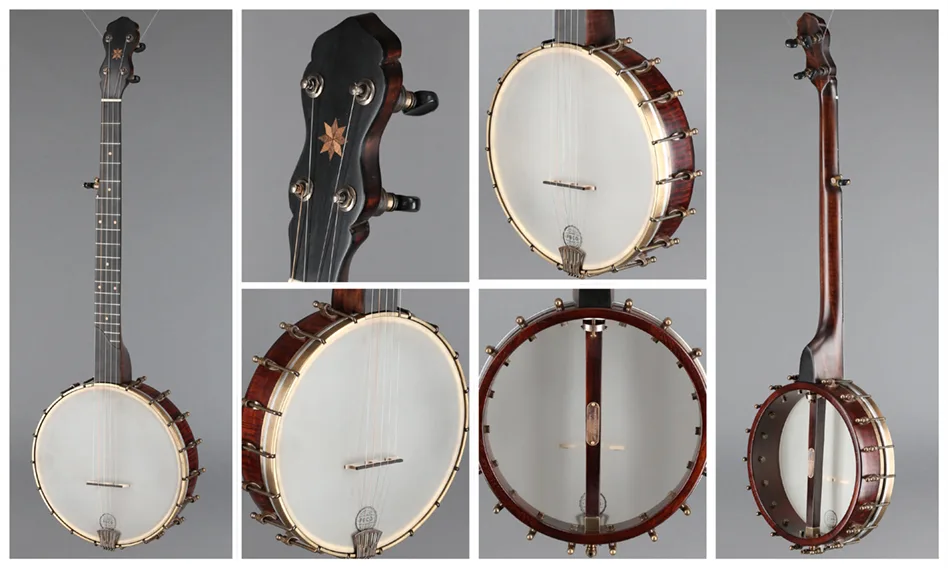
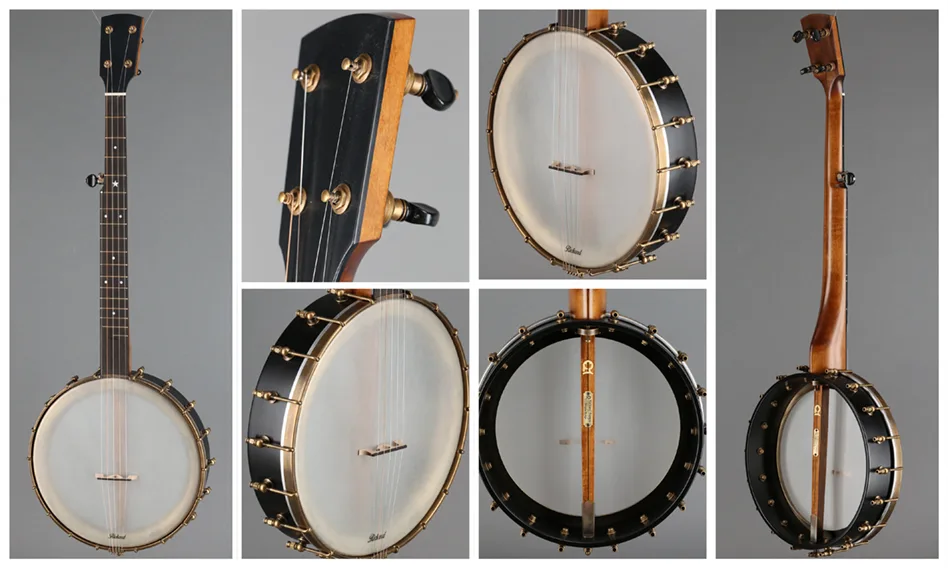
Recently, a more soulful style of playing has evolved among singer-songwriters looking for a subtler sound to accompany their vocals. There has also been a revival of old-time string band music and a growing interest in music from the 19th century. Consequently, lighter weight banjos with bigger (12 inch) heads have become quite popular. These banjos produce a warmer, sweeter tone and many of them have no tone ring at all and have the head simply pulled down over the wooden shell. Although this style of banjo may seem new, it’s actually a throwback to the instruments of the 19th century. These new (that is old) banjos are very plain with little or none of the fancy inlay decorating the neck and headstock that came into vogue in the early part of the 20th century. Many of them are based on the work of 19th century luthiers like Dobson, Boucher and Ashborn. In keeping with the antique asthetic, the shiny nickel plating common on modern instruments has been replaced by antiqued brass. This return to an older aesthetic has produced some of the nicest looking and sounding banjos to date.
Here at Gryphon we stock a variety of these instruments from a number of makers. Private builders include Rickard (Canada) and Waldman (California). Factory makers include: OME (Colorado), Bart Reiter (Illinois), Pisgah (North Carolina), Deering (California), and Recording King (China).


 Now I brush on the epoxy and clamp it up.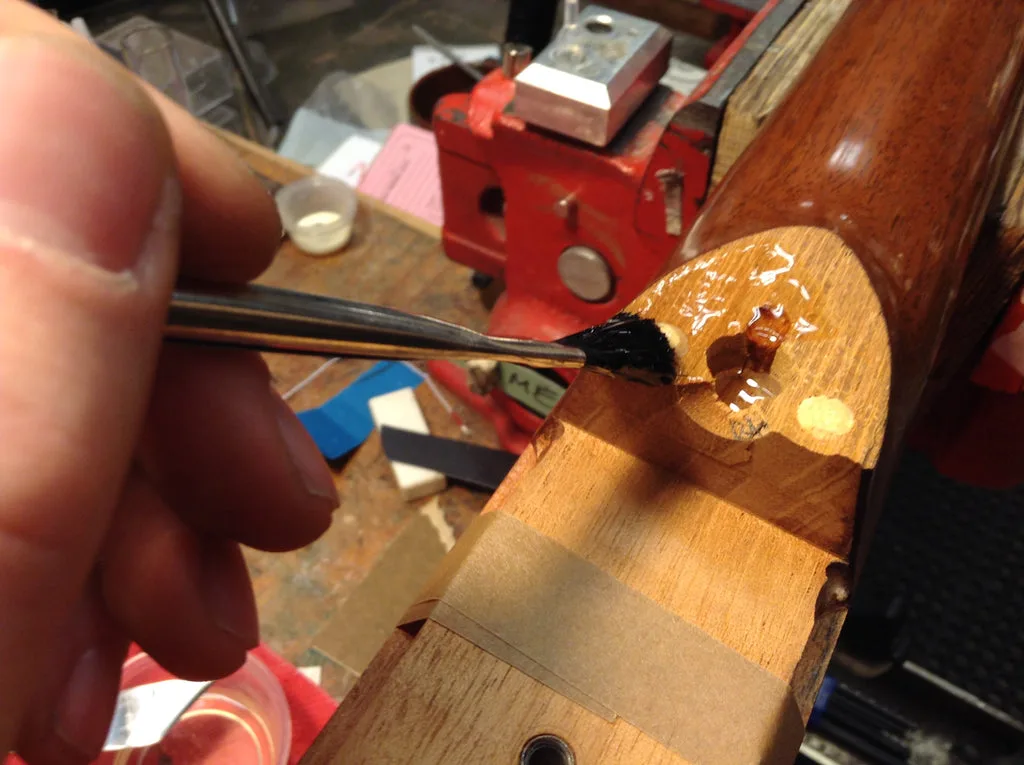


 Taylor V-Class 914ce Guitar
 Shells: 1) Thin, lightweight wood, 2) “spunover” nickel clad wood, 3) heavy wood, 4) “spunover” raw brass clad wood
 Pot Size Differences: